This tutorial was written by Can Taşpınar and published as part of the Hasura Technical Writer Program - an initiative that supports authors who write guides and tutorials for the open source Hasura GraphQL Engine.
Introduction
In this blog post we are going to make a quiz app with Flutter powered by Hasura and Firebase. We are going to see how Hasura can work with Firebase services such as Authentication and Cloud Functions to handle user authentication and business logic. Combining these services together will provide us a flexible and scalable architecture.
This will be a 3-part series. In this first part, we are going to deploy Hasura and we will see how to model the relational data with permissions.
Part 2 will cover how to setup Auth with Firebase and Hasura. Part 3 will cover how to make the flutter frontend.
Hasura Deployment on Heroku
Deploy Hasura less than a minute by using the Heroku button below.
When it is done, you can access the Hasura Console by opening your Heroku app URL.
Modelling Data
Let’s start with modelling our data first. We are going to define columns, relationships and permissions. Hasura makes it easy to create relationships by tracking foreign keys in tables and suggesting possible relationships. By setting permissions you can restrict access for rows and columns for users by their role.
Head to the Data > Add Table
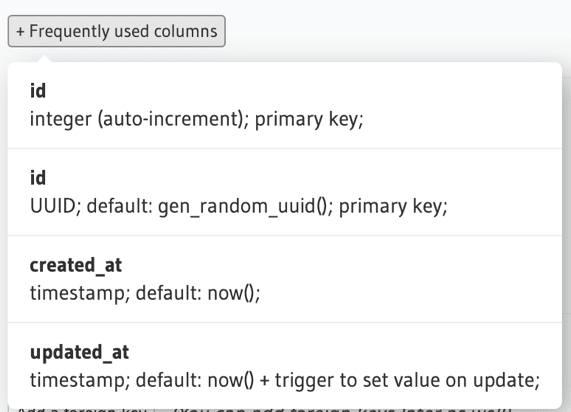
HINT: You can use the “Frequently used columns” for these frequently used types:
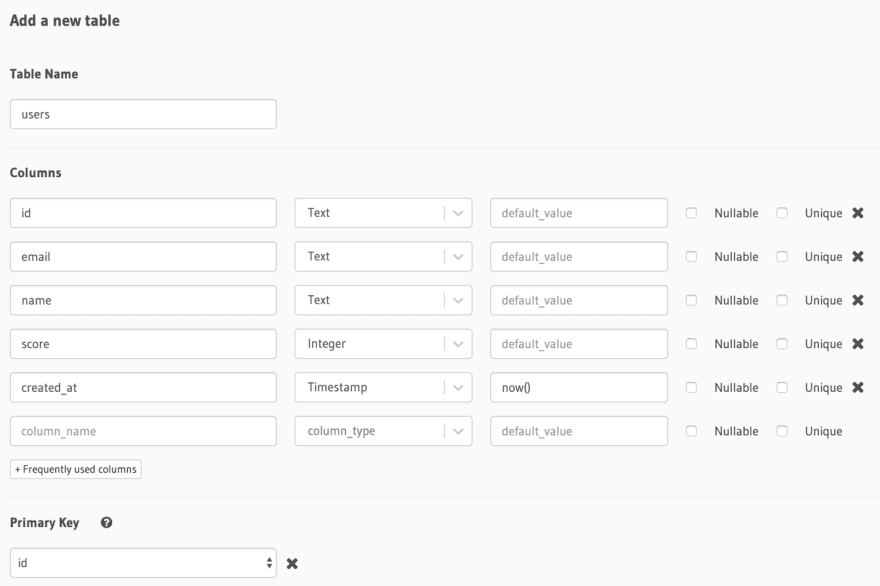
Table: users
id, email, name columns will be filled by the data coming from Firebase. Notice that id here is type of Text . We are going to talk more about that later on. score column will be incremented if the user submits the correct answer. created_at will be set to now when a new user is inserted to the table. Let’s set id as the primary key.
After creating table head to the Permissions tab. For now, there is only one role which is admin and it has full access on every operation below. Enter a new role called “user”. For users table we are only going to give select permissions. A user should be able to see other’s name and score. We are mostly going to deal with following rules when we are adjusting select permissions.
- Row select permissions to restrict access to rows.
- Column select permissions to restrict access for certain columns
We don’t need a custom check for Row select permissions. For the Column select permissions, check only name and score columns. This way we ensure that users can only see these fields.
Table: questions
id is a field with type UUID and the primary key. Default function gen_random_uuid() will generate a unique UUID whenever a new object is inserted to the table. question is the question title and created_at will be used for ordering questions later.
For permissions, every user can make a query to get the questions, so we have the following permission for the questions table.
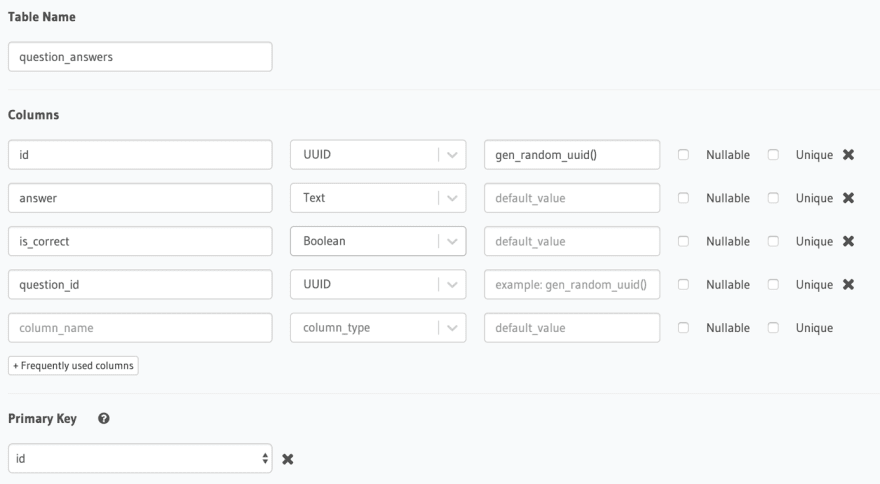
Table: question_answers
id is again type of UUID and the primary key for the table. answer is the question answer. Since we are going to give multiple answer options for a question, we need to know which answer is the correct one. To do that we have the is_correct column with a type of Boolean.
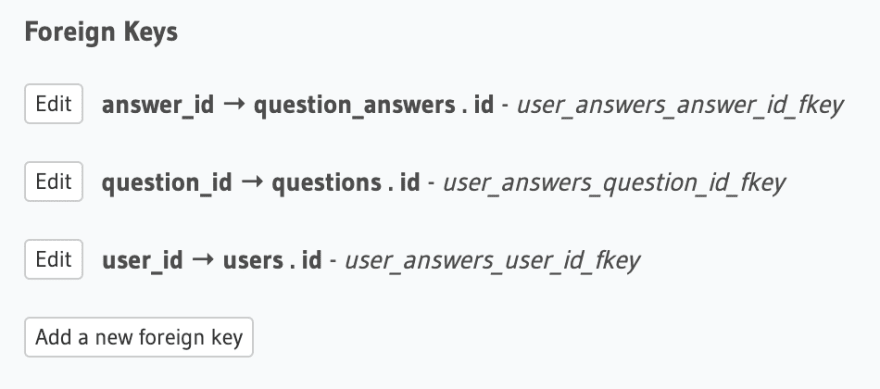
question_id is here to point out which question this answer belongs to. So, it will be a foreign key.
Users should be able to make a query to get the possible answers of a question. Permissions for this table is as below.
Table: user_answers
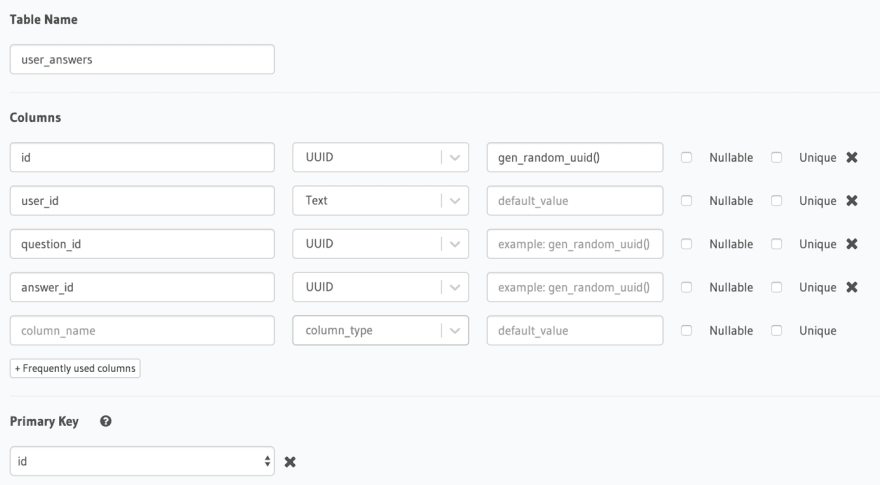
id is type of UUID and primary key. user_id, question_id and answer_id are foreign keys to point out to other tables. Notice that user_id column is type of Text instead of UUID. This is because we defined the id field in users table as Text. This is because it will be filled by the value coming from Firebase Authentication and Firebase user id is a string.
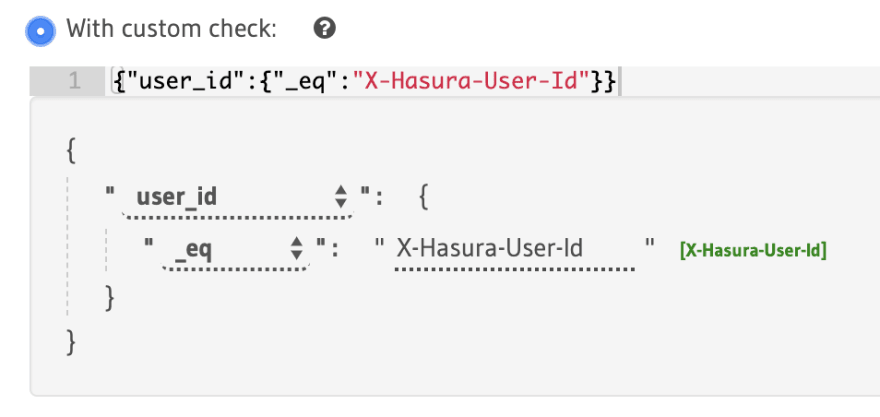
For the permission part, we are going to allow users to insert answers, but we need to make sure a user can only insert an answer if the request is coming from the same user. In other words, a user can’t insert a new record on behalf of someone else. This is where Sessions Variables comes in. Hit with custom check box and give the following rule.
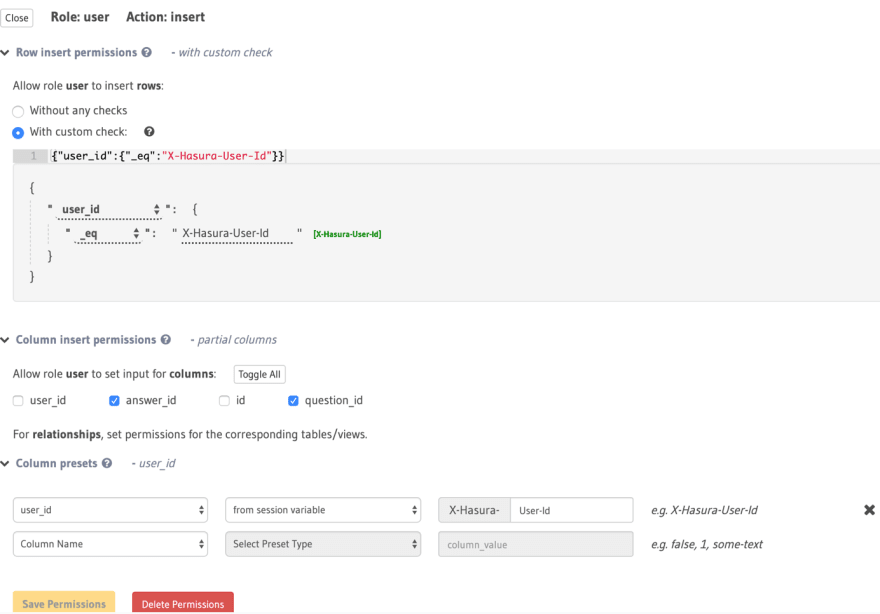
Every request from user that comes to the GraphQL API, will include a X-Hasura-User-Id header. We are going to talk more on that in Authentication part. Last thing we need to do is to set to the user_id field automatically from the X-Hasura-User-Id header. For that we are going to make use of Column presets. This allow a column to be filled by a static value or a session variable in our case.
At the end insert permissions for user_answers table should look like below.
Now that we defined our tables, it is time to create relationships for GraphQL API. Head to the Data tab. Hasura tells you about the Untracked foreign-key relations. Hit Track All to expose these relations over GraphQL API.
To sum things up, we defined the tables, gave permissions and tracked relationships. Hasura already prepared our API for us at this point. You can head to the GRAPHIQL tab and explore the API. There is one last thing to do before we move on. We need a way to query the questions that hasn’t been answered by the user. To do that, we can create a PostgreSQL function with an argument. Hasura will again magically track this function and expose it over GraphQL API. Head to Data > SQL. In here, you can write raw SQL. It can be for creating triggers, views or a function in our case. Write the following code and don’t forget to check Track this box. This box will tell Hasura to track this function and expose it over GraphQL API.
CREATE
OR REPLACE FUNCTION public.unanswered_questions(userid text) RETURNS SETOF questions LANGUAGE sql STABLE AS $ function $
SELECT
  *
FROM
  questions
WHERE
  id NOT IN (
    SELECT
      question_id
    FROM
      user_answers
    WHERE
      user_id = userID
  ) $ function $
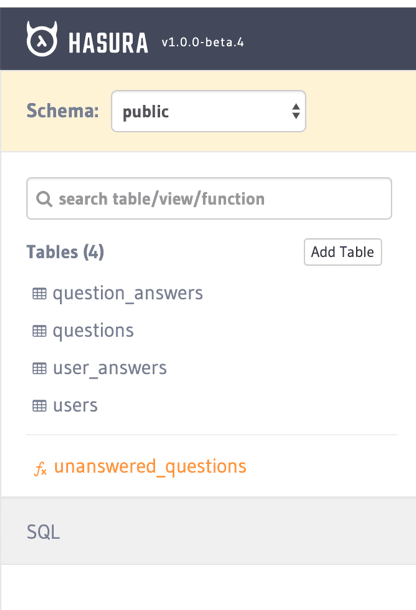
After you click Run, the function will take its place below the tables on the sidebar.
Now that we have deployed Hasura and modeled the data & relationships, we have can move on to the next step. In Part 2 we are going to prepare Auth and Business Logic by integrating Firebase services. Part 3 will cover how to to make the Flutter frontend.
About the Author
Can Taşpınar is passionate and enthusiastic developer whose journey started with the question “How to make a video game?”Moving on with mobile application development and Full Stack Web development. Enjoys working with modern and open source technologies.










Top comments (0)