Travis CI offers free test builds for open source projects on GitHub. You'd be a fool not to take them up on their offer. Their email alerts have saved my projects many times before.
In this tutorial, we will be setting up an Express app for continuous integration (CI). Whenever we commit to our master branch, Travis CI will clone our repository, spin up a cloud build of linux, install any required dependencies, and run our tests! Hopefully, they pass! If not, we'll be alerted.
Install
Set up a quick package.json file with: npm init -y. Then grab Express: npm i express --save as well as supertest and Jest, our development dependencies: npm i supertest jest --save-dev.
Or clone the repository, which serves as a live example of the project!
Taking the App Out of Express
A default hello world application with Express looks like this:
// app.js

const express = require('express');
const app = express();
const port = 3000;

app.get('/', async (req, res) => res.status(200).send('Hello World!'));

app.listen(port, () => console.log(`Our app listening on port ${port}!`));
This works for manual testing. We can run this application and check that the right pages are being returned — but what if we have 50 pages with complicated logic? We want to automate this process. The first step is exporting our app object. When we run our tests, we don't need a live HTTP server.
Let's alter our hello world application.
// app.js

const express = require('express');
const app = express();

app.get('/', async (req, res) => res.status(200).send('Hello World!'));

// Don't listen, just export
module.exports = app; // <--
Great. But how do we launch our application now? We'll use separation of concerns and place the call to listen() in another file called server.js (which also uses the app object!)
// server.js

const app = require('./app');
const port = 3000;

app.listen(port, () => console.log(`Our app listening on port ${port}!`))
To launch our application, we now use node server.js. Let's add that to our package.json so people can simply use npm start. By default, Node.js will look for a server.js file but let's be explicit.
"scripts": {
  "start": "node server.js"
},
The Tests
A common pattern is to place your tests inside a folder called __tests__ in the root directory. Another pattern is to repeat the names of the files being tested with .test inserted before the .js. Thus, __tests__/app.test.js.
We'll be using Jest as a test runner. Jest will look inside __tests__ as part of its default search and will run any test files it finds. You can use a custom test search with --testMatch.
By default [Jest] looks for .js, .jsx, .ts and .tsx files inside of
__tests__folders, as well as any files with a suffix of .test or .spec (e.g. Component.test.js or Component.spec.js). It will also find files called test.js or spec.js.
Inside our tests, supertest will mock requests to our app object. Mocking requests is faster and more predictable than launching a server and using live requests. It also makes it easier to write setup and teardown methods when they're required.
// __tests__/app.test.js

const app = require('../app');
const request = require('supertest');

// `describe` is used for test components
describe('GET /', () => {

    // `it` is for individual tests
    it('responds with 200', async () => {
        await request(app)
            .get('/')
            .expect(200); // If the status code is not 200, this test will fail
    });
})
Let's add another line to our package.json so that our tests can be run with npm test. The reason we use start and test aliases is so that our software is predictable for developers picking it up for the first time, and so that it plays nice with other packages.
"scripts": {
  "start": "node server.js",
  "test": "jest"
},
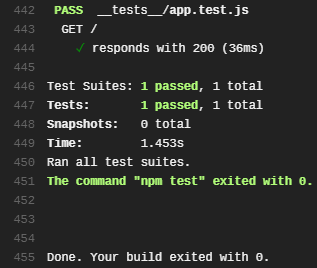
npm test yields the following output.
 PASS  __tests__/app.test.js
  GET /
    √ responds with 200 (39ms)

Test Suites: 1 passed, 1 total
Tests:       1 passed, 1 total
Snapshots:   0 total
Time:        2.681s
Ran all test suites.
Travis CI
Let's get this code into a repository on GitHub, and install the Travis CI GitHub App. Make sure that the repo you're testing has Travis CI enabled.
As the Travis CI tutorial tells us:
Add a .travis.yml file to your repository to tell Travis CI what to do.
In our instance, it's that simple. We don't need to specify any additional settings beyond which version of Node.js we want the test build to use. Travis CI will use the default testing alias npm test.
# .travis.yml

language: node_js
node_js:
 - lts/* # Long Term Support
Committing and pushing this file to GitHub will queue up a test build immediately. You can watch the builds execute live at travis-ci.com/{your-username}/{your-repo}, and review them later to see where things went wrong. Use this page to grab the markdown for your Travis CI build status badge too!
Tweet @healeycodes or raise an issue in the repository if you run into problems!
Join 150+ people signed up to my newsletter on programming and personal growth!
I tweet about tech @healeycodes.


Latest comments (2)
I used Travis years back and while I liked it quite well, they also got acquired just a couple months ago. The new owners, Idera, have a nasty habit of picking up tools for the captive (since it takes effort to migrate off) subscriber base and letting them languish. They promptly gutted the Travis team. Don't reward that kind of behavior. If you want badges, there are plenty of them for other build services.
Oh no! I had no idea they had been acquired. That doesn't sound too good. Thank you for bringing this to my/everyone's attention.