Introduction
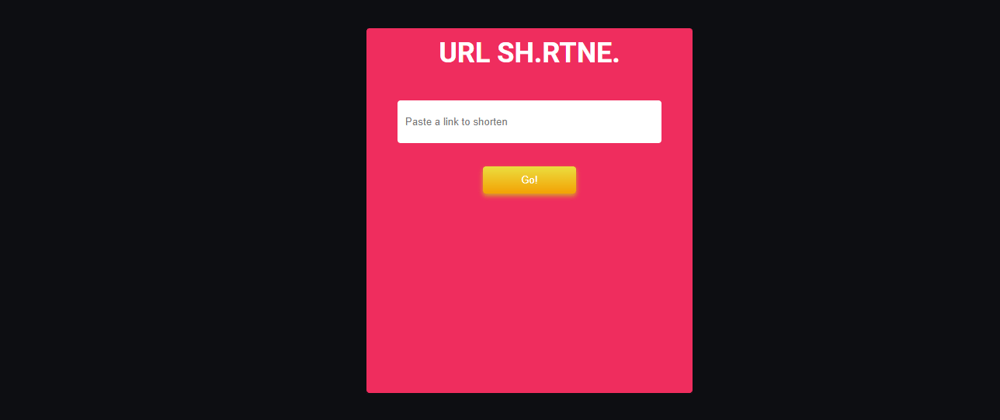
Hey there! In this tutorial, we'll create a URL shortener that works similarly to bit.ly or tinyurl. Our URL shortener will simply take in a URL which is arbitrarily long and shortens it to look so small so it can be shared easily.
Prerequisites
For this tutorial, you should be comfortable working with JavaScript (ES6) and Nodejs. I'm assuming you already have Nodejs installed, if you don't you can install it from here. Also, you'll need to have MongoDB installed on your computer, if you don't you can check my guide here on how to use MongoDB locally with VS Code.
How it works
Before we dive into writing the code, let's first understand how URL shortening works. The logic behind our URL shortener is as follows:
- User pastes in an arbitrarily long URL to shorten
- We send the long URL to the server which stores the long URL into a database along with a short unique id to identify the URL ( this id is randomly generated and is usually not more than 7-8 characters long)
- The shortened URL will be our website address with the unique id that looks something like so:
mysite.com/4FRwr5Y - When the user navigates to the shortened URL, we extract the unique id from the URL and find in the database which original long URL is associated with that id
- Finally, we redirect the user to the original URL from the database
You can find the complete code for this project on GitHub.
Initialize the project
Now that we understand the logic behind what we'll building, let's go ahead and initialize a new app to get started.
First, we'll create a new directory (or folder, if you like) for our project on the terminal with:
mkdir url-shortener
Of course, you could name your directory anything you want but I chose url-shortener for clarity.
Next, we change directory into our new folder with:
cd url-shortener
Then, run the following command to initialize a new Nodejs project in our current directory:
npm init -y

// or if you are using Yarn

yarn init -y
At this point, we'll need to install a few packages to get started with our project. These are:
-
express- a Nodejs framework to bootstrap our server. -
mongoose- an ODM (Object Document Modeling) to query our MongoDB database. -
dotenv- allows us to load environment variables into our app effortlessly. -
nodemon- to automatically restart our server when we make changes to our code. -
url-exist- we'll use this package to confirm the existence of the URL submitted by the user. -
nanoid- we'll use this to randomly generate unique ids for the URL.
Next, run the below command to install the packages:
npm install express dotenv mongoose url-exist nanoid
Or with Yarn:
yarn add express dotenv mongoose url-exist nanoid
I have excluded nodemon from the installation because I have it installed already. If you don't have it installed, you can install it globally with:
npm -g i nodemon
Or
yarn -g add nodemon
And in package.json, we'll add a scripts field to include the command for starting our app like so:
"scripts": {
    "dev": "nodemon index.js"
  }
Now we can run npm dev or yarn dev to start our application.
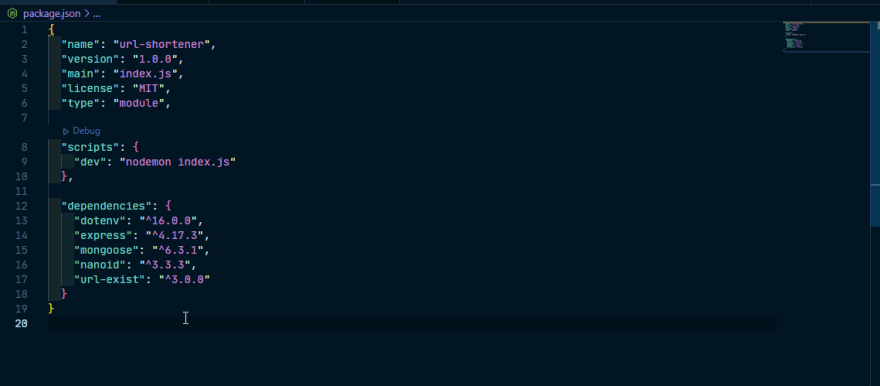
Note: Since we'll be using import statements in our code, we'll need to add the following to the package.json file to tell Nodejs we're writing ES6 JavaScript:
"type" : "module"
In the end, your package.json should look like below:
Writing the code
Create a new file index.js (here, we'll write the bulk of our server code) in the root directory and two new directories models and public.
In index.js, add the following code:
import express from "express";
import dotenv from "dotenv";
import path from "path";
import mongoose from "mongoose";
import { nanoid } from "nanoid";
import urlExist from "url-exist";
import URL from "./models/urlModel.js";

const __dirname = path.resolve();

dotenv.config();

const app = express();

app.use(express.json());
app.use(express.URLencoded({ extended: true }));
app.use(express.static(__dirname + "/public")); // This line helps us server static files in the public folder. Here we'll write our CSS and browser javascript code

app.listen(8000, () => {
  console.log("App listening on port 8000");
});
Above, we imported the libraries we installed earlier and some core modules from Nodejs, then initialized and created a new server with Express.
You might have noticed we imported a file that doesn't exist yet from the models folder. Let's go ahead and create it.
In the models folder, create a new file named urlModel.js and add the following code:
// models/urlModel.js
import mongoose from "mongoose";

const urlSchema = new mongoose.Schema({
  url: {
    required: true,
    type: String,
    },
  id: {
    required: true,
    type: String
    }
});

const URL = mongoose.model("URL", urlSchema);

export default URL;
Here, we're defining a URL schema with mongoose, this object will let us save the URL object to the MongoDB database and perform other queries.
In modern web application development, it's common practice to not keep sensitive application data in the application code directly to prevent malicious users from exploiting our application. For this reason, we'll store our database URI in a .env file as it is a sensitive information.
In the root folder, create a .env file with the following configuration:
MONGO_DB_URI = "mongodb://localhost:27017/URL-shortener"
Info: At this point for safety purposes, we should create a .gitignore file in the root directory to prevent committing accidentally the .env file to GitHub.
Next, in the index.js file, just before where we are calling app.listen(), add the following code to connect mongoose with our MongoDB database:
mongoose.connect(process.env.MONGO_DB_URI, (err) => {
  if (err) {
    console.log(err);
  }
  console.log("Database connected successfully");
});
Note: If you followed this guide, the above code will automatically create a new database named url-shortener for us. You can confirm this by clicking on the MongoDB extension icon on the left panel in VS Code.
Writing the client-side code
In the public folder, create four new files: index.css, index.html, 404.html and index.js. These are the static files for the front-end of our app and will represent the app's UI.
In the public/index.html file, add the following code:
<!DOCTYPE html>
<html lang="en">
  <head>
    <meta charset="UTF-8" />
    <meta http-equiv="X-UA-Compatible" content="IE=edge" />
    <meta name="viewport" content="width=device-width, initial-scale=1.0" />
    <title>URL Shortener</title>
    <link rel="stylesheet" href="./index.css" />
  </head>
  <body>
    <main>
      <div class="container">
        <div class="header">URL SH.RTNE.</div>
        <form class="form" id="form">
          <input
            type="text"
            name="URL"
            id="URL"
            value=""
            placeholder="Paste a link to shorten"
          />
          <div class="error"></div>
          <button type="submit" class="btn">Go!</button>
        </form>
        <div class="link-wrapper">
          <h3 class="link-text">Shortened Link</h3>
          <div class="short-link"></div>
        </div>
      </div>
    </main>
    <script src="./index.js"></script>
  </body>
</html>
And in the public/index.css file, add the following:
body {
  background-color: #0d0e12;
  color: white;
  padding: 0;
  margin: 0;
  font-family: "Roboto", sans-serif;
}

.container {
  display: flex;
  flex-direction: column;
  place-items: center;
  position: absolute;
  transform: translate(-50%, -50%);
  left: 50%;
  top: 50%;
  width: 400px;
  height: 450px;
  border-radius: 4px;
  background-color: #ef2d5e;
  padding: 10px;
}

.header {
  font-size: 36px;
  font-weight: bold;
}

.btn {
  height: 35px;
  width: 120px;
  border-radius: 4px;
  background-image: linear-gradient(to bottom, rgb(235 222 63), rgb(243 161 5));
  border: none;
  outline: none;
  color: white;
  box-shadow: 0 3px 6px #d7a827;
}

.btn:hover {
  cursor: pointer;
}

.form {
  margin-top: 30px;
  display: flex;
  flex-direction: column;
  align-items: center;
  justify-content: center;
  place-items: center;
}

input {
  height: 35px;
  width: 320px;
  border-radius: 4px;
  background-color: #fff;
  color: black;
  outline: none;
  border: none;
  margin: 10px 0;
  padding: 10px;
}

input:focus {
  border: 2px solid rgb(243 85 144);
  outline: none;
}
.error {
  color: black;
  margin: 10px 0;
  font-weight: bold;
}

.link-wrapper {
  display: none;
  flex-direction: column;
  margin: 75px 0;
  place-items: center;
  opacity: 0;
  transition: scale 1s ease-in-out;
  scale: 0;
}

.link-text {
  font-weight: bold;
  color: black;
  margin: 5px 0;
}

.short-link {
  display: flex;
  place-items: center;
  place-content: center;
  width: 300px;
  height: 50px;
  background-color: wheat;
  border-radius: 4px;
  padding: 10px;
  margin: 10px;
  color: black;
  font-weight: bold;
  box-shadow: 0 3px 6px #afada9ba;
}

.loader {
  width: 40px;
  height: 40px;
}
And in 404.html, add the following code:
<!DOCTYPE html>
<html lang="en">
  <head>
    <meta charset="UTF-8" />
    <meta http-equiv="X-UA-Compatible" content="IE=edge" />
    <meta name="viewport" content="width=device-width, initial-scale=1.0" />
    <title>Not Found</title>
    <style>
      @font-face {
        font-family: "Roboto";
        src: URL("/Roboto-Medium.ttf") format("truetype");
      }

      body {
        background-color: #0d0e12;
        color: white;
        padding: 0;
        margin: 0;
        font-family: "Roboto", sans-serif;
      }

      .message {
        position: absolute;
        transform: translate(-50%, -50%);
        left: 50%;
        top: 50%;
      }
    </style>
  </head>
  <body>
    <div class="message">
      <h1>Oops! Sorry, we couldn't find that URL. Please try another one.</h1>
    </div>
  </body>
</html>
We'll simply render this file when the user tries to visit a shortened link that is not valid.
Then, in public/index.js, add the following:
const form = document.getElementById("form");
const input = document.querySelector("input");
const linkWrapper = document.querySelector(".link-wrapper");
const errorDiv = document.querySelector(".error");

const shortenedLink = document.querySelector(".short-link");

const handleSubmit = async () => {
  let url = document.querySelector("#url").value;
  const response = await fetch("http://localhost:8000/link", {
    headers: {
      "Content-Type": "application/json",
    },
    method: "POST",
    body: JSON.stringify({ url }),
  }).then((response) => response.json());

  if (response.type == "failure") {
    input.style.border = "2px solid red";
    errorDiv.textContent = `${response.message}, please try another one!`;
  }
  if (response.type == "success") {
    linkWrapper.style.opacity = 1;
    linkWrapper.style.scale = 1;
    linkWrapper.style.display = "flex";
    shortenedLink.textContent = response.message;
  }
};

 // Clear input field and error message
const clearFields = () => {
  let url = document.querySelector("#url");
  url.value = '';
  url.addEventListener('focus', () => {
    errorDiv.textContent = '';
  })
}

form.addEventListener("submit", (e) => {
  e.preventDefault();
  handleSubmit();
  clearFields();
});
Above, we're making a POST request to the server using the fetch api to submit the long URL the user wants to shorten and then updating the DOM with the result from the server accordingly.
Defining the routes
Next, we'll create routes in url-shortener/index.js to serve the front-end files we just created and also handle the POST and GET requests from the user.
In url-shortener/index.js, add the following code right before where we are calling app.listen():
// {... previous code}
app.get("/", (req, res) => {
  res.sendFile(__dirname + "/public/index.html");
});

app.post("/link", validateURL, (req, res) => {
  const { URL } = req.body;

  // Generate a unique id to identify the URL
  let id = nanoid(7);

  let newURL = new URL({ URL, id });
  try {
    newURL.save();
  } catch (err) {
    res.send("An error was encountered! Please try again.");
  }
  // The shortened link: our server address with the unique id
  res.json({ message: `http://localhost:8000/${newURL.id}`, type: "success" });
});
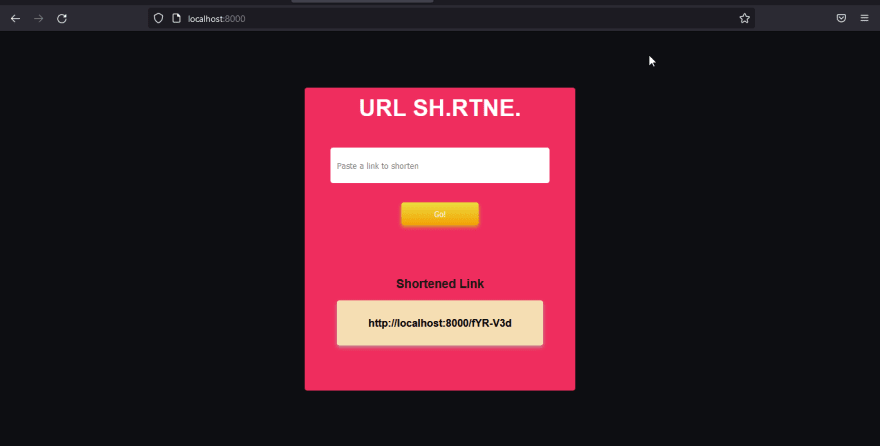
In the first three lines in the code above, we're simply rendering the index.html file when we navigate to http://localhost:8000 in the browser, which is the homepage. This should render the following in the browser:
In the next lines, we defined a route to handle the URL we received from the user and then we generated a unique id to identify the URL and then saved it in the database.
Validating the URL
If you noticed, we added a validateURL middleware to the /link route which we haven't created yet. In this middleware, we're using url-exist to check if the URL submitted by the user is valid before saving the URL at all. If the URL submitted by the user is invalid, we'll return an "Invalid URL" message, else we'll call the next() function to proceed with saving the URL and sending the shortened link. Now, let's create the middleware. Above the previous code, add the following:
// Middleware to validate url
const validateURL = async (req, res, next) => {
  const { url } = req.body;
  const isExist = await urlExist(url);
  if (!isExist) {
    return res.json({ message: "Invalid URL", type: "failure" });
  }
  next();
};
Redirecting the user
The last part of our app is redirecting the user to the original URL when they visit the shortened link we generated. For this, we'll create a route to retrieve the unique id from the link and then find in the database the original URL associated with that id and finally, redirect the user to the original URL. Also, we're checking if the shortened link the user is querying has an original URL associated with it, if doesn't, we respond with the 404 page.
app.get("/:id", async (req, res) => {
  const id = req.params.id;

  const originalLink = await URL.findOne({ id });

  if (!originalLink) {
    return res.sendFile(__dirname + "/public/404.html");
  }
  res.redirect(originalLink.url);
});
Now if you followed this tutorial correctly and paste in any link to shorten, you should get the shortened URL of the original URL as in the following example:
Conclusion
Congratulations if you made it this far! You just built a URL shortening app! Of course, there are other features lacking in our app, but this tutorial is just to show you the basics and logic behind a URL shortening service. You can get creative and add more features if you like, e.g., a simple add-to-clipboard feature to allow our users copy the shortened link to their clipboard.
Thanks for reading. If you liked this tutorial, you may consider following me to be notified for more posts like this or say Hi on Twitter.


Latest comments (2)
Cool. Great works. Thanks
Good tutorial it works.