In this tutorial, you’re going to learn how to send an email using Firebase Functions and Nodemailer.
- Setup Firebase Functions Environment
- Install Nodemailer Package
- Send Emails On Firestore Database Trigger
- Send Emails On HTTP Triggers
01. Setting Up Firebase Functions Environment
1.1 Create A Firebase Project
Go ahead and create a firebase project, if you haven’t already.
1.2 Install Firebase CLI
Firebase CLI requires Node.js so install it if you haven’t already done so.
Then, open up the Terminal / Command prompt and install Firebase CLI globally by running the following command:
npm install -g firebase-tools
Once it’s installed, go ahead and create a directory and CD to it. Then, log in to your Firebase Google Account via Terminal by running the following command:
firebase login
After that, you will be prompted with a question before opening up a browser. Hit enter, which will open up your default browser to log in.
1.3 Initialize Firebase SDK
Once you’re logged in, run the following command which will ask a few questions:
firebase init functions
- Choose the newly created project among the other projects from the list.
- What language would you like to use to write Cloud Functions? → Choose JavaScript, hit enter.
- Do you want to use ESLint to catch probable bugs and enforce style? → choose N.
- Do you want to install dependencies with npm now? (Y/N) → Yes. It will take a few seconds to complete the installation.
Once it’s installed, the new directory structure will look like this:
– firebase.json
+ functions
1.4 Install Firebase Admin SDK
Now, CD to the functions folder and run the following command:
npm install firebase-admin
Once it’s done, go to functions → index.js and import and initialize Firebase Admin SDK.
const admin = require("firebase-admin")
admin.initializeApp()
✅ Recommended
6 Must-Know Firestore Security Rules
02. Install Nodemailer Package
2.1 Install nodemailer
CD to the functions folder and run:
npm install nodemailer
Import it inside index.js file:
const nodemailer = require('nodemailer');
2.2 Create A Nodemailer Transporter
var transporter = nodemailer.createTransport({
    host: 'smtp.gmail.com',
    port: 465,
    secure: true,
    auth: {
        user: '********@gmail.com',
        pass: '************'
    }
});
This is the place where you’re going to add your SMTP information from your email hosting provider. I am using Gmail in the above example.
If you want to use a different provider, make sure to update the smtp information with yours.
Call createTransport() method passing a JavaScript object with options such as host, port, etc.
✅ Recommended
Build Web Apps with Vue JS 2 & Firebase
03. Send Emails On Cloud Firestore Trigger
3.1 Declare sendEmail()
Let’s say you want to send an email to a customer every time an order is placed.
To do that, create a function named sendEmail() – it can be any name. Then, pass your Firestore database path inside the document() as an argument.
In this case, the database path is orders which is a collection. Make sure to add the wildcard {orderId} variable which will hold an actual auto-generated ID of a newly added document.
exports.sendEmail = functions.firestore
    .document('orders/{orderId}')
    .onCreate((snap, context) => {

});
I want this function to be fired when a document is created, so I am using onCreate() method. You can use onUpdate, onDelete or onWrite as well.
3.2 Invoke sendMail()
Define mailOptions with the following properties: from, to, subject and html. You can find more options here.
const mailOptions = {
    from: `softauthor1@gmail.com`,
    to: snap.data().email,
    subject: 'contact form message',
    html: `<h1>Order Confirmation</h1>
     <p> <b>Email: </b>${snap.data().email} </p>`
};
One thing worth pointing out here is that the snap.data() has information about the newly added document.
Assuming email is one of the fields in that document, I can get the value of an email field using snap.data().email.
return transporter.sendMail(mailOptions, (error, data) => {
    if (error) {
        console.log(error)
        return
    }
    console.log("Sent!")
});
Finally, call sendMail() method on transporter object by passing mailOptions as an argument.
3.3 Deploy SendMail()
Open up the Terminal and cd to the project and run:
firebase deploy --only functions
The deployment process will take a fair bit of time, which I found it too long. 🙁 Eventually, you will get the ✔ Deploy complete! message.
3.4 Test SendMail()
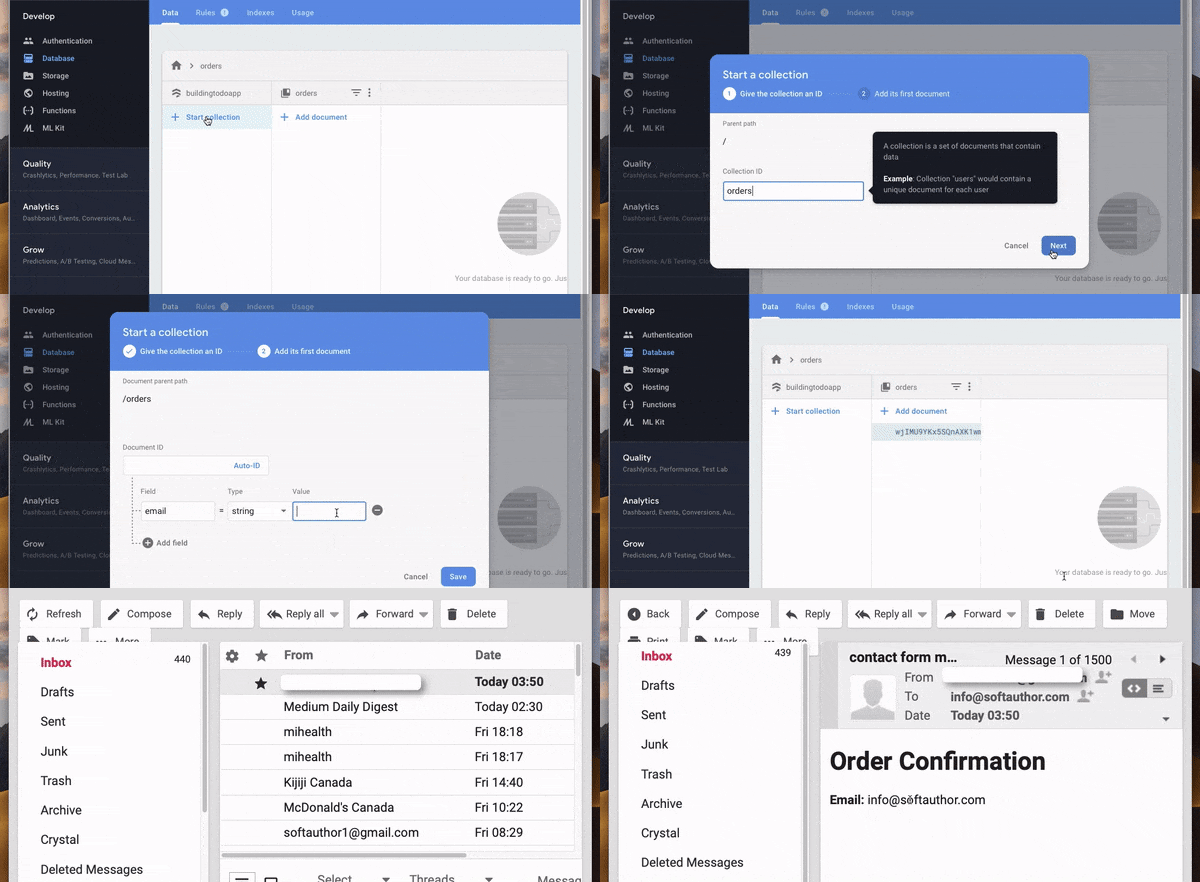
Create a document with a field email as a key and an actual receiver email as a value inside orders collections which will trigger the sendMail() function.
Log into a receiver email account, you should have an email.
Here is the index.js file.
const functions = require('firebase-functions');
const admin = require("firebase-admin")
const nodemailer = require('nodemailer');

admin.initializeApp()


//google account credentials used to send email
var transporter = nodemailer.createTransport({
    host: 'smtp.gmail.com',
    port: 465,
    secure: true,
    auth: {
        user: '***********@gmail.com',
        pass: 'yourpassword'
    }
});


exports.sendEmail = functions.firestore
    .document('orders/{orderId}')
    .onCreate((snap, context) => {

        const mailOptions = {
            from: `***********`,
            to: snap.data().email,
            subject: 'contact form message',
            html: `<h1>Order Confirmation</h1>
                                <p>
                                   <b>Email: </b>${snap.data().email}<br>
                                </p>`
        };


        return transporter.sendMail(mailOptions, (error, data) => {
            if (error) {
                console.log(error)
                return
            }
            console.log("Sent!")
        });
    });
[Continue Reading...](


Top comments (2)
How do you add an attachment? How do you handle the file path?
For mail sending we must upgrade our firebase to Blaze(pay as you go). But no cost untill 2,000,000 invocation.