
Hello, this is my very first dev.to post. Please let me know if you find it useful and would like me to continue writing the rest of the series.
Overview
This post is to be part of a series. Today we focus on our local development setup and initial tooling. At the end of this post, you'll have a barebones Vue application with automated testing (Cypress), code coverage (Codecov), and a visual review tool (Percy).
Note: I do not work for, and am not receiving compensation by any of the companies or products mentioned.
My day job is working in front-end development for a large company with a big budget. I have access to pretty much any tool I need to get the job done. I also am part of a small non-profit that we set up in honor of my son. So the tools I get to use are on both ends of the cost spectrum.
https://www.twentz.com is the website I built for the non-profit. It does not get much traffic. Working on a site like this is not easy emotionally. To keep me motivated, I use it to experiment with new ideas and technology. I have to be careful. I have NO budget.
I redesigned the https://www.twentz.com site this year, and while we are keeping our hosting costs down, I did begin to question with all the free SASS tool offerings for hobbyists if I could even cut the cost of hosting to nothing. As I started looking into this, I saw that I could take it even further then I realized.
I challenged myself to see how far I could get with an automated CICD pipeline using open source tools and free SASS services. Note that this is all written from a developer who focuses significantly on the front end. We are NOT talking Docker containers, Kubernetes, or anything like that. I built a CICD process that is simple to set up and maintain for a front end project. I use Vue in this guide, but this could easily be modified to handle Angular, React, and probably even Svelte.
I call this the Kitchen Sink Pipeline because I keep throwing in just about anything I want to try.
Tools used
Local Setup
SASS Providers (in today's post)
This article's GitHub repo
Let's dive right in
Create your project
vue create kitchen-sink-pipeline
I use the default settings for the sake of simplicity. If you need additional features, enable those as required. I did not include e2e testing when I set this up for a specific reason (more on that later)
Confirm the app is working (
npm run serveand visit http://localhost:8080/)commit your project to GitHub
Add Cypress for testing
Above I indicated not to add e2e testing via the Vue CLI. I made this decision for two reasons.
- The Vue CLI does an opinionated install that is not Cypress's default install
- Cypress is evolving at a VERY rapid pace (as of this writing version 4.8.0), and the Vue CLI is locked in at version 3.8.3
Let's get back to it
Install and initialize cypress
npm install cypress --save-dev
Then
npx cypress open
Click on Ok, got it when Cypress opens it will create the default setup in our repo once the installation is complete, close Cypress.
Note: There are many canned tests provided with Cypress in the cypress/integration/examples directory. You can delete them, but I move them to cypress/examples and add that to my .gitignore file because I find them to be a handy reference.
With the default Cypress setup complete, you will see a cypress.json file at the root of your project. Edit this file so it knows where to find your application.
{
  "baseUrl": "http://localhost:8080"
}
- Modify your
package.jsonby adding atest:localscript.
  "scripts": {
    ...
    "test:local": "npm run serve & cypress open"
  },
- Create a new file
cypress/.eslintrc.jsand add the following code to prevent linting errors
module.exports = {
  plugins: ["cypress"],
  env: {
    mocha: true
  },
  rules: {
    strict: "off"
  }
};
Create a simple test
We are going to ensure the app loads and renders the headline. I am going to create this test using Cypress best practices for selecting elements
- Edit the
src/components/HelloWorld.vuefile<h1>from
<h1>{{ msg }}</h1>
to
<h1 data-cy="headline">{{ msg }}</h1>
- Create a new file
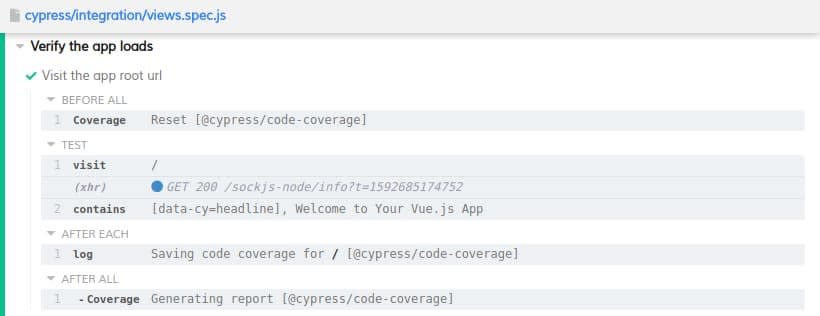
cypress/integration/views.spec.jswith the following content
describe("Verify the app loads", () => {
  it("Visit the app root url", () => {
    cy.visit("/");
    cy.contains("[data-cy=headline]", "Welcome to Your Vue.js App");
  });
});
Run the test locally
Execute npm run test:local
When the Cypress window opens, click run all specs, and our test will run.

The way the app is currently running, it is hot reloading. You can play and see if you can get the test to fail as you edit and save your code in real-time.
NOTE: Now is an excellent time to commit your changes.
Okay time to step it up a notch
Having a project setup and testing in place is pretty barebones basic. What is our level of confidence that we are testing everything? I think it's time we make some updates to get some code coverage reporting in place! There are many opinions about testing and tooling. I am going to handle all of this in just Cypress for the sake of this post.
Setup
- Install the packages needed to enable cypress code coverage
npm install @cypress/code-coverage babel-plugin-istanbul istanbul-lib-coverage nyc --save-dev
IMPORTANT (it took me a while to debug this part so I'll save you the frustration) DELETE
babel.config.jsCreate a
.babelrcfile at your project root with the following contents
{
  "presets": ["@vue/cli-plugin-babel/preset"],
  "plugins": ["istanbul"]
}
- Create a
.nycrcfile at your project root with the following contents
{
  "extension": [".js", ".vue"]
}
- Edit
cypress/support/commands.jsby replacing the file content or adding this to the top of the file
import "@cypress/code-coverage/support";
- Edit
cypress/plugins/index.jscontent
module.exports = (on, config) => {
  require("@cypress/code-coverage/task")(on, config);
  // IMPORTANT to return the config object
  // with the any changed environment variables
  return config;
};
- Execute
npm run test:localthen run your test. You will see that coverage is now part of the test. Close Cypress once the test runs
- Cypress adds some directories we do not need to store in our repo. Add the following items to your
.gitignorefile.
# code coverage directories and files
.nyc_output
coverage
NOTE: Now is an excellent time to commit your changes.
You can now take a look at your code coverage report by opening up the coverage/lcov-report/index.html in your web browser. You can see that since we checked the headline value in our vue app, we have 100% code coverage.
But wait there's MORE
We have a simple web application, Cypress testing, and code coverage. What else do we need?
Let's get our local environment set up to communicate with 2 of our SASS products
We'll start with codecov.io
Why do we need this when we already have a coverage report?
The advantage of a code coverage system is the ability to be able to track the rate of improvement of our code. Codecov keeps a history so we can see when our coverage improves or declines. I'll admit it's not a must have, but at the same time, I was curious, so I wanted to see what it would take, and the answer is "NOT MUCH."
- Create an empty
codecov.yamlfile at your project root. We are doing this now so you can add your token in a later step
codecov:
  token: "{TOKEN GOES HERE}"
- Open your browser and go to https://codecov.io/signup and register for your free account.
- Once you have your account add your repository
- After you add you repo you will end up on the following screen:

- Copy your token and paste the value in your
codecov.yamlfile
codecov:
  token: "xxxxxxxx-xxxx-xxxx-xxxx-xxxxxxxxxxxx"
- In the root of your project terminal type in
bash <(curl -s https://codecov.io/bash) - the last output from the above command is your report URL. Open the URL in a browser, and you can now see the report. Again, it is small because of the simplicity of our file.
- You will want to add the
codecov.yamlto your .git ignore file.
Let' finish this up with something cool... It's time for Percy.
I'll be honest, I am not sure how much I buy into visual comparison testing yet, but I can say it is a cool kid out there. It demo's well, and Percy is pretty darn simple to set up with the tools we have in place.
- Open your browser and go to https://percy.io/ and click
Start for freein the header and register your free account. - On your account dashboard click
Create new project - Give your project a name and click
Create Project - You are now in your project workspace.
Nothing is there yet, so let's go back into our code and take care of that.
- in your project execute
npm install --save-dev @percy/cypress
- open
cypress/support/commands.jsand edit the file to add@percy/cypress.
import '@percy/cypress';
import "@cypress/code-coverage/support";
- open
In cypress/plugins/index.jsand edit the file to addpercyHealthCheck
/// <reference types="cypress" />
/**
 * @type {Cypress.PluginConfig}
 */
let percyHealthCheck = require("@percy/cypress/task")

module.exports = (on, config) => {
  require("@cypress/code-coverage/task")(on, config);

  // add other tasks to be registered here
  on("task", percyHealthCheck);

  // IMPORTANT to return the config object
  // with any changed environment variables
  return config;
};
- now we add visual tests to our
cypress/integration/views.spec.jsfile by addingcy.percySnapshot();
describe("Verify the app loads", () => {
  it("Visit the app root url", () => {
    cy.visit("/");
    cy.contains("[data-cy=headline]", "Welcome to Your Vue.js App");
    cy.percySnapshot();
  });
});
It's time to run the test and load the snapshot to Percy.
- Go back to your Percy web site workspace and get the project token following the directions on the screen and set the token in your existing terminal.
- Note: If you close your terminal session you will have to set the project token again. When we add this to the pipeline we will automate this so we won't have to worry about this right now.
- Update the
test:localvalue in thescriptssection to
"test:local": "npm run serve & percy exec -- cypress open"
- execute
npm run test:localin your terminal. Then run your Cypress test as usual. - Once you have closed your Cypress test, go back to your Percy web workspace, and your build should be there for review. If it is not, just refresh your browser window.

- Now it's time to play. I would take the time to make changes to the base app.
- Play around with some testing in Cypress
- Make some visual changes to the app and see how Percy handles them.
- Add some more code to the project, write some tests, and see how it impacts your code coverage.
OF COURSE - NOTE: Now is an excellent time to commit your changes.
We Are Done with Part 1
Thanks for taking the time to read this. I'd love some feedback. If people are interested, Part 2 will be all about wiring this up with GitHub actions to get all the tools in a build pipeline and published out to a production web site.

Latest comments (0)