
The project used as basis for this article can be found here.
I, like most of my friends that are software developers have the habit of starting small projects to work on after work or in the weekends. More than rarely it turns out that the project is actually not so small, or I lose interest, or it turns out that there are similar products that I haven’t found before starting… When this time comes the project, is either left for dead, or if it is nearly finished, at least in my cases, it gets finished and published in some store, hosting, etc. just out of pure stubbornness.
Enough with the intro…
I’ll start with the things that I like in both this project and JS in general.
I dislike far more things, than I like in both, most of my projects and JS, so I’ll leave those for the end.
1 Math.rand()
It is probably the probably the thing that I love the most in JS. It is so easy to write something, that returns random values in a given range, like:
randInRange = function( min, max ){
    return Math.floor(Math.random() * (max - min + 1)) + min;
}
Randomness can save a LOT of time for creating level varieties, attack varieties, enemies and so on.
Quick example of randoms awesomeness :
- spawning enemies from either left or right part of the screen this.enemies[index].x = randInRange( 0, 1 ) ? 0 : window.innerWidth;
- Playing random attack sounds this.player.play( 'attack' + randInRange( 1, 3 ) );
- Playing random attack animation this.play( 'kick' + randInRange( 1, 2 );
2 Dynamically creating background and movements without visual resources by heavily abusing pixiJS and Math.random()
Now this is something I am kinda proud of (smirk)
Usually my creative process when making a game (or anything really) is by writing most of the code, then adding visual resources, decide it is time to finish writing the code, test, add audio, test, fix, get annoyed and release.
This time it was nothing different (yes, I am a stubborn creature of habit). I wrote the basic code of the character, the navigation, pausing, resuming game, etc. and decided to look for animations of the main character. Luckily for me I found something awesome in OpenGameArt very soon. After tinkering with the gifs, TexturePacker and Gimp I had all of the animations for my character.
Awesome!
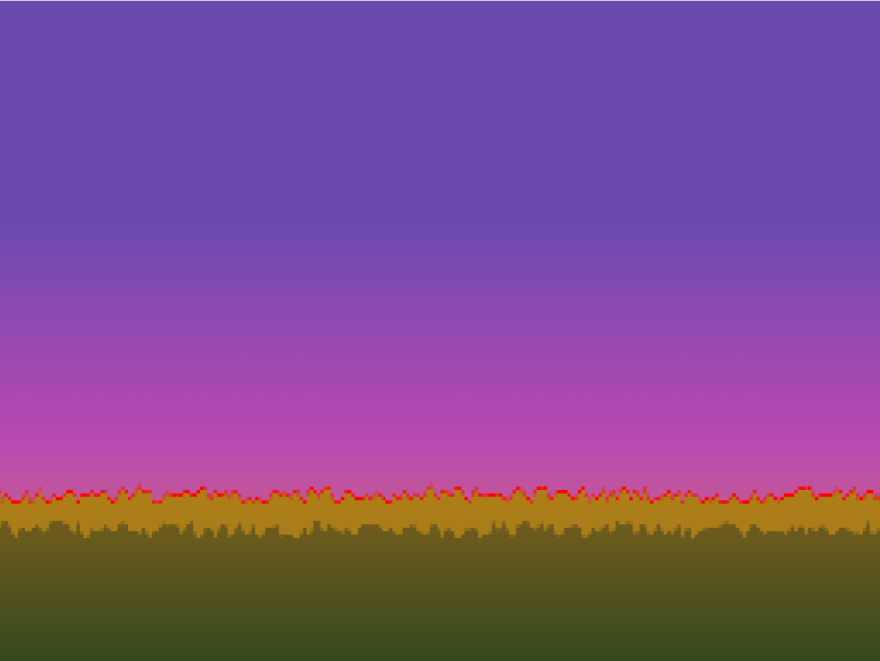
However, having a character with no background environment sucks. So I ventured into searching for more free resources for the background. Then this came in mind:

And so I decided to generate my background entirely in JS. This reduces the general file size, network load, skips copyrights (as a nice bonus) and it was a nice exercise.
I started by just wanting to create a simple gradient background for the sky. However, pixiJS doesn’t provide anything for gradients. So I just extended it…
PIXI.gradientTexture = function( width, height, colors ){
    var canvas = document.createElement( "canvas" );
    var ctx = canvas.getContext( "2d" );
    canvas.height = height;
    canvas.width = width;
    var grd = ctx.createLinearGradient(0, 0, 0, height);
    for( var i in colors ){
    grd.addColorStop( i / (colors.length - 1), colors[i] );
    }

    ctx.fillStyle = grd;
    ctx.fillRect(0, 0, width, height);

    return new PIXI.Texture.fromCanvas( canvas );
};
Sidenote: JS prototypal inheritance can be an awesome gun to fire at everything that stands in your way, but can also blow your head off, just as easily if you don’t know what you are doing.
Back to the code – it is pretty straightforward, create canvas with given width and height, add color stops to create the gradient, make texture from the canvas and return it.
From this creating the whole scene, take ~100 lines of code. Making sky is as simple as creating a texture, that has a width of 1px and the whole screen as height and making a tiling sprite out of it, to cover the whole screen.
var texture = new PIXI.gradientTexture( 1, window.innerHeight, ["#6a4aaf", "#6a4aaf", "#ba49b2", "#d17b55" ] );
var skyBackground = new PIXI.extras.TilingSprite( texture, window.innerWidth + this.pixelateSize, window.innerHeight + this.pixelateSize);
Making the curvy ground is where the Math.random() comes again in play. I simply make a polygon, that starts from the bottom corners of the screen, and the top border is filled with points with random height and fill it with gradient texture.
var groundPolygon = new PIXI.Graphics();
var offset = window.innerHeight - groundHeight;
var backgroundPath = [];

backgroundPath.push( new PIXI.Point( -1 / config.ground.numberOfPoints * (window.innerWidth + this.pixelateSize), window.innerHeight ) );
for( var i = -1; i <= config.ground.numberOfPoints; i++ ){
    backgroundPath.push( new PIXI.Point( i / config.ground.numberOfPoints * (window.innerWidth + this.pixelateSize), randInRange( offset * (1 + config.ground.offsetDiff), offset * ( 1 - config.ground.offsetDiff ) ) ) );
}
backgroundPath.push( new PIXI.Point( window.innerWidth + this.pixelateSize, window.innerHeight ) );
groundPolygon.beginFill( 0 );
groundPolygon.drawPolygon( backgroundPath );
groundPolygon.endFill();
this.groundContainer.addChild( groundPolygon );

var texture = new PIXI.gradientTexture( 1, groundHeight, colors );
var tilingSprite = new PIXI.extras.TilingSprite( texture, window.innerWidth + this.pixelateSize, groundHeight );
Do that a few times, and you get layers.
Having just a static background, however, is boring.
A lot of pixel games, add minor moving details in the background to make it dynamic. This is where the clouds come into play and they are also are a direct descendant of Math.random().
Background.prototype.createCloud = function(){
    var cloud = new PIXI.Container();
    var numberOfCircles = randInRange( config.sky.minCircles, config.sky.maxCircles );
    var cloudParts = [];
    var alpha = 1 - randInRange( 0, 4 ) / 10;
    for( var i = 0; i < numberOfCircles; i++ ){
        cloudParts[i] = new PIXI.Graphics();
        cloudParts[i].beginFill( 0xFFFFFF, alpha );
        cloudParts[i].drawCircle(0, 0, randInRange( config.sky.minCircleRadius, config.sky.maxCircleRadius ) );
        cloudParts[i].endFill();
        cloudParts[i].x = cloudParts[i - 1] ? randInRange( cloudParts[i-1].x, cloudParts[i-1].x + cloudParts[i].width / 2.2 ) : 0;
        cloudParts[i].y = cloudParts[i - 1] ? randInRange( cloudParts[i-1].y, cloudParts[i-1].y + cloudParts[i].height / 2.2 ) * (i % 2 == 0 ? 1 : -1) : 0;
        cloud.addChild( cloudParts[i] );
    }
    cloud.x = -cloud.width;
    cloud.y = randInRange( cloud.height, cloud.height * 2);
    cloud.cacheAsBitmap = true;
    cloud.filters = [ this.filter ];
    this.skyContainer.addChild( cloud );

    new TimelineMax().to( cloud, randInRange( config.sky.minSpeed, config.sky.maxSpeed ), { x: window.innerWidth + cloud.width, force3D:true, onComplete: function(){
        this.skyContainer.removeChild( cloud );
        cloud.destroy( true );
        this.createCloud();
    }.bind(this)});
    cloud.cacheAsBitmap = true;
};
Creating the clouds is a relatively simple process:
- make new container to hold the cloud parts
- decide how many parts will the cloud have, using randInRange
- for every part, create a circle which position generated from randInRage with the condition that its x and y should lay somewhere between the center and the radius of the circle create just before it
- set it random alpha from 1 to 0.6
- add all of the circles to their parent container
- flat it to a bitmap
- position it randomly on the y axis
- apply pixelate filter
Clouds generated like that are always going to be different and sometimes they have rather interesting forms.

Disclaimer: Randomly generated assets like that were incredibly suited for my “game mostly because of the pixel filter. I don’t think that they will be useful in any case. However, it is a nice example of (ab)using randomness to save time.
3 Object.defineProperty()
OK, I think I lied a little… I love Object.defineProperty far more than Math.random, even though our relationship is far shorter.
Most of the rendering engines I have come across rely on it heavily every time you try to use any properties of any container either to update its parent, then its parent, then its parent and so on, until you reach the main stage, in order to make sure that you have the correct scale, width, height, x, y, and so on, or to update the parent bounds after you have set a value of any of its children or its children children and so on…
Enough with general examples. Quick intro of how the main character is done in my game – from visual perspective it is a container, that has a movieClip child for every animation of the character. Having them grouped up in a container means that I can move, tint, animate alpha and destroy only the main container and its children will follow.
The part where Object.defineProperty() comes and does its magic is for example by:
- defining x and y properties for the character that have a bunch of checks to make sure that the character is not dead, the game is not paused, that by updating it will not move the character outside of the screen, etc.
- defining tint, scale, orientation and animationSpeed means that every time I change any of those properties, the setter will kindly iterate trough all of the movieClips of the character and change them accordingly.
Object.defineProperty( Character.prototype, 'animationSpeed', {
    get: function() {
        return this._animationSpeed || 0;
    },
    set: function( val ){
        this._animationSpeed = val;
        for( var i in this.animations ){
            this.animations[i].movieClip.animationSpeed = val;
        }
    },
});

Object.defineProperty( Character.prototype, 'x', {
    get: function() {
        return this._x || 0;
    },
    set: function( val ){
        if( this.isPaused() )
            return;

        if( !this.enemy && (val + this.width / 2 >= window.innerWidth || val <= this.width / 2 ) )
            return;
        if( this.dead )
            return;

        this._x = val;
        this.container.x = val;
    },
});

Object.defineProperty( Character.prototype, 'y', {
    get: function() {
        return this._y || 0;
    },
    set: function( val ){
    if( this.isPaused() )
        return;

        this._y = val;
        this.container.y = val;
    },
});

Object.defineProperty( Character.prototype, 'tint', {
    get: function() {
        return this._tint || 0;
    },
    set: function( val ){
        this._tint = val;
        for( var i in this.animations ){
            this.animations[i].movieClip.tint = val;
        }
    },
});

Object.defineProperty( Character.prototype, 'scale', {
    get: function() {
        return this._scale || 0;
    },
    set: function( val ){
        this._scale = val;
        for( var i in this.animations ){
            this.animations[i].movieClip.scale.set( val );
        }
    },
});

Object.defineProperty( Character.prototype, 'orientation', {
    get: function() {
        return this._orientation || this.defaultOrientation;
    },
    set: function( val ){
        this._orientation = val;
        for( var i in this.animations ){
            this.animations[i].movieClip.scale.x = val * this.scale;
        }
    },
});
4 Mobile first
When I make things for the android store it’s easy – they have to work on android devices in portrait, landscape or both.
When I make chrome plugins it’s easy – they have to work on a desktop chrome.
This was different, since it had to work on both mobile devices and desktop. Because of that I decided to make the mobile version first. Creating the phone version have several benefits:
- Performance– if it runs well on mobile, it will definitely run well on desktop
- UI – once you fit everything on mobile, it is easier to make it bigger, that the other way around. For desktop the whole navigation is hidden, since the user can play with a keyboard.
I honestly believe that this is as applicable to web based games, as it is to web apps and web sites.
Now, the things that I don’t like
There are a lot of things that I don’t like how I’ve done, but this time I decided to leave them like that for the time being, to highlight them as well.
1 Constantly referencing to the window dimensions
Instead I should’ve gotten the window size in a config at launch, and on every resize update either the portrait or landscape dimensions, that I have saved in the config.
2 Collision detection
Not directly from this project, but it still has a connection, since I learned my lesson. In an older project of mine – asteroids (made only for mobile, so please emulate a mobile devices), back when I was even younger and even stupider I read how collision detection is done properly in 2D games – by creating polygons and checking if they intersect with each other. Of course, being younger, stupider means that I was cockier, and I thought to myself that I can find a much better way to do this, than brutally making polygons for every part of my game… And so I did the following check if two objects/containers are close enough by checking their x,y, width and height to see if they intersect This isn’t enough, since if the visual part of one of the containers is with complex form, when treated as a square with only width, height, x and y it may return false positive, since the above concept doesn’t check for the visual representation of the containers. So I went further. If two objects intersect, I took the intersection from both of them and started “walking over it to see if non empty pixels from one, cross over pixels of the other’s non empty pixels. Not a bad idea at first. It turns worse however when this is attempted on every animation frame and you have multiple objects on the screen. At some point the above calculations took far more time than the animation frame, which lead to wrong results. I tried to optimize it by checking not pixel, by pixel, but in steps of 2–3–4–10. It did help, but not nearly enough.
Anyhow, what I was trying to say with that example is, it isn’t a bad idea to try to do something that people thought to be impossible, but you have to be ready to drop it and start over.
3 Using module loaders
Probably my biggest regret and the thing that I will fix first…
At first I believed that this is just going to be a game with a background, character, score, main logic and config… It gradually grew to have almost 20 files.
Even if I only had the 4 I thought to be enough at the beginning, I still should have used a module loader like RequireJS, Browserify or Webpack.
It is a lot easier to have every component wrapped as module, since you don’t have to be careful of the order of your script tags in the html file and you can see every module dependencies right at the top of the file.
Prologue
I guess
I wrote this article to remind myself what was to make http://kristiyan.quatinus.info/ and use everyone that reads this article as a rubber duck, to which I try to explain parts of my code. There are a lot more things that I recalled than those explained above, but I thought that they are either too insignificant or too boring to discuss.
I hope that at least something was of some interest or useful to you.
This post was originally published on medium.com
