When using idea, if multiple projects are opened at the same time, the memory is often full, which leads to abnormal freezes, and sometimes prompts memory overflow. At this time, it can be improved by increasing the value of Xmx. But how should the Xmx value be adjusted? Why does someone modify the Xmx value but it doesn’t take effect? This article will explain in detail.
1.Ineffective method
Many of the methods found on the Internet to guide you to adjust Xmx are generally as follows:
1.1 Right-click on the application idea — display package contents:

1.2 Then open idea.vmoptions under the bin, modify Xms, Xmx and save, restart idea.

But there should still be many friends who found that this operation has no effect, the idea is still stuck, and the fan is still whirring.
1.3 How to check whether the setting takes effect
In fact, you can judge whether the setting takes effect by looking at the two numbers in the lower right corner of the idea, as shown in the figure:

Here 989 is the maximum available memory, Xmx (the idea itself should occupy a small part), and 862 is the used memory.
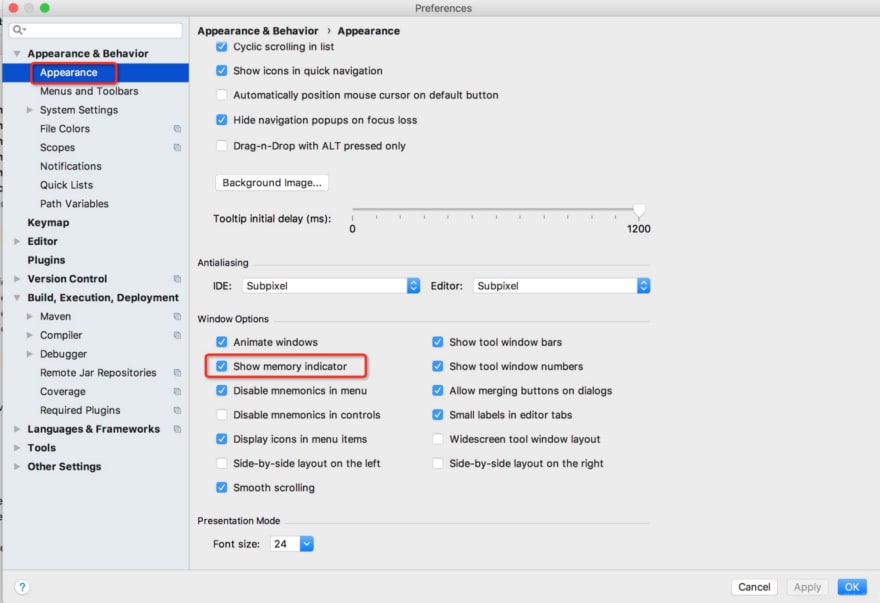
If this number is not displayed in your lower right corner, you can set it by clicking “Intellij IDEA” — “Preferences” — “Appearance” in the upper right corner,
Check “Show memory indicator”, ok to save.

2. Reasons for ineffectiveness
2.1 What is the reason for the modification not taking effect?
First of all, confirm whether you have restarted the idea. The restart requires you to close all the idea windows and then open the idea.
If you are sure that it does not take effect after restarting, then there is only one reason: the modified file is not the file that idea actually uses.
2.2 Find the correct configuration
If you want to know which configuration file your idea allows, you can find Contents — the idea executable file under MacOS and double-click to run it

You will see that the path of the idea startup loading configuration file is as follows:

The configuration file used by my idea is: /Users/rcm/Library/Preferences/IdeaIC2018.1/idea.vmoptions
2.3 Modify the correct configuration
By going to the folder command, you can directly find this file and modify it. After modifying and saving, restart the idea to take effect.

My modified configuration is as follows:
-Xms1024m
-Xmx2048m
-XX:ReservedCodeCacheSize=1024m
-XX:+UseCompressedOops
-Dfile.encoding=UTF-8
-XX:+UseConcMarkSweepGC
-XX:SoftRefLRUPolicyMSPerMB=50
-ea
-Dsun.io.useCanonCaches=false
-Djava.net.preferIPv4Stack=true
-XX:+HeapDumpOnOutOfMemoryError
-XX:-OmitStackTraceInFastThrow
-Xverify:none

-XX:ErrorFile=$USER_HOME/java_error_in_idea_%p.log
-XX:HeapDumpPath=$USER_HOME/java_error_in_idea.hprof
The three main parameters modified:
- Xms1024m -Xmx2048m -XX:ReservedCodeCacheSize=1024m
3. A more convenient method
Of course, you can also set it up in an easier way:
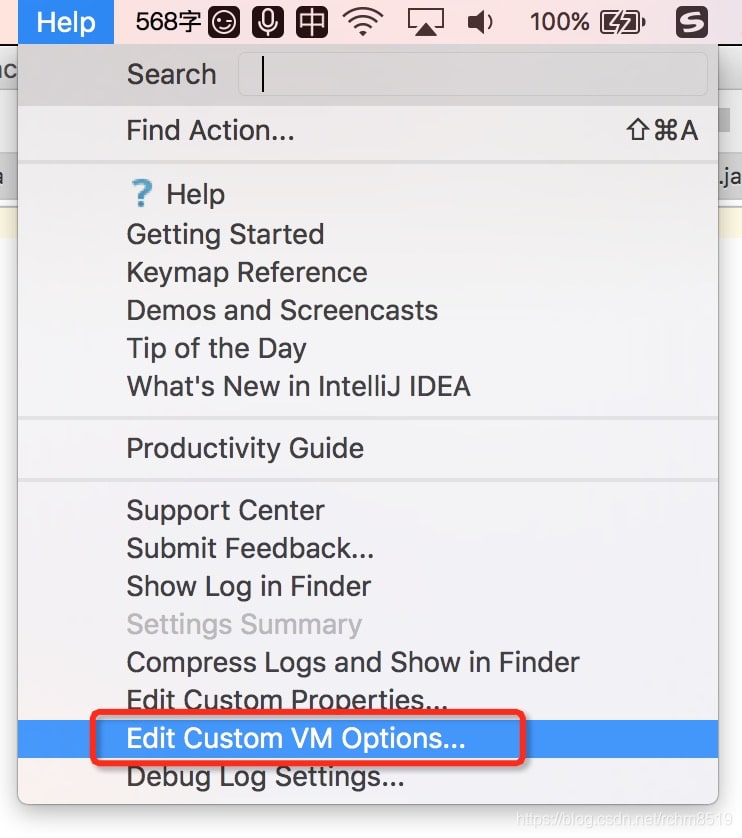
Click Help — Edit Custom VM Options , modify it in the open file, and restart the idea after modification


Top comments (0)