Hey there!
Have you ever thought about creating your own web server on the cloud? Well, you’re in for a treat because in this article, we’re going to explore how you can launch an EC2 instance and use HTTPD to host a simple web server. The best part? We’ll automate the installation of HTTPD using EC2 user data, so your web server is up and running as soon as your instance launches!
Let's jump in......
EC2 User Data
It is possible to bootstrap our instances using an EC2 User
data(a piece of code you pass to the EC2 instance script).Bootstrapping means launching commands when a machine starts.
That script is only run once at the instance's first start once and for all.The EC2 User Data Script runs with the root user; therefore, any commands you have will have the sudo rights
-
EC2 user data is used to automate boot tasks such as:
- Installing updates
- Installing software
- Downloading common files from the internet
- Anything you can think of
NB: The more you add into your user data script, the more your instance has to do at boot time
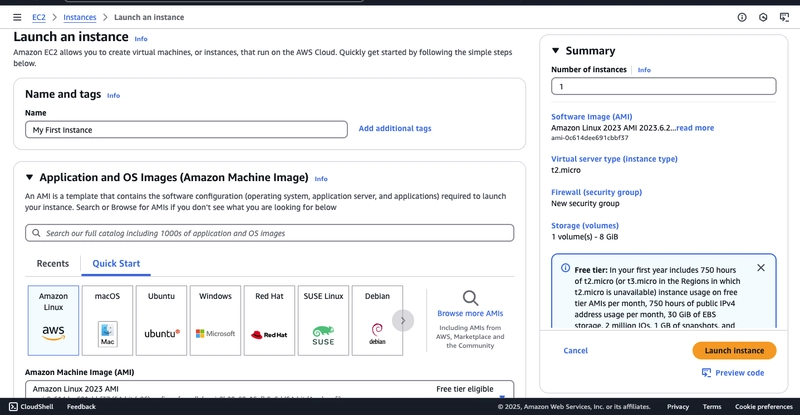
Launch our first EC2 Instance running on Amazon Linux
- Go into the EC2 console and click the "Launch Instance" orange button
Add a name and tag, e.g. "My First Instance". This helps you keep track of multiple instances while adding a personal touch to your cloud workspace.
Choose a base image (operating system) for your EC2 instance. Choose from the Quickstart section, or you can browse more images of your choice.
In my case, I have chosen the Amazon Linux 2023 AMI (Amazon Machine Image), which is Free Tier eligible.
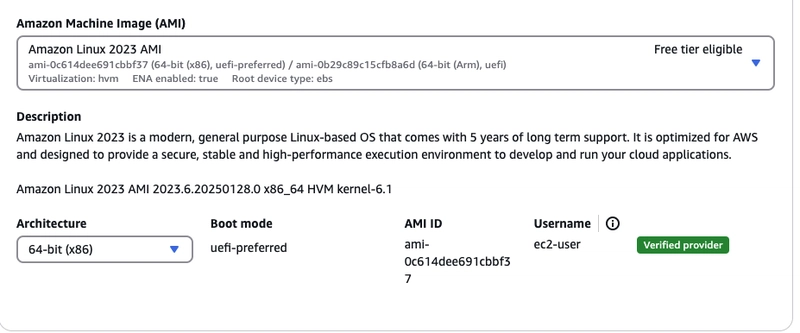
- Leave architecture as default. Also, remember to check the default username for the AMI you select. Since you’ve chosen Amazon Linux, the default username is ec2-user. Keep this in mind for connecting to your instance later!
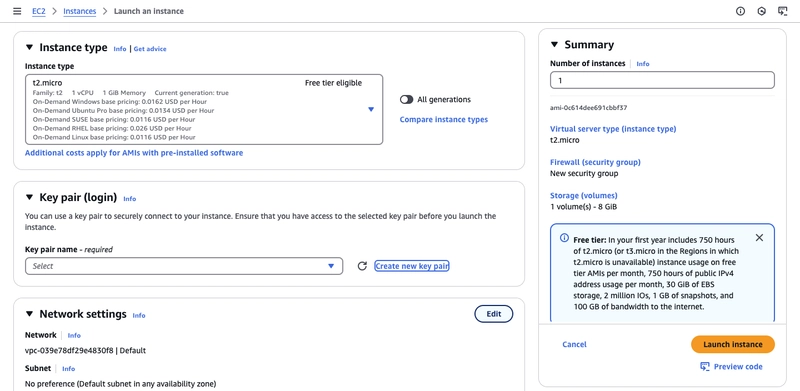
Next, we need to choose the instance type
Here I have a t2.micro selected.It is free tier eligible, so it will be free to launch for the entire month if I leave it running.
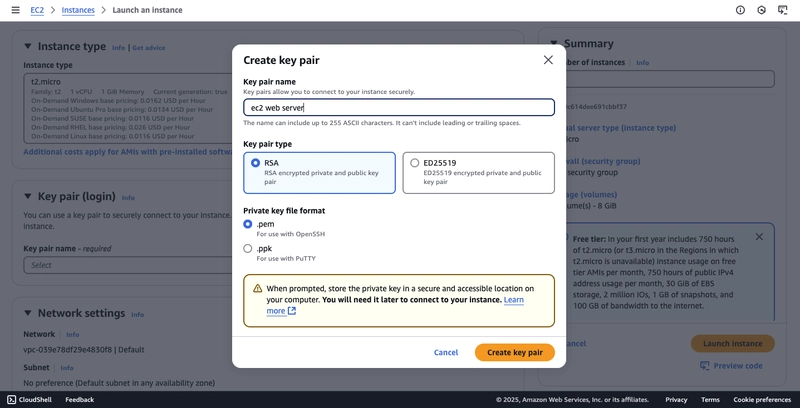
Create a new key pair to log into my EC2 instance.It is necessary if you are going to use the SSH utility to access our instance.
The key must be RSA-encrypted and the key file format must be .pem if you use Mac/Linux/Windows 10 and .ppk if you have windows with a version < 10(for use with PuTTY)
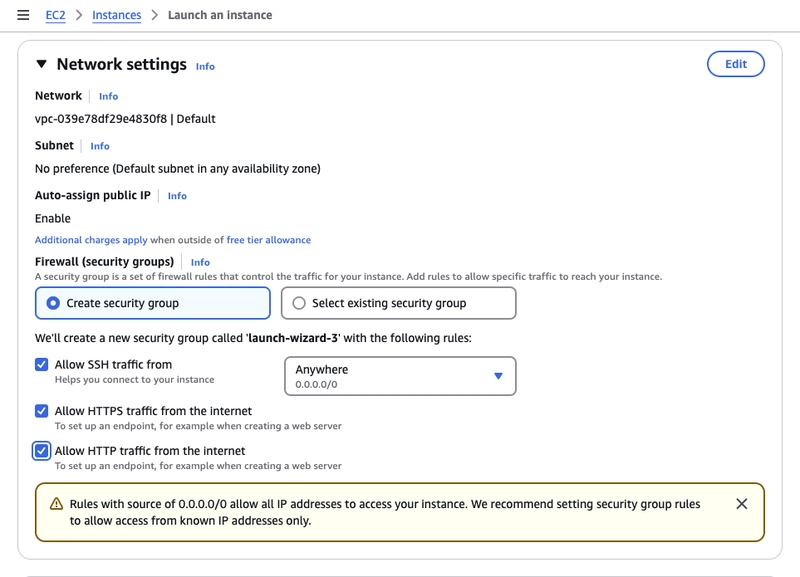
Next, we have to configure our network settings.
My instance will get a public IP auto-assigned.
To connect to our instance, there is going to be a security group attached, which is going to control our traffic from and to our instance, together with the rules you define for your security group.
Create a new security group or use an existing security group (for instance, mine is "launch-wizard-2" created by the console directly)
The first rule is to allow SSH traffic from anywhere and also allow HTTP/HTTPS traffic from the internet since we are launching a web server.
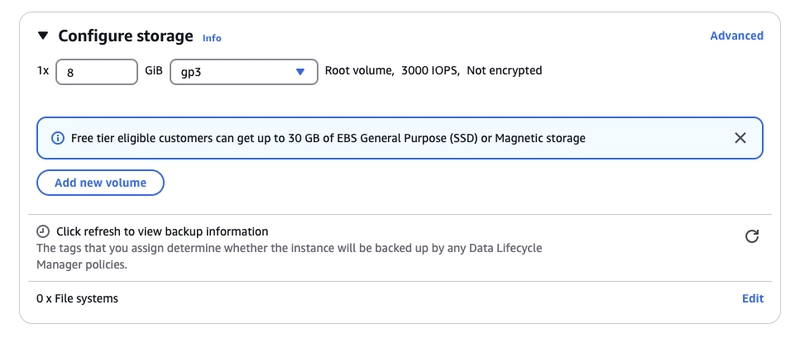
Storage section
I will leave it as it is since I have an 8GiB gp3 root volume
How do you add a user data script?
Navigate into the Advanced Details

Scroll down all the way to the bottom
Here you pass a script to the ec2 instance to execute on its first launch
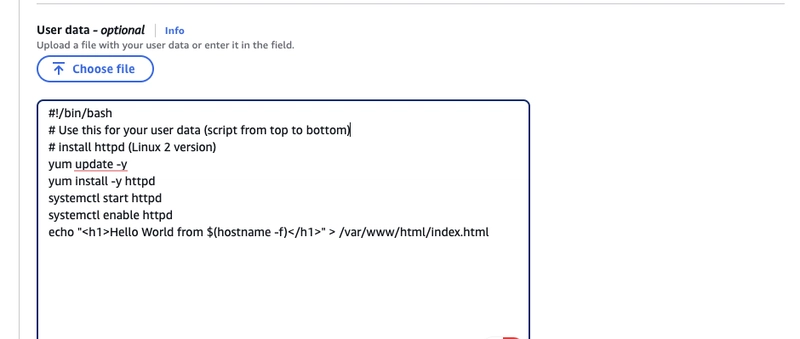
From the script, I added:
- It's going to update a few things
- Install the HTTPD web server on the machine
- Then write an HTML file that will be our web server
Once you are done, click the button to launch the instance
Voila, my instance is up and running

Now, select your EC2 instance, and you’ll find its public IP address.
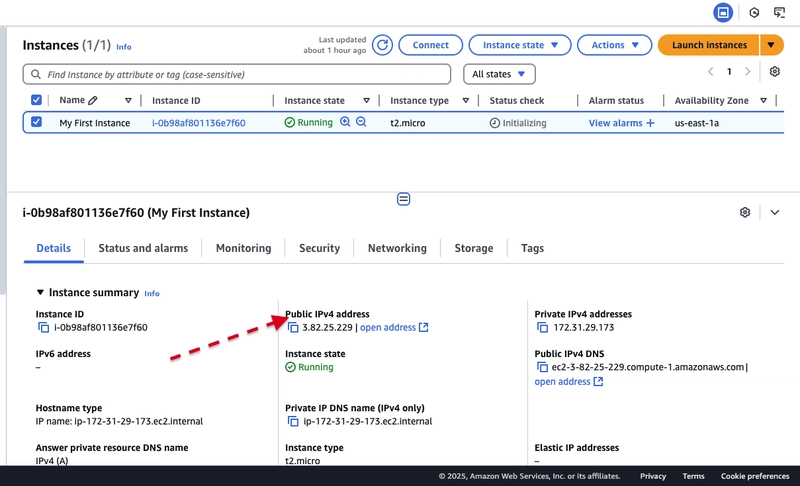
- Open your browser, enter that IP, refresh the page, and .....!

Your custom message is live on the site. 🎉

Feel free to modify the text to make it uniquely yours!
Until next time.Happy cloud computing!

Top comments (2)
That's very helpful! Keep up the good work. 👏 The community needs you.
Thank you so much! I’m glad you found it helpful. I’ll keep sharing and learning with the community — let’s grow together! 🙌