
In this tutorial, we are going to see how to install Wireguard on a VPS with a few command lines!
Step 1️⃣
You have to create a VPS instance to setup your VPN. I can advise you
Scaleway, Vultr or Linode because their prices are cheap.
Don't forget to check what kind of IP they have : all these providers have multiple geographical zones available to create a VPS instance.
I advise you to use Debian or Ubuntu image because we are using PiVPN to install Wireguard and it's optimized for debian based distributions.
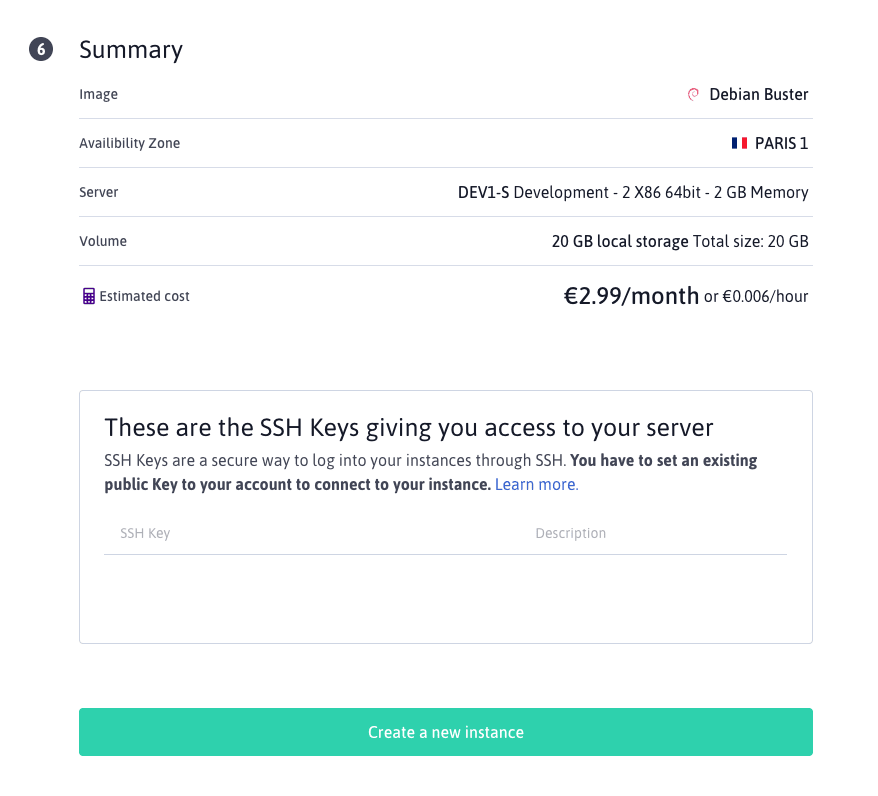
Personally, I'm creating a DEV1-S VPS instance located in France, with a Debian Buster image with a volume of 20 GB. Add your ssh key at the end of the process.
➡️ Click on the green button to build your instance!
Step 2️⃣
To connect to your VPS, use the following command line : ssh root@YOUR_VPS_IP
For me, it was ssh root@51.15.244.227 and upgrade your packages : sudo apt update -y && sudo apt upgrade -y and reboot the server sudo reboot
To secure your VPS server, I advise you to create an user account, setup your SSH key and disable password authentication to the server. I found some useful resources on the internet about these steps : Disable SSH passwords on linux, Create sudo user on Debian, Disable the root access and Change default SSH port
Now, it's the right time to install Wireguard and PiVPN! First of all, I've got some errors during the installation with iptables-persistent package : now I have to run sudo apt install netfilter-persistent.
Sometimes, it can happen that you have to reboot your server to activate the changes.
Then, go to your user folder, and the command line to download and launch PiVPN installer :
curl -L https://install.pivpn.io > pivpn.sh
sudo bash pivpn.sh
For the first answer, select your user and then Wireguard.

For the DNS selection : Quad9 or Cloudfare depending on your needs. You can find some article about them over the internet. Personally, I'm using Cloudflare for his speed.
You can respond the default answer to all the following questions except if you want to have a specific configuration
➡️ Reboot your system and tada! 🎉
Step 3️⃣
Now the final step is to create and configure the client :

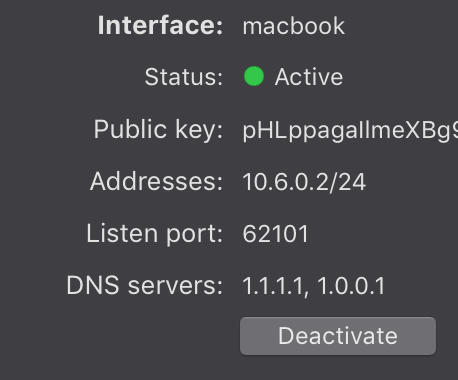
The config file is located in your home folder, you can copy the configuration (as you can see above) and paste it in the client app of your OS
And now it has to works correctly! 🍻

Top comments (0)