Its name is pretty clear: the #100DaysOfCode challenge is about coding at least one hour per day, everyday, for 100 days. It's a great way to push yourself to act. Especially if you are a seasoned procrastinator like me 😅
In addition to coding, the challenge comes with a few extra rules. Among them, you are supposed to fork a repository and use it to log your daily activity in a markdown file.
It's cool and useful, but there is little chance that it will be noticed. After all, this repository has been forked 10K+ times, and Twitter is cluttered with #100DaysOfCode hashtags.
To give me a good start, I decided to show my progress in my Twitter banner. Like this:
Disclaimer: I faked my progress to produce this screenshot. If you wanna know what my progress actually is, visit my Twitter profile 😁
How does that work? First, there is a banner template I created with Resoc. Then, I added a GitHub Action to my forked #100DaysOfCode repository. This action parses my log to get my progress, generates a banner image and upload it to Twitter.
In this article, I explain how you can build you own automated Twitter banner. When I say "your own", I really mean it. Your image will look exactly the way you want and embed the data you want. Would you like it to show your follower count? Something else? That will be up to you.
And now for the good news: as long as you brand the banner to make it yours, following this tutorial counts as your daily hour of coding! 🎉🚀🤣
Prepare the repository
Before we create any file, we need a repository. If you already follow the #100DaysOfCode challenge and have forked the official GitHub repository, you're all set! Otherwise, even if you don't do the challenge, get your copy to follow the tutorial.
Fork the #100DaysOfCode GitHub repository:
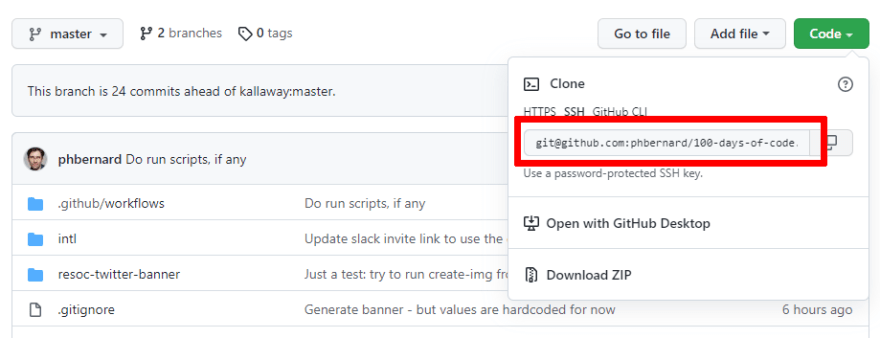
Get the URL of your new repository:
And clone it:
git checkout [Your repo URL]
The project is quite light. Actually, we will use only one file, log.md. This is the file we update on a daily basis with our progress:
# 100 Days Of Code - Log

### Day 0: February 30, 2016 (Example 1)
##### (delete me or comment me out)

**Today's Progress**: Fixed CSS, worked on canvas functionality for the app.

**Thoughts:** I really struggled with CSS, but, overall,
I feel like I am slowly getting better at it. Canvas is still new for me,
but I managed to figure out some basic functionality.

**Link to work:** [Calculator App](http://www.example.com)

...
So far so good.
Talking about repository, the tutorial repository is available, too. Have a look into it if something goes wrong as you follow the tutorial.
Your Twitter banner template
It's time to design the Twitter banner. We create a Resoc image template, made of HTML and CSS:
cd 100-days-of-code
npx itdk init -m twitter-banner resoc-twitter-banner
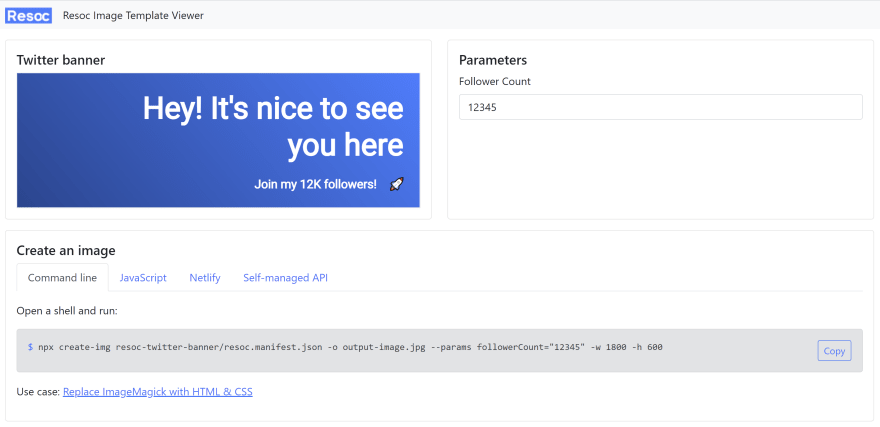
This command creates a new template based on the twitter-banner starter template, in a sub-directory called resoc-twitter-banner, and opens a new browser:
On the left, we have a default banner template. On the right, there is a form with a single parameter: the follower count. At the bottom, the editor shows us how we can generate actual images. Curious to see this in action? Try it! Type a follower count in the form, copy/paste the command line and run it.
This template is a good start but it's not what we want.
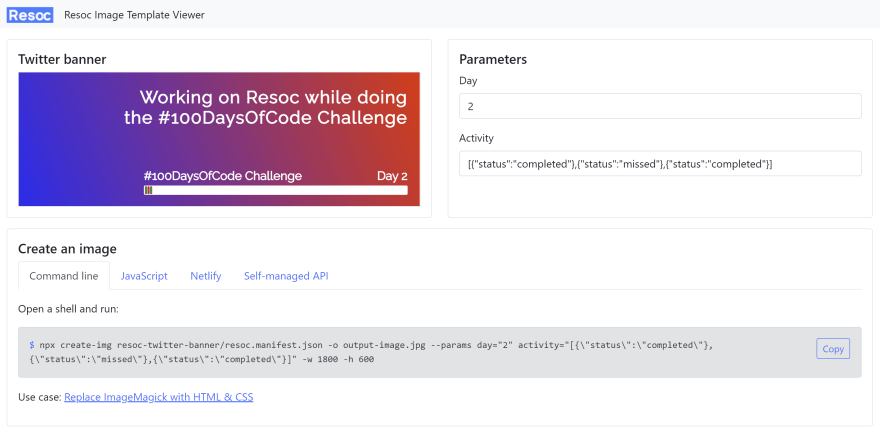
First, this template takes a single parameter: a follower count. Our banner should display our #100DaysOfCode progress. More precisely, it should show the day and the previous activity (legend: green dot for an active day, red dot for a missed day):
Edit resoc-twitter-banner/resoc.manifest.json and replace its content with:
{
  "imageSpecs": {
    "destination": "TwitterBanner"
  },
  "partials": {
    "content": "./content.html.mustache",
    "styles": "./styles.css.mustache"
  },
  "parameters": [
    {
      "name": "day",
      "type": "number",
      "demoValue": "2"
    },
    {
      "name": "activity",
      "type": "objectList",
      "demoValue": [
        { "status": "completed" },
        { "status": "missed" },
        { "status": "completed" }
      ]
    }
  ]
}
There are two entries in the parameters section. The first parameter is called day, is a number and has a demo value of 2. By the way, first day of the #100DaysOfCode challenge is Day 0, not Day 1. We are developers after all 😋. The second parameter is less obvious. Named activity, it lists the status of all days so far. completed means we coded for at least an hour, missed is for, well, rest days 😅. The demo value is plain JSON.
Now let's write HTML. Fill resoc-twitter-banner/content.html.mustache with:
<div class="wrapper">
  <h1 id="title">
    Working on Resoc while doing the #100DaysOfCode Challenge
  </h1>
  <div class="challenge-progress">
    <div class="caption">
      <span>
        #100DaysOfCode Challenge
      </span>
      <span>
        Day {{ day }}
      </span>
    </div>
    <div class="progress">
      {{#activity}}
        <div class="daily-activity {{ status }}"></div>
      {{/activity}}
    </div>
  </div>
</div>
In this file we see how to use the parameters: Day {{ day }} becomes Day 87 when the day parameter is set to... 87. The activity parameter is iterated to produce a bunch of div, one per day. Each div is assigned the daily status as a CSS class. This syntax is Mustache, a simple yet powerful templating system.
Last but not least, the CSS. Open resoc-twitter-banner/styles.css.mustache and populate it with:
@import url('https://fonts.googleapis.com/css2?family=Raleway&display=swap');

.wrapper {
  background: rgb(11,35,238);
  background: linear-gradient(70deg, rgba(11,35,238,1) 0%, rgba(246,52,12,1) 100%);
  color: white;
  font-family: 'Raleway';

  display: flex;
  flex-direction: column;
  padding: 2vh 3vw 2vh 3vw;
}

#title {
  flex: 1.62;
  font-size: 13vh;
  height: 100%;
  text-align: right;
  margin-left: 20vw;
  letter-spacing: 0.05em;
}

.challenge-progress {
  flex: 0.8;
  display: flex;
  flex-direction: column;
  margin-left: 30%;
  gap: 2vh;
}

.caption {
  font-size: 9vh;
  font-weight: bold;
  display: flex;
  justify-content: space-between;
}

.progress {
  background-color: white;
  border-radius: 1vh;
  height: 7vh;
  display: flex;
  align-items: center;
  padding-left: 0.2vw;
  padding-right: 0.2vw;
}

.daily-activity {
  display: inline-block;
  width: 0.8%;
  margin-left: 0.1%;
  margin-right: 0.1%;
  height: 6vh;
  border-radius: 1vh;
}

.completed {
  background-color: #2e7d32;
}

.missed {
  background-color: #c62828;
}
That's a few lines of CSS, but nothing fancy. Just regular web design. That's the great part: we reuse our know-how.
Go back to the template editor. Our changes have been reloaded while we were editing:
Great! Now we have a banner template we can turn into images.
Generate and update the banner
Now we are going to parse the challenge log file, generate the banner with the data we found and upload it to Twitter.
So far, this project has been quite static. It's time to add some code. Create a NPM project:
# Still in 100-days-of-code
npm init -y
At the root of the project, create update-twitter-banner.js:
const updateTwitterBanner = async() => {
  // Do something smart
}

try {
  await updateTwitterBanner();
  console.log("Done!");
}
catch(e) {
  console.log(e);
}
Also edit package.json to run this script (add type and update-twitter-banner):
   ...
  "type": "module",
  "scripts": {
    "update-twitter-banner": "node update-twitter-banner.js",
    "test": "echo \"Error: no test specified\" && exit 1"
  },
  ...
Run the script just to make sure you are on track:
npm run update-twitter-banner

# prints: Done!
For clarity, the following sections will focus on code snippets, not the entire file. If you plan to copy/paste, don't worry: there is a full recap at the end.
Parsing the log file
The log file is a safe place: no one will edit it but us. Therefore we can assume its format will remain consistent. The rules:
- Each day section starts with
### Day [the day number]: [the date]. - When there is a day when we don't code, we don't create the corresponding section. In other words, I know I didn't code on day 82 because I can't find
### Day 82:anywhere in my log file.
Let's parse the file with these conventions in mind:
let currentDay = -1;
const activeDays = [];
const log = await fs.promises.readFile('log.md', { encoding: 'utf8' });
log.split('\n').forEach(line => {
  const m = line.match(/### Day (\d+):/);
  if (m) {
    const day = parseInt(m[1]);
    activeDays.push(day);
    if (day > currentDay) {
      currentDay = day;
    }
  }
});

const daysStatus = new Array(currentDay + 1).fill(false);
activeDays.forEach(day => {
  daysStatus[day] = true;
});

console.log(`At day ${currentDay}`);
console.log('Days I have been active', activeDays);
console.log('Status, day by day', daysStatus);
Generating the banner
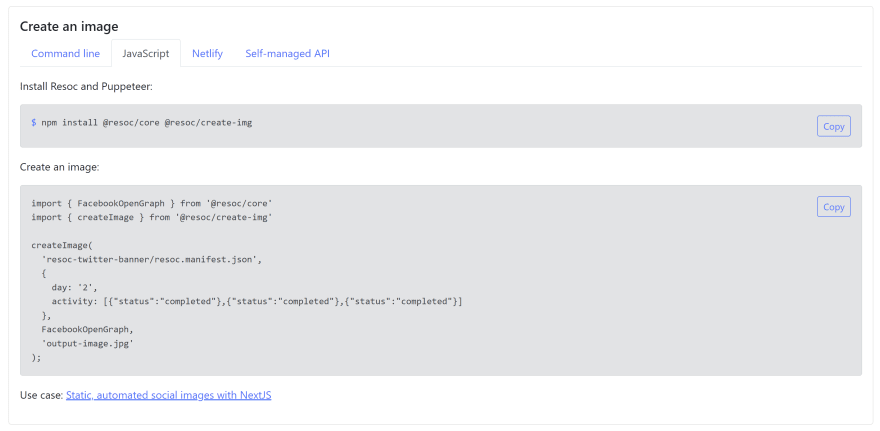
For this part, we are going to cheat. Remember the Resoc template editor? In the bottom panel, JavaScript tab, we get the instructions to create an image from our script:
Let's do as instructed:
npm install @resoc/core @resoc/create-img
We cannot use the provided code as is because it is using the demo values. We adapt it to use the data we got from parsing:
const bannerFileName = 'new-banner.png';

await createImage(
  'resoc-twitter-banner/resoc.manifest.json',
  {
    day: currentDay.toString(),
    activity: daysStatus.map(status =>
      ({ status: status ? 'completed' : 'missed' }))
  },
  { width: 1800, height: 600 },
  bannerFileName
);
At this point, you might want to run the script and make sure new-banner.png is created and match your log file.
Replace the existing banner on Twitter
We update the Twitter banner with only one line of code! Problem: there are a lot to prepare for this command to work. No time to waste!
Secure credentials management with dotenv
We are about to obtain a few credentials from Twitter. An app secret, etc. This kind of data cannot be stored in our code. Seriously. These credentials will give access to your Twitter account and your #100DaysOfCode repo is public. So don't store them in your code!
Instead, configure dotenv:
npm install dotenv
touch .env
echo .env >> .gitignore # Important!
The .env file will contain the Twitter credentials. Because we added it to .gitignore, we won't commit it by mistake.
Make sure the environment variables we will declare in .env will be available in our code. At the top of update-twitter-banner.js, add:
import dotenv from 'dotenv';
dotenv.config();
Twitter App
To access our Twitter account, we need a Twitter App.
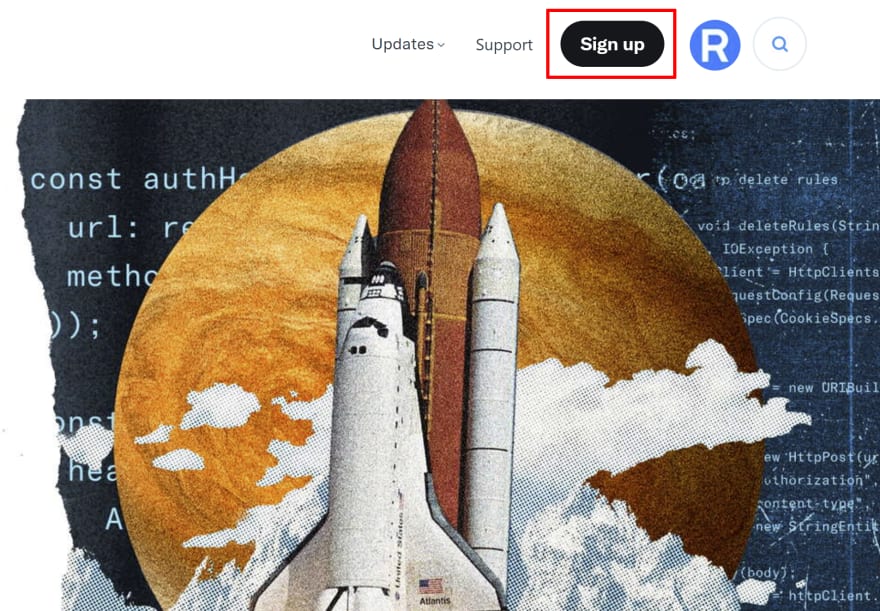
Make sure you are connected to Twitter. If you have multiple accounts, select the right one. Then, visit the Twitter Developer Platform and sign up:
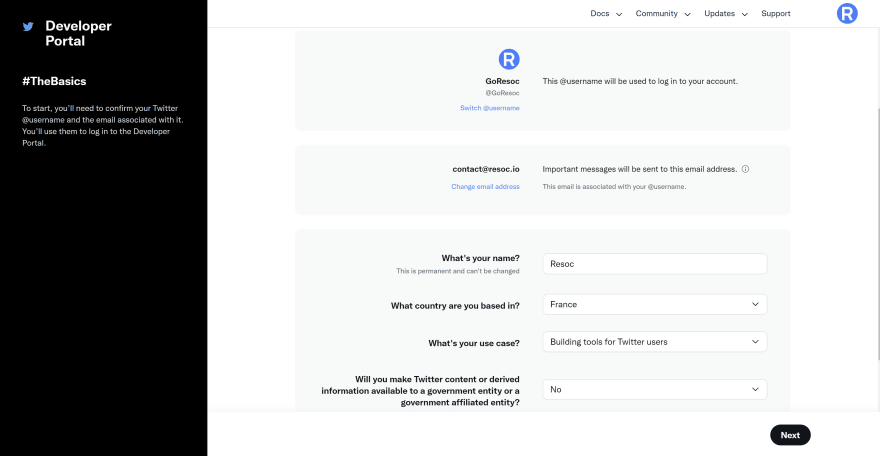
Fill the sign up form:
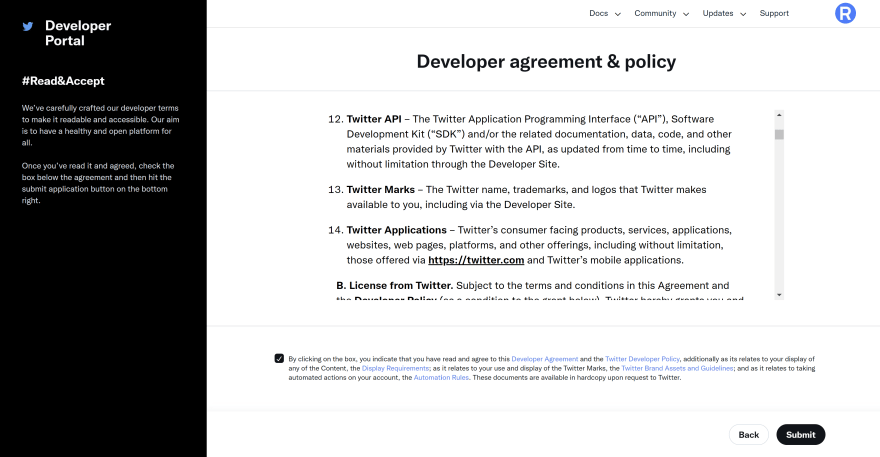
Accept the terms, which you obviously read 🙄
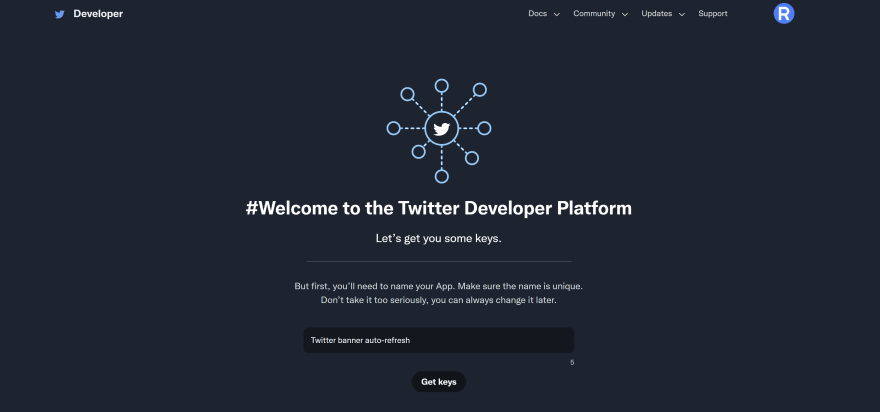
Next, you are asked for an app name:
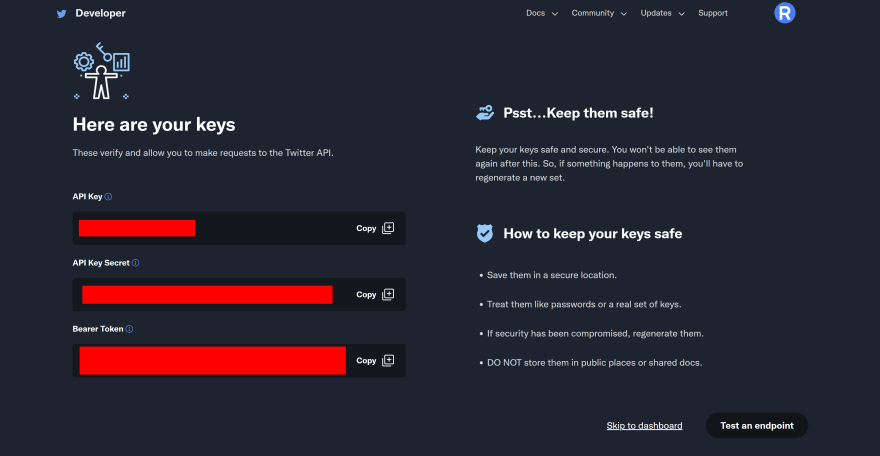
On the next page, you are presented your Twitter API credentials:
Save your credentials. Copy/paste the API key and key secret from the Twitter Dev Platform to your .env file:
TWITTER_API_KEY=[your API key]
TWITTER_API_SECRET=[your API key secret]
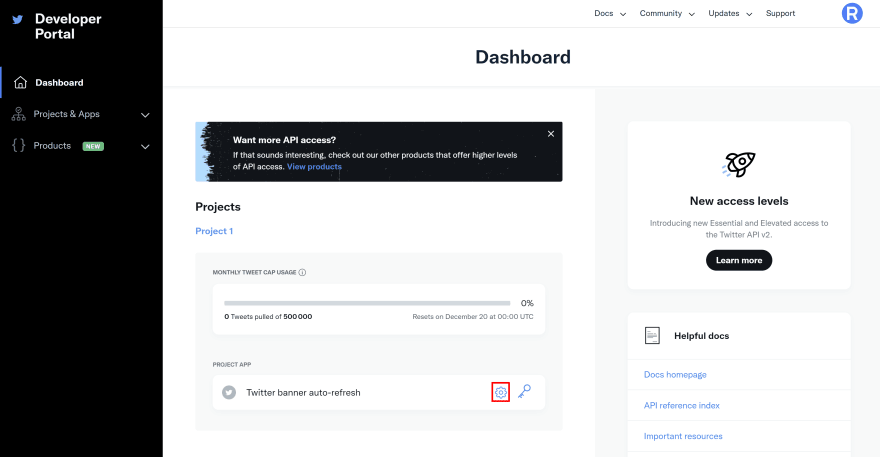
Once your keys are saved, go to your dashboard and edit the settings of your app:
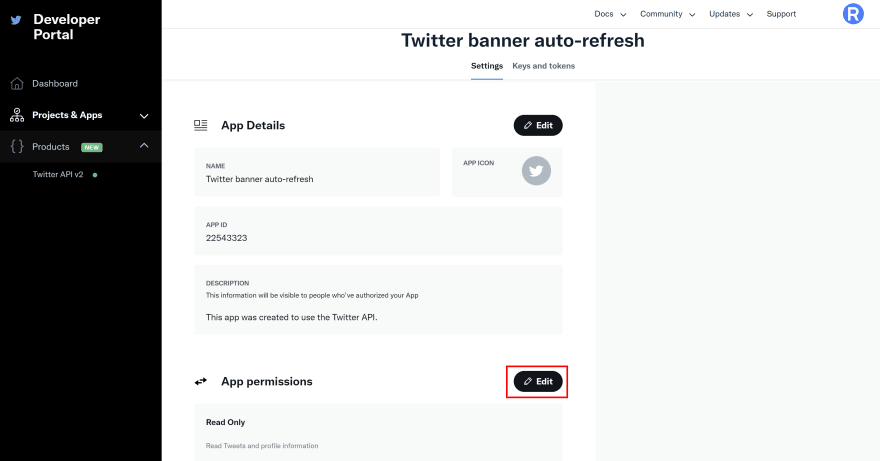
For now our app has a read only permission. Because it will update our banner, we need to make it read and write. Edit the permissions:
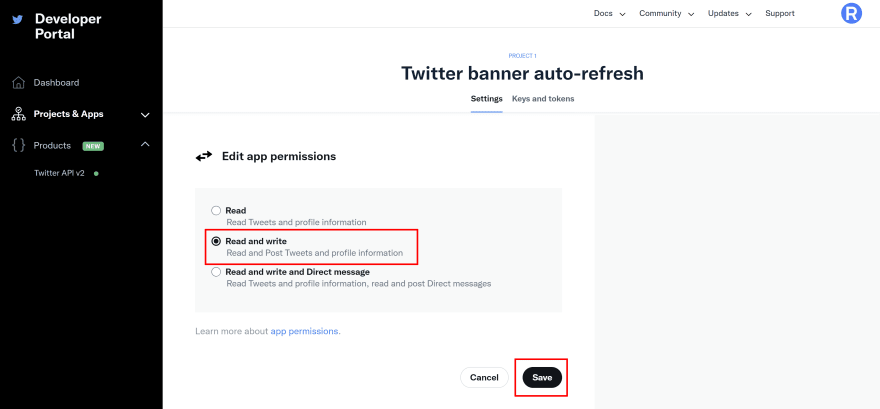
Change the permission and save:
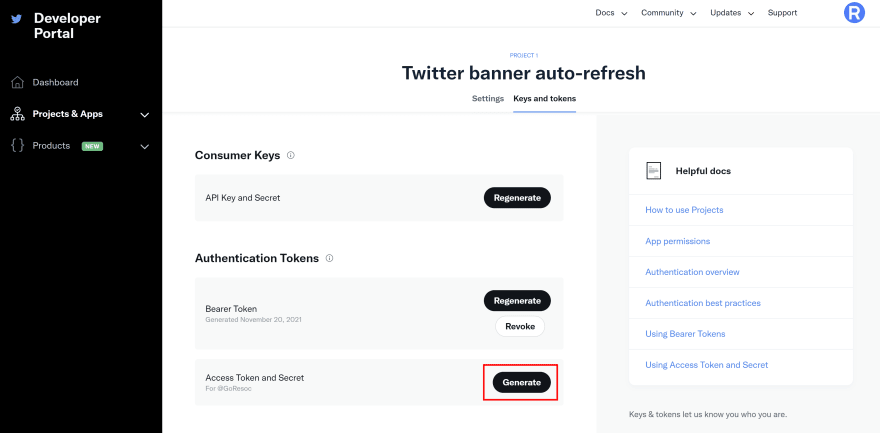
Now we are going to create another set of credentials so our app can access our Twitter account. From the dashboard, edit the keys of the app:
Generate an access token and secret:
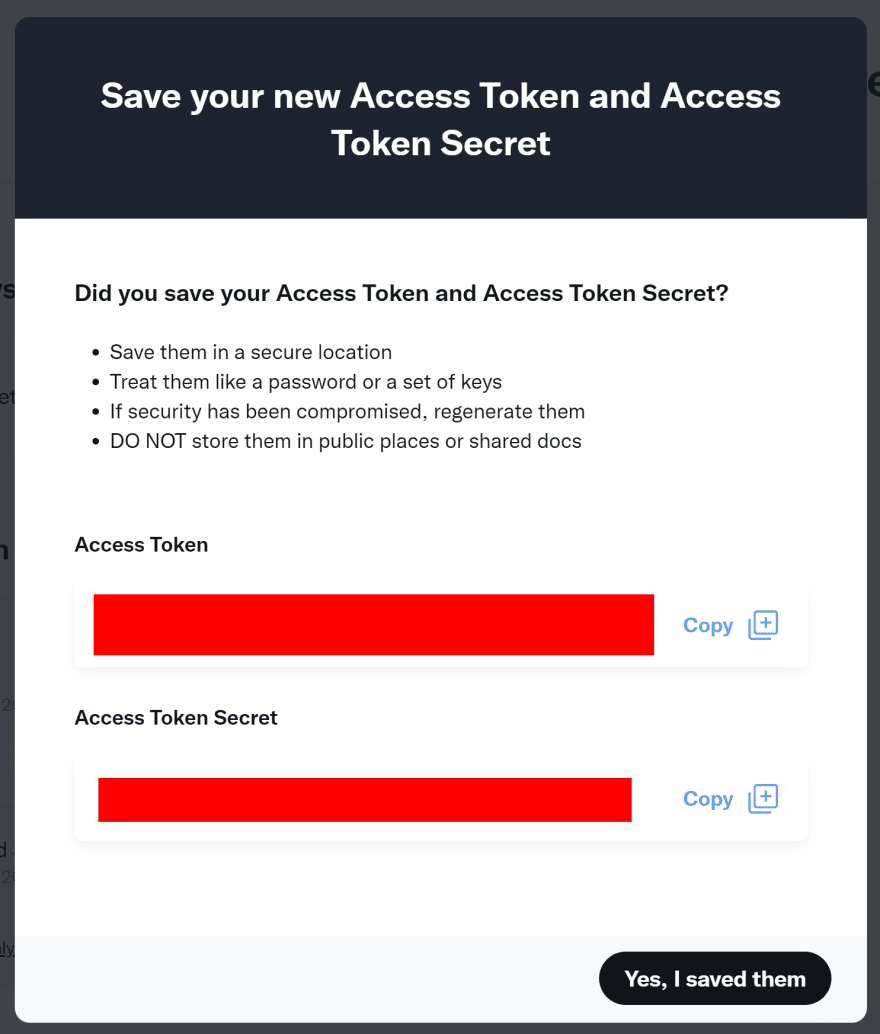
A popup appears with additional credentials:
You know the procedure. Add two more lines to your .env file:
...
TWITTER_ACCESS_TOKEN=[your access token]
TWITTER_ACCESS_TOKEN_SECRET=[your access token secret]
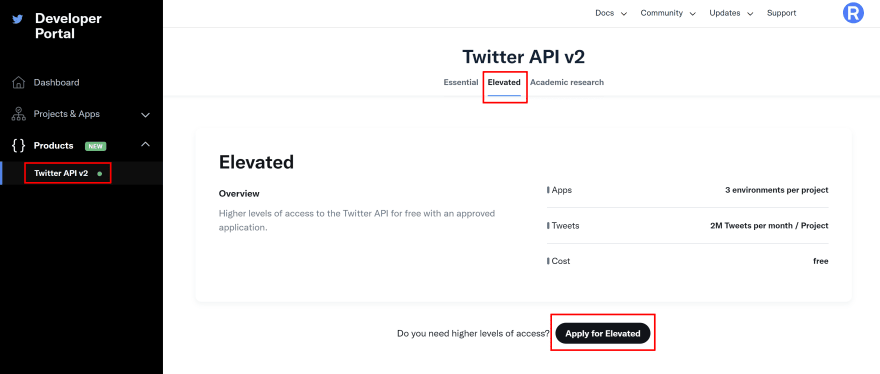
There is one last step to prepare the Twitter app. By default, the app can use the Twitter API v2. Problem: the entry point we need is only available in v1.1, which require an elevated access.
From the dashboard, go to the Twitter API v2 (left sidebar), Elevated tab, and click Apply for Elevated:
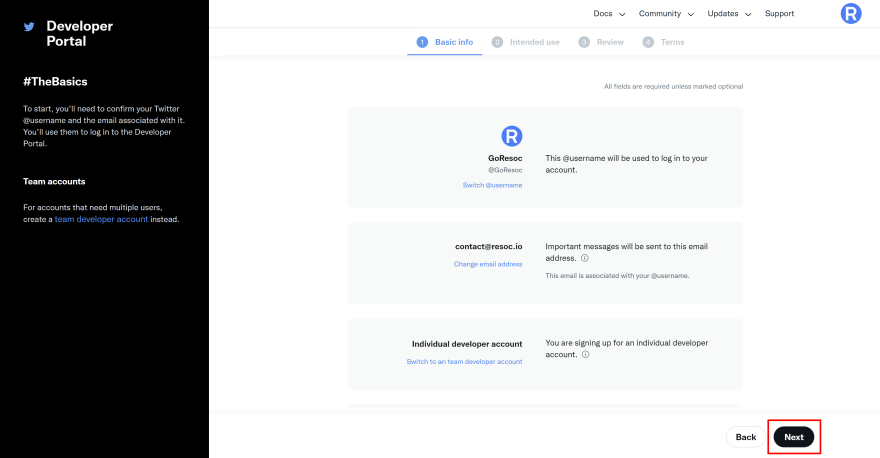
Validate your basic information:
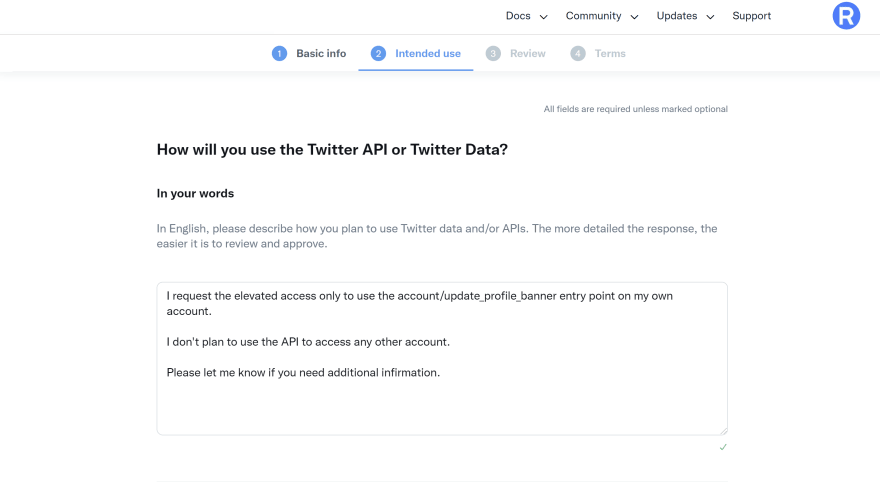
On the next screen, you are asked how you will use the the API. Here, the goal is to reassure Twitter: we won't do anything tricky with our app. For example, we won't steal user data, FB / Cambridge Analytica style. This is the message I used:
I request the elevated access only to use the account/update_profile_banner entry point on my own account.

I don't plan to use the API to access any other account.

Please let me know if you need additional information.
Use it as is or write your own:
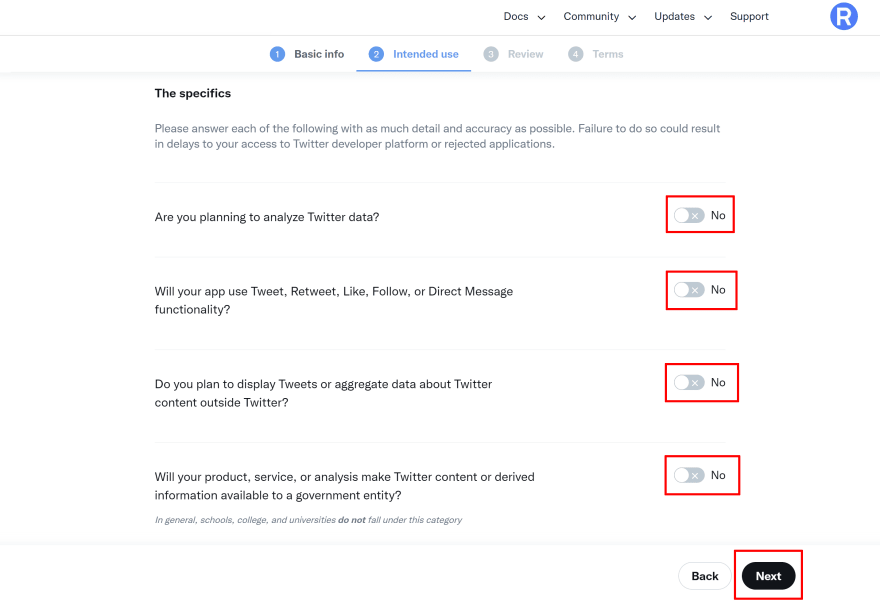
Also uncheck all specifics and click Next:
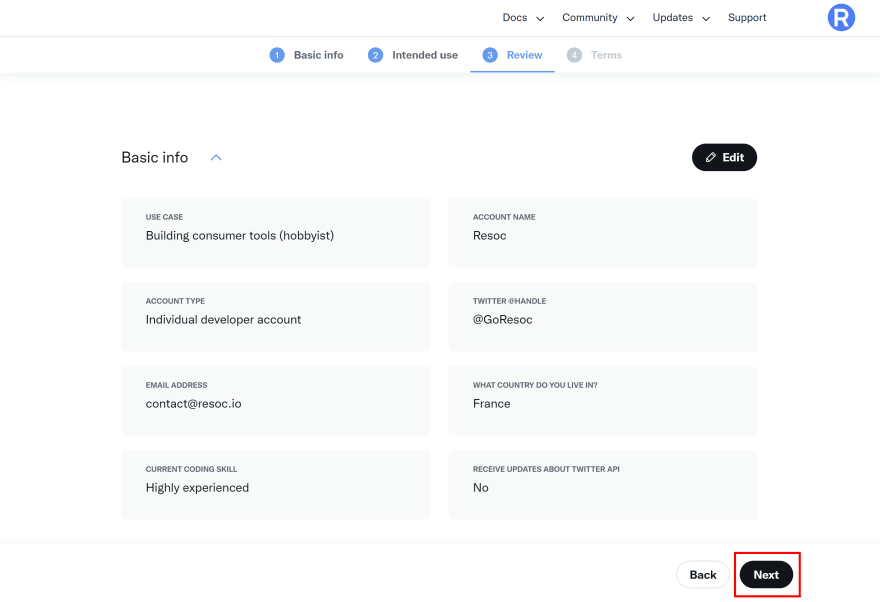
Review your submission and click Next:
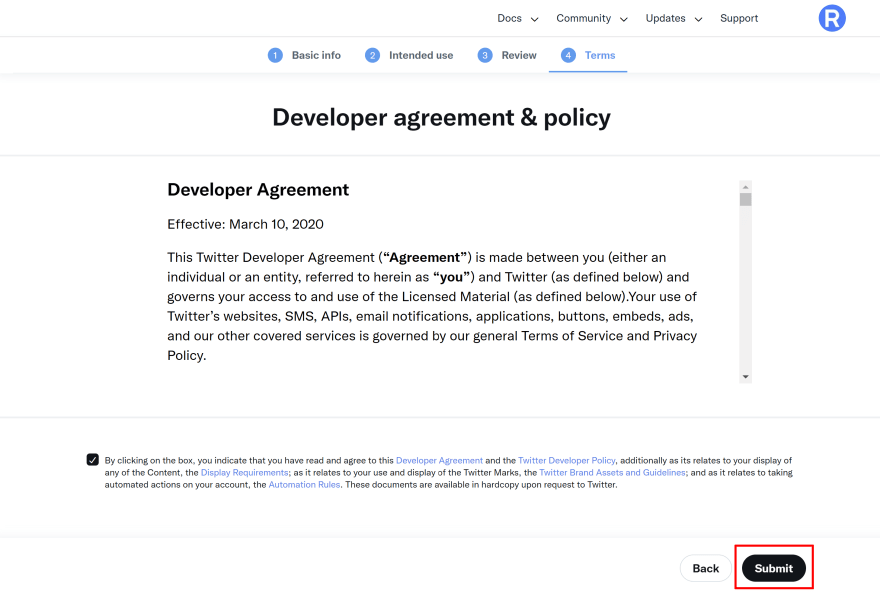
Agree to the terms again:
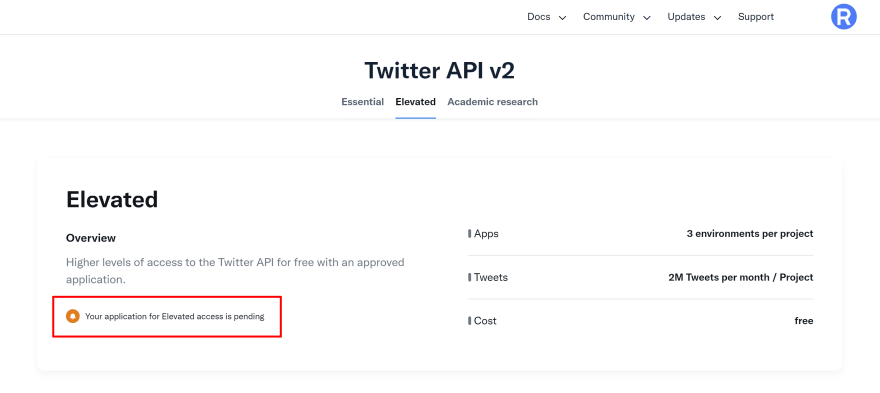
Congratulations! Well... almost:
That's the boring part: you have to wait for Twitter validation. For me it took less then 24 hours and I hope it won't be longer for you.
At this point, you can bookmark this article and come back to it again when you receive Twitter's approval.
A brief list of things you can do while waiting:
- Comment this article: how was the process so far?
- Share this article on Twitter — Maybe you've just completed your daily hour of coding!
- Follow me on Twitter — I'm creating Resoc and document my journey.
Update the banner — at last
Twitter app approved? Great!
Install the Twitter client API:
npm install twitter-api-client
Thanks to this great client, the code is straightforward. In update-twitter-banner.js, at the end of updateTwitterBanner:
const twitterClient = new TwitterClient({
  apiKey: process.env.TWITTER_API_KEY,
  apiSecret: process.env.TWITTER_API_SECRET,
  accessToken: process.env.TWITTER_ACCESS_TOKEN,
  accessTokenSecret: process.env.TWITTER_ACCESS_TOKEN_SECRET,
});

const banner = await fs.promises.readFile(bannerFileName, { encoding: 'base64' });

await twitterClient.accountsAndUsers.accountUpdateProfileBanner({ banner });
As a summary, here is the full update-twitter-banner.js:
import dotenv from 'dotenv';
dotenv.config();

import fs from 'fs';
import { TwitterClient } from 'twitter-api-client';
import { createImage } from '@resoc/create-img';

const updateTwitterBanner = async() => {
  let currentDay = -1;
  const activeDays = [];
  const log = await fs.promises.readFile('log.md', { encoding: 'utf8' });
  log.split('\n').forEach(line => {
    const m = line.match(/### Day (\d+):/);
    if (m) {
      const day = parseInt(m[1]);
      activeDays.push(day);
      if (day > currentDay) {
        currentDay = day;
      }
    }
  });

  const daysStatus = new Array(currentDay + 1).fill(false);
  activeDays.forEach(day => {
    daysStatus[day] = true;
  });

  console.log(`At day ${currentDay}`);
  console.log('Days I have been active', activeDays);
  console.log('Status, day by day', daysStatus);

  const bannerFileName = 'new-banner.png';

  await createImage(
    'resoc-twitter-banner/resoc.manifest.json',
    {
      day: currentDay.toString(),
      activity: daysStatus.map(status => ({ status: status ? 'completed' : 'missed' }))
    },
    { width: 1800, height: 600 },
    bannerFileName
  );

  console.log("New banner generated");

  const twitterClient = new TwitterClient({
    apiKey: process.env.TWITTER_API_KEY,
    apiSecret: process.env.TWITTER_API_SECRET,
    accessToken: process.env.TWITTER_ACCESS_TOKEN,
    accessTokenSecret: process.env.TWITTER_ACCESS_TOKEN_SECRET,
  });

  const banner = await fs.promises.readFile(bannerFileName, { encoding: 'base64' });

  await twitterClient.accountsAndUsers.accountUpdateProfileBanner({ banner });

  console.log("Twitter banner updated");
}

try {
  await updateTwitterBanner();
  console.log("Done!");
}
catch(e) {
  console.log(e);
}
Update your Twitter banner! Run:
npm run update-twitter-banner
After a few seconds, your banner should be updated. Visit your Twitter account: how cool is it?
Twitter banner automation with GitHub Actions
We already push to Git once per day to log our #100DaysOfCode daily activity. So if we have GitHub regenerate our Twitter banner on push, we achieve full automation.
For this task, we use GitHub Actions. Actions are the core of GitHub's solution for CI/CD (Continuous Integration / Continuous Delivery).
Create a file named .github/workflows/update-twitter-banner.yml and fill it with:
name: Update Twitter Banner
on: [push]
jobs:
  Update-Twitter-Banner:
    runs-on: ubuntu-latest
    environment: twitter-credentials
    steps:
      - name: Check out repository code
        uses: actions/checkout@v2
      - name: Setup Node
        uses: actions/setup-node@v2
      - name: Install dependencies
        run: npm ci
      - name: Run the update script
        env:
          TWITTER_API_KEY: ${{ secrets.TWITTER_API_KEY }}
          TWITTER_API_SECRET: ${{ secrets.TWITTER_API_SECRET }}
          TWITTER_ACCESS_TOKEN: ${{ secrets.TWITTER_ACCESS_TOKEN }}
          TWITTER_ACCESS_TOKEN_SECRET: ${{ secrets.TWITTER_ACCESS_TOKEN_SECRET }}
        run: npm run update-twitter-banner
Although this syntax may not be familiar, this action is quite easy to read. It is triggered on push. It is run by an Ubuntu instance. It uses an environment named twitter-credentials that we are going to create in a moment. The rest: checkout our code, setup a Node environment, install the project dependencies and finally run update-twitter-banner with all the Twitter credentials as environment variables.
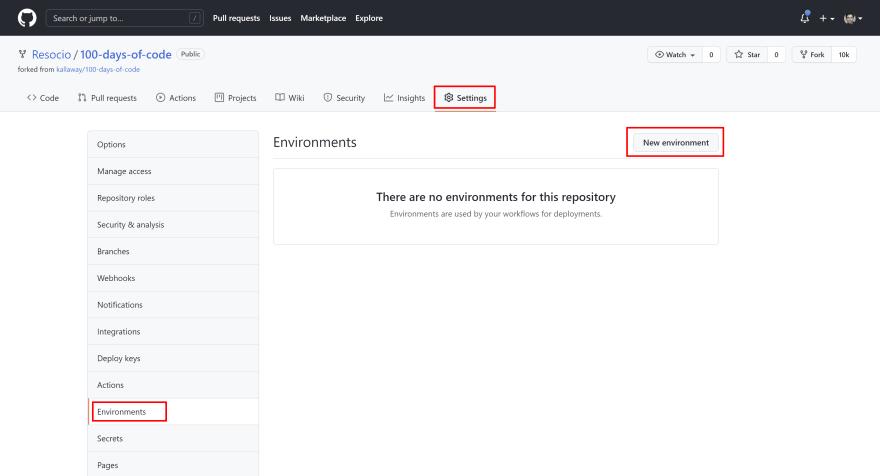
The last piece we need is the twitter-credentials environment. Remember the .env file we created but didn't commit to git? We must provide Twitter keys to GitHub in a way or another, and this is what this environment is for. Got to your project on GitHub, Settings tab, Environment in the sidebar and click New environment:
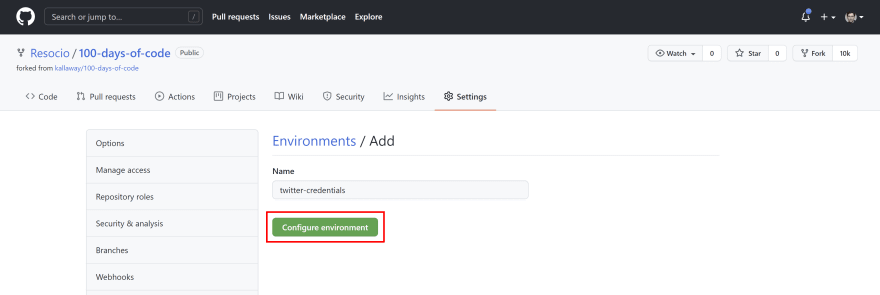
Type twitter-credentials as the environment name and click Configure environment:
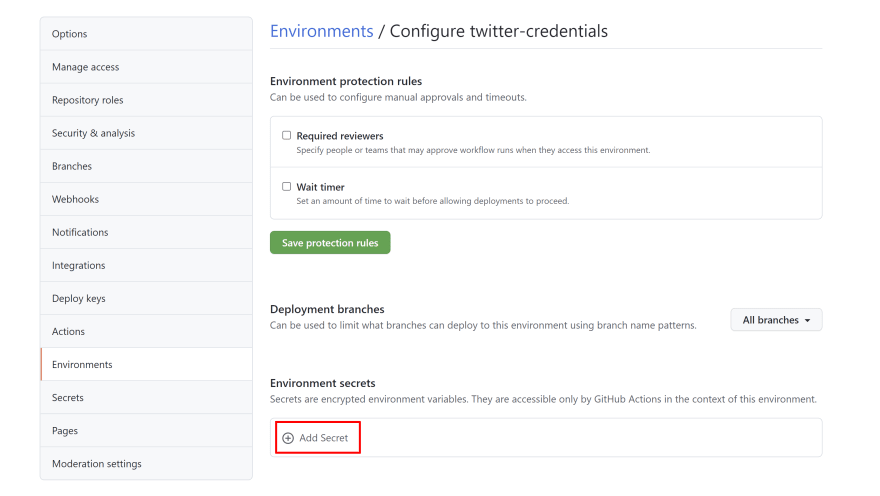
In the next page, use the Add secret button at the bottom:
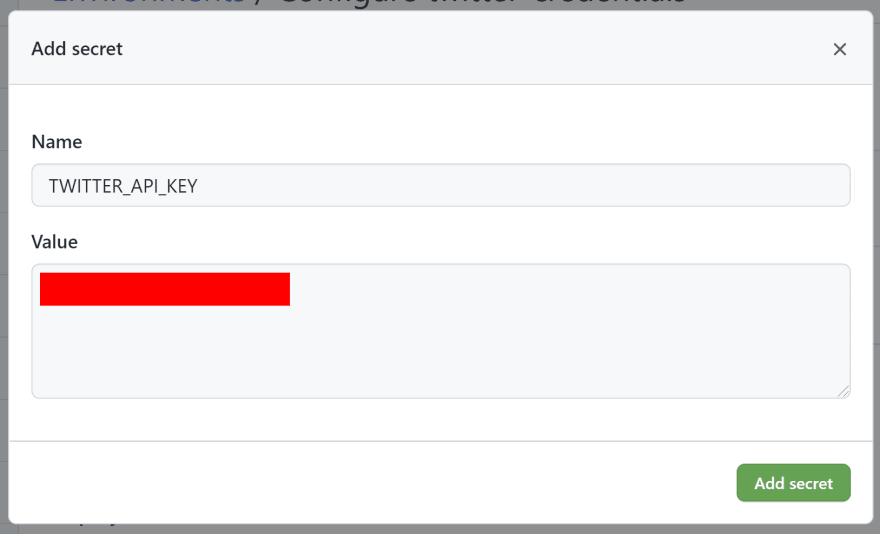
In the popup, set TWITTER_API_KEY as the secret name and the actual key as its value:
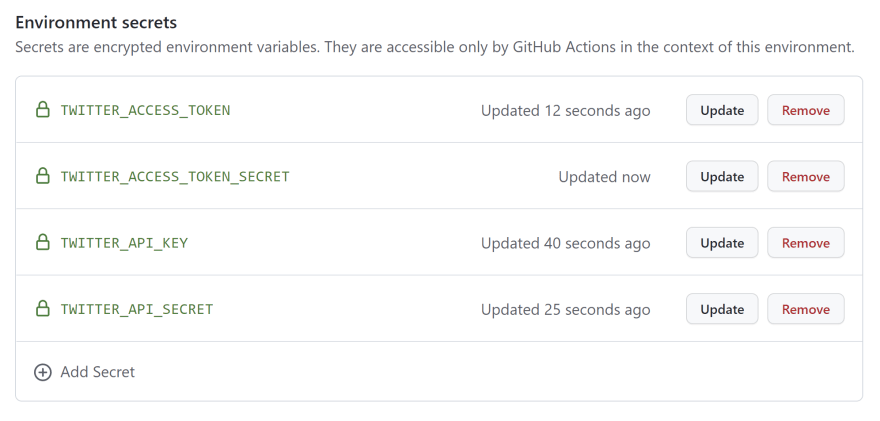
Repeat the process for TWITTER_API_SECRET, TWITTER_ACCESS_TOKEN and TWITTER_ACCESS_TOKEN_SECRET. When you're done, the environment secrets look like this:
GitHub Action ready!
Got back to your project. Add an entry to log.md to indicate you setup your dynamic Twitter banner. Commit everything and push.
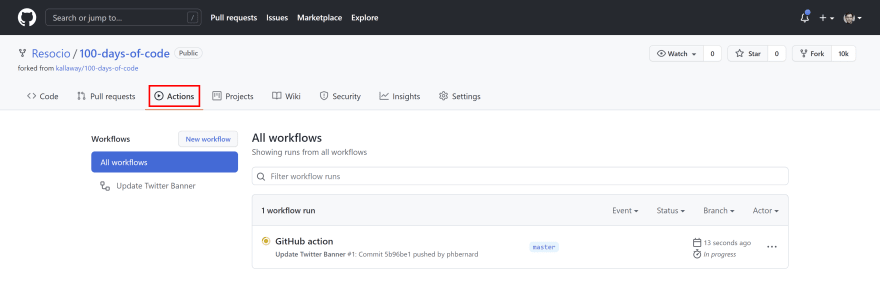
On GitHub again, click the Actions tab. After a few seconds, your action is running:
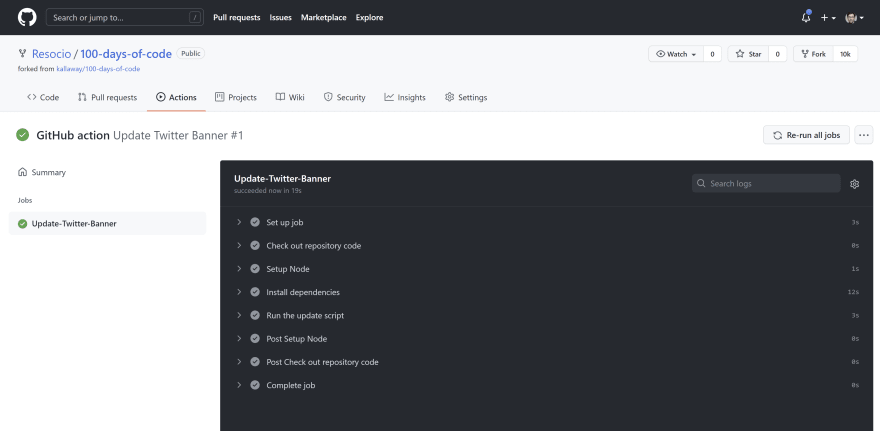
Click the running instance to watch it run:
When it's completed, visit your Twitter profile. Your banner reflect today's progress. Victory!
Conclusion
Congratulations! You now have one of the coolest Twitter banners, no less!! I hope you enjoyed the process as much as I did. Experimenting with Resoc, the Twitter API and GitHub Actions have been a lot of fun to me.
Now, you have to show me what you did. Please, mention me so I can review what you created!
Oh, I'm creating Resoc, a set of open source tools and components to create and deploy image templates, the major target being automated social images. Wanna know how it goes? Follow me on Twitter!





Top comments (2)
Great post and fun project! Thanks for sharing. I think having this run as a GitHub Action is a very neat idea.
Thank you Andy!!