
If you're just getting started with Git and GitHub, here's a simple, clear guide to walk you through setting up your repository and pushing your changes for the first time!
🛠️ Initialize a Git Repository
git init
🗂️ This creates a new Git repository in your current folder.
Example: initializing in a folder named 24MCR080.
📄 Add a File to the Staging Area
git add 24MCR080-NOTEPAD.txt
📌 Stages 24MCR080-NOTEPAD.txt so it's ready to be committed.
✅ Commit the File
git commit -m "Added Personal Details"
📝 Creates a snapshot of your project with a commit message.
🔍 Check Git Status
git status
👀 View which files are staged, modified, or untracked.
📜 View Commit Log
git log
📚 Shows the history of your commits.
🌐 Add a Remote GitHub Repository
git remote add origin https://github.com/rajaramnivas/24MCR080.git
🔗 Links your local repository to a GitHub remote.
🌿 Check Current Branch
git branch
🧾 Displays your current branch, typically master by default.
🪄 Rename master to main (Optional but Recommended)
git branch -M main
🎯 Renames the current branch to main for consistency with modern standards.
☁️ Push Code to GitHub (First Time)
git push -u origin main
📤 Pushes the main branch to GitHub and sets it as the default upstream branch.
🖼️ Visuals for Reference
Here are some screenshots that help illustrate the steps:
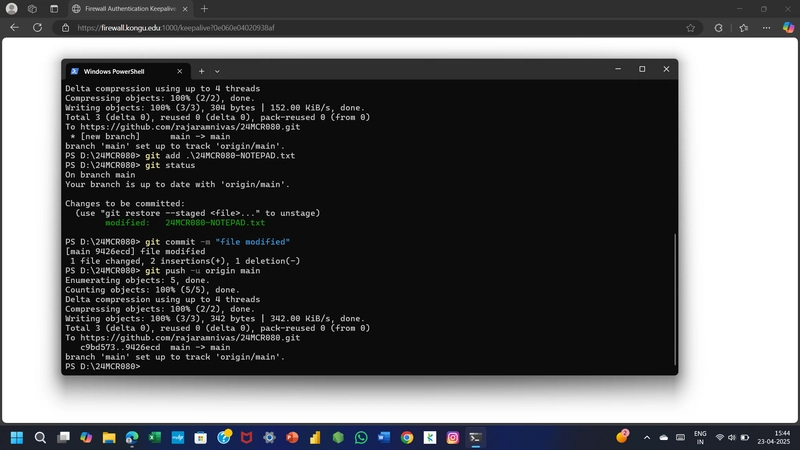


🔁 Modifying or Adding New Files
When you update existing files or add new ones, repeat the following:
git add .
git commit -m "Your updated message"
git push origin main
📌 This ensures all changes are tracked and synced with your GitHub repo.
🎯 Conclusion
And that’s it! You’ve successfully:
- Initialized a Git repo
- Committed your work
- Connected to GitHub
- Pushed your project to the cloud! ☁️

Top comments (3)
Helpful Content
Useful
congrats Rajram