![Cover image for How to create SQL database - Managed Instance in Azure [Azure Portal]](https://media2.dev.to/dynamic/image/width=1000,height=420,fit=cover,gravity=auto,format=auto/https%3A%2F%2Fdev-to-uploads.s3.amazonaws.com%2Fuploads%2Farticles%2Fptg15kk1bb95ai3qjxus.jpg)
What is Azure SQL?
Azure SQL is a family of managed, secure, and intelligent products that utilize the SQL Server database engine in the Azure cloud. It is designed to help businesses migrate, modernize, and innovate their SQL applications with ease. Azure SQL offers three main products:
Azure SQL Database: This is a fully managed Platform-as-a-Service (PaaS) database engine that supports modern cloud applications. It includes serverless compute and Hyperscale storage options. Azure SQL Database handles most database management functions such as upgrading, patching, backups, and monitoring without user involvement
Azure SQL Managed Instance: This is also a PaaS offering that provides a fully managed instance of SQL Server with almost 100% feature parity with the SQL Server database engine. It is best suited for migrating existing SQL Server applications to the cloud with minimal changes
SQL Server on Azure Virtual Machines: This Infrastructure-as-a-Service (IaaS) option allows you to run SQL Server inside a fully managed virtual machine in Azure. It provides full control over the SQL Server instance and the underlying operating system, making it ideal for lift-and-shift migrations
Follow the below steps to create SQL Database in Azure.
Log in to the Azure portal (https://portal.azure.com/)
Search for Azure SQL and select it.
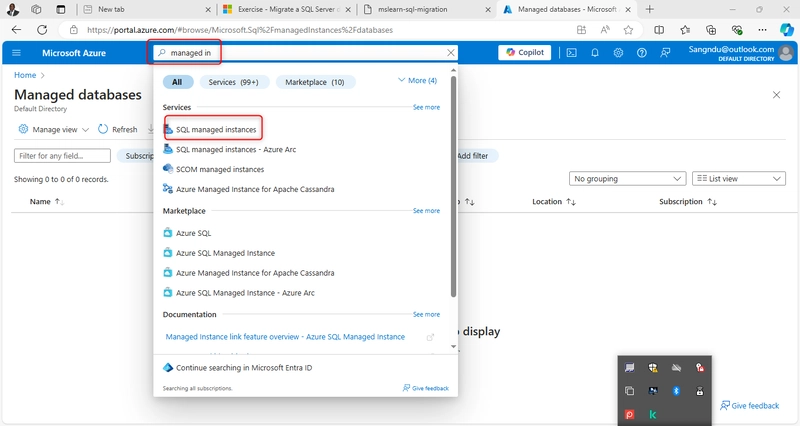
Click on the CREATE button On the Azure SQL page.

The Create Azure SQL Database Managed Instance window will open now. Fill out the mandatory information required on the Basics tab.
Subscription: Choose your correct subscription.
Resource group: You can choose your existing resource group or create a new one by clicking the Create new link.
Managed Instance name: Provide a name for the managed instance.
Region: Select the region you belong to.
Compute + storage: Select the default or configure a new one by clicking on the Configure Manage Instance link per your business needs.
Managed Instance admin login: Provide a username for the login.
Password: Provide a password as per the password policy
Confirm Password: Confirm the same Password.


Click the Next: Networking > button to go to the Networking tab.

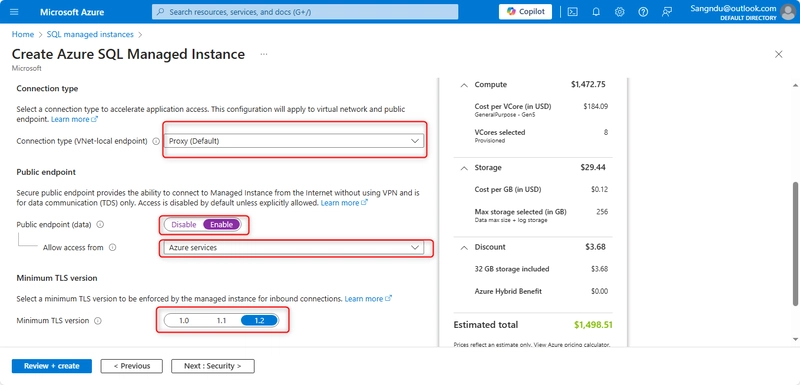
On the Networking tab, Fill in the optional options as per the business need.
Virtual network: Select a valid virtual network or Create a new one or the default one.
Connection type: You can choose a proxy(Default) option or a redirect connection type.
Public endpoint (data): Select the Enable option here.
On the tags tab, you can keep the default option. Click on the Next: Review + Create > button.
Finally, click on the Create button


Top comments (0)