
Originally posted at Serverless
Serverless Cloud is an amazing development and hosting platform that lets you easily build powerful cloud-based applications. You can build an API in seconds, and it supports file storage, data, scheduled tasks, eventing, and static website hosting.
If you are a React developer, then you may already be familiar with Vercel and Next.js. Vercel is a popular front-end hosting platform that supports Next.js and other front-end frameworks. It has support for server-side rendering, automatic image optimization, and more.
Combining Vercel and Serverless Cloud is a great way to build highly scalable serverless applications that combine the best features of both platforms.
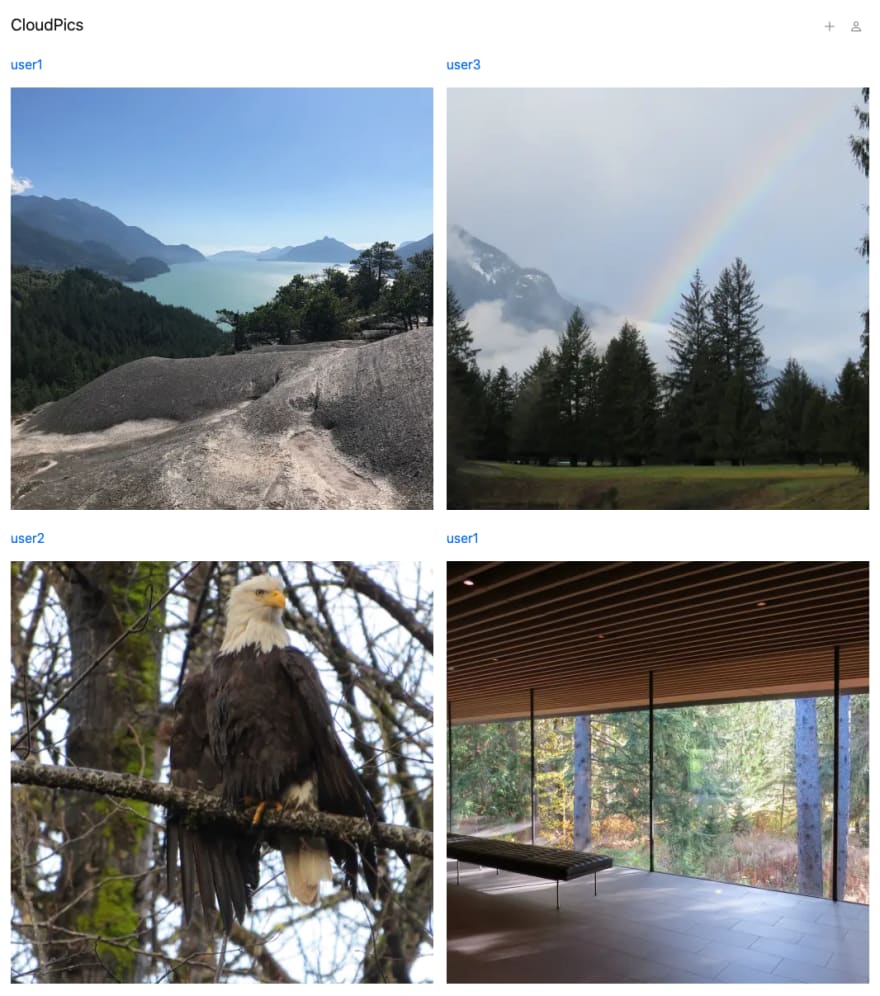
To show you how easy it is to use Serverless Cloud and Vercel together, let’s setup and deploy our CloudPics example application. It’s a React application built with Next.js that lets you upload photos which are stored in Serverless Storage, resized, and indexed in Serverless Data. The home page is visible to both authenticated and non-authenticated users, and it uses server-side rendering to improve SEO and performance for end users.
The CloudPics example has two main parts to it: a frontend that uses Next.js and will run on Vercel, and a backend that uses Serverless Cloud.
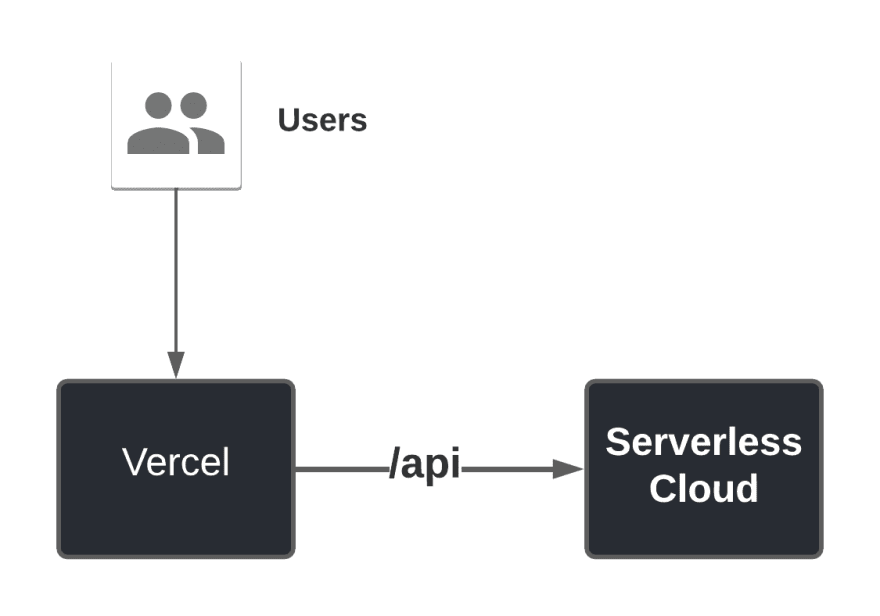
Requests are made from user browsers to the frontend, which routes /api requests to Serverless Cloud. The API implements a simple authentication system, a file upload API that supports image uploads directly to S3, and an API to retrieve the latest uploaded images. As images are uploaded, the Serverless Cloud application reacts to storage events to resize the images, and indexes them in Serverless Data.
We’re going to first get this application running locally, and then deploy it to production with Vercel.
Setting up
First clone the serverless/cloud repository that contains the example applications:
Make sure you have Node.js installed and then install Serverless Cloud and Vercel:
Running the example
To run the example locally we’ll use two terminal windows, one to run the frontend, and one for the backend.
Open up your first terminal window and start the Interactive Cloud Shell. We’ll also run npm install the first time, to install our dependencies.
This will start up your Cloud developer sandbox and print out it’s endpoint URL:

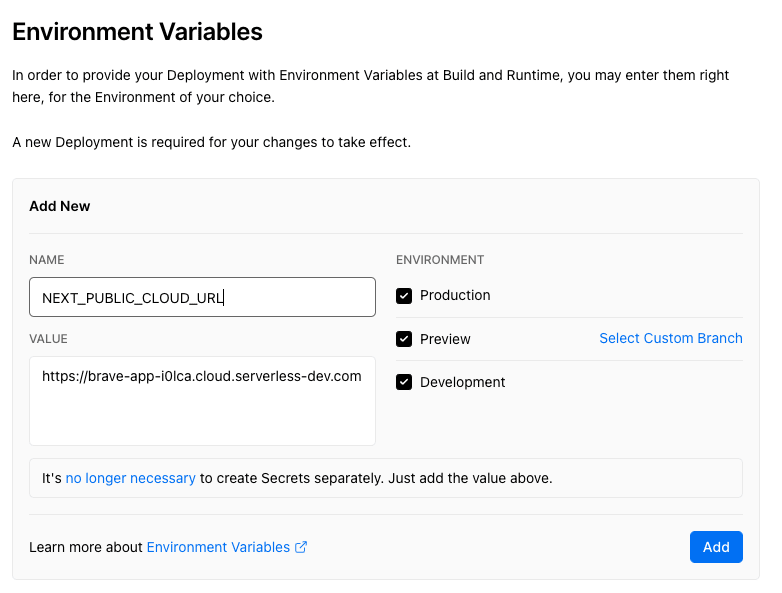
Create a file called .env.local in the root of the project, and add a variable called NEXT_PUBLIC_CLOUD_URL that uses your URL. Make sure you replace the example URL with the one you got when you started cloud.
This tells Next.js to send API requests to your Cloud URL. You’ll see this value used in
next.config.js:You can see that requests to “/api” and “/public” are sent to your Cloud API. The “/public” prefix is where public images are stored by the application.
In a new terminal window you can now start the Next.js development server:

The Next.js dev server is now running and you can now open “http://localhost:3000" in your browser and upload some images.
Any changes you make to the frontend code are automatically compiled and applied by the Next.js development server. When you change your backend code, your Serverless Cloud developer sandbox is automatically updated.
Deploying to production
Deploying your Serverless Cloud backend to production couldn’t be simpler, in the terminal where you are running cloud enter:
This will create a production instance and print out the URL.

To deploy the frontend to Vercel, quit the Next.js development server and then run:
The first time you run this you’ll need to log in to Vercel and it will create a new project in your account. Go to the project settings, and add the
NEXT_PUBLIC_CLOUD_URL environment variable, and set the value to be your production URL from the previous step.
Click Add. Once that’s done, run vercel — prod in your terminal again and it will deploy the application and print out the production URL.
Your application is now running in production!
Go build!
Serverless Cloud and Vercel complement each other perfectly. With Serverless Cloud, you get highly scalable serverless applications that you can develop and test in the cloud and deploy in seconds. With Next.js and Vercel, you can build beautiful frontends with an amazing local developer experience and advanced features like server-side rendering.
Now it’s your turn to build something awesome. Make sure to check out the docs for all the details, join our Slack channel, and follow us for updates. Reach out and let us know what great things you are building with Serverless Cloud!
Sign up for Serverless Cloud

Top comments (0)