
Summary
In this post I would walk through the following:
- Creating an Amazon EFS file system
- Configuring an Amazon EFS file system to work with Kali Linux running on AWS EC2
- Attaching an EFS file system while creating an EC2 instance
[1] Create your own Amazon EFS File System
- Log in to your AWS Account.
- Go to your region of choice where your EC2 instance is hosted. If you do not have an EC2 instance running Kali linux you can follow my previous post to set one up. Link to post here.
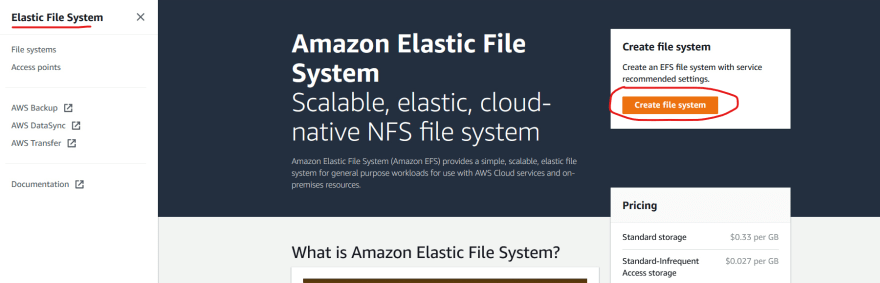
- Go to the service EFS and click on Create file system.
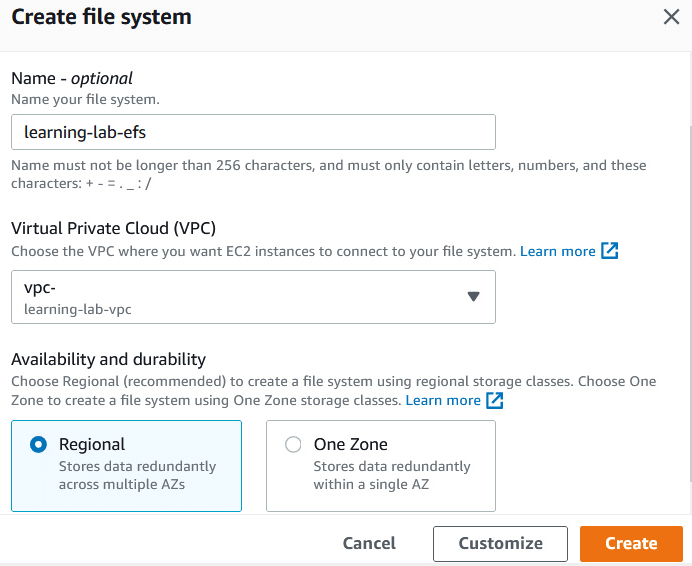
- Provide a name for your efs file system (note its optional), select the VPC where your EC2 instance is running already or one where you plan to spin one up, and select the availability of your EFS. Regional is recommended option for availability for redundant data storage. Related AWS documentation for creating EFS. link.
- Once your EFS file system is created, you will see an available state displayed to you in the EFS console.

- Create a securtiy group to allow NFS access.
- Create mount targets as in link. You can see them in the network tab of your efs file system.

[2] Configuring an Amazon EFS file system to work with Kali Linux running on AWS EC2
[2.1.] Pre-requisites
- Install amazon-efs-utils debian package. AWS documentation link here. Though the efs-utils documentation does not call out Kali linux explicitly, the debian package does work as you will see through this tutorial.
sudo apt-get -y update
sudo apt-get -y install git binutils
git clone https://github.com/aws/efs-utils
cd /path/efs-utils
./build-deb.sh
sudo apt-get -y install ./build/amazon-efs-utils*deb
The connecting EC2 instance must be in a virtual private cloud (VPC) based on the Amazon VPC service. It also must be configured to use the DNS server provided by AWS. For information about the Amazon DNS server, see DHCP Options Sets in the Amazon VPC User Guide.
The VPC of the connecting EC2 instance must have DNS hostnames enabled. For more information, see Viewing DNS Hostnames for Your EC2 Instance in the Amazon VPC User Guide.
[2.2.] Mount the file system using efs-mount-helper
- Create a mount directory.
mkdir ~/efs-mount-point
- Mount your directory with tls encryption in transit. See AWS documentation here.
sudo mount -t efs -o tls fs-<your fs id> ~/efs-mount-point/
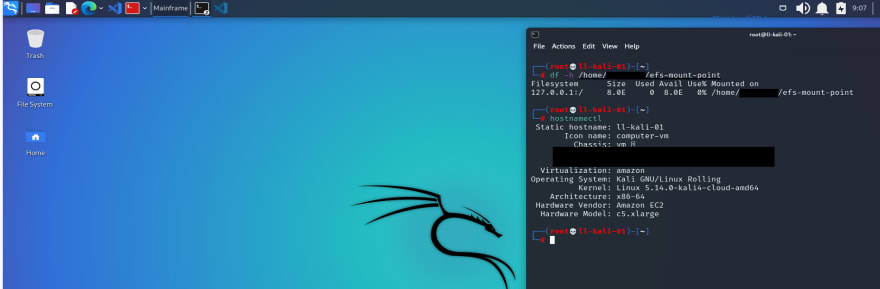
- You can verify this using the mount command. You will see an output line from the mount command as
127.0.0.1:/ on /home/<your user>/efs-mount-point type nfs4
- To auto-mount using /etc/fstab you can first create an access point for your user see link. Once you have created an access point, you can use the following in the /etc/fstab file.
file-system-id efs-mount-point efs _netdev,tls,accesspoint=access-point-id 0 0
- Configure users, groups and permissions as defined in this link, to create an access/permissions hierarchy for using your efs file system.
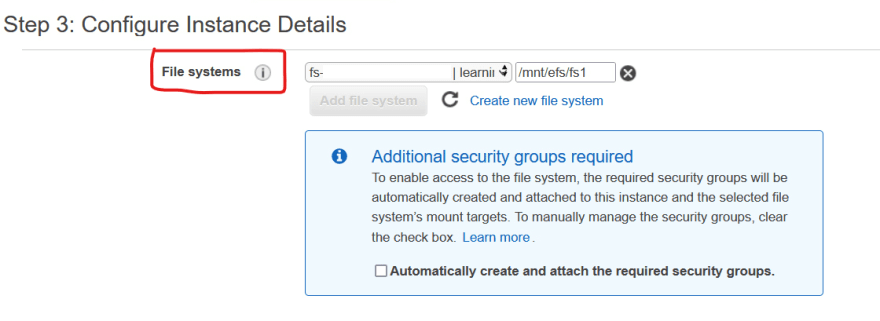
[3] Attach an EFS file system while creating an instance
- You can refer to my post on configuring Kali linux on AWS EC2.
- Log into you AWS account, and choose a region nearest to you. If you do not have an account you can sign up for one for free using this link.
- Go to EC2 service and click on Launch Instances.
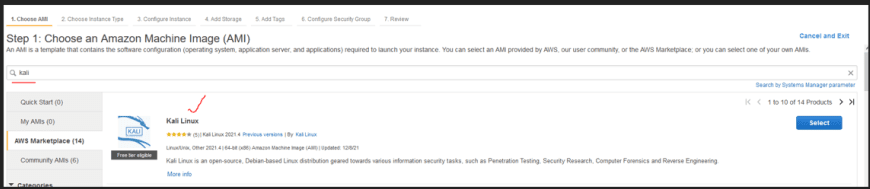
- In AMI's seach for the keyword Kali and select the image from AWS marketplace as shown in the image below
- Accept the aws marketplace subscription dialog box.
- Add an instance type.
- Select a VPC and the basic networking setup. Add an EBS volume and choose a keypair to associate with you instance.
- Make sure to associate a security group with your instance which has inbound ports 3389 and 22 open.
- In the configure instance details page, under file systems, choose the file system you created in step 1.
- Review and launch the instance.

Top comments (0)