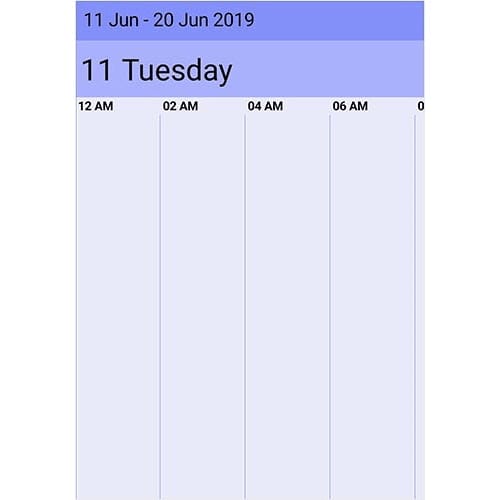
The Xamarin.Forms Scheduler control’s timeline view displays dates in a horizontal time axis with the desired number of days. This feature is available from 2019 volume 2 beta release. It allows users to schedule and manage events precisely. Its rich feature set includes events rescheduling, view customization, special time regions support, navigation, date restrictions, and other features.
In this blog, I will provide a walk-through on key features of the timeline view in Scheduler. If you are new to the Scheduler control, then we recommend you go through its getting started documentation before proceeding further. 
Working hours customization
The timeline view allows users to change the start and end times so they can customize their working hours. You can also display a wide range of time durations by setting a double value. This will be converted to minutes as shown in the following code snippet.
<schedule:SfSchedule x:Name="schedule" ScheduleView="TimelineView">
    <schedule:SfSchedule.TimelineViewSettings>
        <!--Setting visible hours properties. -->
        <schedule:TimelineViewSettings
            StartHour="7.5"
            EndHour="18.5">
            <schedule:TimelineViewSettings.LabelSettings>
                <schedule:TimelineLabelSettings TimeFormat="hh:mm" />
             </schedule:TimelineViewSettings.LabelSettings>
        </schedule:TimelineViewSettings>
    </schedule:SfSchedule.TimelineViewSettings>
</schedule:SfSchedule>
Support for limiting time slots
Timeline view allows you to limit the highlighting of a particular region of time for idle and break hours based on application-specific use cases. You can also restrict user interactions, selection, and events creation in the selected region of time. You can add single and multiple special regions of time in the timeline view by using the SpecialTimeRegions property of Scheduler as shown in the following code.
<schedule:SfSchedule x:Name="schedule" ScheduleView="TimelineView">
    <!--Setting special time region properties.-->
    <schedule:SfSchedule.SpecialTimeRegions>
        <schedule:TimeRegionSettings
            StartHour="13"
            EndHour="14"
            Text="Lunch"
            CanEdit="False"
            Color="Black"
            TextColor="White"/>
    </schedule:SfSchedule.SpecialTimeRegions>
</schedule:SfSchedule>
Nonworking days
Timeline view allows you to skip selective days of a week to remove nonworking days.
public ObservableCollection NonWorkingDays = new ObservableCollection();
this.NonWorkingDays.Add(DayOfWeek.Sunday);
this.NonWorkingDays.Add(DayOfWeek.Saturday);
<syncfusion:SfSchedule
            x:Name="schedule"
            ScheduleView="TimelineView">
       <syncfusion:SfSchedule.TimelineViewSettings>
           <syncfusion:TimelineViewSettings
               NonWorkingsDays="{Binding NonWorkingDays}">
           </syncfusion:TimelineViewSettings>
       </syncfusion:SfSchedule.TimelineViewSettings>
</syncfusion:SfSchedule>
Schedule and manage events
Timeline view allows you to schedule and manage all kinds of events such as all-day, spanning, and recurring events. Each view displays events across the time slots based on their duration within their respective days. By default, all-day events will be rendered on top of time slots, then span events, followed by recurring and normal events.
You can quickly reschedule any event in the timeline view by dragging it from a one-time slot and dropping it in another. It is also possible to restrict the rescheduling of certain appointments and prevent the dropping of an appointment at a certain time. 
In the timeline view, you can display events with a desired height based on the content to greatly enhance the content’s readability using the AppointmentHeight property.
<schedule:SfSchedule x:Name="schedule" ScheduleView="TimelineView">
    <schedule:SfSchedule.TimelineViewSettings>
        <!--Setting appointment height property.-->
        <schedule:TimelineViewSettings
            AppointmentHeight="100" />
    </schedule:SfSchedule.TimelineViewSettings>
</schedule:SfSchedule>
If you need to add a large number of events to the same time slot, each event’s height will be adjusted automatically without considering the AppointmentHeight to make all the events visible.
Personalized timeline view
The timeline view is flexible enough that its appearance and format can be customized to provide a uniform and consistent look. You can also expand or condense the time interval and its height based on the application’s size and requirement.
<schedule:SfSchedule x:Name="schedule"
     ScheduleView="TimelineView"
     TimeInterval="180"
     TimeIntervalHeight="150">
     <schedule:SfSchedule.TimelineViewSettings>
         <schedule:TimelineViewSettings
            Color="#fcf3c9"
            BorderColor="#fceb9f"
            BorderWidth="5" >
                   <schedule:TimelineViewSettings.LabelSettings>
                        <schedule:TimelineLabelSettings
                              TimeLabelColor="#8282ff"
                              TimeLabelSize="15" />
                    </schedule:TimelineViewSettings.LabelSettings>
                </schedule:TimelineViewSettings>

    </schedule:SfSchedule.TimelineViewSettings>
</schedule:SfSchedule>
Conclusion
In this blog post, we’ve had a quick overview of the key features of the timeline view that are available form 2019 volume 2 beta release. You can explore other features of this control in the documentation, where you can find detailed explanations of each feature along with code examples. You can also check out our project samples in this GitHub repository. Feel free to try out this sample and share your feedback or questions in the comments section. You can also contact us through our support forum, Direct-Trac, or feedback portal. We are happy to assist you.
The post Introducing Timeline View in Xamarin.Forms Scheduler appeared first on Syncfusion Blogs.


Top comments (0)