
Hosting your own WordPress website is interesting right!! Ok, come on let's do it!!
We are going to do this practical from Scratch. From the Creation of our Own VPC, Subnets, Internet Gateway, Route tables to Deployment of WordPress.
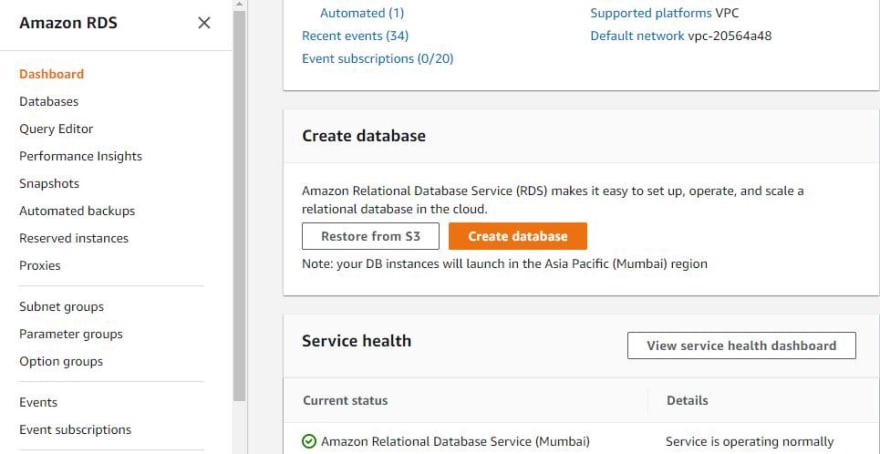
Here, We are going to use Amazon Web Service’s RDS service for hosting our own WordPress site. Before that, let's take a look at a basic introduction to RDS service.
Amazon Relational Database Service is a distributed relational database service by Amazon Web Services (AWS). It is a web service running in the cloud designed to simplify the setup, operation, and scaling of a relational database for use in applications.
Administration processes like patching the database software, backing up databases and enabling point-in-time recovery are managed automatically.
Features of AWS RDS
- Lower administrative burden. Easy to use
- Performance. General Purpose (SSD) Storage
- Scalability. Push-button compute scaling
- Availability and durability. Automated backups
- Security. Encryption at rest and in transit
- Manageability. Monitoring and metrics
- Cost-effectiveness. Pay only for what you use
Ok, let's jump onto the practical part!!.We will do this practical from scratch. Since it will be long process, so we divided this into 5 small parts namely,
- Creating a MySQL database with RDS
- Creating an EC2 instance
- Configuring your RDS database
- Configuring WordPress on EC2
- Deployment of WordPress website
Creating a MySQL database with RDS
Before that, we have to do two pre-works namely the Creation of Virtual Private Cloud(VPC), Subnets and Security groups. These are more important because in order to have a reliable connection between WordPress and MySQL database, they should be located in the same VPC and should have the same Security Group.
Since Instances are launched on Subnets only, Moreover RDS will launch your MySQL database in EC2 instance only, that we cannot able to see since it is fully managed by AWS.
We are going to create our own VPC. For that, we have to specify IP range and CIDR. We specified IP and CIDR as 192.168.0.0/16.
What is CIDR?. I explained this in my previous blog in very detail. You can refer here.

Let's come to the point. After specifying the IP range and CIDR,then enter your VPC name.
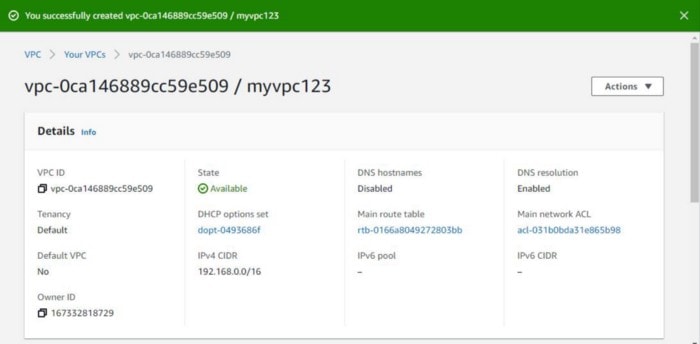
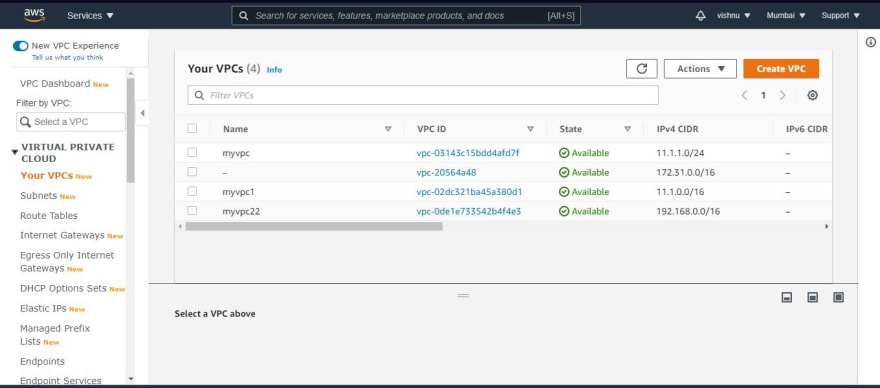
Now, VPC is successfully created with our specified details.
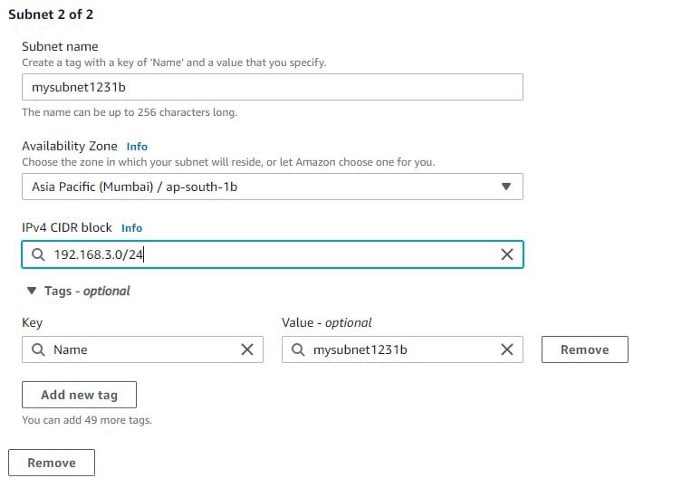
Next step is to launch the subnet in the above VPC.
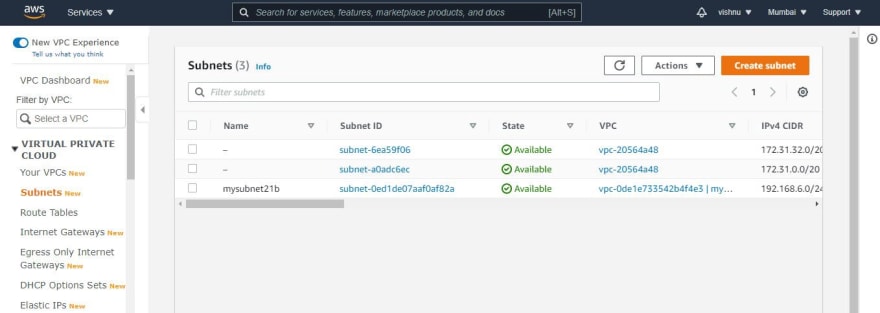
For Creating Subnets, you have to specify which VPC the lab should launch. We already have our own VPC named “myvpc123”.
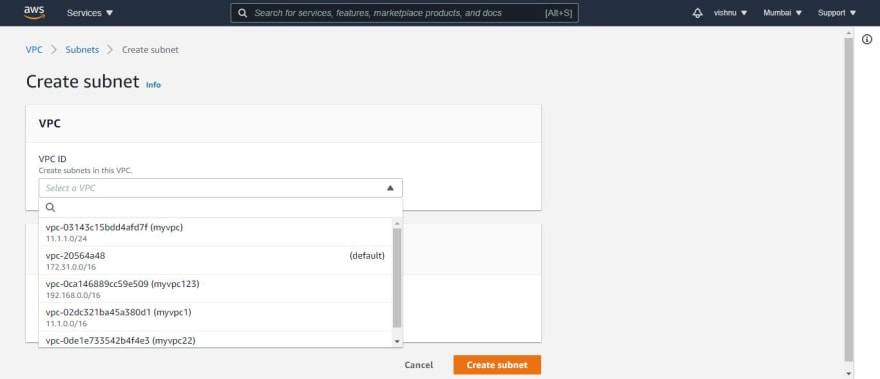
And then we have to specify the range of Subnet IP and CIDR. Please note that the Subnet range should come under VPC range, it should not exceed VPC range.
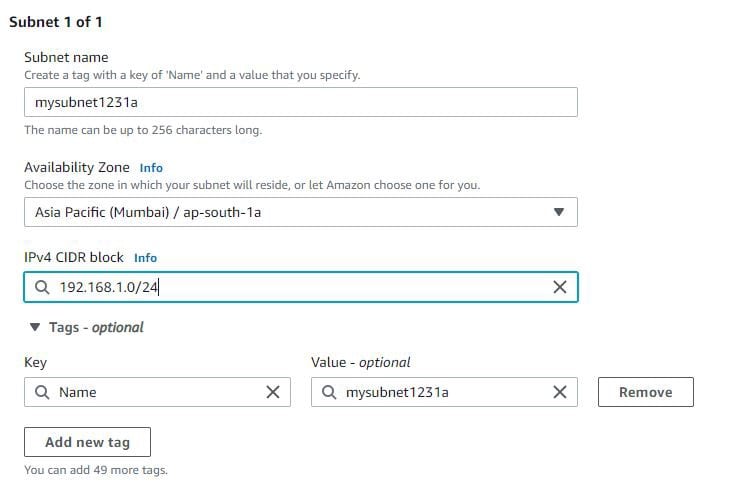
For achieving the property of High Availability, We have to launch minimum two subnets, so that Amazon RDS will launch its database in two subnets, if one subnet collapsed means, it won't cause any trouble.
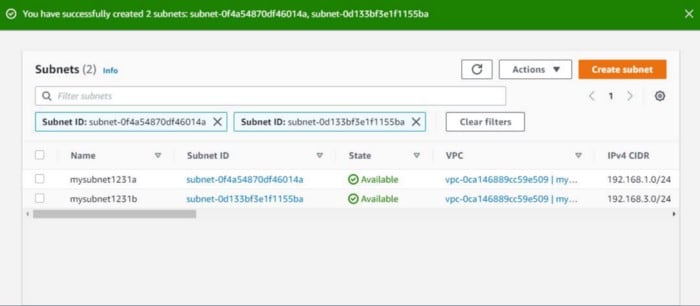
Now, two Subnets with their specified range of IPs and CIDR are launched successfully inside our own VPC and they are available.
Next step is to create a security group in order to secure the WordPress and MySQL databases. Note that both should have the same Security Group or else it won't connect.

For creating a Security Group, we have to specify which VPC it should be launched and adding a Description is mandatory.
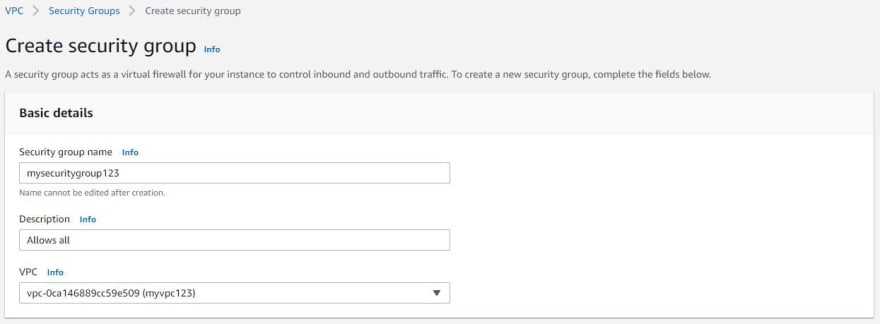
Then we have to specify inbound rules, for making this practical simple, we are allowing all traffic to access our instance.
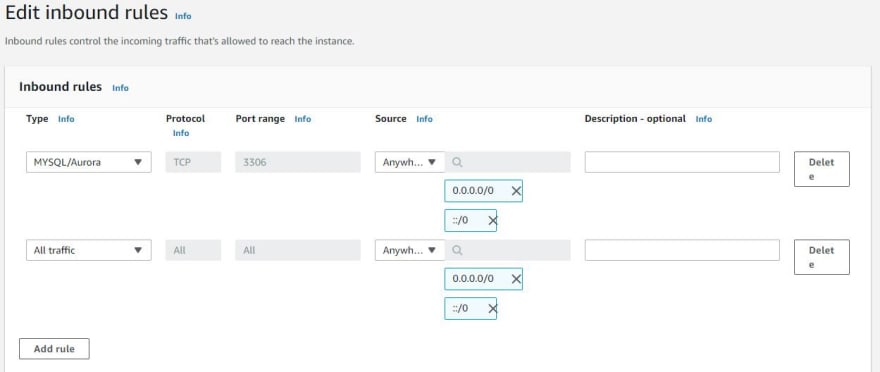
Now, the Security Group is successfully created with our specified details.
Now let's jump into part 1 which is about Creating a MySQL database with RDS.
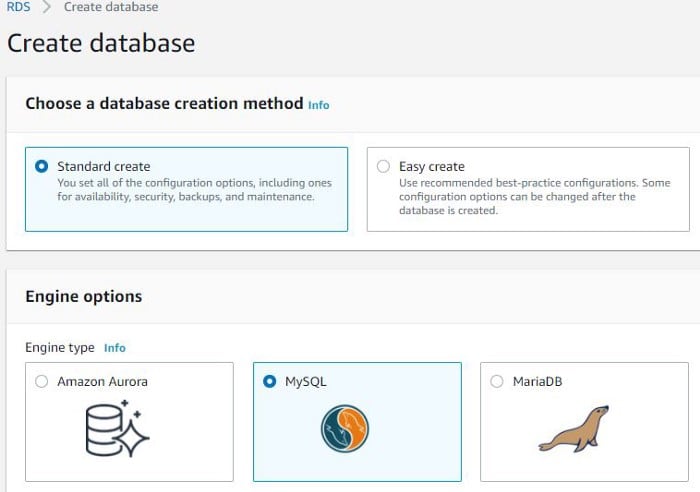
Select Create database, then select Standard create and specify the database type.
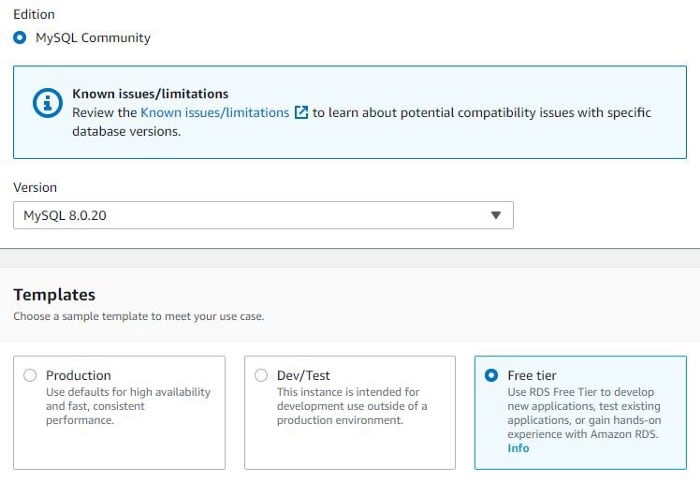
Then you have to specify the Version. Version plays a major role in MySQL when integrating with WordPress, so select the compactible version or else it will cause serious trouble at the end. Then select the template, here we are using Free-tier since it won't be chargeable.
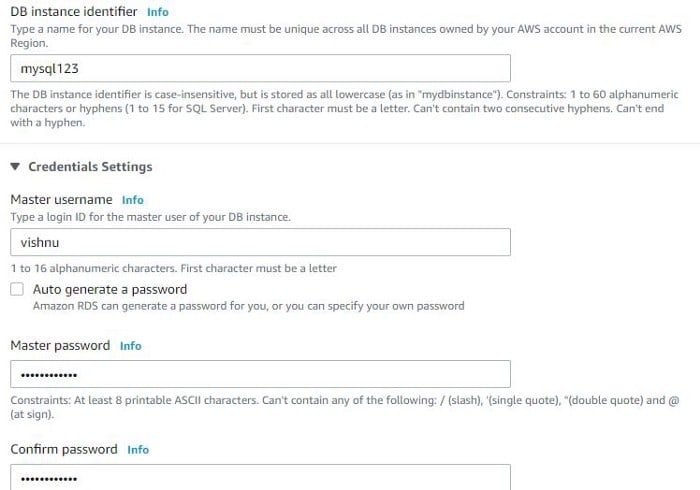
Then you have to specify the credentials such as Database Instance name, Master username and Master password.
Most important part is a selection of VPC, you should select the same VPC where you will launch your EC2 instance for your WordPress and we can’t modify the VPC once the database is created. Then select the Public access as No for providing more security to our database. Now, the people outside of your VPC can’t able to connect to your database.

Then you have to specify the Security group for your database. Note that the Security Group for your database and WordPress should be the same or else it will cause serious trouble.
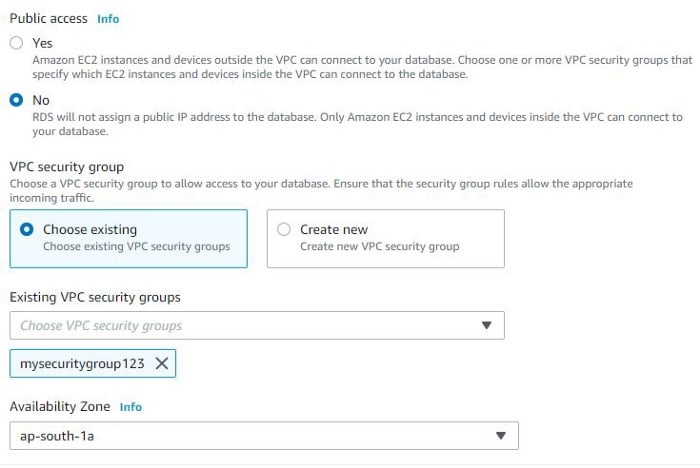
Note that Security Groups is created per VPC. After selecting Security Group, then click Ok to create the RDS database.
Creating an EC2 instance
Before creating an instance, there should be two things you have to be configured namely Internet Gateway and Route tables. It is used for providing outside internet connectivity to an instance launched in the subnet.
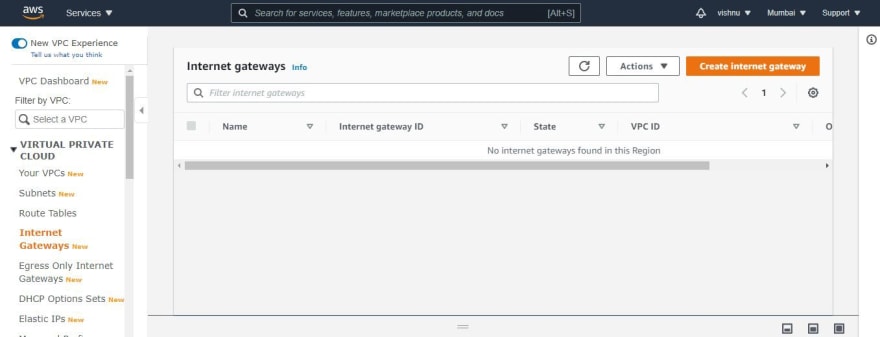
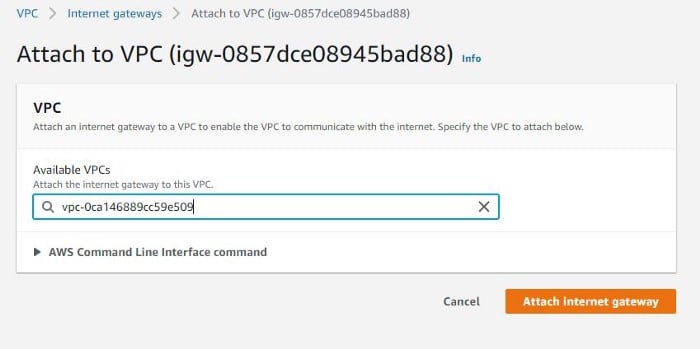
Internet Gateway is created per VPC. First, we have to create one new Internet Gateway with the specified details.
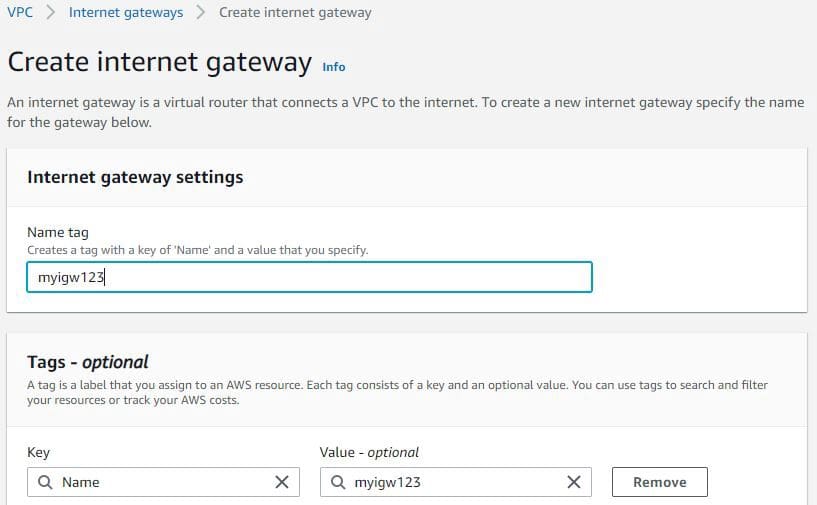
Then you have to attach Internet Gateway to the VPC.
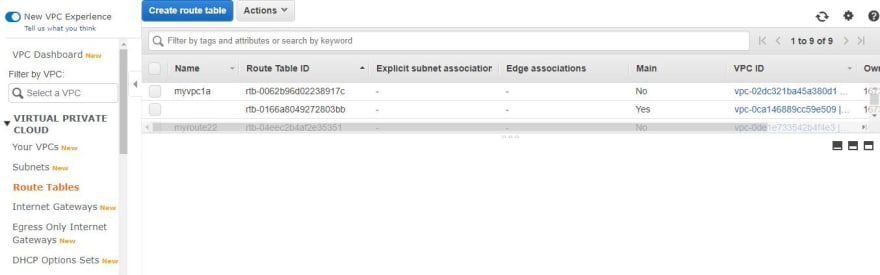
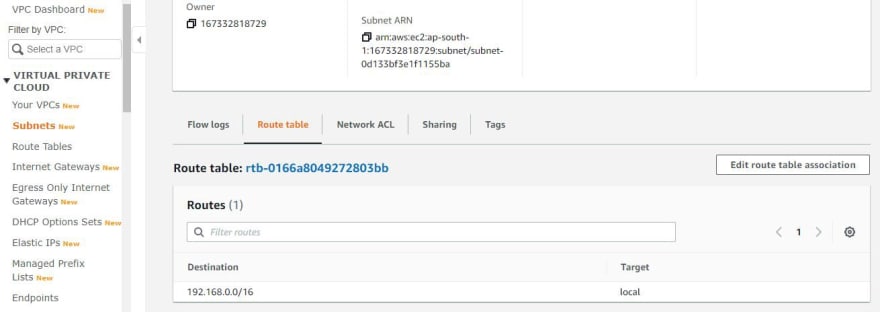
Next step is to create Routing tables. Note that Route table is created per Subnet.
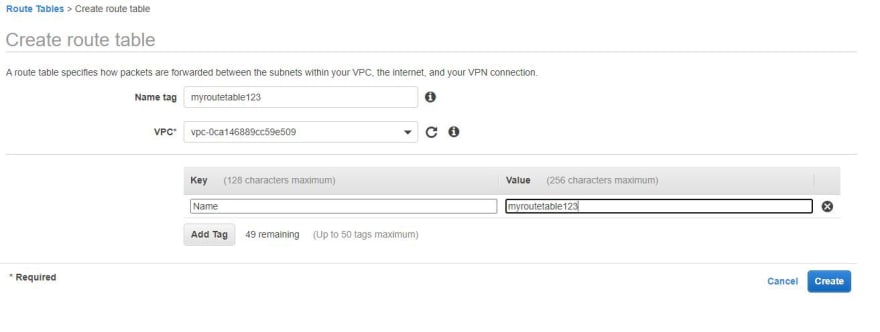
We have to specify which VPC in which your subnet is available to attach routing table with it, specify Name and click create to create the route table.
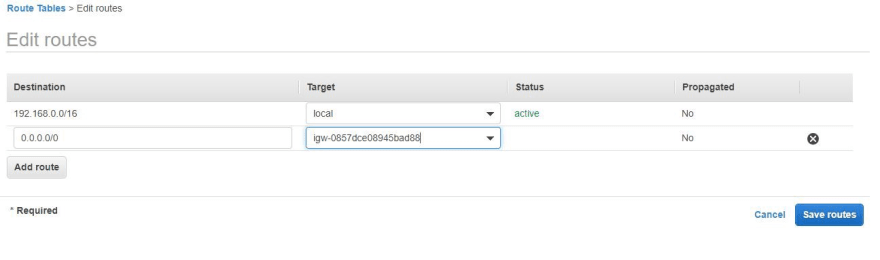
Then click Edit route to edit the route details namely destination and target. Enter destination as 0.0.0.0/0 for accessing any IP anywhere on the Internet and target is your Internet Gateway.

After entering the details, click Save routes.
We created a Route table, then we have to attach that table to your Subnet. For that click Edit route table association and select your subnet where you want to attach the route table with it.
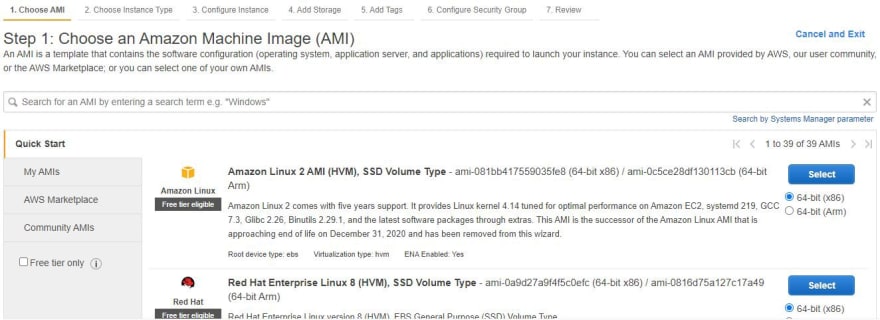
Now, lets jump into the task of creating an EC2 instance. First, you have to choose the AMI image in which you used for creating an EC2 instance, here I selected Amazon Linux 2 AMI for that.
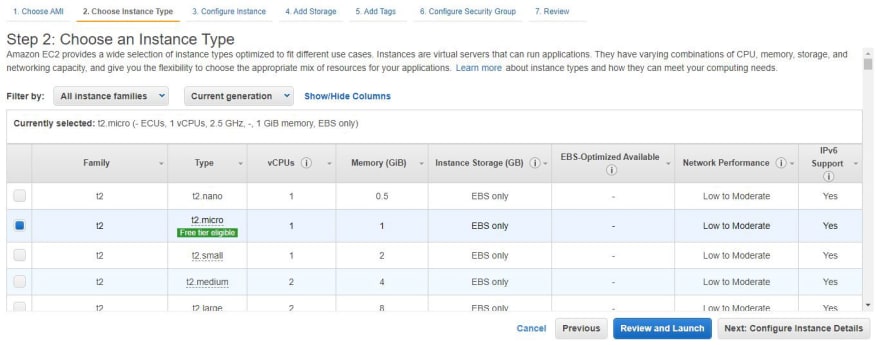
Then you have to select Instance type, here I selected t2.micro since it comes under free tier.
Then you have to specify the VPC, Subnet for your instance and you have to enable Auto-assign Public IP in order to get your Public IP to your instance.

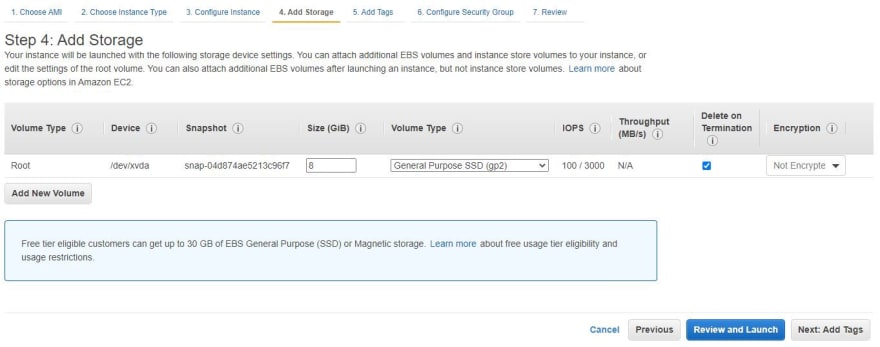
Then you have to add storage for your instance. It is optional only.
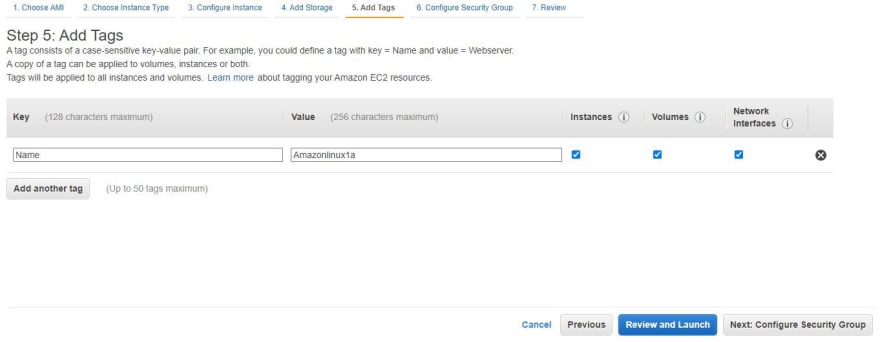
Then you have to specify the tags which will be more useful especially for automation.
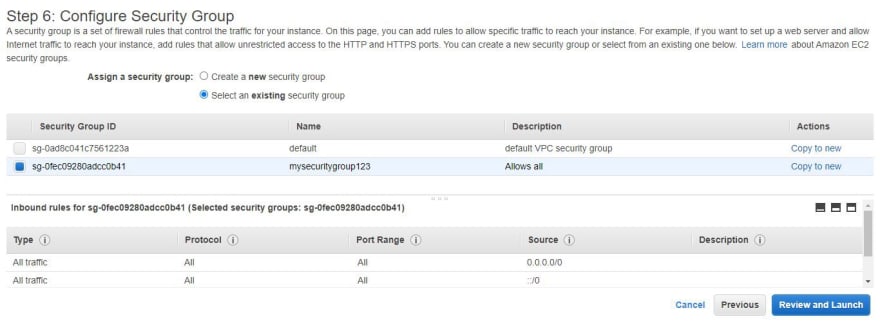
Then you have to select the Security Group for your instance. It should be the same as your database have.
And click Review and Launch. Then you have to add Keypair to launch your EC2 instance. If you didn't have Keypair means, you can create at that time.
Configuring your RDS database
At this point, you have created an RDS database and an EC2 instance. Now, we will configure the RDS database to allow access to specific entities.
You have to run the below command in your EC2 instance in order to establish the connection with your database.
export MYSQL_HOST=<your-endpoint>
You can find your endpoint by clicking database in the RDS
dashboard. Then you have to run the following command.
mysql --user=<user> --password=<password> dbname

This output shows the database is successfully connected to an EC2 instance.
In the MySQL command terminal, you have to run the following commands in order to get all privileges to your account.
CREATE USER 'vishnu' IDENTIFIED BY 'vishnupassword';

GRANT ALL PRIVILEGES ON dbname.* TO vishnu;

FLUSH PRIVILEGES;

Exit
Configuring WordPress on EC2
For Configuring WordPress on EC2 instance, the first step is to configure the webserver, here I am using Apache webserver. For that, you have to run the following commands.
sudo yum install -y httpd

sudo service httpd start
Next step would be download the WordPress application from the internet by using wget command. Run the following code to download the WordPress application.
wget https://wordpress.org/latest.tar.gz

tar -xzf latest.tar.gz

Then we have to do some configuration, for this follow the below steps.
cd wordpress

cp wp-config-sample.php wp-config.php

cd wp-config.php
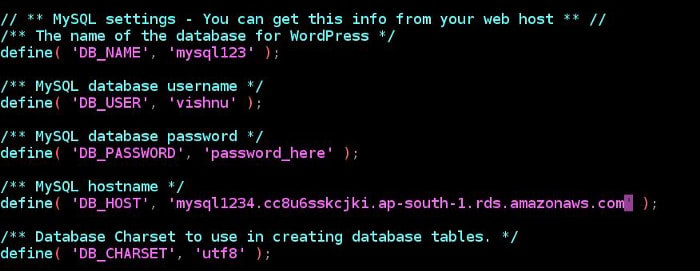
Go inside the wp-config.php file and enter your credentials (including your password too)
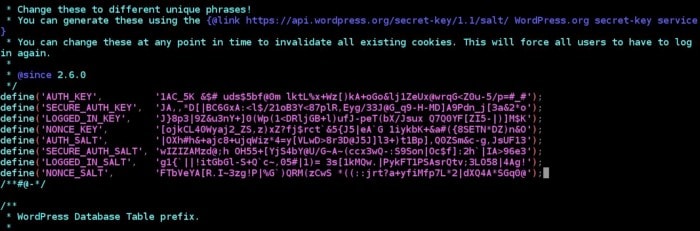
Then, Goto this link and copy all and paste it to replace the existing lines of code.
Next step is to deploy the WordPress application. For that, you have to run the following commands in order to solve the dependencies and deploy WordPress in the webserver.
sudo amazon-linux-extras install -y lamp-mariadb10.2-php7.2 php7.2

sudo cp -r wordpress/* /var/www/html/

sudo service httpd restart
That’s it. You have a live, publicly-accessible WordPress installation using a fully-managed MySQL database on Amazon RDS.
Then if you enter your WordPress instance IP in your browser, you will land your WordPress home page.
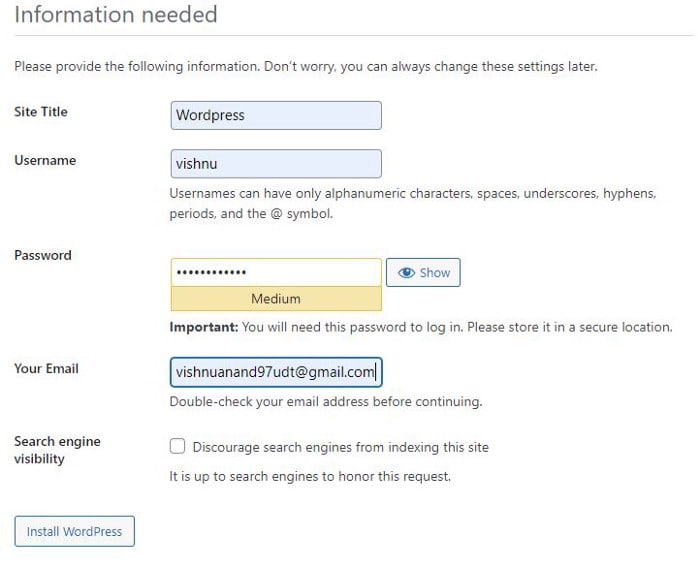
After you filled in your credentials, you will get your own homepage.

That's it. You launched your own application in your own instance and your database is managed by AWS RDS service.
Thank you all for your reads. Stay tuned for my upcoming articles!!

Top comments (2)
Some comments may only be visible to logged-in visitors. Sign in to view all comments.