The Internet allows us to chat, exchange, search for news, share experiences, and download documents, gadgets, applications, etc. So if you have a WordPress website and want to share documents with users, creating a download button using custom fields is not a bad idea - it looks beautiful, professional, and not difficult to create at all.
In this article, we're going to show you how to create a download button using custom fields with Meta Box plugin, and then display this button on the front end in two ways: adding code to the theme's file and using a shortcode. But first, let's take a quick look at when you should create and use the download buttons!
The Applications of Download Buttons
The download buttons can be used for many situations, but it works best in these kinds of site:
- Business websites: download profiles, catalogs, decisions, annual reports, ... of the company.
- Real estate websites: download price lists, project brochures, information about apartments / lands for sale.
- Travel websites: download trip brochures.
- Law websites: download law documents.
- Blogs: download documents that bloggers share.
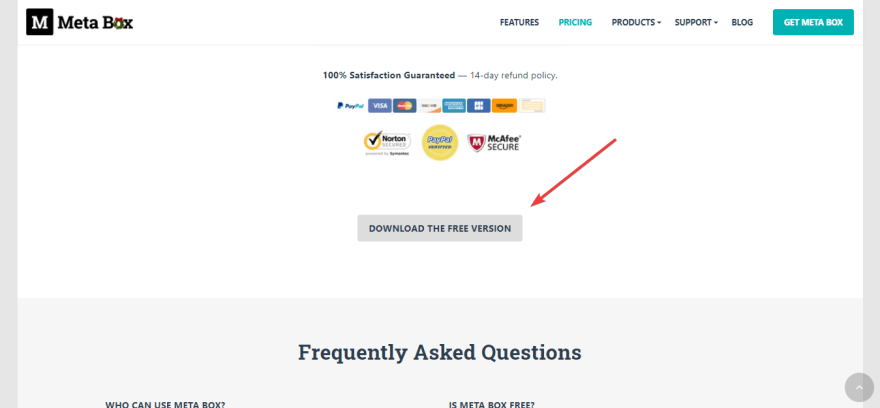
This is an example of how we use the download button on our Meta Box pricing page.
The download buttons are really useful, so how can we add them to our site? Let's see!
Before Getting Started
To create download buttons by custom fields, we need the following tools:
- Core plugin Meta Box: a framework that helps us create custom fields, custom meta boxes easily and quickly. It's free and available on wordpress.org.
- Meta Box Builder: a premium extension of Meta Box that provides you a UI to create custom fields right on the back end.
If you don't want to use the premium extension Meta Box Builder, you can still manually code to create custom fields. Or you can use the free Online Generator tool of Meta Box to save time and money. This tool comes up with an intuitive UI for creating custom fields. Once you finish creating fields, it will automatically generate code, and then you can add this code to the functions.php file. Get more details on how to use this tool here.
Besides, I use eStar theme and create a child theme. This multipurpose theme is free and very lightweight, you can download it here.
Once you finished installing and activating the plugins, follow these steps:
Step 1: Create the Download Button Using Custom Fields
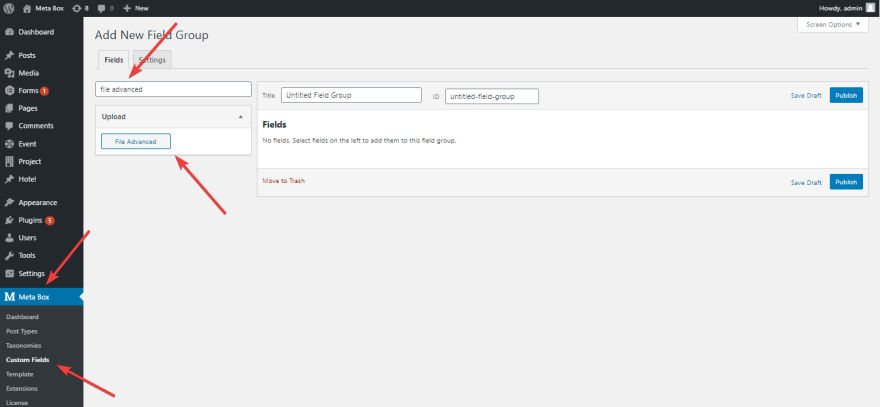
First, go to Meta Box > Custom Fields > Add New. After that, search and choose the File Advanced field type.
Next, enter the field ID and Label. Here's what I do:
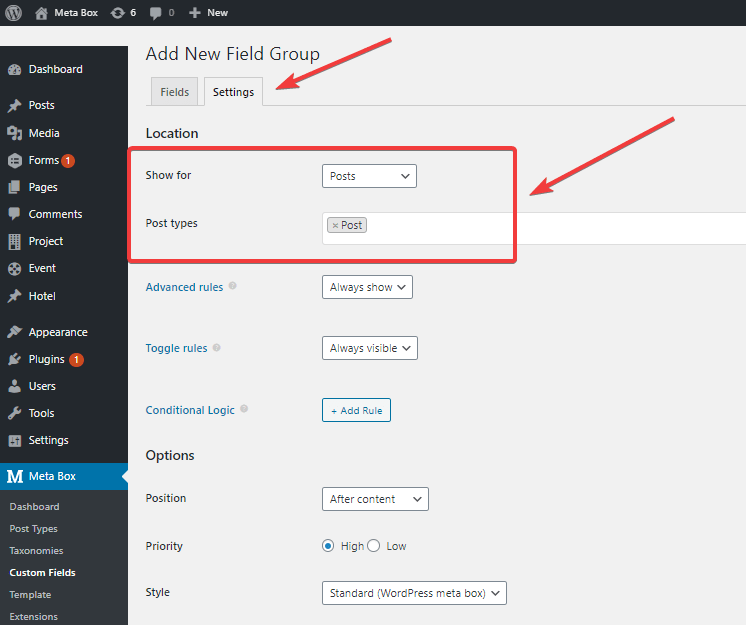
To display custom fields in all posts on the website, go to Settings tab, and choose Posts in the Show for section. Then, choose the Post types as Post (you can choose other post types such as page or a custom post type).
And don't forget to click Publish.
Step 2: Upload the Documents
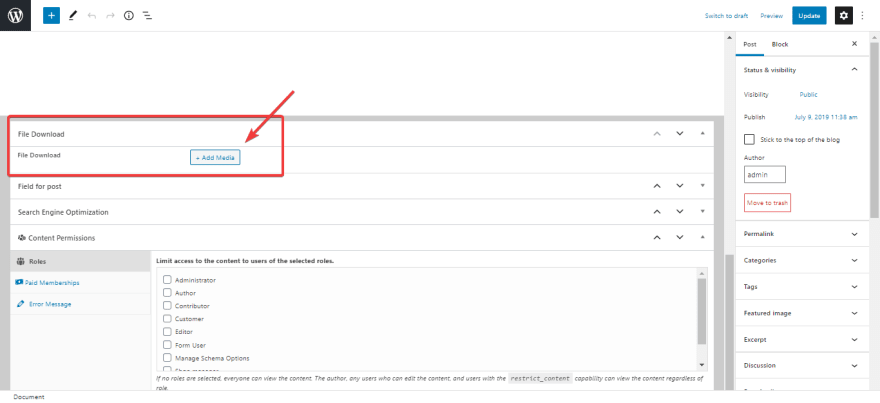
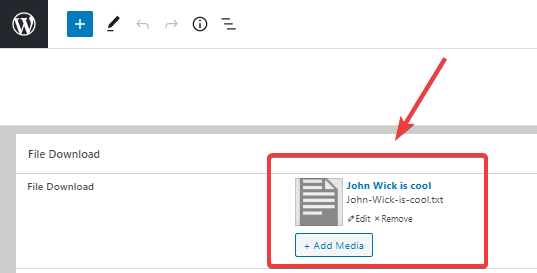
Go to any post type that you want to display the download button. In the WordPress editor, the custom field that we've created displays as follows:
Upload the document that you want to share with readers by clicking Add Media. This is the document that I've uploaded:
Now we've finished uploading a document. Still, readers can't see the download button on the front end, so let's do it in step 3.
Step 3: Display the Download Button on the Front End
This can be done using two methods: adding code to the theme or using a shortcode. The first method is suitable when you just need to display the download button in only one position on all pages. Meanwhile, the second method is faster and more convenient if you want to insert the download buttons in different positions on different pages.
Method 1: Display the Download Button by Adding Code to the Theme
For example, I want to display the download button at the end of all posts.
To do so, add this code to the functions.php file of the child theme:
add_action( 'estar_entry_footer_before', 'estar_child_add_link' );

function estar_child_add_link() {

?>

<div class="document_link_download abc">

<?php

$files = rwmb_meta( 'file_download' );

foreach ( $files as $file ) : ?>

<a class="document_link" href="<?php echo $file['url'] ?>" target="_blank">

<svg xmlns="http://www.w3.org/2000/svg" width="24" height="24" viewBox="0 0 24 24" fill="none" stroke="currentColor" stroke-width="2" stroke-linecap="round" stroke-linejoin="round" class="feather feather-download"><path d="M21 15v4a2 2 0 0 1-2 2H5a2 2 0 0 1-2-2v-4"></path><polyline points="7 10 12 15 17 10"></polyline><line x1="12" y1="15" x2="12" y2="3"></line></svg>

<?php esc_html_e( 'Download document', 'estar' ) ?>

</a>

<?php endforeach ?>

</div>

<?php

}
Explanation:
-
'file_download'is the ID of the custom field for documents uploading that we've created in step 1. -
'estar'is the theme that I'm using. -
add_action( 'estar_entry_footer_before', 'estar_child_add_link' );function estar_child_add_link() { ?>is the code to specify the location in which you want to display the download button. In this case, I display the download button in the'estar_entry_footer_before'hook of eStar theme. This hook is created right on the tags list. You can refer to this hook here (line 42).
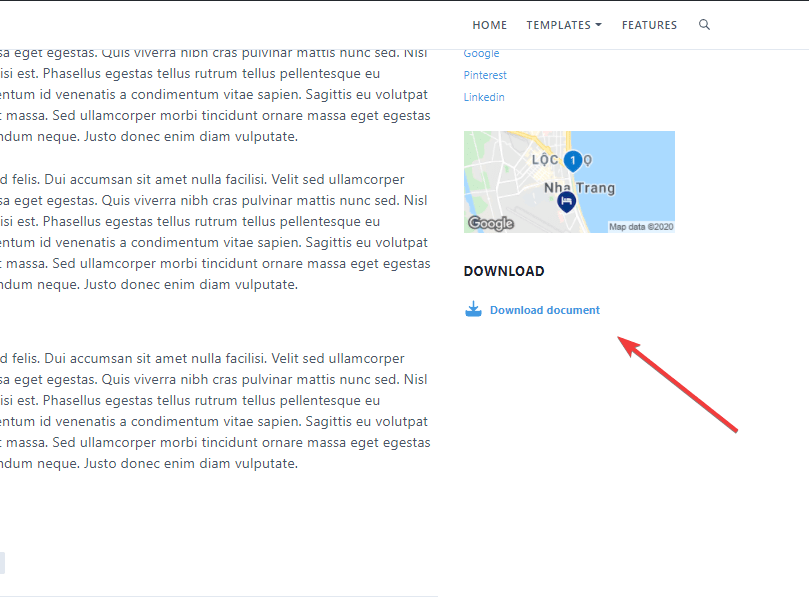
And this is the result:
Done! We've finished displaying the download button in a fixed position on all pages by adding code to the theme. But if this method doesn't fit your requirements, try the second method below.
Method 2: Display the Download Button Using a Shortcode
First, add this code to the functions.php to create the shortcode:
add_shortcode( 'estar_button_download', 'estar_button_download');

function estar_button_download() {

ob_start();

?>

<div class="document_link_download abc">

<?php

$files = rwmb_meta( 'file_download' );

foreach ( $files as $file ) : ?>

<a class="document_link" href="<?php echo $file['url'] ?>" target="_blank">

<svg xmlns="http://www.w3.org/2000/svg" width="24" height="24" viewBox="0 0 24 24" fill="none" stroke="currentColor" stroke-width="2" stroke-linecap="round" stroke-linejoin="round" class="feather feather-download"><path d="M21 15v4a2 2 0 0 1-2 2H5a2 2 0 0 1-2-2v-4"></path><polyline points="7 10 12 15 17 10"></polyline><line x1="12" y1="15" x2="12" y2="3"></line></svg>

<?php esc_html_e( 'Download document', 'estar' ) ?>

</a>

<?php endforeach ?>

</div>

<?php

return ob_get_clean();

}
Explanation:
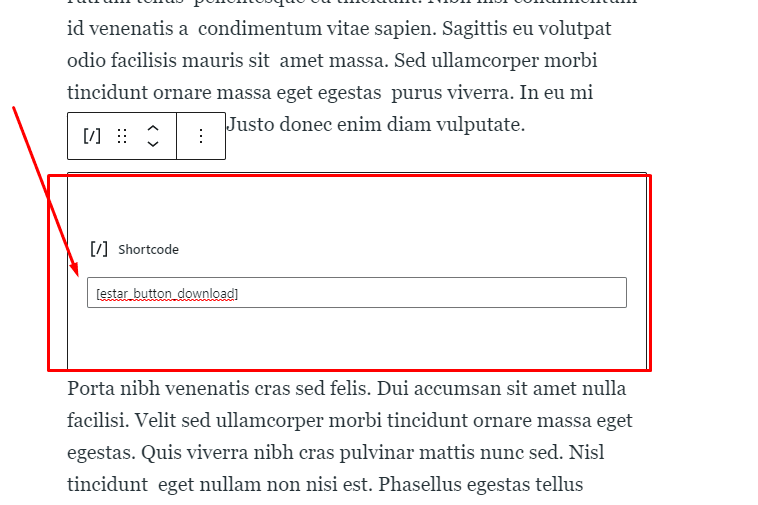
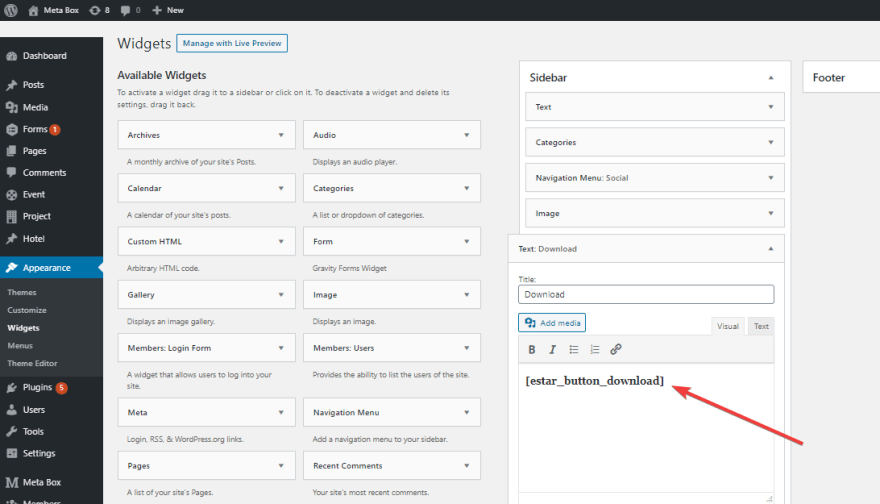
estar_button_download is the shortcode for the download button (you can name it whatever you want). From now on, you just need to insert this shortcode in the desired positions such as posts, pages, widgets.
For example, I insert the [estar_button_download] shortcode in the content of a post as follows:
Or I can add the shortcode to a widget like this:
Also, you can display the download button in other positions depending on your needs so that the buttons look eye-catching and appealing.
Last Words
What do you think? Using the download buttons is more effective and professional than inserting an ugly long hyperlink, right? In addition to creating the download button using custom fields, Meta Box plugin has many other interesting applications that we will seamlessly update in the upcoming tutorials.
If you have any questions or ideas about using Meta Box plugin, feel free to share them with us in the comment section or in the Meta Box users group here!






Top comments (0)