I was learning docker to containerize automation testcases. Moving forward, I realized- I don't even have the basics and it is difficult to setup and run testcases without knowing the fundamentals of Selenium Grid.
So, I decided to start learning grid first, then coming back to docker. Reading this blog you will know about grid from very basic to some basics 😄
Step 01: Configure
Assuming-
- Java is already installed.
- Environment variable has been set.
To start handling with grid, we need selenium server standalone JAR file. We are going to use selenium-server-standalone-3.141.59. Download it from here.
Here comes Hub and Node concept. A Hub is the central point where nodes will be connected. Hub is something like a docking system, where we can connect several devices via different ports/interfaces to a system. In selenium grid- a node may contain several browsers.
First, make a directory and put the selenium-server-standalone-3.141.59.jar there. This step is very important, because every time we want to start a hub- we must keep the jar file in the same directory.
Step 02: Start Hub
Open a cmd terminal window and type-
java -jar selenium-server-standalone-3.141.59.jar -role hub
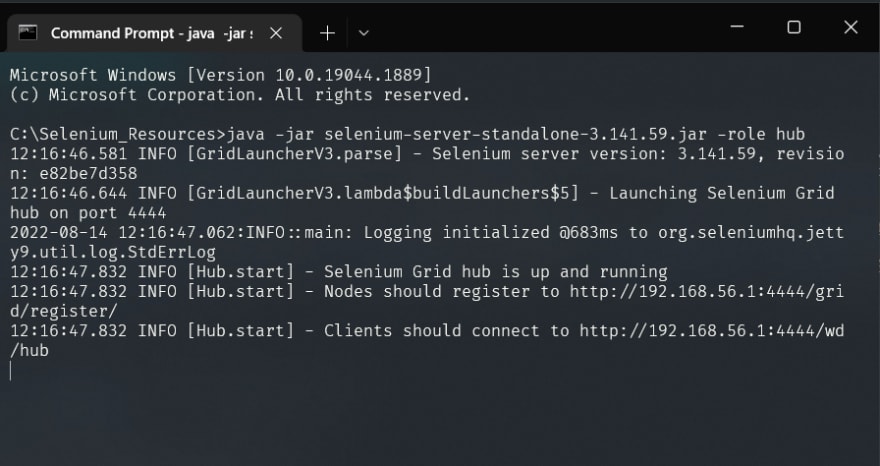
💡 Note: By default, it connects to port
4444. We can use any port using-portparameter.
java -jar selenium-server-standalone-3.141.59.jar -role hub -port 5555
now, see the grid console at http://localhost:4444/grid/console/

The console is blank as of now, because no node is registered yet.
Step 03: Register Node
Now, we need to register some nodes to the hub. Open a new cmd window(in the same directory) and type-
java -jar selenium-server-standalone-3.141.59.jar -role node -hub http://localhost:4444/grid/register
A new message apperared in hub cmd after executing the command, see below-

💡 Note: We must put chromedriver.exe/ geckodriver.exe/ iedriver.exe in the same directory.
Registering a node has been succeeded, refresh the window in browser-
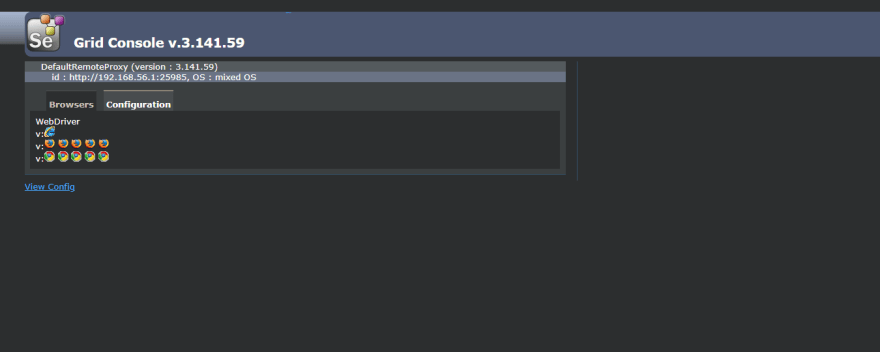
By default, it creates 11 browser instances (5 chrome, 5 firefox & 1 internet explorer) and it connects with hub using port 4444. To register to a particular port, you can use -port parameter as said before.
localhost and IP address:
We are setting up hub and nodes on the same local machine. So that, localhost has been used instead of machine IP address. But in real situation, nodes will be connected from different machines with the hub. To find the IP of your machine-
- open cmd
- type
ipconfig& press Enter
the highlighted IPv4 Address is our machine ip-

-
localhostwill be replaced with IP address along with port no. to register node from a remote machine like this-
java -jar selenium-server-standalone-3.141.59.jar -role node -hub http://192.168.251.61:4444/grid/register
To create only one instance of a particular browser-
java -jar selenium-server-standalone-3.141.59.jar -role node -hub http://localhost:4444/grid/register -browser browserName=chrome
We can create any browser instance using -browser browserName=chrome parameter. Change any browser name instead of chrome.
To create single instance of several browser-
java -jar selenium-server-standalone-3.141.59.jar -role node -hub http://localhost:4444/grid/register -browser browserName=chrome -browser browserName=safari -browser browserName=firefox
Refresh the grid console, the console should look like this-

This is the end of the first tutorial on Selenium Grid. In the next tutorial, we will run a dummy project and learn about- how to use parameters and capabilities to define browser, browser version, max instances, max sessions etc.
Thanks for reading!

Top comments (0)