
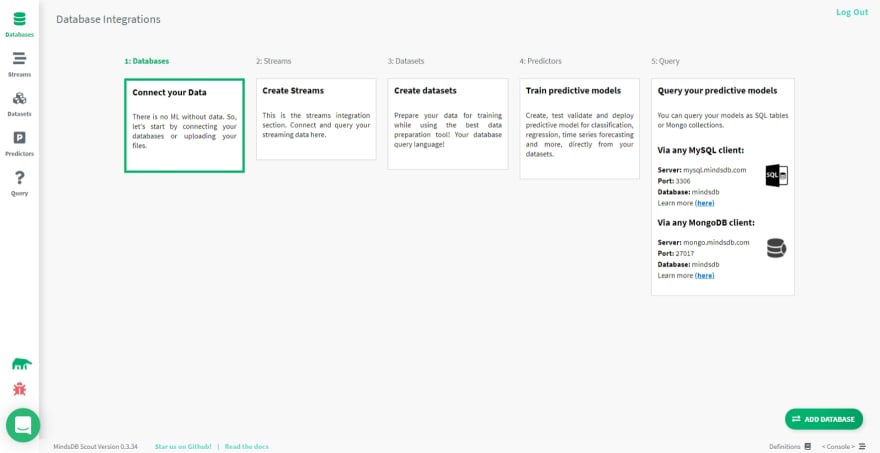
In this tutorial, we will be learning to:
👉 Connect a MongoDB database to MindsDB.
👉 Train a model to predict metro traffic.
👉 Get a prediction from the model given certain input parameters.
All of that without writing a single line of code and in less than 15 minutes. Yes, you read that right! 💯
We will be using the Metro traffic dataset 🚇 that can be downloaded from here. You are also free to use your own dataset and follow along the tutorial.
#️⃣ Pre-requisites
- This tutorial is primarily going to be about MindsDB so the reader is expected to have some level of familiarity with MongoDB Atlas. In short, MongoDB Atlas is a Database as a Service(DaaS), which we will be using to spin up a MongoDB database cluster and load our dataset.
- Download a copy of the Metro Traffic dataset from here.
- You are also expected to have an account on MindsDB Cloud. If not, head over to https://cloud.mindsdb.com/ and create an account. It hardly takes a few minutes. ⚡
- We also need MongoDB Compass to load the dataset into the collection. It can be downloaded from here.
Finally, No! You are not required to have any background in programming or machine learning. As mentioned before you wont be writing a single line of code!
#️⃣ About MindsDB
MindsDB is a predictive platform that makes databases intelligent and machine learning easy to use. It allows data analysts to build and visualize forecasts in BI dashboards without going through the complexity of ML pipelines, all through SQL. It also helps data scientists to streamline MLOps by providing advanced instruments for in-database machine learning and optimize ML workflows through a declarative JSON-AI syntax.
Although only SQL is mentioned, MongoDB is also supported.
#️⃣ Dataset overview
The dataset contains information about the: Hourly Interstate 94 Westbound traffic volume for MN DoT ATR station 301, roughly midway between Minneapolis and St Paul, MN. More details can be found here.
The dataset is a .csv file that contains 9 columns:
-
holiday: Categorical US National holidays plus regional holiday, Minnesota State Fair -
temp: Numeric Average temp in kelvin -
rain_1h: Numeric Amount in mm of rain that occurred in the hour -
snow_1h: Numeric Amount in mm of snow that occurred in the hour -
clouds_all: Numeric Percentage of cloud cover -
weather_main: Categorical Short textual description of the current weather -
weather_description: Categorical Longer textual description of the current weather -
date_time: DateTime Hour of the data collected in local CST time -
traffic_volume: Numeric Hourly I-94 ATR 301 reported westbound traffic volume
Phew! With all of that out of the way, we can finally get started! 🚀
#️⃣ Setting up a Cluster on MongoDB Atlas
- Head over to https://cloud.mongodb.com/ and create a new project named
mindsdband within it a new database cluster namedmindsDB. Typically, it takes a minute or two to provision a cluster. Once it is done, you should have something like this: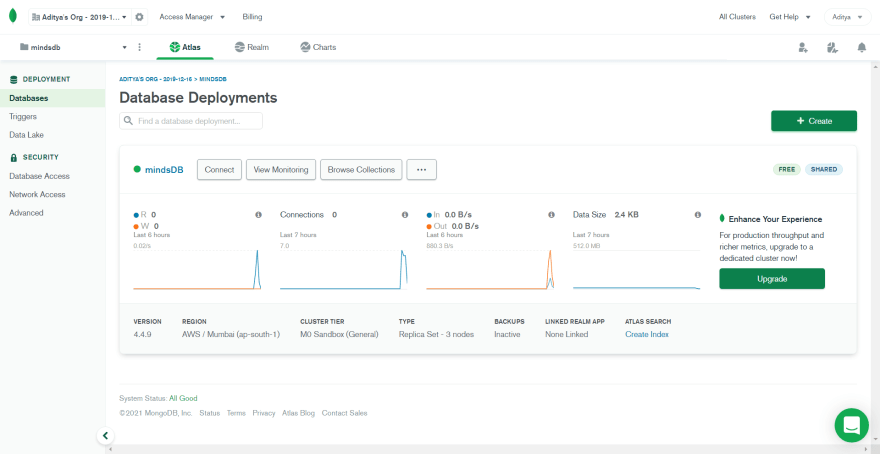
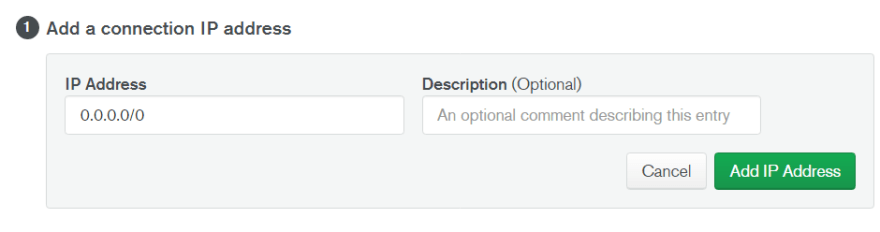
- Click on the "Connect" button. In the popup modal, you will be asked to add a connection IP address. Although not recommended, for the sake of this tutorial, choose "Allow access from anywhere" and then "Add IP Address".
- Next, you will be asked to create a new database user. After providing a username and password, click on the "Create Database User" button.

- In the next step, select "Connect using MongoDB Compass". Copy the connection string which should look like this:
mongodb+srv://<username>:<password>@mindsdb.htuqc.mongodb.net/
We will now use this connection string to connect to our database from MongoDB Compass and load our dataset.
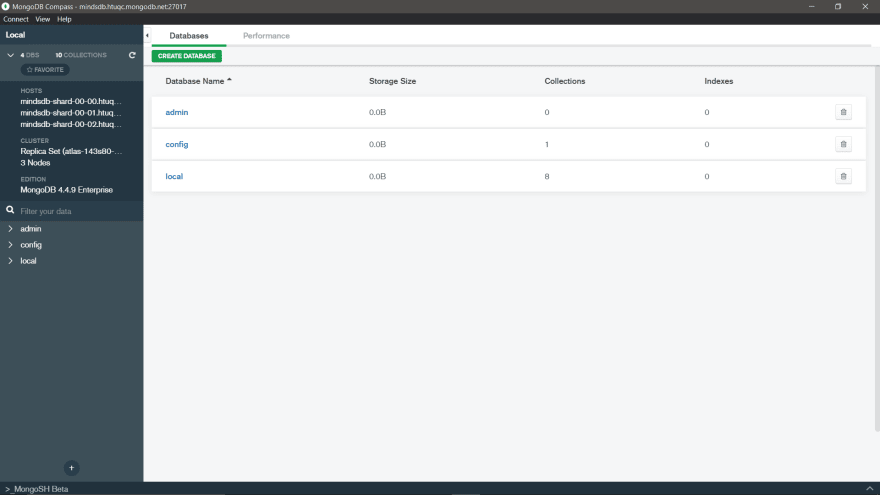
#️⃣ Loading the dataset with MongoDB Compass
- Open MongoDB Compass. Paste the connection string and click on "Connect". On successful authentication, you will be welcomed by this screen.
- Click on "Create Database" and create a database named
mindsDBand a collection nameddata.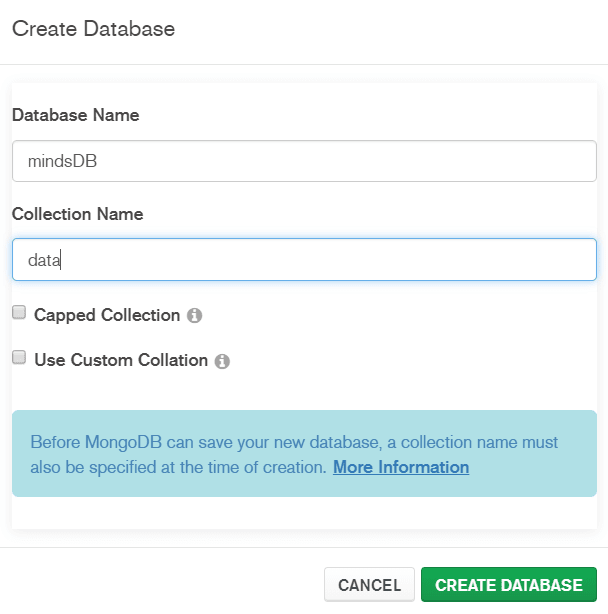
- You will now see
mindsDBlisted. Click on it and you will see that it contains a collection nameddata. We will be loading data from the.csvfile into this collection. Open thedatacollection by clicking on it.
- Click on the "Import data" button and load your
.csvfile. You will now be able to preview your dataset and also assign the data types as shown below. Then, "import" the dataset and wait for a few seconds for the import to finish.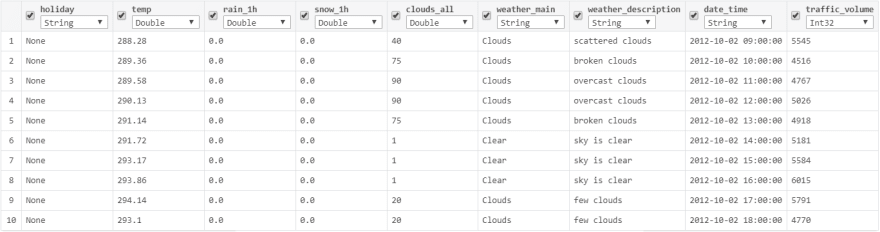
#️⃣ Connecting MindsDB to MongoDB Database
- Head over to https://cloud.mindsdb.com/ and click on "Add Database".
-
Enter the required details as shown below. The connection string must be similar to:
mongodb+srv://<username>:<password>@mindsdb.htuqc.mongodb.net/mindsDB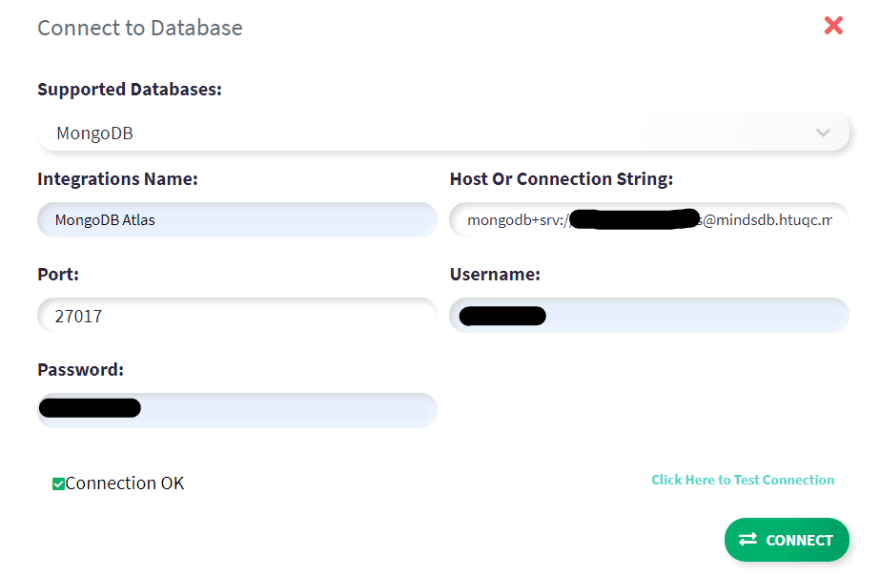
Click on "Connect" and that's it! We have successfully linked our Database to MindsDB.

Next, head over to the Datasets tab and click on "From database".
Enter the details as shown below. In the Find field, we can specify a Mongo query using which MindsDB will include only the results of this query in the data source. By specifying
{}, we are telling MindsDB to include every single document in thedatacollection in the data source.
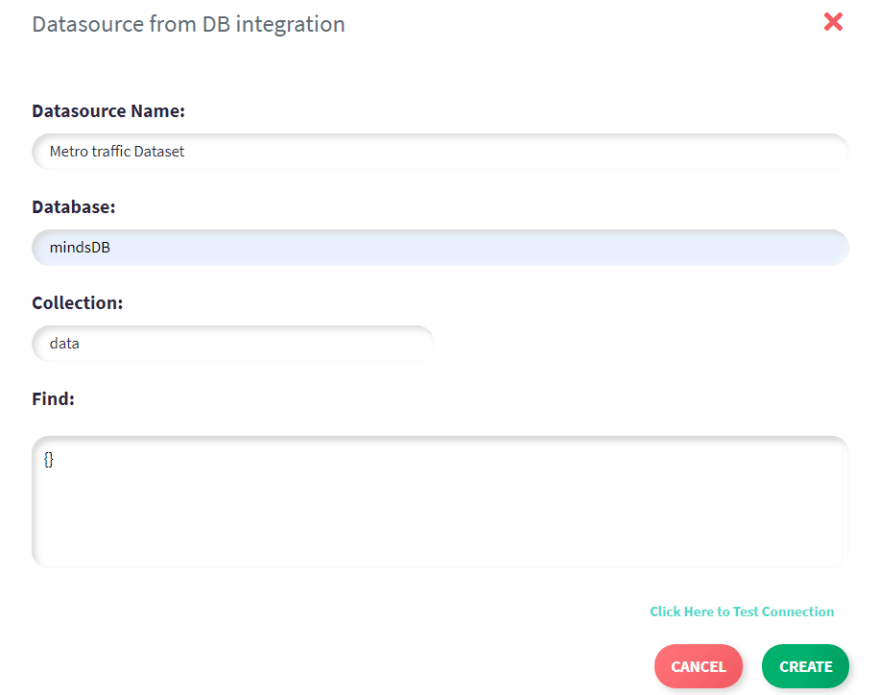
Click on "Create" and now we will see that our data source named "Metro Traffic Dataset" has been added. One can check for the quality and also preview the data source.

We are now ready to train an ML model to predict thetraffic_volumeusing MindsDB.
#️⃣ Training the ML Model
- Head over to the Predictors Tab and click on "Train New".
- In the popup modal, give a name to the predictor and select the column that needs to be predicted, which in our case is
traffic_volume.
- After entering the details, click on "Generate". That's how simple training an ML model is with MindsDB. Now all you have to do is wait for a few minutes for the model to get trained after which you will be able to run queries and get predictions on the
traffic_volume.
#️⃣ Running Queries to get predictions
- Once the status changes to COMPLETE, it means that our model is now ready and we can start getting predictions.
 We can see that the model has an accuracy of 98.6%, which is impressive!
 - To start getting predictions, click on the "Query" button and then "New Query".
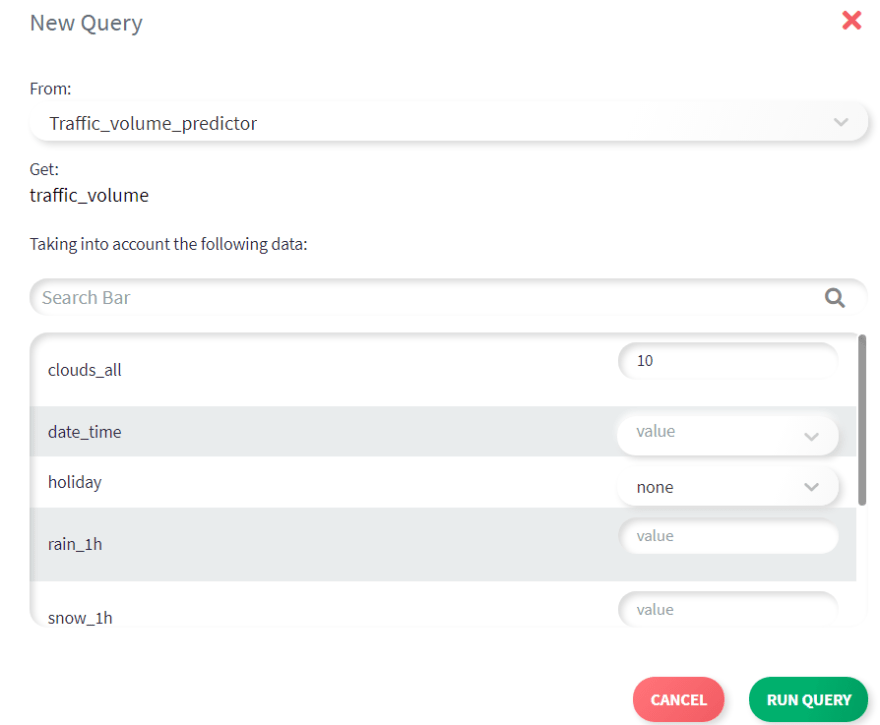
-
Let's say we wanted to know the
traffic_volumefor some day and all we know is the following:
{
    temp: 300, # temperature of 300 Kelvin
    clouds_all: 10, # 10% cloud cover
    weather_main: "Clouds",
    weather_description: "few clouds",
    holiday: "None"
}
Enter the above details and "Run Query".
We can see that the model predicted with 99% confidence that on such a day, the traffic volume would be 832.

You can play with the inputs and run a few more queries and observe the results.
#️⃣ What Next?
This tutorial can be extended to perform lots of awesome things. For example, it would be interesting to see the dependence between the weather and the traffic volume. Some interesting questions that can be asked are:
- Given a certain
traffic_volumewhat is the probability the sky is clear ☀️? What is the probability that it is raining? 🌧️ - Given a certain
traffic_volume, how certain can we be that the day is a holiday? 🏖️ - Can we predict more parameters instead of only the
traffic_volume? 🤔
Apart from these, you can also install MindsDB on your machine and connect with your local databases to get predictions. You can also use a BI tool to visualize these predictions. Apart from SQL and MongoDB, you can explore other data source integrations that MindsDB supports like Oracle and Kafka.
If you have made it this far, thank you for your time and hope you found this useful. If you like the article, like it and share it with others.
Happy Querying! 📉

Latest comments (0)