Strapi is a headless content management system (CMS) that provides an easy-to-use interface for creating, managing, and publishing content on the web. It is built on top of Node.js and uses a modern web stack that includes React, GraphQL, and MongoDB. Strapi is highly customizable and can be used to build a wide variety of web applications, from simple blogs to complex e-commerce sites.
docker run -it \
  -e DATABASE_CLIENT=postgres \
  -e DATABASE_NAME=strapi \
  -e DATABASE_HOST=0.0.0.0 \
  -e DATABASE_PORT=5432 \
  -e DATABASE_USERNAME=strapi \
  -e DATABASE_PASSWORD=strapi \
  -p 1337:1337 \
  -v `pwd`/project-name:/srv/app \
  strapi/strapi
Step 1. Setting up Strapi Backend
yarn create strapi-app communityhub --quickstart
Your application was created at /Users/ajeetsraina/May/communityhub.

Available commands in your project:

  yarn develop
  Start Strapi in watch mode. (Changes in Strapi project files will trigger a server restart)

  yarn start
  Start Strapi without watch mode.

  yarn build
  Build Strapi admin panel.

  yarn strapi
  Display all available commands.

You can start by doing:

  cd /Users/ajeetsraina/May/communityhub
  yarn develop

Running your Strapi application.

> communityhub@0.1.0 develop
> strapi develop

Building your admin UI with development configuration...
Admin UI built successfully
[2023-05-04 15:57:10.854] info: The Users & Permissions plugin automatically generated a jwt secret and stored it in .env under the name JWT_SECRET.

 Project information

┌────────────────────┬──────────────────────────────────────────────────┐
│ Time               │ Thu May 04 2023 15:57:10 GMT+0530 (India Standa… │
│ Launched in        │ 866 ms                                           │
│ Environment        │ development                                      │
│ Process PID        │ 13685                                            │
│ Version            │ 4.10.2 (node v18.16.0)                           │
│ Edition            │ Community                                        │
│ Database           │ sqlite                                           │
└────────────────────┴──────────────────────────────────────────────────┘

 Actions available

One more thing...
Create your first administrator 💻 by going to the administration panel at:

┌─────────────────────────────┐
│ http://localhost:1337/admin │
└─────────────────────────────┘

[2023-05-04 15:57:11.171] http: GET /admin (9 ms) 200
[2023-05-04 15:57:11.230] http: GET /admin/main.41970e4c.js (4 ms) 200
[2023-05-04 15:57:11.317] http: GET /admin/project-type (2 ms) 200
[2023-05-04 15:57:11.584] http: GET /admin/init (6 ms) 200
[2023-05-04 15:57:11.655] http: GET /admin/telemetry-properties (4 ms) 401
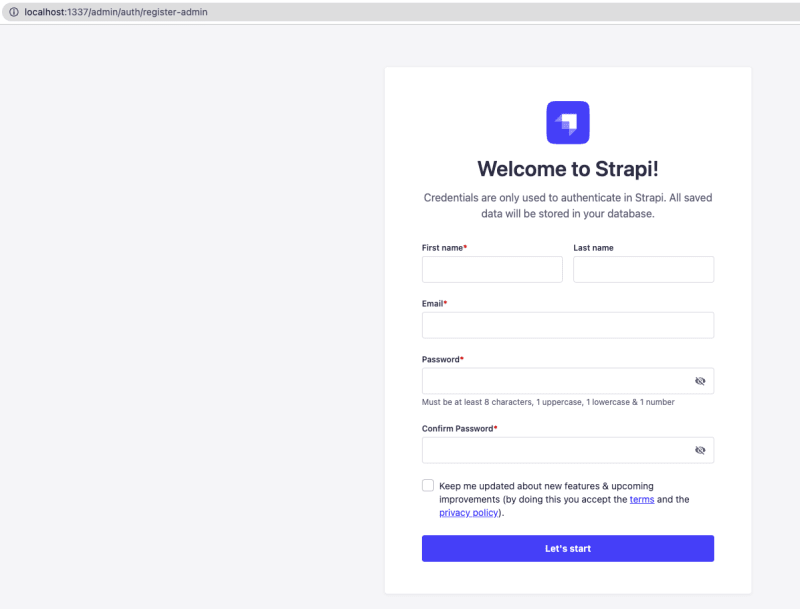
Step 2. Accessing the Dashboard

Step 3. Creating a New Collection Type
Let's create a new collection type called BlogPosts.

Step 4. Selecting field for Collection Type
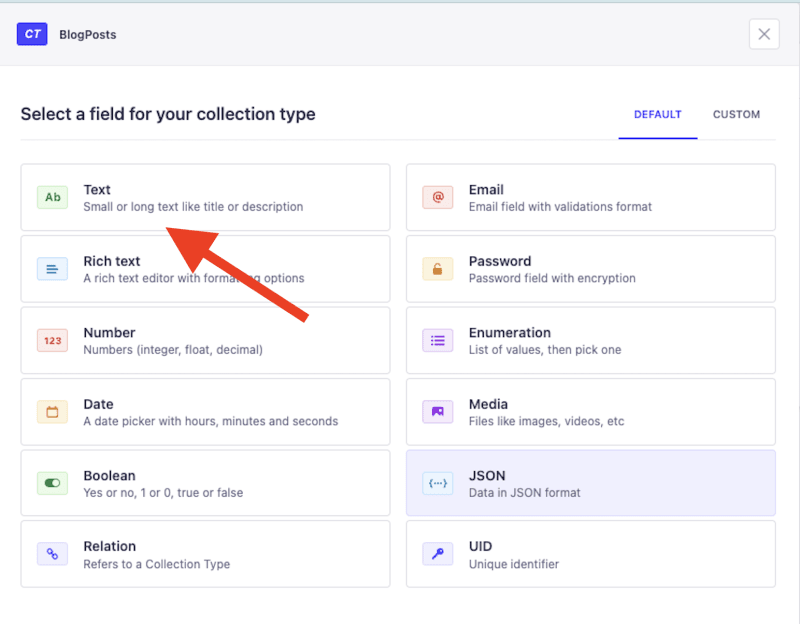
Step 5. Creating a New Collection Type

Step 6. Adding New Text Field
Let's create two components - BlogPosts and Events as shown:

Adding a Sample Blog Post with Image

Verifying if the API is reachable

curl http://localhost:1337/api/blog-posts/
{"data":[{"id":1,"attributes":{"Title":"How to install and Configure NVM on Mac OS","createdAt":"2023-05-04T11:57:39.228Z","updatedAt":"2023-05-04T11:57:40.662Z","publishedAt":"2023-05-04T11:57:40.661Z"}}],"meta":{"pagination":{"page":1,"
Creating a React app with Strapi
Here's a step-by-step guide to creating a basic React app with Strapi:
Step 7. Install Node.js and npm
Before we can start building a React app with Strapi, we need to make sure that we have Node.js and npm installed. You can download and install Node.js from the official website: https://nodejs.org/
Step 8. Create a new React app
Here's an example directory structure for a React application that uses Strapi as the backend:
- src/
  - components/
    - BlogList.js
    - EventList.js
    - FeaturedBlogs.js
    - VideoList.js
  - pages/
    - HomePage.js
    - BlogPage.js
    - EventPage.js
  - utils/
    - api.js
  - App.js
  - index.js
In this structure, the components folder contains all the reusable React components, the pages folder contains the top-level components for each page of the website, and the utils folder contains the API functions. The App.js file is the entry point of your application, and the index.js file is responsible for rendering the app.
Let's try to create the project structure.
Once you have Node.js and npm installed, you can create a new React app by using the create-react-app command. Open your terminal or command prompt and navigate to the directory where you want to create your app. Then, run the following command:
npx create-react-app my-app
Replace "my-app" with the name of your app. This will create a new directory with all the files needed to get started with a basic React app.
Step 9. Install the axios library
Install the axios library to make HTTP requests to the Strapi backend:
Assuming that you have followed the previous steps for setting up Strapi app set up, you can create content types for your blog posts, events, and videos.
Step 10. Create an API file
To fetch data from the Strapi backend, we need to create an API file. Create a new file called "api.js" in the "src" directory of your React app. In this file, we'll define functions that will fetch data from the Strapi backend.
Here's an example API function for fetching blog posts:
import Strapi from 'strapi-sdk-javascript';

const apiUrl = process.env.API_URL || 'http://localhost:1337';
const strapi = new Strapi(apiUrl);

export async function getBlogPosts() {
  try {
    const response = await strapi.getEntries('blog-posts');
    return response;
  } catch (err) {
    console.error(err);
  }
}
This function fetches all the entries from the "blog-posts" content type.
You can create similar functions for fetching events and videos.
Step 10. Create React component to display a single BlogPost
Now that we have our API functions set up, we can create React components to display the data. In the "src" directory of your React app, create a new directory called "components". In this directory, create a new file called "BlogPost.js".
Create a new file called "BlogPost.js" inside the "components" folder. This component will display a single blog post.
Here's an example React component for displaying blog posts:
import React from "react";
import PropTypes from "prop-types";

const BlogPost = ({ title, content }) => (
  <div>
    <h1>{title}</h1>
    <p>{description}</p>
  </div>
);

BlogPost.propTypes = {
  title: PropTypes.string.isRequired,
  description: PropTypes.string.isRequired,
};

export default BlogPost;
This component is a simple functional component that receives two props: "title" and "content". It renders a div that contains an h1 element with the title and a p element with the content.
Note that we also used PropTypes to validate the types of the props received by the component.
Step 14. Fetching data from Strapi
We'll use the "useEffect" hook to fetch data from Strapi. This hook allows us to perform side effects in a functional component, such as fetching data from an API.
Create a new file called "useBlogPost.js" inside the "hooks" folder. This custom hook will fetch a single blog post from Strapi.
This custom hook receives an "id" parameter, which is used to fetch the corresponding blog post from Strapi. It uses the "useState" hook to store the fetched data and the "useEffect" hook to perform the fetch operation.
Note that we used the "fetch" API to fetch the data. We passed the URL of the blog post API endpoint to the fetch function and awaited the response. We then parsed the response data using the "json" method and set the state using the "setBlogPost" function.
Step 15. Using the BlogPost component in the BlogPostPage component
We'll use the "useBlogPost" hook inside the "BlogPostPage" component to fetch the data and pass it to the "BlogPost" component.
import React from "react";
import { useParams } from "react-router-dom";
import useBlogPost from "../hooks/useBlogPost";
import BlogPost from "../components/BlogPost";

const BlogPostPage = () => {
  const { id } = useParams();
  const blogPost = useBlogPost(id);

  if (!blogPost) {
    return <div>Loading...</div>;
  }

  return <BlogPost title={blogPost.title} content={blogPost.content} />;
};

export default BlogPostPage;
We used the "useParams" hook from the "react-router-dom" package to retrieve the "id" parameter from the URL. We then used the "useBlogPost" hook to fetch the corresponding blog post and stored the result in the "blogPost" variable.
If the "blogPost" variable is null (i.e., the fetch operation is still in progress), we render a simple "Loading..." text. Otherwise, we pass the "title" and "content" properties of the "blogPost" object to the "BlogPost" component.
Step 16. Creating a React component to display all BlogPosts
Create a new file called "BlogPosts.js" in the "src/components" directory.
import React, { useState, useEffect } from 'react';

const BlogPosts = () => {
  const [posts, setPosts] = useState([]);

  useEffect(() => {
    const fetchPosts = async () => {
      const response = await fetch('http://localhost:1337/blog-posts');
      const data = await response.json();
      setPosts(data);
    };

    fetchPosts();
  }, []);

  return (
    <div>
      <h1>Blog Posts</h1>
      {posts.map(post => (
        <div key={post.id}>
          <h2>{post.title}</h2>
          <p>{post.content}</p>
        </div>
      ))}
    </div>
  );
};

export default BlogPosts;
In this component, we are using the useState hook to initialize a state variable called posts as an empty array. We are also using the useEffect hook to fetch the data from the Strapi backend when the component mounts and set the posts state variable to the fetched data.
Finally, we are rendering a list of blog posts by mapping over the posts array and rendering a div for each post.
Step 17. Rendering the BlogPosts component in App.js
Now that we have created our BlogPosts component, let's render it in the App component.
Open the App.js file in the src directory and replace the existing code with the following:
import React from 'react';
import './App.css';
import BlogPosts from './components/BlogPosts';

function App() {
  return (
    <div className="App">
      <BlogPosts />
    </div>
  );
}

export default App;
This will render the BlogPosts component in the App component.
Step 18. Running the React app
To run the React app, open a new terminal window and navigate to the root directory of the project.
Then, run the following command:
npm start
This will start the React app on http://localhost:3000.
You should now see a list of blog posts rendered in the browser.
Congratulations, you have successfully created a basic React app that fetches and displays data from a Strapi backend!


Top comments (0)