
So, you have a powerful tool like Bold Reports to create reports. But how do you make sure viewers only see the information they have permission to see? That is where user management steps in. It’s like having a digital sentinel that controls who can access, edit, and work with your reports. In this blog, we will explore the vital role of user management in Bold Reports and how it helps you share, secure, and organize your reports effectively.
User Management: The Heart of Efficient Reporting
User management is at the core of any reporting tool’s functionality. It plays a pivotal role in ensuring that the right people have access to the right information while maintaining data security and integrity. Bold Reports understands this critical aspect and provides a comprehensive suite of user management features that enable organizations to secure their reporting processes. Admin permissions allow managers to control access and security, ensuring users have appropriate access to data.
Admin Permissions in UMS
This is an overview of the capabilities that users with admin permissions can exercise in the UMS (user management system):
Add, Edit, and Delete User Accounts: Administrators can generate new user accounts, alter existing user details, and deactivate or remove user accounts when required.
Assign Permissions: Admins can designate additional administrators for other users, distributing the responsibilities of managing user accounts.
Create and Manage Reporting Sites (Tenants): Administrators can establish and oversee multiple reporting sites that function as segregated environments for distinct departments, clients, or projects.
Define Site Settings: Admins can configure site-specific settings, encompassing branding, appearance, and access controls. This customization ensures the uniqueness of each reporting site.
Admin Permissions within Reporting Sites (Tenants)
This is an overview of the capabilities that users with admin permissions can exercise in the reporting sites:
User Account Management: Site administrators can add, modify, and remove user accounts within the reporting site to which they are assigned.
Group Management: Admins have the authority to create, edit, and delete user groups within their reporting site. This simplifies the management of permissions.
Assign and Modify Group Permissions: Admins can allocate precise permissions to user groups, thereby regulating access to reports and resources within their site.
Control User Access: Administrators hold the power to grant or withdraw user access to the reporting site along with its contents.
Configure Site Settings: Site admins can fine-tune site-specific settings, including design, layout, and data sources, to align with the requirements of their reporting environment.
Content Management: The management of reports, data sources, and data sets available within their reporting site falls under their purview. This ensures an organized and accessible collection of content.
Permissions
Permissions can be managed only by the users belonging to the system administrator group. Permissions can be directly assigned to both users and groups and can be classified in the Access Mode, Entity, and Scope structures.
The list of entities is used to set access for the user, either with a group of resources or with a specific resource.
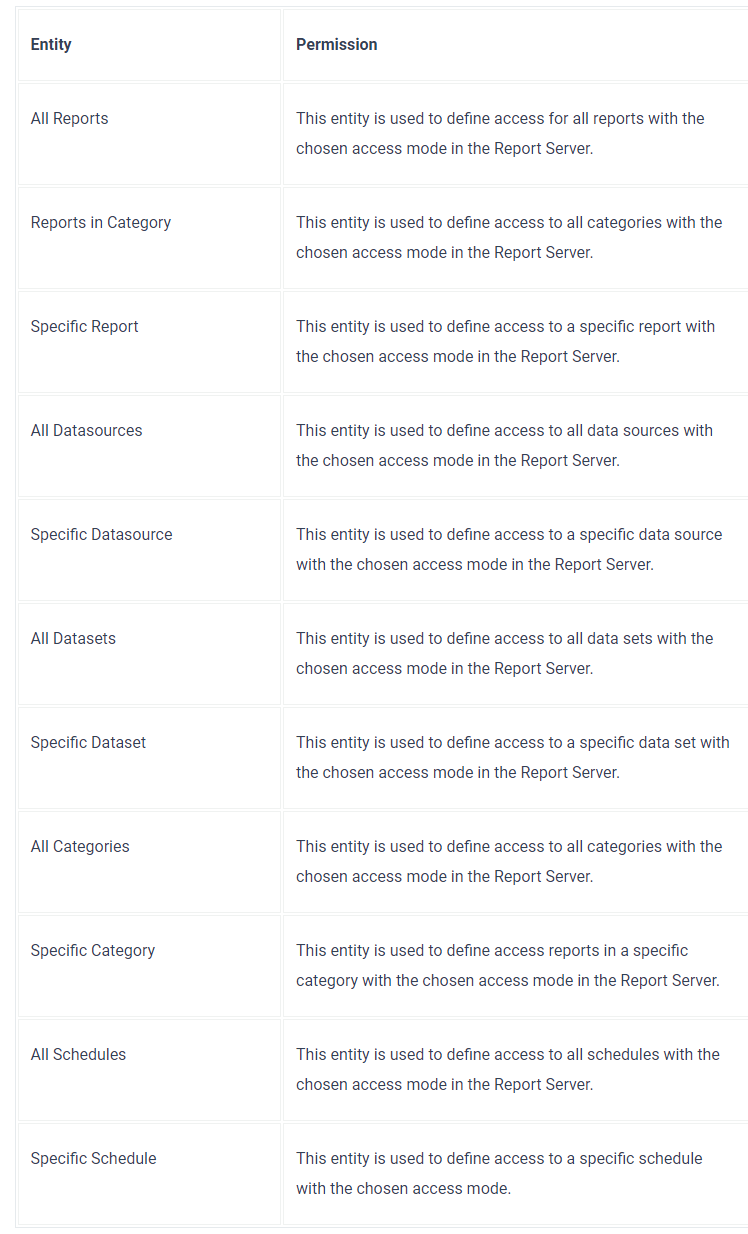
Following is the list of access modes available with a permission module to define the access for users.

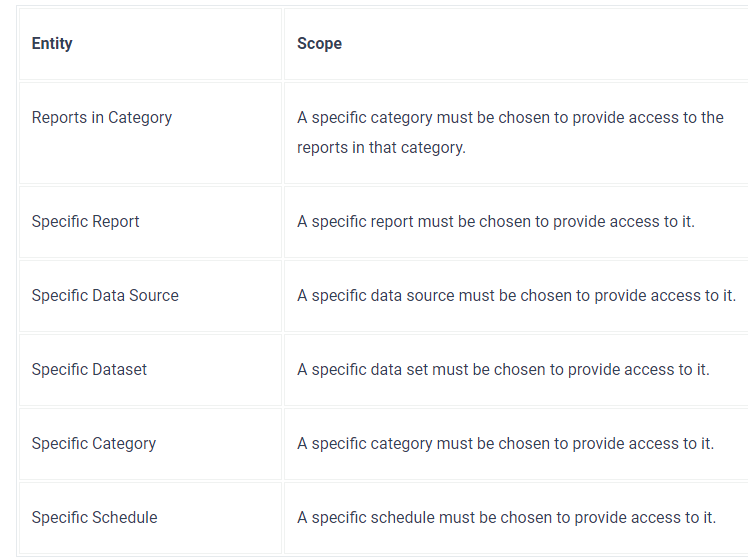
For access to be granted with any of the entities labelled "specific," the scope must be specified. The next table explains the scopes for the entities.
These permissions can be added to both users and groups.
Adding Users
Adding users helps people work together efficiently on projects. It lets them divide big projects into tasks and ensures security with different access levels. Project managers can track progress, enhancing teamwork and communication. It also allows knowledge sharing and personalized user experiences.
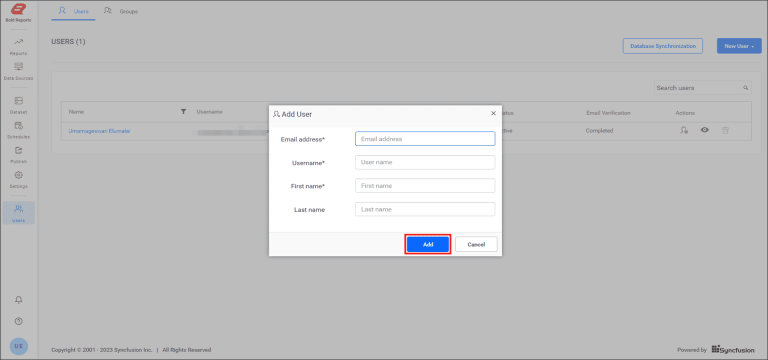
To add a new user to your Bold Reports Server:
- Navigate to the Users section.
- Click New User > Add User.
- Fill in the necessary information for the new user.
- Finally, click Add to create the user account.
For more detailed instructions on how to add a user, please refer to the official documentation.
Note: In addition to manual user creation, you can also import users from CSV files, databases, Active Directory, and Azure AD (Active Directory).
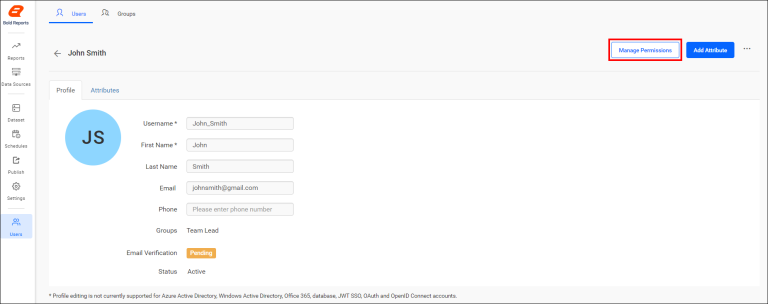
Edit a User
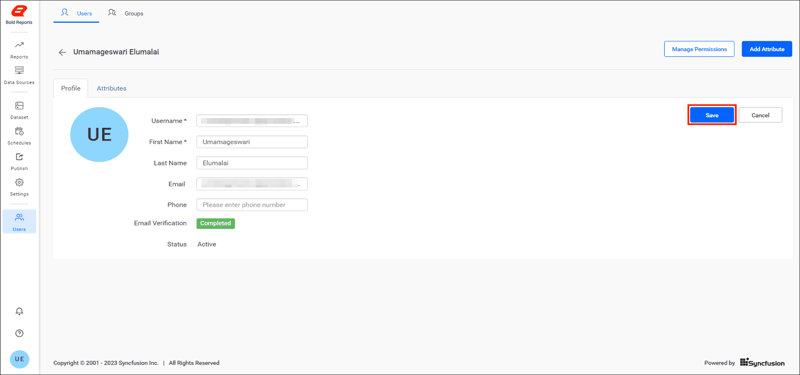
Editing user profiles helps administrators fix mistakes, change user roles and permissions, update access levels, and accommodate personal preferences.
To change a user’s information, click their name. You will go to the user edit page. Click Edit Profile to make changes, then click Save.
Deleting a User
Regular cleanups of user accounts keep the user list neat, follow data rules, save resources, and boost security.
Note: Users can be deleted from Bold Reports when they no longer require access.
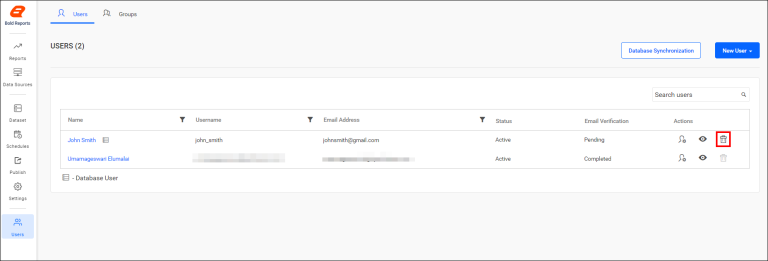
You can delete a user by:
Clicking the delete icon in the user list.
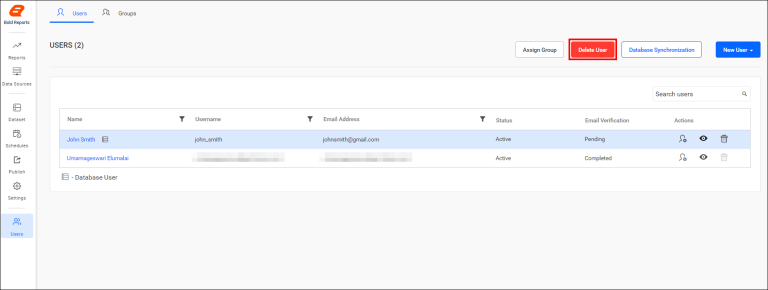
Selecting the user and clicking Delete User.
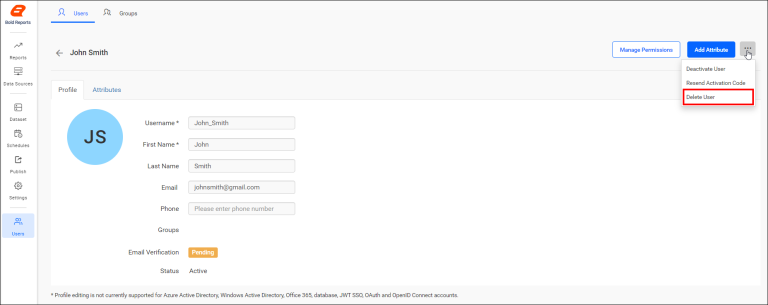
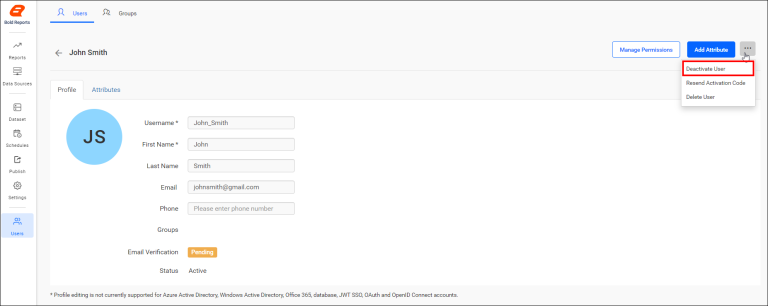
Choosing Delete User in the user edit page dropdown.
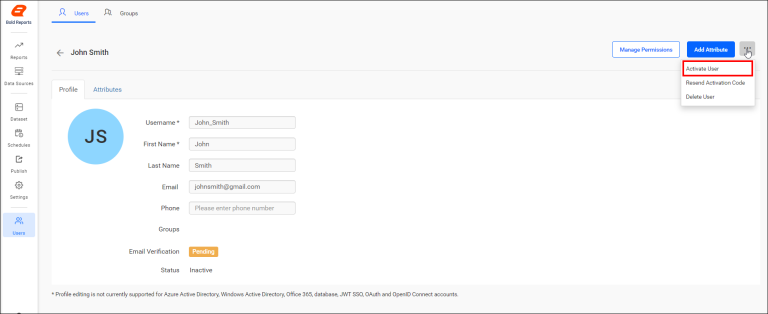
Activating and Deactivating Users
Activating users lets them access resources and do tasks. This is vital for new users to start using the system quickly.
On the other hand, deactivating users revokes access for individuals who no longer require it, such as employees who have left the organization or users who pose security risks. This protects data and keeps the system safe. It’s vital for controlling access and managing users online.
Adding a Group
Creating user groups makes managing users easier. It helps group people with the same jobs and permissions, making it simple to control who can do what. This boosts teamwork, streamlines work, and increases safety because it lets admins set clear rules and watch what users do, making the computer system safer.
Note: Groups can also be added from Active Directory and Azure AD.
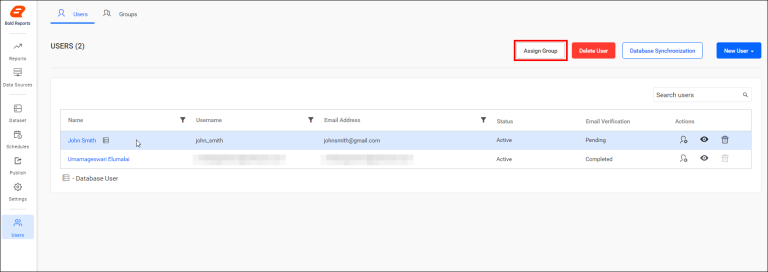
You can add a user to a group by clicking the user and then clicking Assign Group at the top.
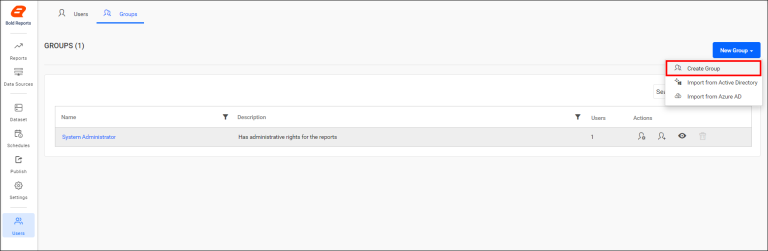
You can also add a group from the group page by clicking the New Group button and selecting Create Group from the dropdown list.
For more detailed instructions on how to add a group, please refer to the official documentation.
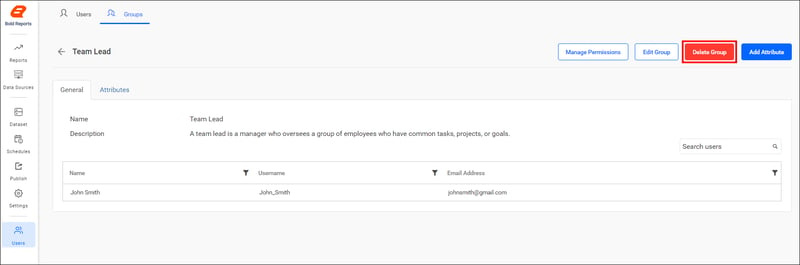
Deleting a Group
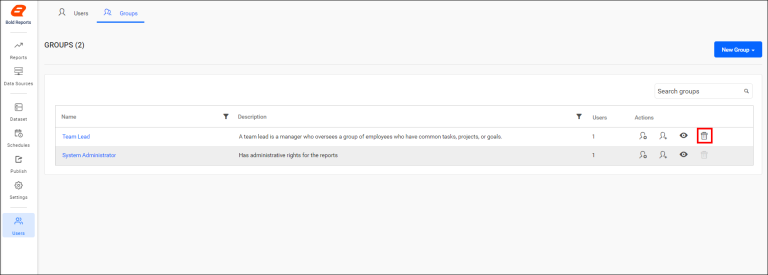
Deleting a group in user management simplifies organizational structures and enhances security by minimizing the risk of unauthorized access through outdated or redundant group memberships.
You can delete a group by clicking the delete icon from the group management page.
You can also delete a group by clicking the Delete Group button in the group profile page.
Adding Permissions to Users
Giving users permissions on a Report Server in Bold Reports means choosing what they can and can’t do. This is important because it keeps data safe, helps people work efficiently, and ensures everyone follows the rules.
On the Users page, click the Manage Permissions icon in the user list to add permissions for the user.
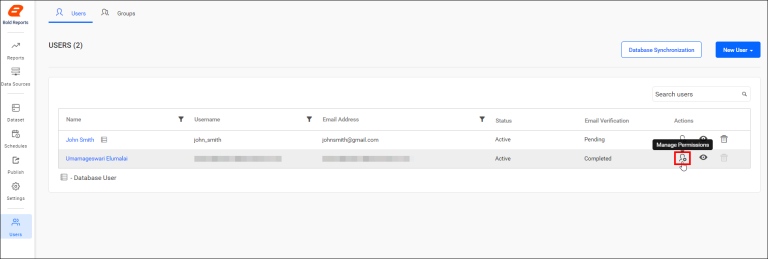
You can also add permissions from the user’s profile page.
To learn more about managing permissions for users, refer to this documentation.
Adding Permissions to Groups
Adding permissions to groups in Bold Reports Report Server ensures secure report management. It allows you to control who can view and edit reports on a more convenient scale. It simplifies onboarding, as new employees can be added to specific groups swiftly, streamlining access management and reducing administrative tasks.
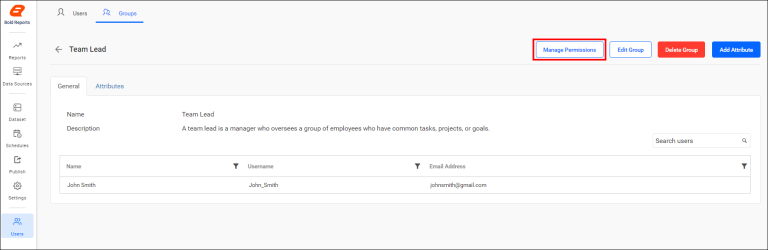
You can add a permission to a group by clicking the Manage Permissions icon.
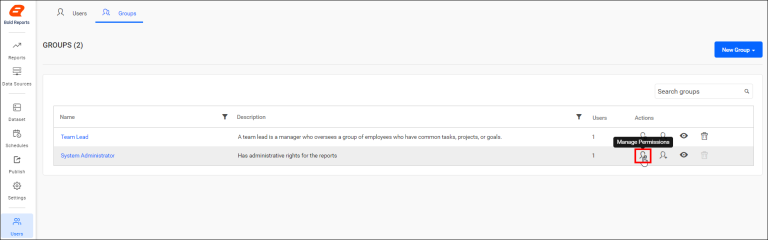
Or you can click Manage Permissions on the Groups profile page.
To learn more about managing permissions for groups, refer to this documentation.
Conclusion
I hope this blog has provided a clear idea of the role of user management in Bold Reports. To learn more about the Report Server, look through our documentation. To experience its features live, check out our demo samples.
If you have any questions, please post them in the comments section. You can also contact us through our contact page, or if you already have an account, you can log in to submit your support question.
Bold Reports comes with a 15-day free trial with no credit card information required. We welcome you to start a free trial and experience Bold Reports. Try it and let us know what you think!
Stay tuned for new releases by following us on Twitter, Facebook, LinkedIn, Pinterest, or Instagram for announcements.


Top comments (0)