This post is mainly intended for professionals who are Data Engineers and use AWS as a cloud provider. It will be covered how to create a local experimental environment step by step.
As you well know, AWS offers multiple data oriented services, where AWS Glue stands out as a fully managed ETL (extract, transform, and load) service that makes it simple and cost-effective to categorize your data, clean it, enrich it, and move it reliably between various data stores and data streams. AWS Glue consists of a central metadata repository known as the AWS Glue Data Catalog, an ETL engine that automatically generates Python or Scala code, and a flexible scheduler that handles dependency resolution, job monitoring, and retries. AWS Glue is serverless, so there’s no infrastructure to set up or manage.
AWS Glue is designed to work with semi-structured data. It introduces a component called a dynamic frame, which you can use in your ETL scripts. A dynamic frame is similar to an Apache Spark dataframe, which is a data abstraction used to organize data into rows and columns, except that each record is self-describing so no schema is required initially. With dynamic frames, you get schema flexibility and a set of advanced transformations specifically designed for dynamic frames. You can convert between dynamic frames and Spark dataframes, so that you can take advantage of both AWS Glue and Spark transformations to do the kinds of analysis that you want.
What is Jupyter Notebook?
The Jupyter Notebook is an open-source web application that allows you to create and share documents that contain live code, equations, visualizations and explanatory text. Uses include: data cleaning and transformation, numerical simulation, statistical modeling, machine learning and much more.

How can we take advantage of Jupyter Notebook? Basically inside a Jupyter notebook we can perform all the necessary experimentation of our pipeline (transformations, aggregation, cleansing, enrichment, etc.) and then export it in a Python script (.py) for use in AWS Glue.
Let’s Get Started!
1)Install Anaconda environment with Python 3.x
- For Windows 64-Bit: https://repo.anaconda.com/archive/Anaconda3-2020.11-Windows-x86_64.exe
- For Windows 32-Bit: https://repo.anaconda.com/archive/Anaconda3-2020.11-Windows-x86.exe
- For other OS, find the version here: https://www.anaconda.com/products/individual
NOTE: I recommend to use Python 3.7
** 2) Install Apache Maven**
Download Link: https://aws-glue-etl-artifacts.s3.amazonaws.com/glue-common/apache-maven-3.6.0-bin.tar.gz
Unzip the file into C:\apache-maven-3.6.0 (Recommended)

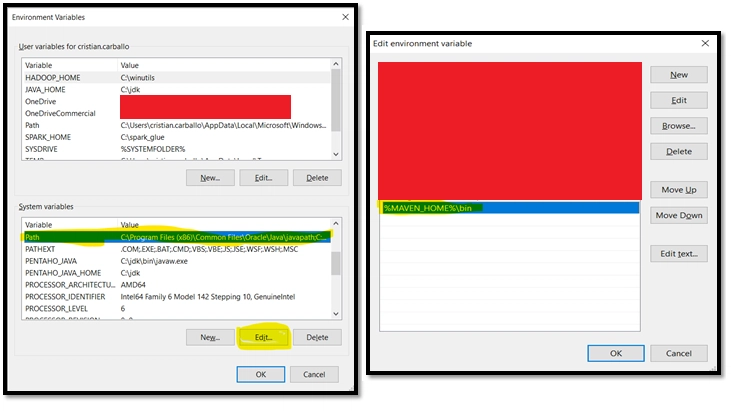
- Create the MAVEN_HOME System Variable (Windows =>Edit The system Environment variables =>Environment Variables). Follow the instructions below:
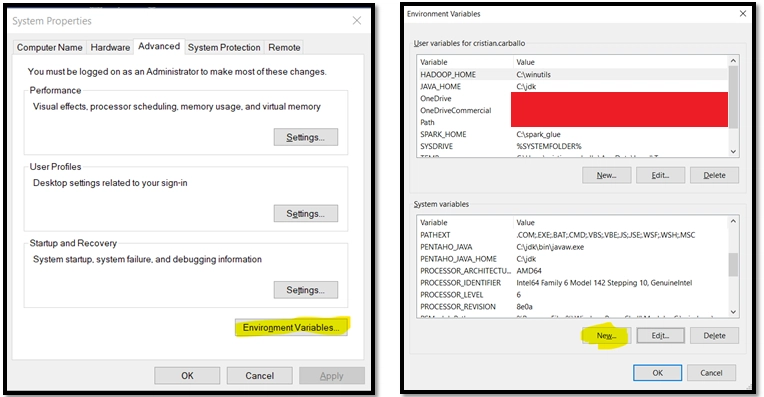

- Modify the PATH Environment Variable in order to make the MAVEN_HOME variable visible:
3) Install Java 8 Version
Download the product for your OS Version https://www.oracle.com/java/technologies/javase/javase-jdk8-downloads.html
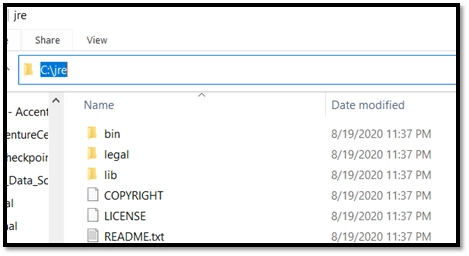
“IMPORTANT” During the Installation make sure to set the installation directory C:\jdk For the Java Development Kit and the C:\jre For the Java Runtime. (Otherwise set the directory you have chosen during the installation)

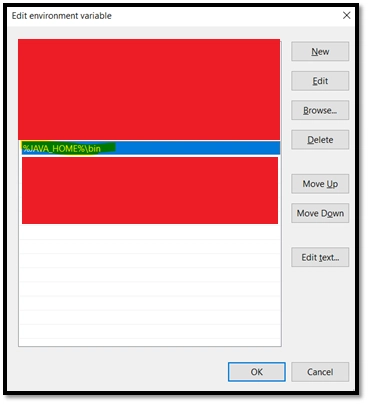
- Create the JAVA_HOME Environment Variable and make sure to add it into the PATH variable. (Similar process than MAVEN_HOME)
4) Install the SPARK distribution from the following location based on the glue version:
Glue version 1.0: https://aws-glue-etl-artifacts.s3.amazonaws.com/glue-1.0/spark-2.4.3-bin-hadoop2.8.tgz
Unzip the File into C:\spark_glue Directory (or choose other directory)

- Create the SPARK_HOME environment Variable and Add it into the PATH Variable. (Similar process than MAVEN_HOME)

5) Download the Hadoop Binaries
Download Link: https://archive.apache.org/dist/hadoop/common/hadoop-2.7.3/hadoop-2.7.3.tar.gz
Create the Environment variable HADOOP_HOME, following the same process of creating the folder into “C:\hadoop”, and adding it into the PATH variable (%HADOOP_HOME%\bin)
It is also required to download the “winutils.exe” that can be downloaded from this link https://github.com/steveloughran/winutils/blob/master/hadoop-3.0.0/bin/winutils.exe
NOTE: Make sure that the “winutils.exe” file is within the “bin” folder of the Hadoop directory
6) Install Python 3.7 in your Anaconda virtual environment
- Open an ANACONDA PROMT and Execute the command conda install python=3.7

NOTE: This Process will take ~30 min
7) Install “awsglue-local” in your Anaconda virtual environment
- Open an ANACONDA PROMT and run the command pip install awsglue-local

*8) Download the Pre_Build_Glue_Jar dependencies (REQUIRED FOR CREATING THE INSTANCE OF SPARK SESSION)
*
Download Link: https://drive.google.com/file/d/19JlxsFykugjDXeRSK5zwQ8M0nWzpGHdt/view
Unzip the jar file into the same folder that you will create your .ipynb (Jupyter Notebook). This .jar file is REQUIRED FOR CREATING THE INSTANCE OF SPARK SESSION. Below is an example of how to create the SPARK Session:

*9) Confirm that you have installed everything successfully
*
Open a new Anaconda Prompt and Execute the following commands:
conda list awsglue-local
java -version
mvn -version
pyspark


10) Once everything is completed, open a Jupyter notebook.
Open a new ANACONDA PROMPT and run the command “PIP INSTALL FINDSPARK” and wait until its completed. Once its completed close the Anaconda prompt. This is only required in most cases for the first time.
Re-Open Anaconda Prompt and run the command “jupyter-lab” in order to open a Jupyter notebook.

- Create a Jupyter Notebook and execute the following commands (THIS IS ONE TIME ONLY)

import findspark
findspark.init()
import pyspark
You won’t need to execute this code again since this is a typical step for the initial installation of spark. The Findspark library generates somes references into the local machine to link the pyspark library with the bin files.
I hope the content is useful for everyone. Thanks a lot!
Cheers!
Cristian Carballo
cristian.carballo3@gmail.com

Oldest comments (0)