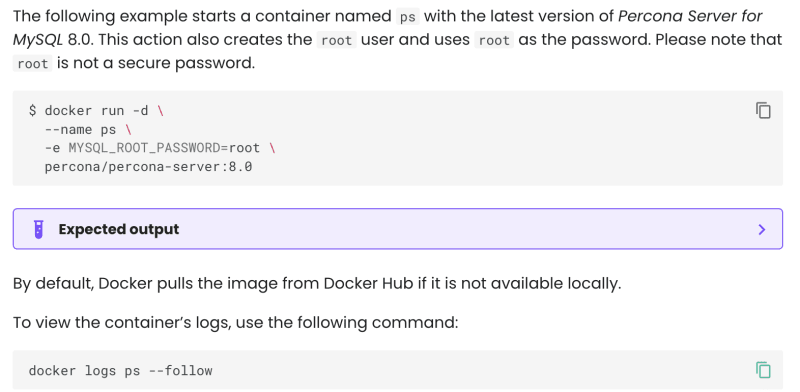
I often see examples using docker in manuals and documentation for services and products.
Docker containers are generally convenient, but we must run them manually with different parameters if we use several containers.
If we need to run PHP + Nginx + MongoDB app, we need to run 3 long commands, and if we need to change them, it will not be convenient.
Docker-compose comes in, which allows us to describe in a single file which containers we need to run and with which parameters. As I explained in my article on preparing the environment: How to Develop a Simple Web Application Using Docker-compose, Nginx, PHP 8, and MongoDB 6
So, what we'll need:
- Install docker and docker-compose.
- Prepare docker-compose.yml
- Run it and stop it when it is no longer needed.
You can use this locally or run it on a server.
Useful Commands
These commands are executed quite often during development.
Docker-compose runs several containers with the right environment variables and parameters described in the file docker-compose.yaml
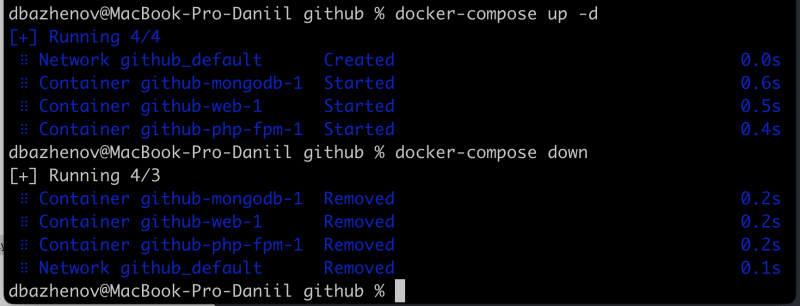
To start them up, we use the command:
docker-compose up -d
We stop it with
docker-compose down
The commands must be run from the directory where docker-compose.yml is located.
The docker-compose ps allows you to see what is currently running.
The command to connect to one of the containers, if necessary
docker exec -it [container-name] bash
[container-name] is available in the list of running containers
Launch result in console
Docker-compose features that I use
Environment variables
It is very convenient and helpful not to keep secrets in the source code.
Environment variables can be connected as a file or as parameters, or you can make shared environment variables for all containers. This is much more convenient than working with environment variables with a simple docker command.
For example, API or databases access data or environment startup parameters.
Simple use of environment variables in docker-compose.yml
    environment:
      DB_USERNAME: root
      DB_PASSWORD: secret
      DB_HOST: localhost
I am connecting environment variables as a file.
File docker-compose.yaml
  php-fpm:
    image: php8-mongo
    env_file:
      - .env
File .env
MONGODB_USER: dba
MONGODB_PASSWORD: secret
MONGODB_HOST: localhost
And that's it, and the variables can be read in any programming language application. In addition, you can use this on any hosting or server, and DevOps will be happy.
Volumes and file system
I do not use volumes from docker for the files, but I use the volumes parameter to connect and link the local directories and the filesystem within the container.
I use a local folder on my computer to develop and modify code, which automatically connects to the container for code execution.
  php-fpm:
    image: php8.2-fpm-mongo
    volumes:
      - ./app:/var/www/html
Also, when running the database container, I prefer to use the main server's or laptop's file system. When the database container starts, I can immediately see the data files and explore, make a backup, or transfer.
  mongodb:
    image: "percona/percona-server-mongodb:6.0.4"
    volumes:
      - ./data:/data/db
This is handy during development and experimentation.
Although you could use the built-in volumes by docker.
Changing application configurations in a container
Often applications require configuration modifications, usually done by editing a parameter file or config file inside a container.
For example, changing PHP, MongoDB, or Nginx parameters requires editing those software files:
- /usr/local/etc/php-fpm.d/zz-docker.conf
- /etc/mongod.conf
- /etc/nginx/conf.d/default.conf
You can connect to the container and edit these files internally, but the next time you run it, the settings will be reset again.
In this case, I copy the config file from the container to my computer in the project folder and connect it to the inside of the container via docker-compose.yml
This way, I can edit the parameters in the file, which will be used inside the container when running.
Example for Nginx
    volumes:
      - ./config/nginx/default.conf:/etc/nginx/conf.d/default.conf
      - ./config/nginx/nginx.conf:/etc/nginx/nginx.conf
As a result, my project has the following file structure.
Conclusion
I love it, recommend it, and use it.


Top comments (0)