
Table of Contents
- Table of Contents
- Repository
- Concept
- Main libraries
- Specifications
- Quick start
- Code
- Installation
- Conclusion
Repository
Fabrice Goret's portfolio
This is my personal website built using Nuxt.js (Vuejs), Bulma (CSS framework) and AOS (Animate On Scroll Library).
The personal information on the website is populated from a JSON file that follows the FRESH Resume schema open source standard.
Customizing it
Feel free to fork this project and update it with your own information and style Update the following parts with your personal information:
- 'static/resume-XX.json' for your resume where XX is the language code
- 'static/images/ego.png' for your photo
- variable 'locales' in 'nuxt.config' to set all the default language and translations. If English is not your default language, replace the code "en" by yours in the i18n section too.
- variable 'baseUrl' in 'nuxt.config' to set your base url.
- locales/XX.json for the website pages translations where XX is the language code. For the moment, English and French are available, feel free to add yours.
Build Setup
Commands from package.json:
Have also a look at the output which is my current portfolio.
Concept
The Covid-19 lockdown is saving me many hours of traffic jams and I wanted to use those hours to create a personal website and improve some skills.
I found some ideas on a similar approach on Dev.to (React.js portfolio) that I wanted to extend with another library.
I made some searches before starting and some of them are available as links named 'article'. I'm not sponsored or affiliate to those websites but their articles may help to get an extended view on the topic.
Main libraries
I've already used Nuxt.js to create static websites in the past. It's a great framework to generate pages and routes on the fly, and it's based on the amazing Vue.js.
The styling is based on Bulma (CSS framework), AOS (Animate On Scroll Library) and Material Design Icons.
Specifications
As an user, I want to navigate on a website having the following features:
- multilingual (English, French) and other languages can be easily added.
- Responsive - Mobile first.
- easy styling: Bulma scss files allow to change a lot of settings, including colors, height, font, ... as explained in this article.
- CV information has to easily populate all the related pages. It's a JSON file that follows the FRESH Resume schema open source standard, which supports more properties than the JSON Resume schema. The file can be used by tools like HackMyResume to generate the resume in other formats (pdf, md, html, MS Word, ...) as explained in this article.
- CV easy print page: Based on the CV components, make a printable page whose the blocks can be resized or moved. Last feature is based on the CSS 'grid-template-areas' as explained in this article.
- Projects or blog page, where the markdown posts are added and transformed on the fly during the generation and sorted by date.
- Reading time and text to speak for the articles, including pause, stop and progress features.
- Contact form. Just add your access key from Staticforms in the global environment key 'staticformsKey'.
- Google Analytics support, managed by the global environment key 'googleAnalyticKey'.
- GDPR friendly: minimal version saving the user's choice.
- Image lazy loading.
- Meta tags support by page (description, title, language).
- A sitemap managing the languages and the custom routes.
- Dark mode, based on this article but managed as themes.
- A small Easter egg; I really need to add a serious one using a Konami code but not in this release ;)
Quick start
Check Node.js and npm are installed on your machine with a recent version (I got some issues due to that when I updated Nuxt).
Update the following parts with your personal information:
- 'static/resume-XX.json' for your resume where XX is the language code
- 'static/images/ego.png' for your photo
- variable 'locales' in 'nuxt.config' to set all the default language and translations. If English is not your default language, replace the code "en" by yours in the i18n section too.
- variable 'baseUrl' in 'nuxt.config' to set your base url (used by the sitemap and the contact form).
- locales/XX.json for the website pages translations where XX is the language code. For the moment, English and French are available, feel free to add yours.
To run it:
- Install the dependencies via "npm install".
- Test it in dev via 'npm run dev".
- Create a distribution in the dist directory and run it via 'npm run dist".
Code
Building the cv page
For each property used in the FRESH Resume schema, a matching component is added in the page by a loop.
// pages/cv.vue
<template>
    <div>
      <component-wrapper v-for="(section, index) in Object.keys(this.resume)" :key="index" :file="section" folder="cv" :options="resume">
      </component-wrapper>
    </div>
</template>

<script>
  import ComponentWrapper from "~/components/ComponentWrapper.vue";
  // the full resume comes from pagesMixin
  import pagesMixin from "~/mixins/pagesMixin.js";

  export default {
      mixins: [pagesMixin],
      components: { ComponentWrapper }
  }
</script>
The first approach used to load the components in ComponentWrapper was to create them on the fly.
// components/ComponentWrapperDynamic.vue
<template>
    <section-item :index="staticIndex">
        <component :is="componentFile" :options="options" :index="staticIndex"></component>
    </section-item>
</template>
[...]
    computed: {
        loader() {
            if (!this.file) {
                return null
            }

            if (!Vue.options.components[this.fileName]) {
              Vue.component(
                this.fileName,
                () => import(`./${this.folderName}${this.fileName}.vue`)
              );
            }

            return Vue.options.components[this.fileName]
        }
    },
    mounted() {
        this.loader()
          .then(() => {
              this.componentFile = () => this.loader()
              // Singleton counter uses to alternate the style in SectionItem
              this.staticIndex = Vue.prototype.componentIndex > 0 || this.file !== 'info' ? ++Vue.prototype.componentIndex : Vue.prototype.componentIndex=1
              this.isLoaded = true
          })
          .catch(() => {
              [...]
          })
    }
Adding a new component will add it directly on the page, without any change in the component.
As disadvantage, each component is mounted once the page is mounted. It implies the html is generated each time the user access the page and not only once during the Nuxt build generation step.
Second try, less dynamic, consists to load first all the components linked to the FRESH schema properties and to bind them by name.
As advantage, the cv page is fully generated during the build.
// components/ComponentWrapper.vue
<template>
    <section-item :index="staticIndex">
        <component :is="componentFile" :options="options" :index="staticIndex"></component>
    </section-item>
</template>
<script>
  import Vue from 'vue';
  import SectionItem from "~/components/SectionItem.vue";
  import ContactItem from "~/components/cv/ContactItem.vue";
  import EducationItem from "~/components/cv/EducationItem.vue";
  import EmploymentItem from "~/components/cv/EmploymentItem.vue";
  import InfoItem from "~/components/cv/InfoItem.vue";
  import InterestsItem from "~/components/cv/InterestsItem.vue";
  import LanguagesItem from "~/components/cv/LanguagesItem.vue";
  import ProjectsItem from "~/components/cv/ProjectsItem.vue";
  import SkillsItem from "~/components/cv/SkillsItem.vue";
  import TestimonialsItem from "~/components/cv/TestimonialsItem.vue";

  export default {
    name: 'ComponentWrapper',
    components: { SectionItem, ContactItem, EducationItem, EmploymentItem, InfoItem, InterestsItem, LanguagesItem, ProjectsItem, SkillsItem, TestimonialsItem  }
    [...]
    computed: {
      fileName() {
        return `${this.file.charAt(0).toUpperCase()}${this.file.slice(1)}Item`
      },
      componentFile() {
        if (this.$options.components[this.fileName]) {
          return this.fileName
        }
        else {
          return false
        }
      }
    }
  }
</script>
The SectionItem component adds an alternate diagonal layout, which can be easily modified or removed.
The concept is based on this article.
Markdown posts
Nuxt, by default, generates only the routes found in the "pages" directory, but it doesn’t generate every dynamic pages, only the index.
A solution is
- For all languages, list all the posts from the folder "staticMarkdowns/contents" and transform them as paths (language/posts/filename)
// nuxt.config.js
var glob = require('glob')
let locales = [
  {
    code: 'fr',
    name: 'Français',
    file: 'fr.json'
  },
  {
    code: 'en', // Default locale is the last one! We don't have the code for this one in the url. Set it in i18n.defaultLocale
    name: 'English',
    file: 'en.json'
  }
]
let files = locales.map(locale => {
  return glob.sync('**/*.md', { cwd: `staticMarkdowns/contents/${locale.code}` })
    .map(d => (locale.code != locales[locales.length-1].code ? `/${locale.code}/posts/` : '/posts/') + d.substr(0, d.lastIndexOf('.')))
}).reduce((acc, val) => acc.concat(val), [])
- Edit the generate object in nuxt.config.js to add the new routes
// nuxt.config.js
module.exports = {
  [...]
  generate: {
    routes: files
  }
  [...]
}
- Let’s modify the configuration file to read the Markdown files using the raw-loader in order to avoid any manipulation of the output. The added libraries are frontmatter-markdown-loader, nuxtjs/markdownit and markdown-it-attrs. I didn't find how to transform the markdown and its attributes at the same time at this place, so I move this part in the dedicated page.
// nuxt.config.js
module.exports = {
  [...]
  build: {
    extend(config, ctx) {
      config.module.rules.push({
        test: /\.md$/,
        use: ['raw-loader']
      });
    }
  }
  [...]
}
- In pages/posts/_slug/index.vue, we transform the markdown and use its attributes to populate the page. During the Nuxt build generation, the generator tries to create a static page for all the new routes (language/posts/filename as fixed previously). The "_slug" parameter contains the filename of markdown and is used to load the file.
// pages/posts/_slug/index.vue
<template>
  <div class="title">
    {{attribute.title}}
  </div>
  [...]
  <div v-html="post" id="post"></div>
</template>

<script>
  const MarkdownIt = require('markdown-it')
  const fm = require("front-matter")
  const md = new MarkdownIt({
      html: true, // Enable HTML tags in source
      typographer: true,
    // injected: true,
      breaks: true, // Convert '\n' in paragraphs into <br>
      linkify: true // Autoconvert URL-like text to links
  })
  .use(require('markdown-it-attrs'))

  export default {
    [...]
    async asyncData({ app }) {
      let post = null
      let attribute = null
      const fileContent = require(`~/staticMarkdowns/contents/${app.i18n.locale}/${app.context.params.slug}.md`)
      let res = fm(fileContent.default)
      post = md.render(res.body)
      attribute = res.attributes

      return {
        post,
        attribute
      }
    }
  }
</script>
Text to speak
This feature was added for all articles from the "projects" page, by the shared "textToSpeechMixin" mixin.
Once the component is mounted, we clone the decoded markdown and filter the parts which don't need to be listened (e.g.: code blocks).
// pages/posts/_slug/index.vue
import textToSpeechMixin from "~/mixins/textToSpeechMixin.js";

export default {
  mixins: [textToSpeechMixin],
  mounted() {
    let postItem = document.getElementById("post").cloneNode(true)
    for(let i=0; i < postItem.children.length; i++) {
      if(postItem.children[i].localName == 'pre') {
        postItem.removeChild(postItem.children[i])
      }
    }
    this.text = postItem.innerText.match(/\w+/g)
    [...]
  }
}
All the magic is done by the SpeechSynthesis interface, by passing a SpeechSynthesisUtterance as parameter to its method speak.
The current progress is shown and can be changed by a slider.
If it's manually changed, the text to speak is reduced following the position of the slider (data.progress).
We save the current progress in offsetProgress and add it to the new current progress unless the user will see a progress starting at 0.
// mixins/textToSpeechMixin.js
window.speechSynthesis.cancel()
[...]
this.offsetProgress = data.progress > 0 ? data.progress : 0
this.progress = 0
this.textLength = data.text.length

if (this.offsetProgress > 0) {
  let index = data.text.lastIndexOf(' ', this.offsetProgress)
  data.text = data.text.slice(index)
}

let speaker = new SpeechSynthesisUtterance(data.text)
speaker.onboundary = (e) => {
  if ( e.name == 'word' ) {
    this.progress = e.charIndex
  }
}
The getVoices method returns all the available voices on the current device. We just take the first available for the current page language.
// mixins/textToSpeechMixin.js
speaker.voice = window.speechSynthesis.getVoices().filter(i => i.lang.startsWith(this.$i18n.locale))[0]
Just use the speak method to start, and the cancel method to stop it.
// mixins/textToSpeechMixin.js
window.speechSynthesis.speak(speaker)
Installation
You can generate manually the output (npm run gen) or if you are "lazy" like me, you can use the deployment pipeline offered by some providers like Netlify.
Some other providers are Heroku or GitHub pages.
How to deploy on Netlify?
Nuxt has an easy documentation for Netlify, so I'll just copy/paste the parts concerning my website.
Press the "New site from Git" button on the Netlify dashboard. Authenticate with your repository host, select a repository to deploy, and continue. You should land on step 3: "Build options, and deploy!"
For the configuration:
- Branch to deploy: master
- Build command: npm run gen
- Publish directory: dist
Add environment variables
Netlify manages the environment variables that I use in nuxt.config.js.
Just go in your site dashboard under Settings > Build & deploy > Environment > Environment variables and add them.
Current metadata (all are optional):
- STATIC_FORM_KEY: Used to set your contact form key for Staticforms.
- GOOGLE_VERIFICATION: Used to submit your website to the search engine of Google under the metadata 'google-site-verification'.
- MS_VERIFICATION: Used to submit your website to the search engine of Microsoft under the metadata 'msvalidate.01'.
For the last two, you can also provide the automatically generated sitemap (your_website_url/sitemap.xml).
Conclusion
Congratulations if you reach this point!
Feel free to fork it, to reuse the website with your resume or to modify it, just notify me because I'm curious to have a look at your version.
If you find bugs or you make some improvements, just post a pull request. I'll really appreciate it.
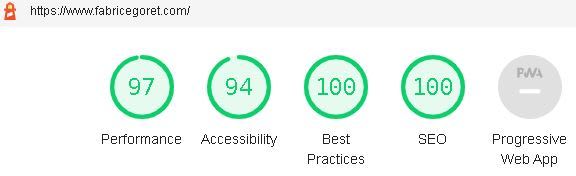
The last Lighthouse test is not bad:

Latest comments (2)
Thank you for sharing
You're welcome.