
Drag and Drop is an adored web feature implemented in many modern web applications. The list is endless, from cloud storage services like Google Drive and Dropbox to project management tools like Jira and Trello. As automation testers, it is our duty to leave no feature of our application untested. But often, it is tricky to automate a feature with complex user interaction like Drag and Drop.
Fortunately, the popular automation testing tool Selenium WebDriver offers functionality to easily automate dragging a web element from one part of the site and dropping it at another. In this article on how to implement drag and drop in JavaScript, we will learn how to write automation test code for the Drag and Drop feature using Selenium JavaScript.
Let’s get started!
What is Drag and Drop Action?
Let us begin by understanding what exactly is the Drag and Drop operation in HTML.

The drag and drop action is a GUI-based software feature done with the help of a mouse. This feature enables us to “hold” an element, “drag” it to a different location or onto another virtual object and “drop” it to the target location. In HTML, any element can be dragged and dropped.
The workflow of a typical drag and drop feature is as follows:
The element of interest, which is to be dragged and dropped, must be visible on the screen.
The user initiates interaction by acquiring the item. The selection technique can be a mouse click.
Keeping the item selected, the user moves the pointing device (mouse) to the desired location or target through continuous press or “drag.”
Once the desired location or target is reached, the user lets go of the item, and it is now “dropped.”
Drag and Drop is a part of many user interfaces we use every day. Some common examples are:
Uploading a file to a web application (Eg: Google Drive)
Moving a file from one folder to another (Eg: Gmail )
Reordering, Resizing, and Grouping of objects (Eg: JIRA, Trello)
Rearranging browser tabs (Eg: Chrome, Firefox)
How to implement Drag and Drop in JavaScript?
We can automate the Drag and Drop operation by leveraging the Actions class in Selenium provided by the Selenium WebDriver API. The actions class supports two methods, using which we can drag and drop an element. They are
dragAndDrop method
dragAndDropBy method
In addition to these two methods, we can also make use of the following Actions class method to achieve drag and drop automation. They are:
moveByOffset method
moveToElement method
Before we get deeper into how to implement drag and drop in JavaScript, let us understand more about the Actions class itself.
What is the Actions class in Selenium?
The WebElement commands need no introduction, and they help us identify a WebElement and perform various actions on it. Most basic user interactions like clicking on a button or entering text to an input field can be achieved using the WebElement commands.
Some popular commands are:
WebElement.click() — to click on a web element
WebElement.sendKeys() — to enter text to a field
WebElement.submit() — to submit a form etc.
However, if you need to perform complex interactions like Drag and Drop Double-click, or Click and Hold an element, they cannot be achieved using simple WebElement commands alone. And this is where the Actions class comes into the picture.
The official documentation describes the Actions class as:
“The user-facing API for emulating complex user gestures. Use this class rather than using the Keyboard or Mouse directly.”
In short, to automate advanced keyboard-based or mouse-based actions in Selenium, you need to utilize the Actions class in Selenium. The methods within the Actions class can be divided into two main categories:
Keyboard Events — keyDown(), keyUp(),sendKeys(), etc.
Mouse Events — dragAndDrop(), dragAndDropBy(), moveByOffset(), moveToElement() etc.
The various actions supported by the actions class are:

Syntax for Drag and Drop in Selenium
At the beginning of this section on JavaScript drag and drop, we learned that the Actions class supports two methods that enable the automation of the drag and drop action. Now, let us study them in detail, along with the syntax required to perform the action.
- dragAndDrop method
This method is used to perform a Drag and Drop operation where you need to left-click on an element, hold it and drag it to the desired target location and drop it.
Syntax:
Actions.dragAndDrop(WebElement source, WebElement target)
This method accepts two parameters:
*source *— the web element which we need to click and start the drag
target — the web element on which we need to drop the source element
To find the source and target element, we can use any locator strategy.
driver.findElement(Any By strategy & locator)
2. dragAndDropBy method
This method is used to perform Drag and Drop operations in Selenium using x and y offsets. The source element will be dragged and dropped at the location specified via the x-axis and y-axis offsets in pixels.
Actions.dragAndDropBy(WebElement source, int xOffset, int yOffset)
This method accepts three parameters:
*source *— the element which we need to click and start the drag
xOffset — x-axis pixel value which defines the horizontal movement of the source element
*yOffset *— y-axis pixel value which defines the vertical movement of the source element
Again, to find the source element, we can use any locator strategy.
driver.findElement(Any By strategy & locator)
The dragAndDropBy() works similar to the dragAndDropBy(), but the only difference is that dragAndDropBy() moves the source element to the offsets and not to any target element.
Finally, once the dragAndDrop() or dragAndDropBy() method is defined with parameters, the perform() method needs to be invoked for performing the action.
Actions.dragAndDrop(WebElement source, WebElement target).perform();
OR
Actions.dragAndDropBy(WebElement source, int xOffset, int yOffset).perform();
Alternatively, we can also achieve drag and drop automation by clicking and holding an element, **moving *it to the target position, and then *releasing **it. To execute this operation sequence, we will be making use of the following methods from the Actions class.
clicking and holding a web element via clickAndHold()
moving to the target location via moveToElement() or moveByOffset()
release mouse button at target position via release()
Let us check out them in detail, along with the syntax below.

3. moveToElement method
This method is used to move the mouse to a specified web element. We can also move a draggable web element using this method.
Syntax:
Actions.clickAndHold(WebElement source).moveToElement(WebElement target).release().perform();
The web element which we desire to click and hold is passed to the clickAndHold()
Then, we move the mouse pointer to the target web element specified within in moveToElement()
Then, we release the element from the mouse button hold using release().
Finally, we invoke the perform() for performing this chain of actions currently built.
4. moveByOffset method
This method is used to move the mouse to the specified offset of the last known mouse coordinates. On the initial page load, the mouse coordinates will be (0,0). We can also move a draggable web element using this method.
Syntax:
Actions.clickAndHold(WebElement source).moveByOffset(int xOffset,int yOffset).release().perform();
The web element which we need to click and hold is passed to the clickAndHold()
Then, we move the mouse pointer to the target location by passing the X and Y offsets within in moveByOffset()
Then, we release the element from the mouse button hold using release().
Finally, we invoke the perform() for performing this chain of actions currently built.
Note: With the help of **Import maps**, you can control what URLs get fetched by JavaScript’s import statements and import() expressions.
Syntax for Drag and Drop in JavaScript using Selenium
To work with Selenium using JavaScript drag and drop, we will be making the selenium-webdriver library. Here, the syntax for calling Actions class and the available methods are slightly different. To use the JavaScript drag and drop feature in Selenium automation testing, we will be utilizing the dragAndDrop method.
- dragAndDrop method
This method helps us to configure drag and drop action by passing either the target web element or X and Y offsets.
Syntax:
this.dragAndDrop(WebElement from, WebElement|{x: number, y: number} to ).perform();
The function accepts two parameters:
from — the web element which we need to click and start the drag
*to *— either a web element or offset (in pixel) to mark the target location where the element needs to be dropped.
In the next section of this article on how to implement drag and drop in JavaScript, we will demonstrate writing a test case to automate Drag and Drop in JavaScript using Selenium.
How to write a test case to automate Drag and Drop in JavaScript using Selenium
So far, we have discussed the Actions class and various methods to automate the Drag and Drop feature. Finally, it’s time to get your hands dirty!
In this section of how to implement drag and drop in JavaScript, you will be learning how to drag and drop using JavaScript while performing Selenium test automation.
Prerequisites
I am assuming that the following prerequisites are installed in your system.
Node.js and NPM
Visual Studio Code or any IDE of choice
Note: **Intl.PluralRules API -**API for plural language rules and plural sensitive formatting.
Test Scenario
For this demo, I will be writing the test case for the following simple and straightforward scenario.
Launch the browser.
Go to the Selenium Playground website.
Perform Drag and Drop by selecting the first element and dragging and dropping it on the second element.
Close the browser.

I will be executing the test case on three different browsers — Firefox, Chrome, and Safari — using the online Selenium Grid provided by the LambdaTest cross-browser testing platform. Automation testing tools like LambdaTest gives you access to an online device farm of 3000+ browser, device, and OS configurations helping you to achieve test coverage on the maximum number of browser and OS combinations. On top of that, LambdaTest also supports web testing in the latest Selenium 4.
Steps for Writing the Drag and Drop test case
Now, it’s time to write tests in Selenium WebDriver for automation testing. From project set-up to test execution, I will be walking you through the whole process step by step.
- Using dragAndDrop() by passing source and target web elements
Step 1: Create a new folder for your project. Open the folder location via your IDE (Visual Studio Code) and initialize the project by giving the following command in the terminal.
npm init -y
The project is now initialized, and the package.json file is created in the root folder.
Step 2: Install dependencies
npm install selenium-webdriver
Step 3: **Create a folder named “tests*” within your project root folder. We will be storing all our test cases here. Inside this folder, create your first test case file, “test.js*.”

Step 4: Inside the test.js file, add required imports and configurations to run the test on a cloud grid hosted by LambdaTest.
Create a free account in LambaTest and fetch your unique username and access key.
-
Define the username and access key in your test.js file. Also, define the grid host.
const USERNAME = "YOUR_USERNAME"; //replace with your username
const KEY = "YOUR_ACCESSKEY"; //replace with your access keyconst GRID_HOST = "hub.lambdatest.com/wd/hub";
const gridUrl = "https://" + USERNAME + ":" + KEY + "@" + GRID_HOST;- Make the required imports.
const { Builder, Key, By } = require("selenium-webdriver");
Step 5: Define the test method. Create a function example(), which will be containing your test script. Feel free to provide any function name of your choice.
async function example() {
}
At the beginning of this test method, let us define the required capabilities. To generate your custom desired capability to meet your browser and OS version requirement, make use of the LambdaTest Capabilities Generator.

Here I have set the capability to run my test case in Chrome browser version 91.0 in the windows 10 platform using Selenium 4.
var capabilities = {
      build: "Drag and Drop",
      name: "Drag and Drop",
      platform: "Windows 10",
      browserName: "Chrome",
      version: "91.0",
      selenium_version: "4.0.0",
      chrome.driver: "91.0",
    };
Step 6: Now, let us write our test script inside our test method using Selenium and JavaScript. I am making use of the dragAndDrop() and passing source and target web elements to achieve the drag and drop action here.
//To wait for browser to build and launch properly
    var driver = await new Builder()
      .usingServer(gridUrl)
      .withCapabilities(capabilities)
      .build();

    //To launch the website
    await driver.get(
      "[https://www.lambdatest.com/selenium-playground/drag-and-drop-demo](https://www.lambdatest.com/selenium-playground/drag-and-drop-demo)"
    );

    //To locate the source and target elements
    let draggable = driver.findElement(By.id("draggable"));
    let droppable = driver.findElement(By.id("droppable"));

    //To perform drag and drop operation
    await driver.actions().dragAndDrop(draggable, droppable).perform();

    //To verify drop success/fail by validating the text inside target element
    let targetText = await droppable.getText();
    if (targetText === "Dropped!") {
      console.log("PASS: Source is dropped at location");
    } else {
      console.log("FAIL: Source is not dropped at location");
    }


    //It is always a safe practice to quit the browser after execution
    await driver.quit();
Our final code looks like this.
const USERNAME = "YOUR_USERNAME"; //replace with your username
const KEY = "YOUR_ACCESSKEY"; //replace with your access key

const GRID_HOST = "hub.lambdatest.com/wd/hub";
const gridUrl = "https://" + USERNAME + ":" + KEY + "@" + GRID_HOST;

const { Builder, Key, By } = require("selenium-webdriver");

async function example() {
  try {
    var capabilities = {
      build: "Drag and Drop",
      name: "Drag and Drop",
      platform: "Windows 10",
      browserName: "Chrome",
      version: "91.0",
      selenium_version: "4.0.0",
      chrome.driver: "91.0",
    };

    //To wait for browser to build and launch properly
    var driver = await new Builder()
      .usingServer(gridUrl)
      .withCapabilities(capabilities)
      .build();

    //To launch the website
    await driver.get(
      "[https://www.lambdatest.com/selenium-playground/drag-and-drop-demo](https://www.lambdatest.com/selenium-playground/drag-and-drop-demo)"
    );

    //To locate the source and target elements
    let draggable = driver.findElement(By.id("draggable"));
    let droppable = driver.findElement(By.id("droppable"));

    //To perform drag and drop operation
    await driver.actions().dragAndDrop(draggable, droppable).perform();

    //To verify drop success/fail by validating the text inside target element
    let targetText = await droppable.getText();
    if (targetText === "Dropped!") {
      console.log("PASS: Source is dropped at location");
    } else {
      console.log("FAIL: Source is not dropped at location");
    }

    //It is always a safe practice to quit the browser after execution
    await driver.quit();

  } catch (err) {
    handleFailure(err, driver);
  }
}

example();

function handleFailure(err, driver) {
  console.error("Something went wrong!\n", err.stack, "\n");
  driver.quit();
}
Additionally, I have added a try-catch block for error handling. Also have provided the function call to execute the method on run command.
Step 7: Execute the test. Make sure you are in the right folder and give the following command in the terminal.
node test.js
The test.js file starts executing, and you can observe your live test running status on your LambdaTest Dashboard along with a detailed report containing video and logs.

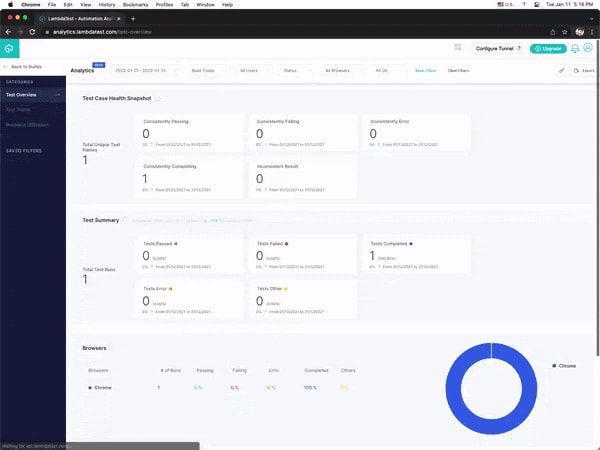
LambdaTest helps you track the state of your automated tests by showing a clear view of the tests that have passed, failed, and are still in progress. You can go through LambdaTest Analytics to help you gain insight into your automated testing efforts.
Similarly, you can run your test case in multiple browsers by defining the appropriate capabilities in your test file.
-
Firefox browser
var capabilities = {
build: "Drag and Drop",
name: "Drag and Drop",
platform : "Windows 10",
browserName : "Firefox",
version : "86.0",
selenium_version : "4.1.0",
driver_version : "v0.36.0"
};- Safari browser
var capabilities = {
build: "Drag and Drop",
name: "Drag and Drop",
platform: "MacOS Monterey",
browserName: "Safari",
version: "15.0",
selenium_version: "4.0.0",
driver_version: "v0.36.0",
};

- Using dragAndDrop() by passing X and Y offsets
In the above section of this article on how to implement drag and drop in JavaScript, we passed the source and target elements to drag and drop. Now, let us see the code to automate drag and drop by passing x and y offset values.
The updated code for the test method is as below:
var driver = await new Builder()
      .usingServer(gridUrl)
      .withCapabilities(capabilities)
      .build();

    //To launch the website
    await driver.get(
      "[https://www.lambdatest.com/selenium-playground/drag-and-drop-demo](https://www.lambdatest.com/selenium-playground/drag-and-drop-demo)"
    );

    //To locate the source elements
    let draggable = driver.findElement(By.id("draggable"));

    //To perform drag and drop by offset
    await driver.actions().dragAndDrop(draggable, { x: 50, y: 50 }).perform();

    await driver.quit();
You can also go through the Selenium JavaScript Tutorial to dive deep into how Selenium WebDriver with JavaScript can be used for automated testing of web applications.
Note: Using JSON.stringify() and **JSON.parse**(), you can convert JavaScript objects to JSON strings and JSON strings back to JavaScript objects.
Conclusion
Selenium WebDriver provides Actions class, which can be leveraged to automate complex user interactions in the browser like Drag and Drop. In this JavaScript drag and drop tutorial, we explored what is Actions class in Selenium is and how to implement drag and drop in JavaScript while performing Selenium automation testing. Hoping this blog turned out to be beneficial.
Happy Testing!

Top comments (0)