I’ve had more opportunities to work on the server-side of things these past couple of months, specifically in Node.js, and Glitch has been an integral part of my learning process.
A recent project I’ve been tinkering with was a good use case for me to familiarise myself with the actual implementation of a site that works without Javascript, but is enhanced by Javascript when it is available.
There are numerous articles that talk about the benefits of progressive enhancement, all of which I agree with, but as someone who hadn’t had to worry too much about the server-side implementation of things, I had not written server-side code that catered for it before.
This will be a write-up of my thought process and implementation details of my approach to progressive enhancement on a very small Koa.js to-do list application.
Disclaimer, this is not the prettiest code, odds are its not entirely best practice either. But it’s a start, and can only get better from here.
A basic Koa.js application on Glitch
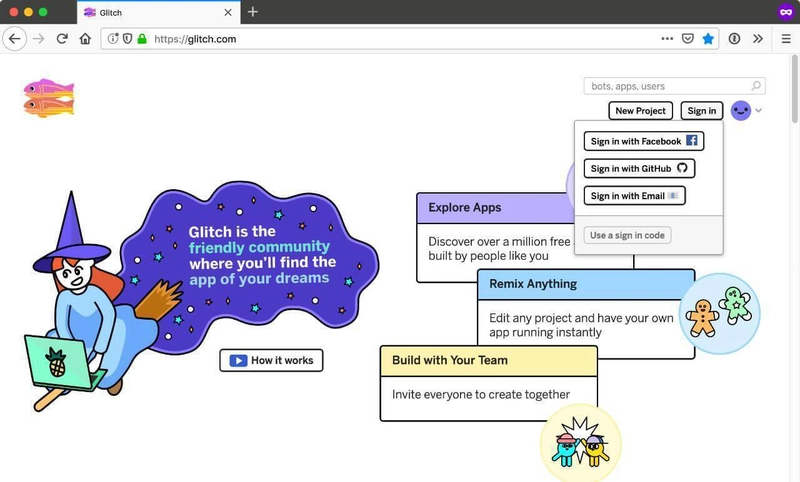
If you’re already using Glitch, please skip all this. For people who have yet to discover the amazing platform that is Glitch, when you first land, you can choose what type of project you want to build. There are 3 presets, a simple website (no backend), a Node application and a Node application with a SQlite database. I went with the second option.

If you’d like to make sure your project persists, it’s a good idea to sign up for a Glitch account. Glitch has been making feature improvements fairly frequently, so this may change if you’re reading far into the future, but as of time of writing, they support sign in via Facebook, GitHub, Email or sign-in code.
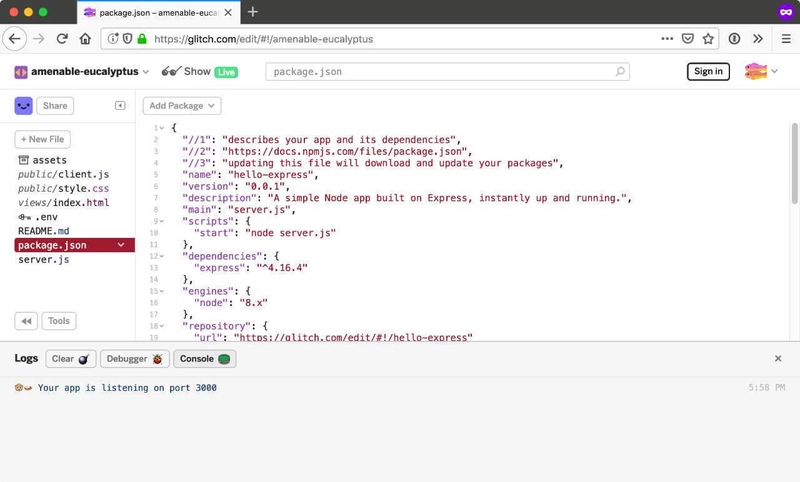
By default, Node applications on Glitch run on Express, which is totally fine. I chose to use Koa.js for my project, so there are a couple more steps to go through for that.

If you click on Tools at the bottom left of the screen, you will bring up some options, like Logs, Console, Container Stats and so on.

Logs is great to have open when developing your application because everything you console.log() shows up here.
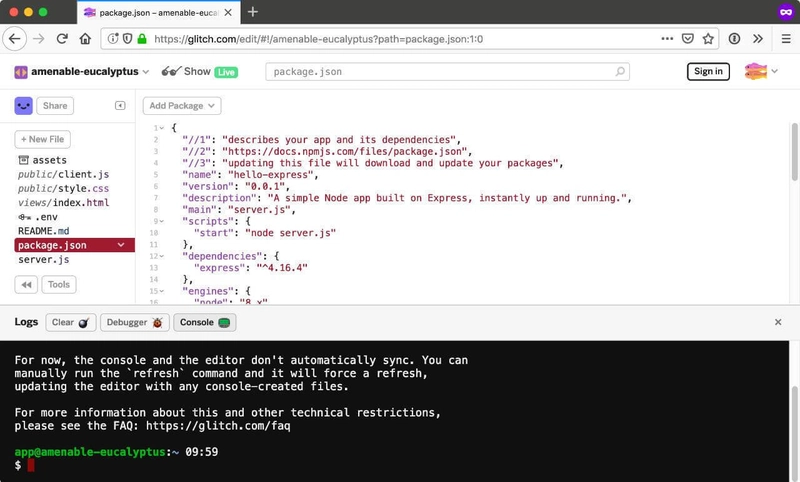
To customise the npm modules you want to use in your project, you can access the command line as you would your local machine or remote server. One thing to note is that instead of npm, Glitch uses pnpm as the package manager.
Remove express by running the following:
pnpm uninstall express
Then, install Koa.js by running the following:
pnpm install koa --save
To verify the npm modules being used in your project, you’ll have to refresh the environment:
refresh
Once you’ve done that, you should see an “Error” indicator next to Tools. That’s fine because in the server.js file, you are requiring the Express framework which is no longer there.
The next thing to do is to rewrite basic server code to use Koa.js. You can do that yourself or paste the following code into your newly created file.
const Koa = require('koa')
const port = process.env.PORT || 3000
const app = new Koa()

app.use(async ctx => {
  ctx.body = 'Hello Dinosaur 🦖'
})

const listener = app.listen(port, function() {
  console.log('Your app is listening on port ' + listener.address().port)
})
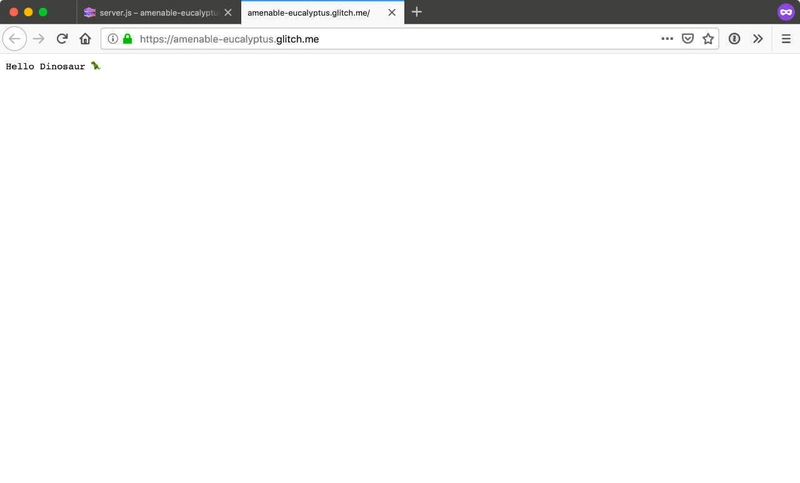
If all went well, clicking on the Show button on the top nav bar should trigger your application in a new window with the text, “Hello Dinosaur 🦖”.
Libraries used
Koa.js is the framework behind the application, for serving, routing, handling of API requests and responses etc. As the core Koa.js framework is rather barebones, various middlewares have to be added where needed. For this project I added the following:
-
koa-staticfor serving static assets -
koa-bodyparserfor handling data sent over via POST requests -
koa-routerfor routing -
koa-viewsfor rendering nunjucks templates (also requires nunjucks to be installed)
Nunjucks is the templating engine for rendering data on the frontend, while lowdb is a very simple JSON database, great for prototypes like this application. All the database related functions can be easily swapped out for another more “serious” database.
Serving static assets
const serve = require('koa-static')
app.use(serve('./public'))
This is probably going to be the least complicated bit to cover, the serving of static assets like CSS and client-side Javascript from the /public folder.
Basic routing and rendering
HTML files can be rendered with koa-views, which provides a render() function. I also configured the application to map .html files to use Nunjucks templating engine. The database-related functions will be covered in the next section.
const Router = require('koa-router')
const views = require('koa-views')
const router = new Router()

app.use(views('./views', { map: { html: 'nunjucks' }}))

router.get('/', (ctx, next) => {
  // Function to get items from database
  const items = dbGetItems()
  return ctx.render('./index', { items: items })
})

router.get('/clear', (ctx, next) => {
  dbClear()
  ctx.response.redirect('/')
})

app.use(router.routes()).use(router.allowedMethods())
For things to work without client-side Javascript, I used HTML forms to collect user input. This meant some POST routes had to be set up as well. To update the page after a form submission, I included a ctx.response.redirect() to refresh the page and render the updated contents.
/* This should appear before any routes */
app.use(bodyParser())

router.post('/add', (ctx, next) => {
  const payload = ctx.request.body
  // Function to add task to database
  dbAddTask(payload)
  ctx.status = 200
  ctx.response.redirect('/')
})

router.post('/update/:id', async (ctx, next) => {
  const id = ctx.params.id
  dbUpdateTask(id)
  ctx.status = 200
  ctx.response.redirect('/')
})
koa-router also provides a way to access URL parameters via ctx.params, and I make use of this to find the corresponding database entry for updating.
Interacting with the database
For this to-do list, the tasks will be stored in a database to be retrieved for rendering on the frontend, and updated accordingly as tasks are completed. I’m using lowdb here, but the code can be swapped out for any database of your choice.
const low = require('lowdb')
const FileSync = require('lowdb/adapters/FileSync')
const lodashId = require('lodash-id')

const adapter = new FileSync('.data/db.json')
const db = low(adapter)

/* Initial database setup */
db._.mixin(lodashId)
db.defaults({ items: [] }).write()
My to-do list had only 4 database operations, a function for adding a new task , a function for retrieving all tasks , a function for updating a task and a function for clearing the entire database.
function dbAddTask(data) {
  return db
    .get('items')
    .insert({ task: data.task })
    .write()
  console.log('New user inserted in the database')
}

function dbGetItems() {
  return db.get('items').value()
}

function dbUpdateTask(id) {
  db.get('items')
    .find({ id: id })
    .assign({ status: 'Done' })
    .write()
}

function dbClear() {
  db.get('items')
    .remove()
    .write()
  console.log('Database cleared')
}
At this point, the application is pretty much working. You can add a new task by submitting a form that posts to the /add endpoint, update a task status by posting to the /update/:id endpoint and the page will refresh to load the updated content.
Adding the client-side Javascript
If you don’t want a refresh every time a task is added or updated, then some Ajax will be required. I’m using Fetch for this, but you can use something else if you want.
For example, when adding a new task, I hijack the normal form submission and use Fetch to send a POST request with a JSON payload to the /add route instead.
const addItemForm = document.getElementById('addItemForm')
const addFormHandler = event => {
  event.preventDefault()
  const data = formToJson(addItemForm.elements)
  addItem(data)
  addItemForm.querySelector('input[name="task"]').value = ''
}
addItemForm.addEventListener('submit', addFormHandler, false)

const addItem = data => {
  fetch('/add', {
    method: 'post',
    headers: {
      'Content-Type': 'application/json'
    },
    body: JSON.stringify(data)
  })
  .then(function(res) { return res.json() })
  .then(function(data) { renderItemTable(data) })
  .catch(function(error) { console.log(error) })
}
Here I’m using an utility function, formToJson() to grab the form values and format them into a JSON object. I’m also parsing the response data into a table with the renderItemTable(data) function.
const renderItemTable = data => {
  const tableContent = document.getElementById('itemList')
  if (tableContent.children.length === 1) {
    tableContent.innerHTML = itemTableMarkup
    const itemRows = document.getElementById('itemRows')
    const newRow = document.createRange().createContextualFragment(renderItemRow(data))
    itemRows.appendChild(newRow)
  } else {
    const itemRows = document.getElementById('itemRows')
    const newRow = document.createRange().createContextualFragment(renderItemRow(data))
    itemRows.appendChild(newRow)
  }
}
If there are no tasks in the database, the table headers have to be generated in addition to the new task. For subsequent tasks, they can be appended to the table accordingly. Template literals makes the markup generation much easier.
const itemTableMarkup = `
  <div class="table">
    <div class="thead">
      <div class="tr">
        <div>#</div>
        <div>Task</div>
        <div>Status</div>
      </div>
    </div>
    <div class="tbody" id="itemRows">
    </div>
  </div>
  <a class="btn" href="clear">Clear database</a>
`

const renderItemRow = data => {
  const item = data.item
  const index = data.count
  return `
    <form class="tr jsItem" method="post" action="update/${item.id}" data-id=${item.id}>
      <div>${index}</div>
      <div>${item.task}</div>
      <div class="status-cell">
       ${(status => {
         if(status)
           return 'Done'
         else
           return `<button class="jsItemDone">Mark done</button>`
         })(item.status)
       }
      </div>
  </form>
  `
}
On the server-side of things, the response is slightly different depending on whether AJAX is used or not.
router.post('/add', (ctx, next) => {
  const payload = ctx.request.body
  const contentType = ctx.request.header['content-type']
  const nonAjax = contentType.includes('www-form')
  const newItem = dbAddTask(payload)
  ctx.status = 200

  if (nonAjax) {
    ctx.response.redirect('/')
  } else {
    const itemCount = dbItemCount()
    const resData = JSON.stringify({
      item: newItem,
      count: itemCount
    })
    ctx.body = resData
  }
})
I’m using the Content-Type header as the identifier to differentiate whether the request was made via AJAX or not. Not sure if this is the proper way of doing things, but it sort of works? A default form submission would have the application/x-www-form-urlencoded header, so…
Wrapping up
This was a tiny project, but because of how small its scope was, it made it easier for me to dig into what was absolutely neccessary, then figuring out which libraries I needed to help me get the job done. (You don’t see it but it took me a long time to figure out koa-views plus koa-router plus koa-static working together)
I found that HTML out-of-the-box takes care of a lot of things when it comes to collecting user inputs from the front-end, which resulted in much less code required. This is not to say client-side Javascript is bad, because the experience was smoother (and faster) when I used it for updating content.
The entire project is up on Glitch if you’re interested in the full code I used to make the application work. Feel free to poke around, remix it and make it better.

P.S. I am a Glitch fangirl. I’m not ashamed. Give it a try, you might love it too. 🙃

Top comments (0)