Tutorial - Elastic Compute Cloud (EC2)
Creating EC2 instances from zero

What is EC2?
In a few words EC2 or Amazon Elastic Compute Cloud is a virtual machine that contains an AMI (image with a selected OS with all the needed configurations) with EC2 you could create instances related to specific tasks or resources, for example, you could easily configure an EC2 with an AMI for data processing, for GPU computing or simple ones to just run web applications.
EC2 could be seen as a virtual server where you are able to run your applications.
In its features we could find:
Global infrastructure
Pay as you use it
Storage
Networking
Optimization
Maintenance
etc.
If you want to learn more about the specifications you can visit the official page of AWS EC2 https://aws.amazon.com/ec2/features/
Creating an EC2 instance
Cool, now that we know a bit about what this service is, the next step is to start with our practical example.
Steps to follow:
Configure VPC.
Configure a public subnet.
Configure the internet gateway.
Create the EC2 instance.
Configure a VPC
A VPC is a private network that we have in our cloud, is similar to having a physical network like you could do in your office to connect your servers but now at the logic level in the cloud.
Let us start.
The first thing is to go to our AWS console and in the services choose VPC to go to the VPC dashboard.
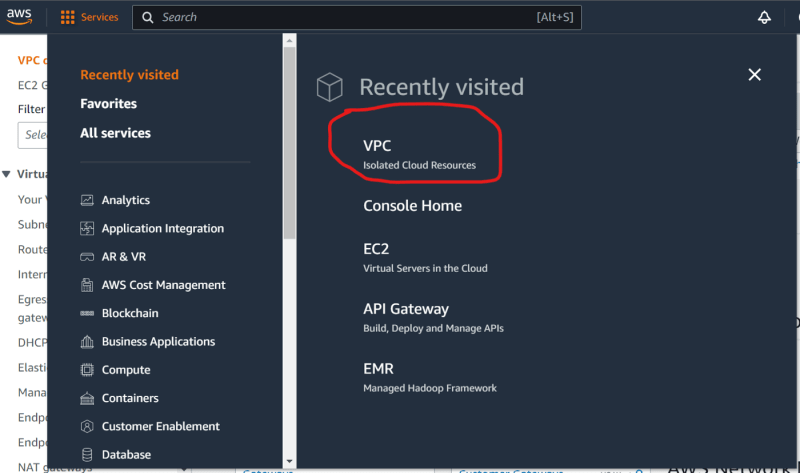
There we going to see the option create VPC Click it to start creating a new one.
It will display a form like the following:
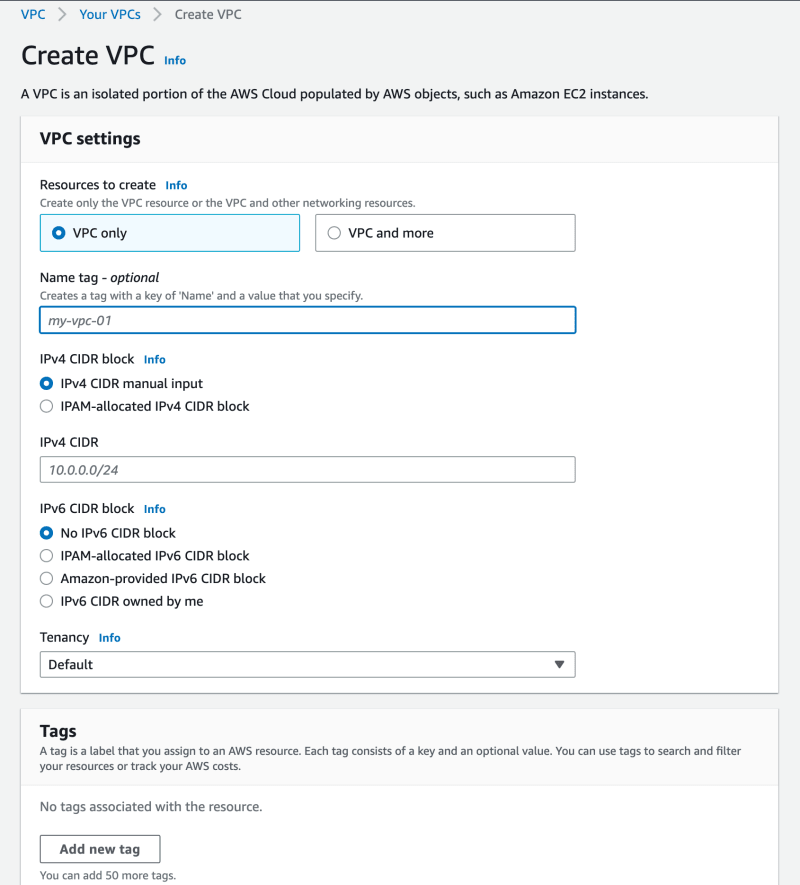
I will share with you the configurations used to create the new one:
First part:
Give a name, example VPCMediumTutorial
Give the CIDR range. In this case, we can use 10.0.0.0/16
The option for IPv6. Choose No IPv6 CIDR block
Tenancy. Keep it with the default value

Scroll down to the following section:
The following options should be enabled:
Enable DNS hostnames
Enable DNS resolution
In tags, you can define a tag to identify the VPC by example the env for deployments, etc. In this case, I used medium_tutorial as a value

Then click on create , a message will be displayed:

Now you can see the VPC details in Your VPCs panel:
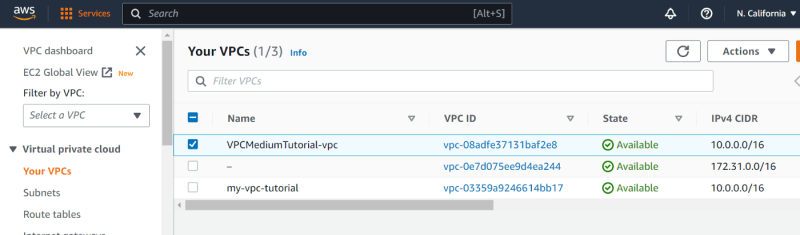
Choose the created one and a page like this will be shown

Configure the public subnet
What is a public subnet?, A public subnet is a subnet within a VPC that has an Internet Gateway route and whose instances have a publicly accessible IP address from the Internet. Public subnets are commonly used to host internet-facing resources, such as web servers or public databases.
Once we have created our VPC is time to add a public subnet, to do that you can take base the following steps:
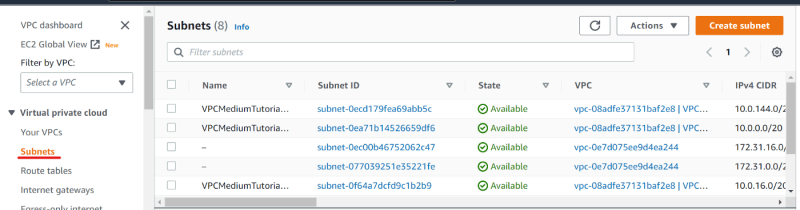
In the left pane choose subnets that will take you to the following page:
Click on create, then Choose the VPC that we created in the previous section.
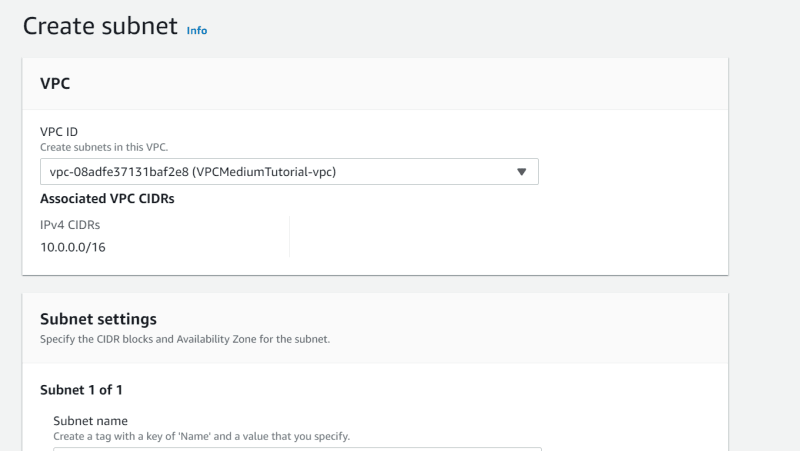
Then start to add the configurations for the public subnet, like is shown in the image below:
As you can see we choose the same availability zone of our VPC and for the CIDR we will define (for this tutorial) 10.0.0.0/24.

Click on create. One success message will be displayed and then you going to be able to see the public subnet in the table.
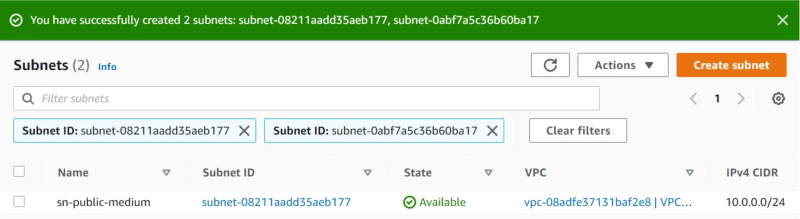
That is for this step.
Configure the internet gateway
The AWS Internet Gateway is an Amazon Web Services (AWS) service that provides a secure and scalable connection between a Virtual Private Cloud (VPC) and the public Internet. Essentially, the Internet Gateway is a virtual gateway that allows bidirectional network traffic between the resources in a VPC and the Internet.
In the left pane choose internet gateways and then provide a name and make click on create.


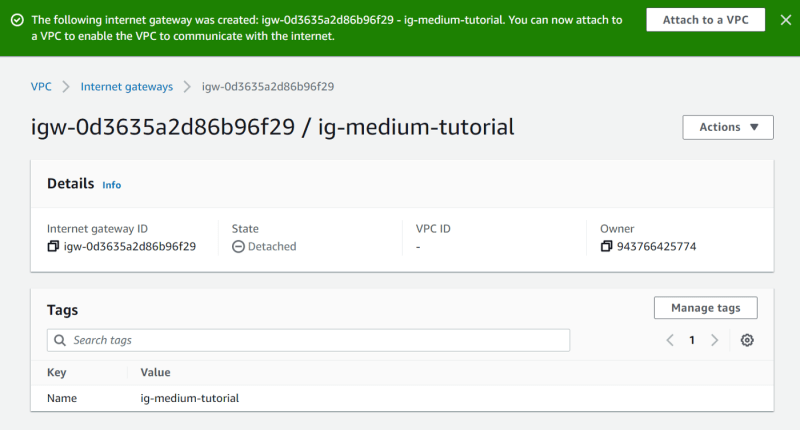
Now we need to attach it to our created VPC. To do that we need to go to actions and then attach to VPC, as is shown in the images below:


Once you attached the internet gateway to the created VPC we need to go to the subnet and make a couple of configurations more.

In the subnets table, choose the one that we created, select the details section make click on the route table:

That action will take you to the following view where you should click on create a route table:

add the following and click on create:


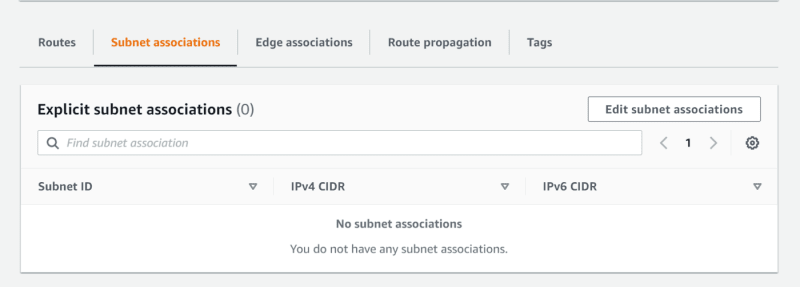
Now we need to add the new route table to our public subnet. To do that go to Edit subnet association and edit it:

In the same view choose routes, we need to add a new internet routing
Click on edit routes and add the following:


Create the EC2 instance
Navigate to EC2 service dashboard
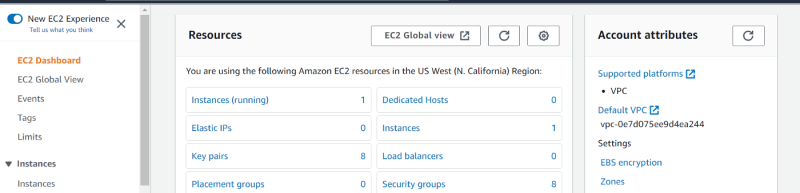
Go to Instances in the left panel, It will take you to the instances view Once there click on the launch instance option:

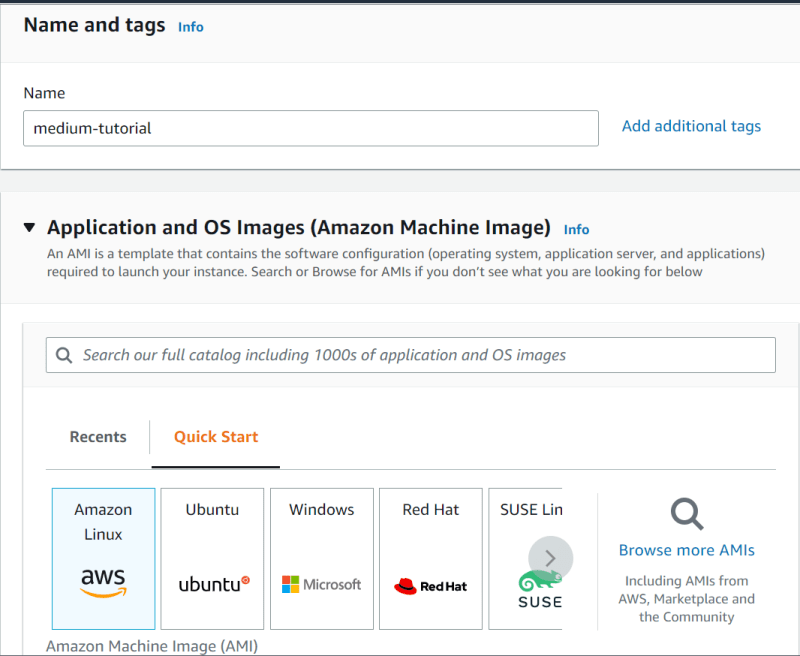
A new view is loaded, here is where we going to configure our EC2 instance.
Give a name, medium-tutorial for example.
Select the AMI, in this case, we will use Amazon Linux.
- Network settings Click on edit in order to add our configurations based on the VPC with internet access. Here we going to choose the one that we created.

- Create a new security group

- Add the security rules
You can take as an example the image below.
In this case, we going to add the configurations needed for:
ssh connection based on your IP address
HTTP connection from anywhere 0.0.0.0/0 ::/0

- **Create a key pair **Use the name medium_tutorial and click create. It will download a .pem file that we going to need to connect by ssh.

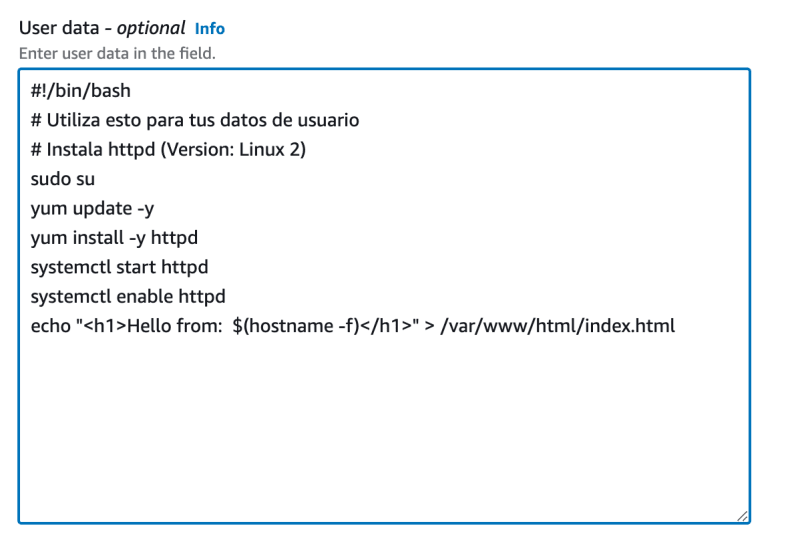
- Add user data on advanced details
Here we going to add the instructions to create a simple server that shows the instance IP, to do that you need to go to advanced details and include the lines below in the user data field
#!/bin/bash
# Utiliza esto para tus datos de usuario
# Instala httpd (Version: Linux 2)
sudo su
yum update -y
yum install -y httpd
systemctl start httpd
systemctl enable httpd
echo "<h1>Hello from:  $(hostname -f)</h1>" > /var/www/html/index.html

Ready, now just make click on create.

Now to these the instance you can click over the instance Id, then copy and paste the Public IPv4 DNS in a browser and you will be able to see something like the following:

Bonus!!!

How to configure the VPC, Subnet, and internet gateway in an easier way?
- Go to VPC dashboard
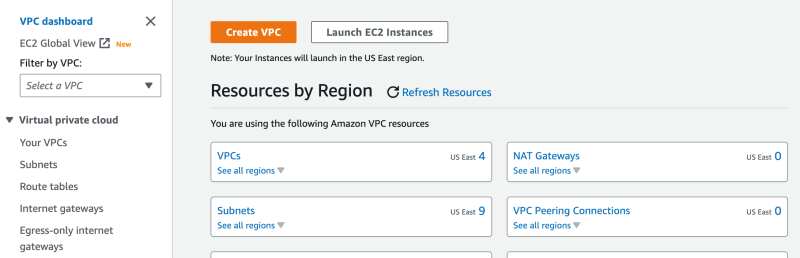
- Click on create VPC
**Configure based on the following images*


As you can see we are adding all the needed basic configurations to generate the VPC, our public subnet, and the internet gateway.
In addition, you can see the configuration in the diagram that is generated based on your selections.

After adding those configurations just click on create and ready your VPC is ready to use.
You can use this option to create the EC2 instance and it should work, and as you can see is easier that the first option that we see in this tutorial.


Top comments (0)