In this tutorial I tried to show how to create windows server ec2 instance in AWS and also I showed how to access that ec2 instance through RDP. If you follow all the instructions step by step, you will be able to create windows server ec2 instance and also will be able to access that machine.
Step 1: Go to your AWS Management Console and select a region where you want to create an instance of Windows machine.

Step 2: Now go to the search bar and type EC2 . Then you will find EC2 service and click on it.

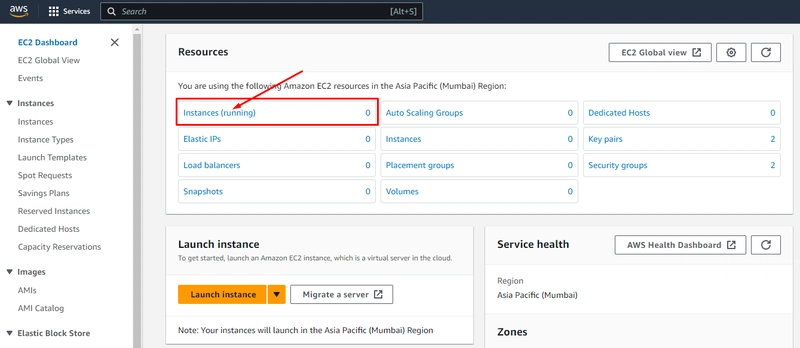
Step 3: You will find EC2 Dashboard like this image and click on instances (running).
Step 4: You will find a window for Launch instances . Now click on Launch instances.

Step 5: Now you will find the Launch an instance page for filling up necessary information for creating a windows server . Follow the below instructions :
→ Provide the name of your windows server. Here I provided a name as “windows-server”.

→ Select your desired windows server. I selected Windows server 2022 and I am using free tier eligible service.

→ Select your desired instance type. I selected t2.micro type which is free.

→ Now you have to create a login key pair for login through RDP (Remote Desktop Connection). Click on “Create new key pair”. And you will find a window.

→ Provide a key pair name. By this key pair you can access your windows server. Now click on “Create key pair” and the key pair will be downloaded. The key pair must save in a secure place.

→ Now Setup your Network settings. Click on the “Edit” button to enable edit option.

→ Now select a VPC . I selected a default VPC (Virtual Private Cloud). Then Select Subnet in your availability zone (or you can create a new subnet). Then Enable “Auto-assign public IP”. Now create a security group or you can use default security group or newly created security group by selecting existing security group option. I created a new security group. Provide a security group name and description as your purpose.

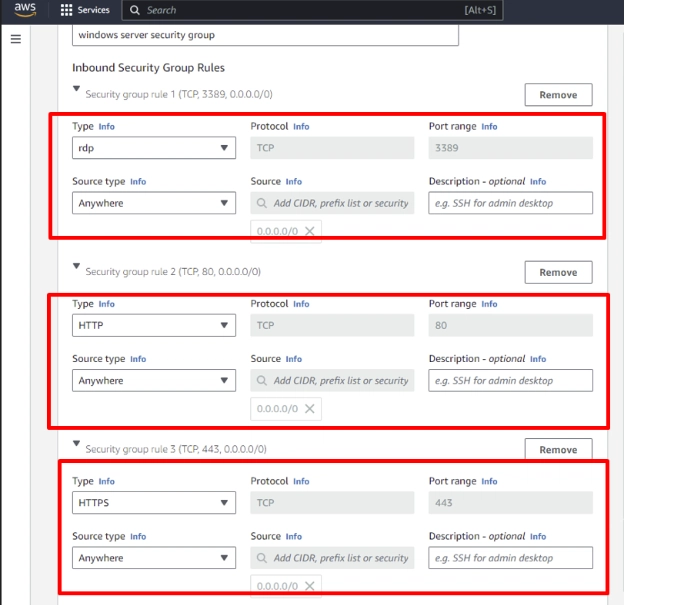
→ Now add Inbound Security Group Rules for public access. Add Rules for RDP, HTTP, HTTPS and assign source type anywhere so that anyone can send requests and get responses from anywhere via Internet.
→ ** You can configure storage from this **storage setting. And There is an Advanced details option for allowing advanced configuration. In this Lab we are not going to set up this advanced feature.

→ Now click on “Launch instance”. After that windows server instance will be created within a few minutes.

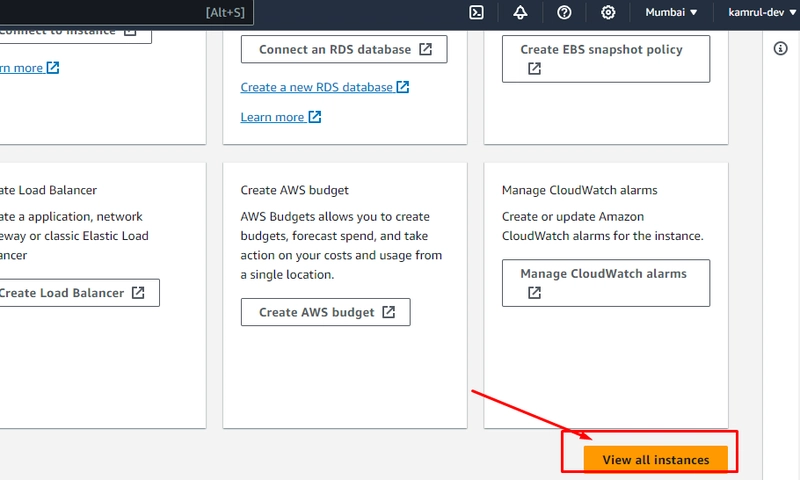
→ Now click on “View all instances”. After that will be redirected to the instances list page. Where you will find all instances.
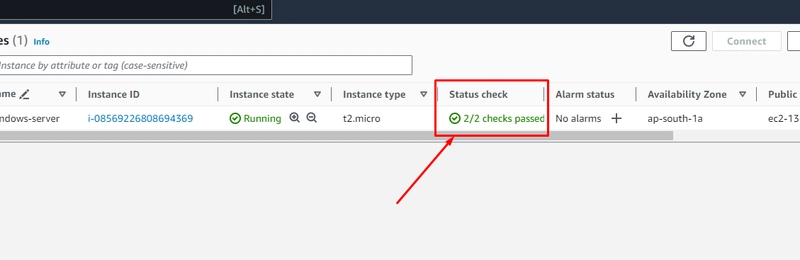
Step 6: Wait until the status 2/2 checks passed . It means your instance is ready to use.
Step 7: Now It is time to access the windows server visually Through RDP. Add a checkmark on your instance and click on “Connect”.

Step 8: After clicking the connect button you will find this window. Now click the RDP client to connect using the RDP client. Then Download the RDP file by clicking “Download remote desktop file” . After that please click on “Get password” for login.

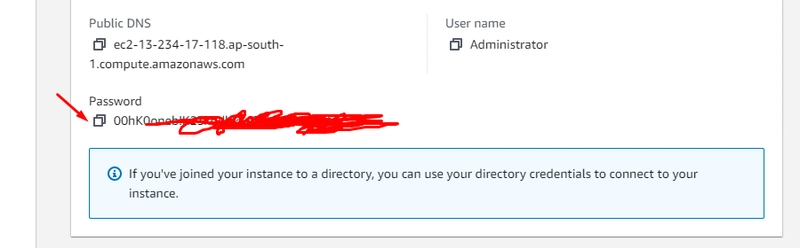
Step 9: After clicking “Get password” , you will find this window for uploading your private key when you downloaded it during creating an instance. I named this private key file “windows-server-key”. You will find this key pair download section of your computer. Now click on “Upload private key file” and upload your private key file. And finally click the “Decrypt Password" button for decrypt your login password and copy it and save it in a secure place.


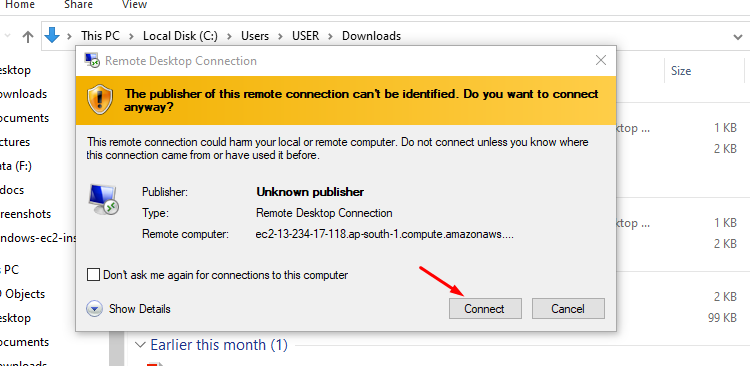
Step 10: After getting the password then go to your computer > download > here you will find the Remote Desktop Connection file when you downloaded. Open this RDP file by double click.

Step 11: After opening the RDP file . You will find this window and click on “Connect” button.
Step 12: Now paste your copied password here and click the ok button.

Step 13: Now click on the yes button.

Step 15: Hurrah ! yayyy! Now you can access your aws ec2 windows server 2022 machine.

Related Keywords: AWS EC2 instance creation;
Create Windows Server EC2 instance on AWS;
AWS EC2 Windows instance setup;
Launch Windows Server on Amazon EC2;
Amazon Web Services Windows instance tutorial;
Step-by-step guide to create Windows EC2 on AWS;
AWS Windows Server instance configuration;
Windows Server Amazon Machine Image (AMI) selection;
EC2 security group setup for Windows Server;
Connect to AWS Windows EC2 instance;
Kamrul devops; kamrul-hasan-devops; kamrul-hasan-aws-solution-architect; kamrul-devops; kamrul-cloud; kamrul-hasan-devops;

Top comments (0)