
Hello, I'm Maneshwar. I'm building git-lrc, an AI code reviewer that runs on every commit. It is free, unlimited, and source-available on Github. Star Us to help devs discover the project. Do give it a try and share your feedback for improving the product.
*Hello, I'm Maneshwar. I'm working on [git-lrc](https://hexmos.com/livereview/git-lrc/): a Git hook for Checking AI generated code. AI agents write code fast. They also silently remove logic, change behavior, and introduce bugs -- without telling you. You often find out in production. git-lrc fixes this. It hooks into git commit and reviews every diff before it lands. 60-second setup. Completely free.* ## Problem Imagine a world where users have to remember a password for every single website they visit. Oh wait, that's this world! Let's fix that for your app by integrating Google Sign-In, so users can log in with their Big G credentials without breaking a sweat. ## Solution Integrating Google Sign-In into your React app is easier than debugging a typo in `useEffect`. Seriously, it jus t takes two steps to welcome the Big G into your project. Let’s dive in! --- ## Step 1: Registering Your App with Google Before the magic happens, you need to tell Google about your app. Here’s how: 1. **Go to the Google Cloud Console**: [https://console.cloud.google.com/](https://console.cloud.google.com/). 2. **Navigate to API & Services**: Once inside, click on **API & Services** from the dashboard. 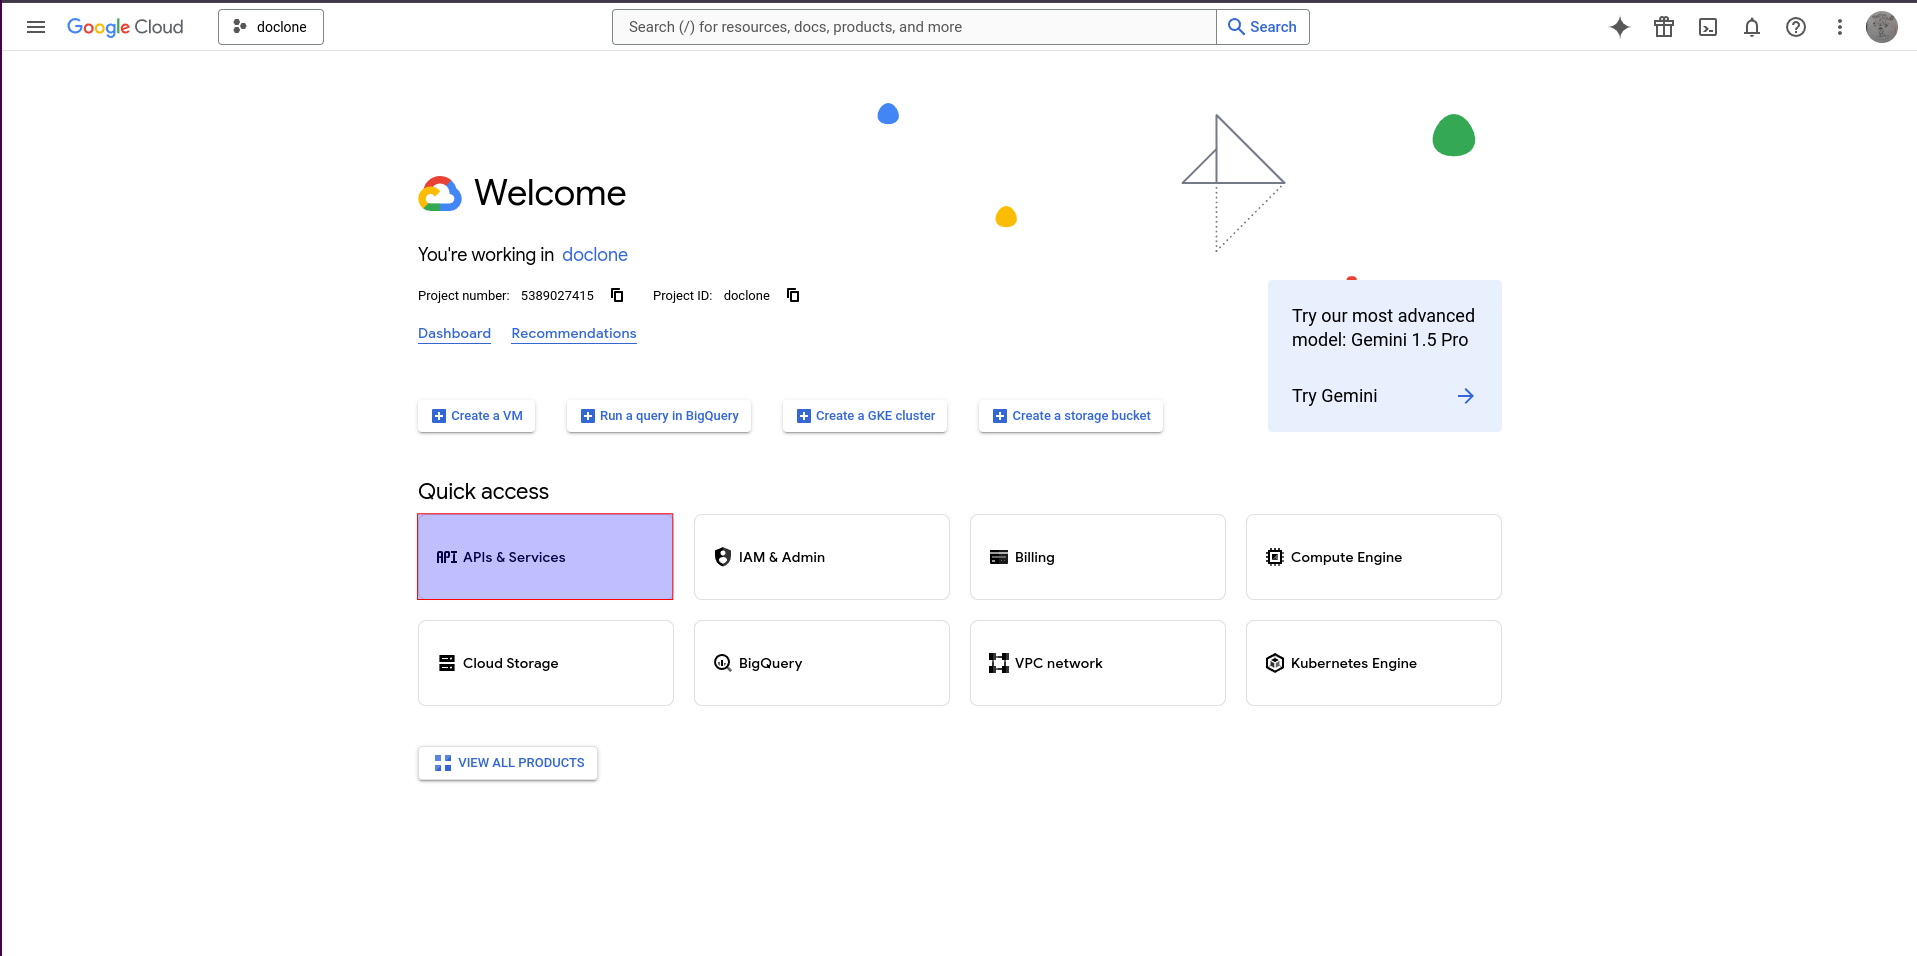 3. **Credentials Sidebar**: On the left-hand side, click on **Credentials**. 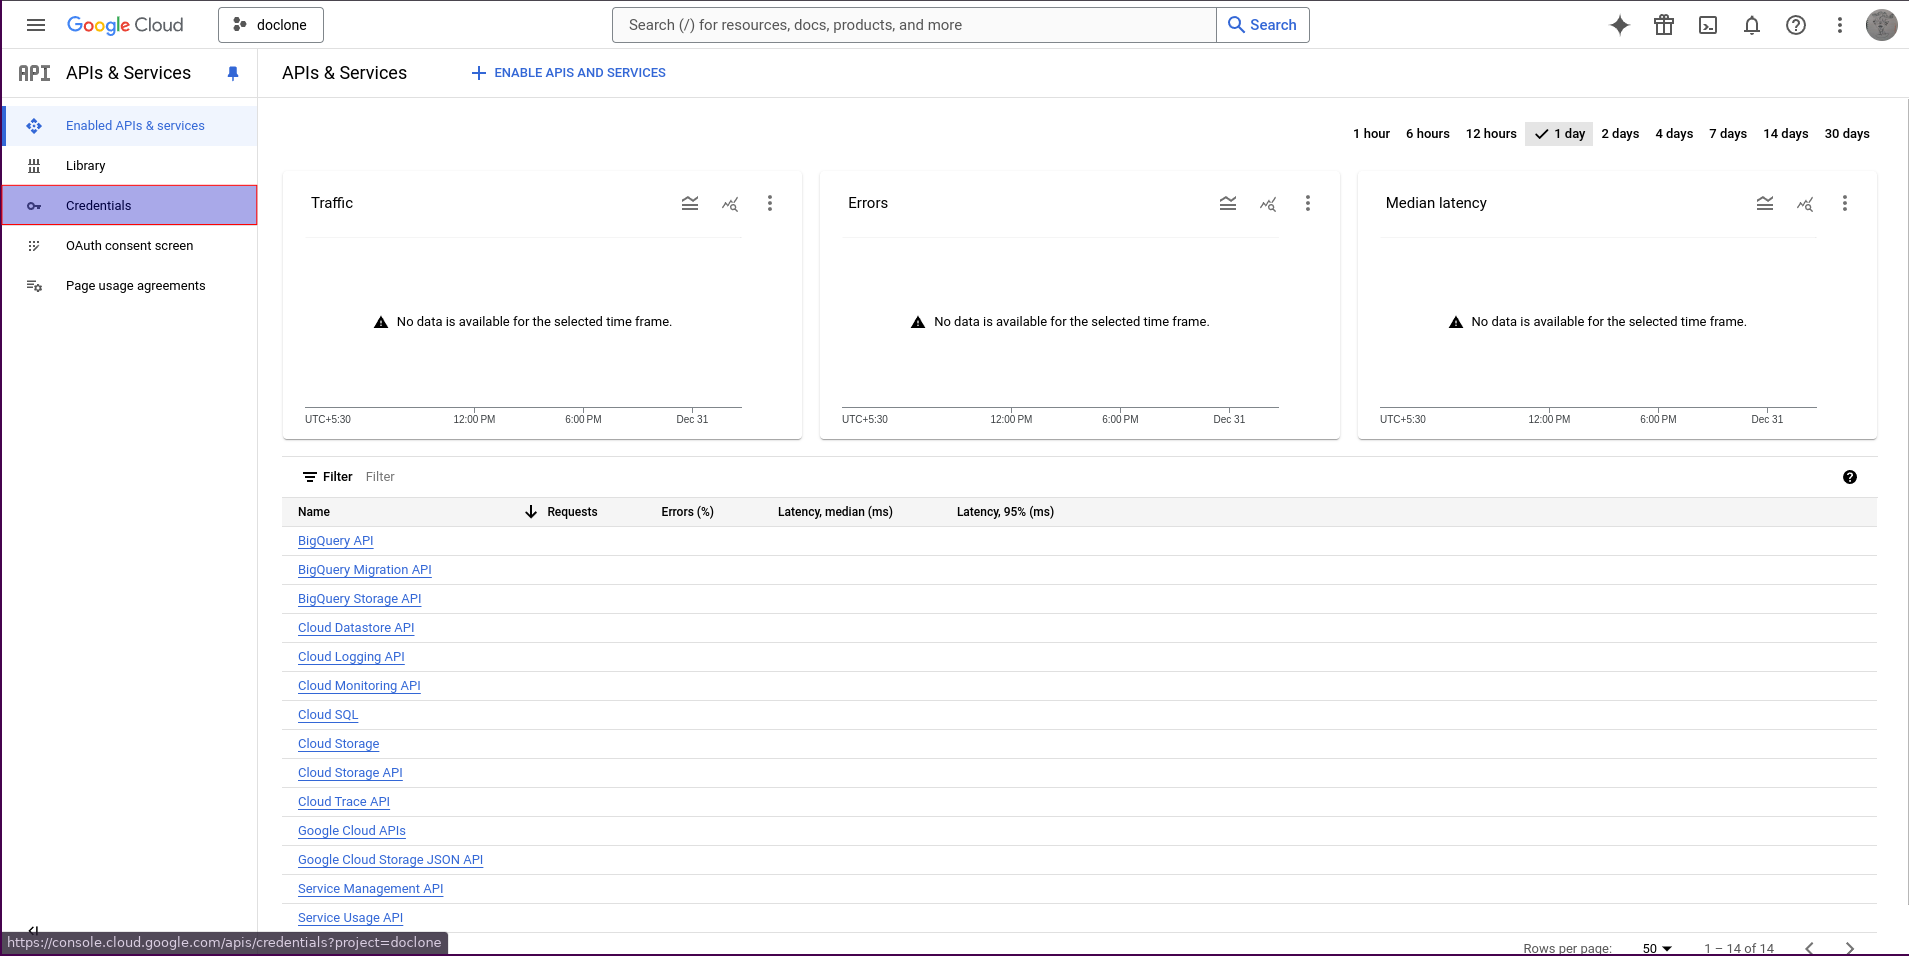 4. **Create Credentials**: In the top navbar, tap on **Create Credentials** and choose **OAuth Client ID**. 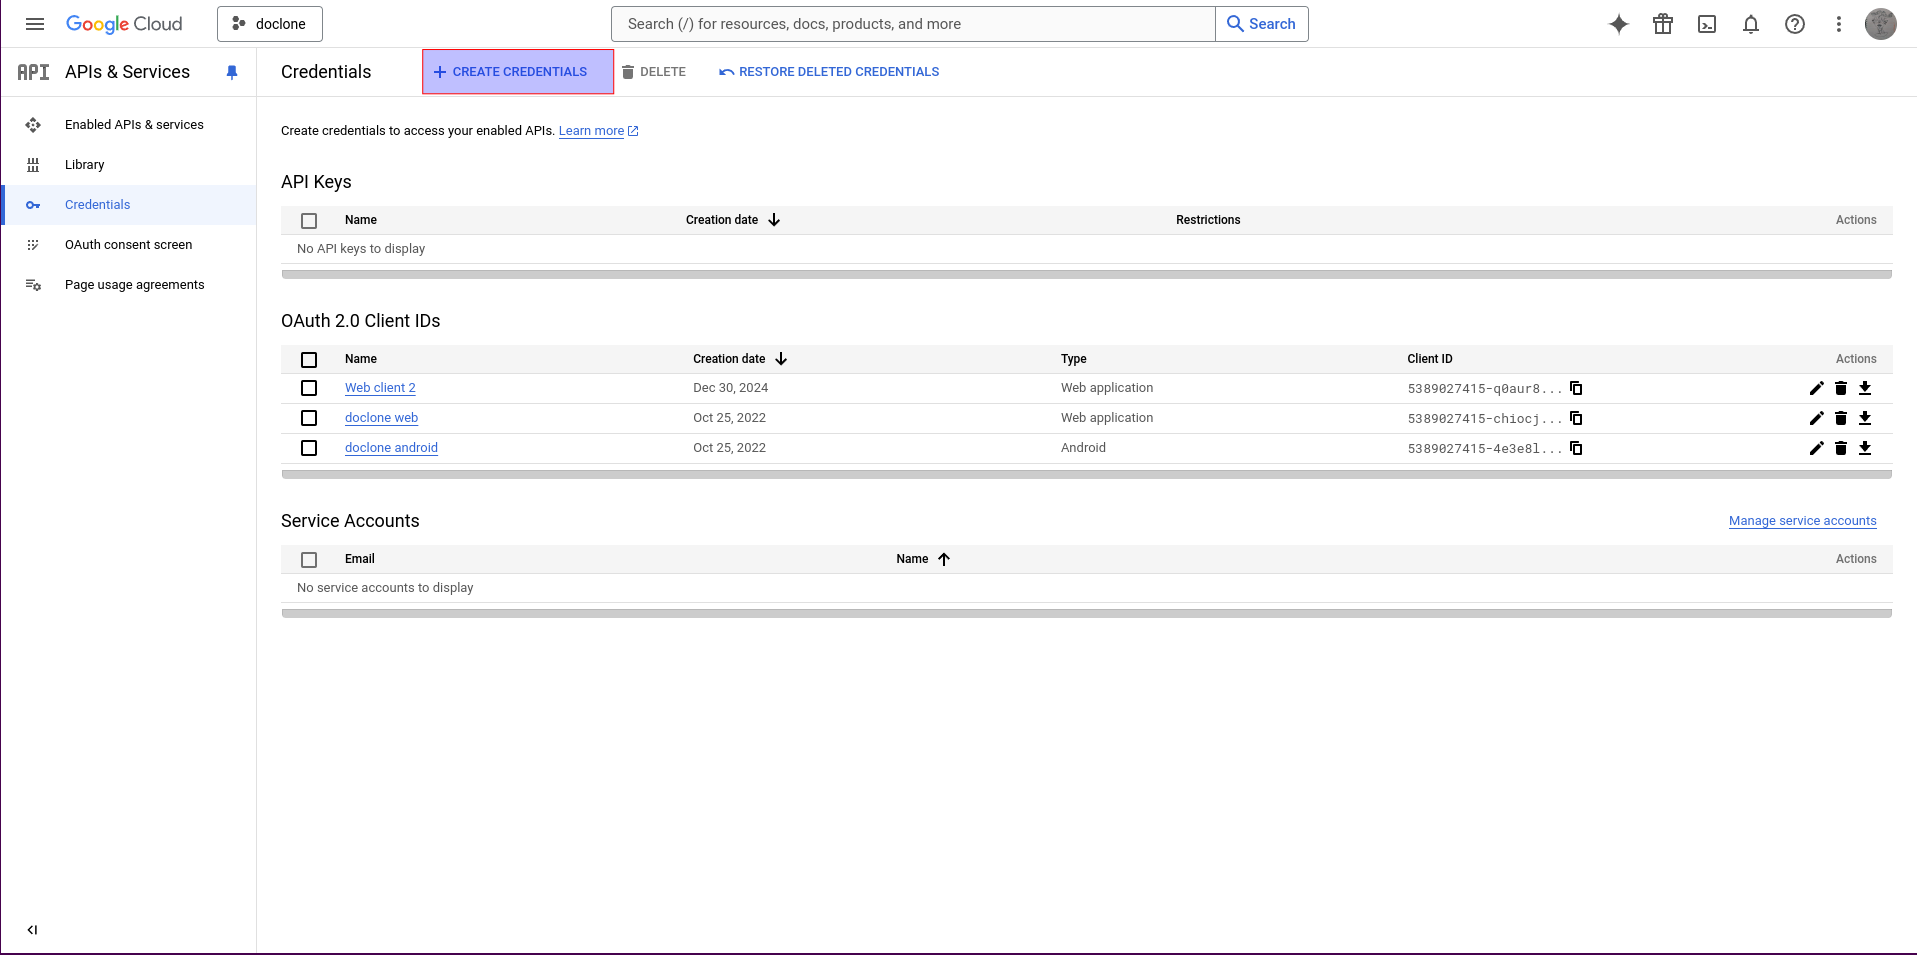 5. **Configure OAuth Client**: - Select **Web Application** as the Application Type. - Under **Authorized JavaScript origins**, add: - Your local server URL (e.g., `http://localhost:3000`). - The domain where you plan to deploy the app (e.g., `https://yourdomain.com/signup`). 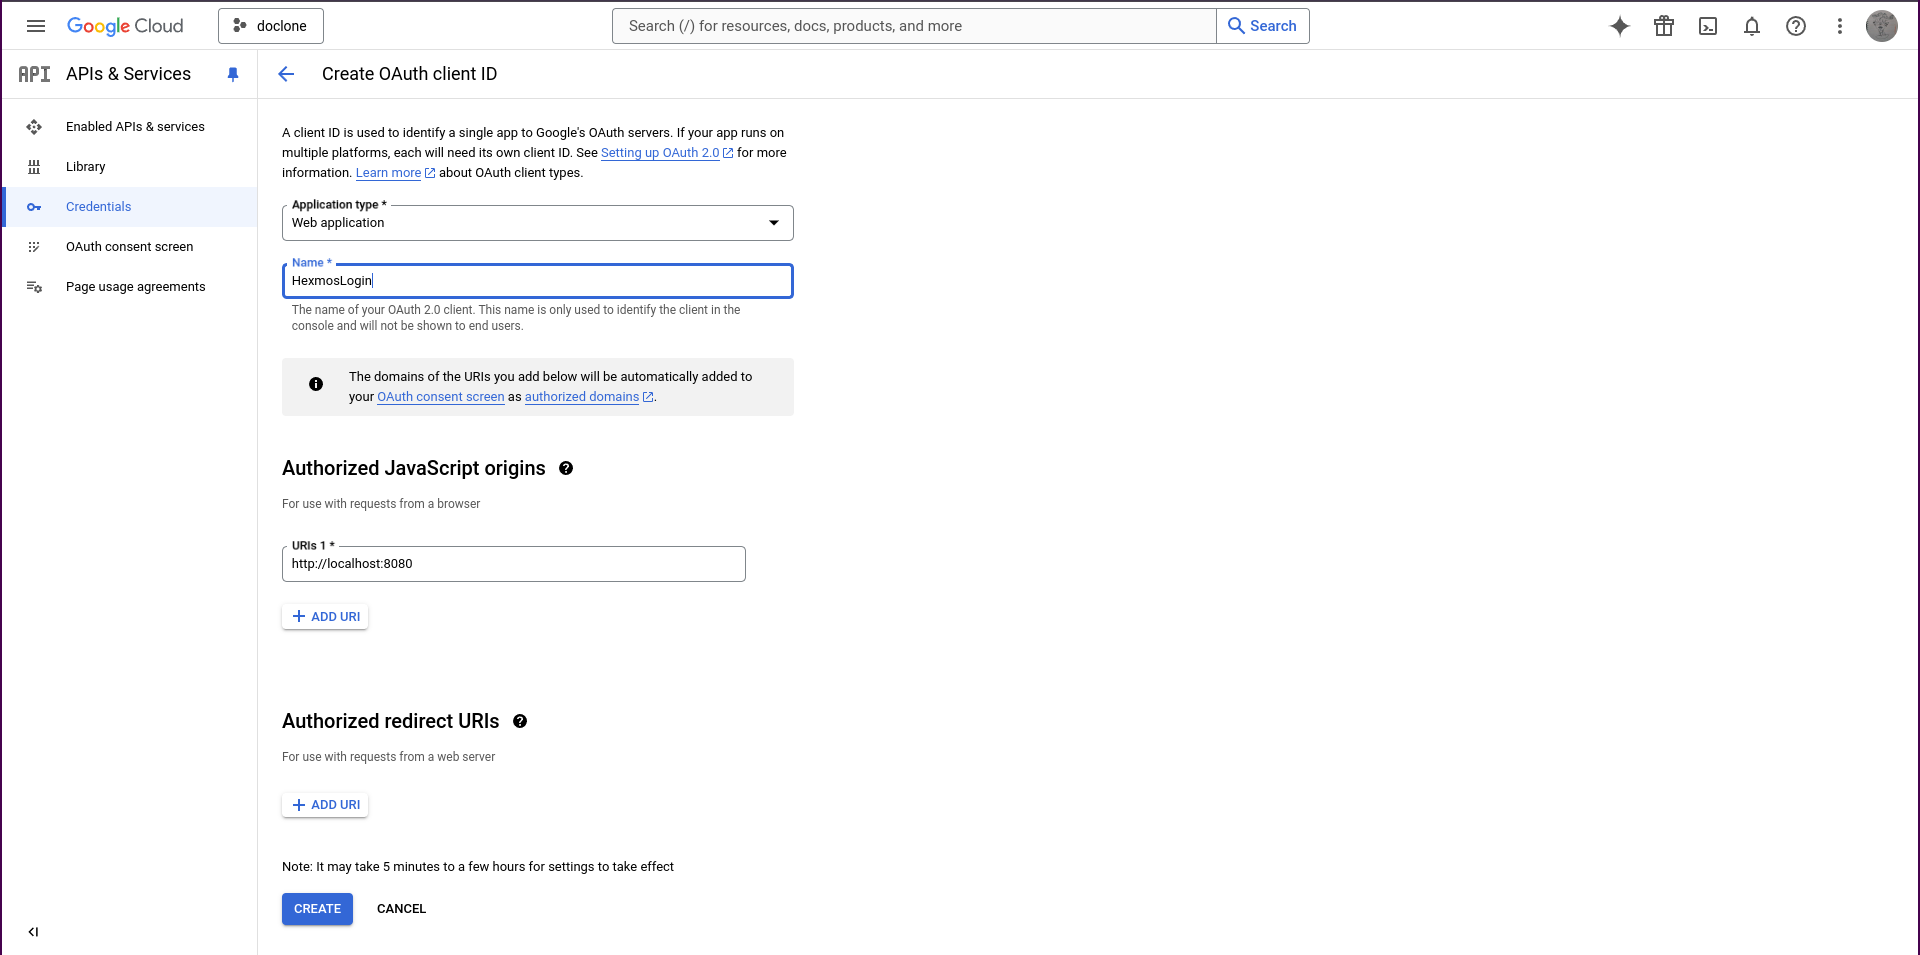 6. **Click Create**: Google will now generate your Client ID and Secret. 7. **Copy Client ID and Secret**: Save these somewhere secure (but not in plain text, because we’re better than that). Congratulations! Major setup is complete. Now it’s time to get our hands dirty with some code. --- ## Step 2: Coding the Integration We’ll be using the [@react-oauth/google](https://www.npmjs.com/package/@react-oauth/google) package. Why reinvent the wheel when someone’s already got it rolling? 1. **Install the Package**: ```bash npm install @react-oauth/google ``` 2. **Write the Code**: Here’s a simple example to get you started: ```javascript // App.jsx import { useState } from "react"; import { GoogleOAuthProvider, GoogleLogin } from "@react-oauth/google"; function Homepage() { const [authData, setAuthData] = useState(null); const gContainer = { display: 'flex', flexDirection: 'column', alignItems: 'center', marginTop: '50px' }; return ( { setAuthData(credentialResponse); console.log("Success!", credentialResponse); }} onError={() => { console.log("Login Failed"); }} /> {authData && (Credential: {authData.credential}
           <p>Select By: {authData.select_by}</p>
         </div>
       )}
     </div>
   </GoogleOAuthProvider>
 );
}
export default Homepage;
3. **Run Your App**:
Fire up your app with `npm start` or `yarn start`, and you’re good to go!
Now users can log in, and you’ll have access to their Google access token to authenticate them on your backend (or to marvel at in your console logs).
---
## What Just Happened?
You’ve successfully added Google Sign-In to your React app by following these steps. When users log in, you’ll receive their access token.
You can call an API endpoint using this token to fetch user-related information. For example:
```javascript
const userInfoEndpoint = `https://oauth2.googleapis.com/tokeninfo?id_token=${accessToken}`;
This request will return the user’s profile data.
It’s recommended to handle this on the backend to prevent misuse of your API for fake logins.
For a quick test, I’ll use LiveAPI to send a request to this endpoint and confirm if I can retrieve the user info from the token we obtained earlier.

And that’s it! You now have all the data you need from OAuth like profile picture, name, and email.

TL;DR
- Register your app with Google Cloud Console to gLet me take one more minute of your time.
👉 Check out: git-lrc
Any feedback or contributors are welcome! It’s online, source-available, and ready for anyone to use.
⭐ Star it on GitHub:
 HexmosTech
/
git-lrc
HexmosTech
/
git-lrc
Free, Micro AI Code Reviews That Run on Commit
| 🇩🇰 Dansk | 🇪🇸 Español | 🇮🇷 Farsi | 🇫🇮 Suomi | 🇯🇵 日本語 | 🇳🇴 Norsk | 🇵🇹 Português | 🇷🇺 Русский | 🇦🇱 Shqip | 🇨🇳 中文 | 🇮🇳 हिन्दी |
git-lrc
Free, Micro AI Code Reviews That Run on Commit

AI agents write code fast. They also silently remove logic, change behavior, and introduce bugs -- without telling you. You often find out in production.
git-lrc fixes this. It hooks into git commit and reviews every diff before it lands. 60-second setup. Completely free.
See It In Action
See git-lrc catch serious security issues such as leaked credentials, expensive cloud operations, and sensitive material in log statements
git-lrc-intro-60s.mp4
Why
- 🤖 AI agents silently break things. Code removed. Logic changed. Edge cases gone. You won't notice until production.
- 🔍 Catch it before it ships. AI-powered inline comments show you exactly what changed and what looks wrong.
- …

*AI agents write code fast. They also silently remove logic, change behavior, and introduce bugs -- without telling you. You often find out in production.
git-lrc fixes this. It hooks into git commit and reviews every diff before it lands. 60-second setup. Completely free.*
Any feedback or contributors are welcome! It's online, source-available, and ready for anyone to use.
⭐ Star it on GitHub:
HexmosTech
/
git-lrc
Free, Micro AI Code Reviews That Run on Commit
| 🇩🇰 Dansk | 🇪🇸 Español | 🇮🇷 Farsi | 🇫🇮 Suomi | 🇯🇵 日本語 | 🇳🇴 Norsk | 🇵🇹 Português | 🇷🇺 Русский | 🇦🇱 Shqip | 🇨🇳 中文 | 🇮🇳 हिन्दी |
git-lrc
Free, Micro AI Code Reviews That Run on Commit
AI agents write code fast. They also silently remove logic, change behavior, and introduce bugs -- without telling you. You often find out in production.
git-lrc fixes this. It hooks into git commit and reviews every diff before it lands. 60-second setup. Completely free.
See It In Action
See git-lrc catch serious security issues such as leaked credentials, expensive cloud operations, and sensitive material in log statements
git-lrc-intro-60s.mp4
Why
- 🤖 AI agents silently break things. Code removed. Logic changed. Edge cases gone. You won't notice until production.
- 🔍 Catch it before it ships. AI-powered inline comments show you exactly what changed and what looks wrong.
- …

Top comments (0)