After elaborating on both sides of Core Data and SQLite in my previous post, let's start with using the Core Data library in Swift.
We'll be making a simple contact list application to store all your contacts in one place.
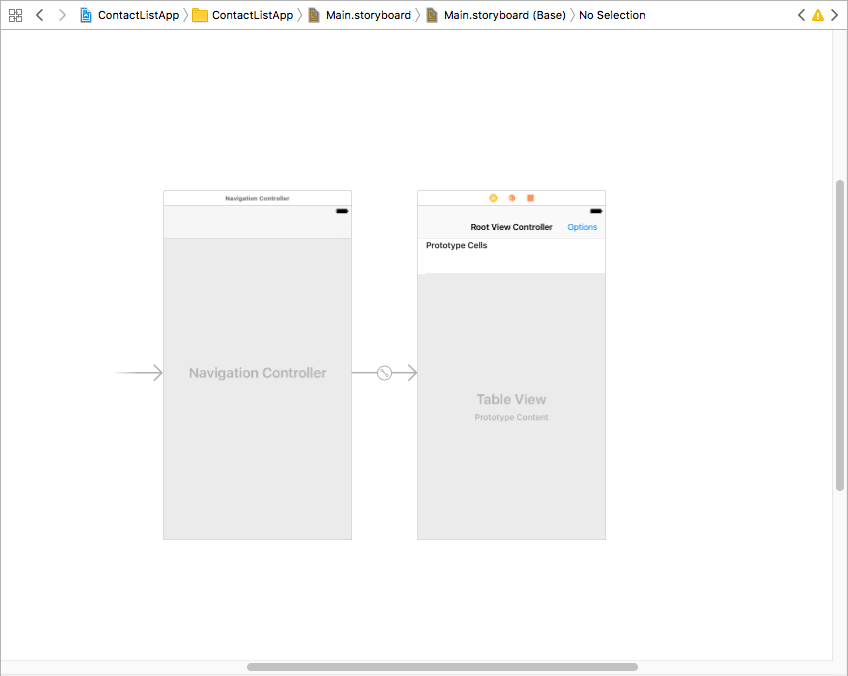
Starting with a new project with a Single View Controller and made a new UINavigationController with root view controller and dragged another View Controller into the app.
After adding some custom Views in the app and now the storyboard looks like this:
The link to the starter app will be posted here.
Now create a new file and set it to Data Model

Name it whatever you’d like and describe the model as given below. I have made this in accordance with the UI that I have structured, but you can make a different UI with a different description of your Model. If you have any other fields, don’t forget to add them in every piece of code as we go further.
Pro tip: You can add and select an image for your contact. The datatype should be set to Binary Data and the data of the image should be stored in this field.

With the Entity Name highlighted, go to the Data Model Inspector and change the property of Codegen under Class from Class Definition to Manual/None

Move to the Editor Tab in Xcode and click on Create NSManagedObjectSubclass which will result in the creation of 2 files namely: CoreDataClass.swift and CoreDataProperties.swift
Add this convenience initializer code in the CoreDataClass.swift:
convenience init(first: String, last: String, email: String, phone: Int64, context: NSManagedObjectContext) {
    if let ent = NSEntityDescription.entity(forEntityName: "Contact", in: context) {
        self.init(entity: ent, insertInto: context)
        self.firstName = first
        self.lastName = last
        self.emailId = email
        self.contactNumber = phone
    } else {
        fatalError("Unable to find Entity name!")
    }
}
This code works on initialization of the Core Data Model instance by setting all the fields through a function call.
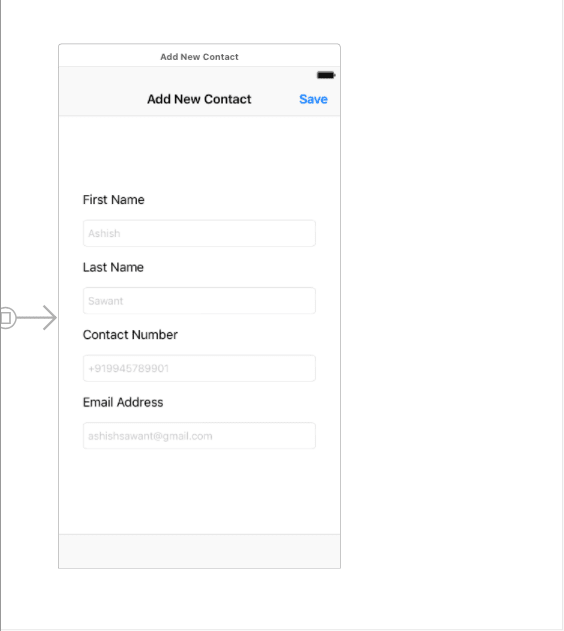
Coming back to the Storyboard, we will first configure the save function in the Add Contact Page.
Prepare all the outlets and actions like so:

You will need to add two more files namely CoreDataStack and CoreDataHelper which are linked in the gist below:
Make an instance of the CoreDataHelper class in the save action:
let helper = CoreDataHelper()
Initialize an instance of the Core Data Model ‘Contact’
guard let newContact = NSEntityDescription.insertNewObject(
            forEntityName: "Contact",
            into: helper.context) as? Contact else { return }
newContact.firstName = firstNameTF.text
newContact.lastName = lastNameTF.text
newContact.emailId = emailTF.text
newContact.contactNumber = Int64(contactTF.text ?? "0") ?? 0
Also, remember to import Core Data in all the files where we use Core Data function and object instances such as this one.
Add a do-catch handler to save the instance in the database
do {
    try helper.context.save()
    print("saved user")
} catch {
    print("error in saving context")
}
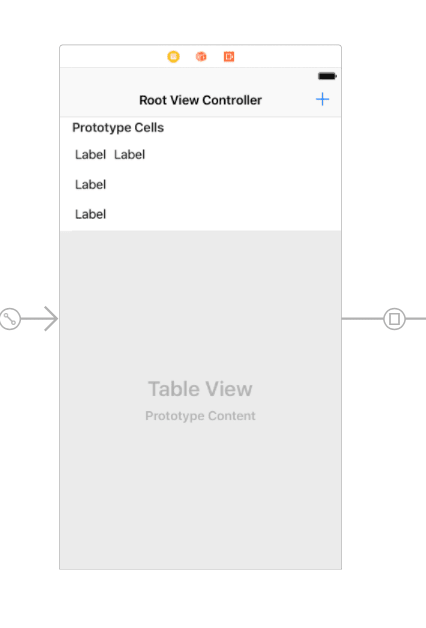
The next step is to fetch the data from the offline graph and present it in our ContactTableViewController.
Fetch all the contacts stored in the database, make a function out of it and call it in the viewDidAppear function.
let helper = CoreDataHelper()
let fr = NSFetchRequest<NSFetchRequestResult>(entityName: "Contact")
do {
    if let contactList = try helper.context.fetch(fr) as? [Contact] {
        allContacts = contactList
        tableView.reloadData()
    }
} catch {
    print("Could not read contact fetcher")
}
Declare the allContacts variable in the class definition like so:
var allContacts: [Contact] = []
Number of rows should be returned as allContacts.count, keeping the number of sections as default.
Next, we will configure the cell for the custom view.
To customize the cell, we will make a UITableViewCell class like so:
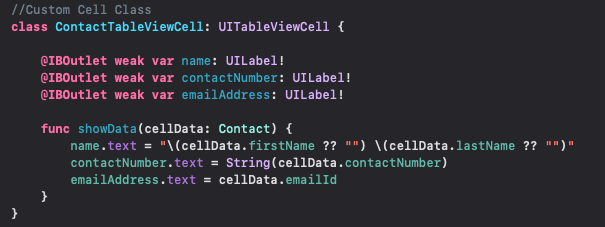
Then add the following code into the cellForRowAt function:
cell.showData(cellData: allContacts[indexPath.row])
Add this to your fetchAllContacts function after fetching the contacts:
tableView.reloadData()
We’re almost done! Just need to wire up the Add Contact Segue.
For the segue, Ctrl+Drag the Add Bar Button to the AddContactViewController and Select the Show Option.
Now the AddContactViewController will be pushed and popped like a new page.
You can download the complete project from here.
Advanced Challenge: Try to make a new page and fetch a single contact on selection in the UITableViewController. (Hint: Use NSPredicate to write a small filter query on the basis of a unique field in the Contact Model)
Stay tuned for the next post on fetching data through a filter and versioning in core data! :)

Oldest comments (0)