I recently wanted to work through the tutorial for building a VS Code extension, but the first step is to install Node.js locally, which, well, I don't want to do. Sorry to the Node peeps out there, but I don't want to touch the (large and rather complex) Node ecosystem just to try out building a VS Code extension. So I then thought, "Hey, you can install Node on a Linux box, so why can't I just do it inside a Docker container?"
And of course, you can, and not only that, but with the magic that is the VS Code Remote Containers extension you can even have VS Code work as if it's all on your local host machine. Let's give this a try.
Install The Pre-Requisites
First step: install the Remote Development extension pack from Microsoft. This will allow you to treat a running container, ssh connection to a remote machine, or Linux environment via WSL (assuming you are a Windows person) as though it's a local folder. If you've never played with this before, it really is worth checking out as it's amazing.
I'm going to assume you also have Docker installed. If not, follow the instructions on their site, or any one of the 59 million or so tutorials online.
Create the Dockerfile
Ok, now let's create a Dockerfile that has what we need. The VS Code tutorial mentions you need the following:
- Node.js
- Git
- Yeoman
- The VS Code Extension Generator
Ok, all those things boil down to some basic terminal commands, but as a simple starting point, let's use the official Node.js Docker image to get Node.js. To do this, make node:10-alpine the base image, and then install those dependencies:
FROM node:10-alpine

RUN apk add --update git bash
RUN npm install -g yo generator-code

USER node

ENTRYPOINT /bin/bash

WORKDIR /home/node
Breaking this down a bit:
- the
FROMline says the image to use as a base image is thenode:10-alpineimage from Dockerhub. This gives you npm & whatnot already installed. - the
apk addline installs Git and Bash (alpine doesn't have Bash installed by default) - the
npm install -gline installs Yeoman and the VS Code Extension Generator - the
USERline creates a user callednode, which you need as otherwiseyofails when you run it in the container due to permission issues (doesn't seem to like running as root) - the
ENTRYPOINTsays when a container is started from this image, start off by running/bin/bash - the
WORKDIRsays when a container is started from this image, start in the/home/nodedirectory
Save this file as Dockerfile. Note that I used node:10-alpine (so a 10.x version of Node), feel free to replace with a newer version if you want (I have no idea what version the VS Code Extension Generator wants).
Build The Docker Image
Now you want to build the Docker image, run this command in the same directory as the Dockerfile:
docker build -t vscodeenv:latest .
The vscodeenv name is totally arbitrary, feel free to name it whatever you want, but that's the name I'll use for this blog post. You'll see a bunch of output, and after it's done, you should be able to see the built image when you do a docker images:
$ docker images
REPOSITORY TAG    IMAGE ID     CREATED        SIZE
vscodeenv  latest 37d9e66fffbc 48 minutes ago 186MB
Run the Image
Now we have a built Docker image with all the tooling you need for the tutorial. Next step is to spin up a container from this image. I'm sure if you get into the VS Code devcontainer.json stuff you could do this from within VS Code, but I just do it from the terminal:
$ docker run -it --name vscodeenv -v /Users/aparkin/dockerpath/:/home/node --rm vscodeenv:latest
bash-5.0$
Replace /Users/aparkin/dockerpath/ with the full path to a directory where you want to put your extensions code (it's perfectly fine to be the same directory where you put theDockerfile).
Note that this just drops you into a bash shell inside the running container. Leave this window open, so long as this is open your container will be running. Once you type "exit" here, the container will be terminated (which we don't want to do until we're done working on our little extension).
To break the docker run command down a bit, the key bits:
-
-itmeans run in interactive mode (ie where you can type in commands) -
--name vscodeenvgives the container the namevscodeenv(again, this is arbitrary) -
-v .....tells it to mount the path you specified on your local host filesystem into/home/nodein the running container (so any files in the path you specify will show up in the container inside/home/node) -
--rmtells Docker to delete the container once you exit
Create The Skeleton Extension
The VS Code tutorial indicates after installing everything, you should run the generator. Do this in the running docker container with the yo code command:
bash-5.0$ yo code

     _-----_ ╭──────────────────────────╮
    | | │ Welcome to the Visual │
    |--(o)--| │ Studio Code Extension │
   `---------´ │ generator! │
    ( _´U`_ ) ╰──────────────────────────╯
    / ___A___ \ /
     | ~ |
   __'.\_\_\_.'__
 ´ ` |° ´ Y `

? What type of extension do you want to create? (Use arrow keys)
❯ New Extension (TypeScript)
  New Extension (JavaScript)
  New Color Theme
  New Language Support
  New Code Snippets
  New Keymap
  New Extension Pack
  New Language Pack (Localization)
This generator walks you through creating your first extension. Following VS Code's tutorial I picked:
- New Extension (TypeScript)
- Name of my extension: "AdamsExtension"
- Identifier of my extension: "adamsextension" (the default)
- Description I entered random gibberish
- Initialize a Git repo: yes
- Bundle with Webpack: no
- Package manager: npm
After that, it goes ahead and installs all the various npm dependencies -- all within the docker container.
Attach To the Container
Now in VS Code open the command palette and search forRemote-Containers: Attach to Running Container.... Pick this, and then your running container called vscodeenv should appear in the list:

Pick it, and VS Code will open a new Window "attached" to the running container. For more details, consult the official docs.
Now click on "Open Folder" and navigate to your adamsextension (or whatever you called your extension) folder and click OK. You then get a VS Code window "attached" to the running docker container, with your test extension open and ready to play with. Here's a screenshot to give an idea:
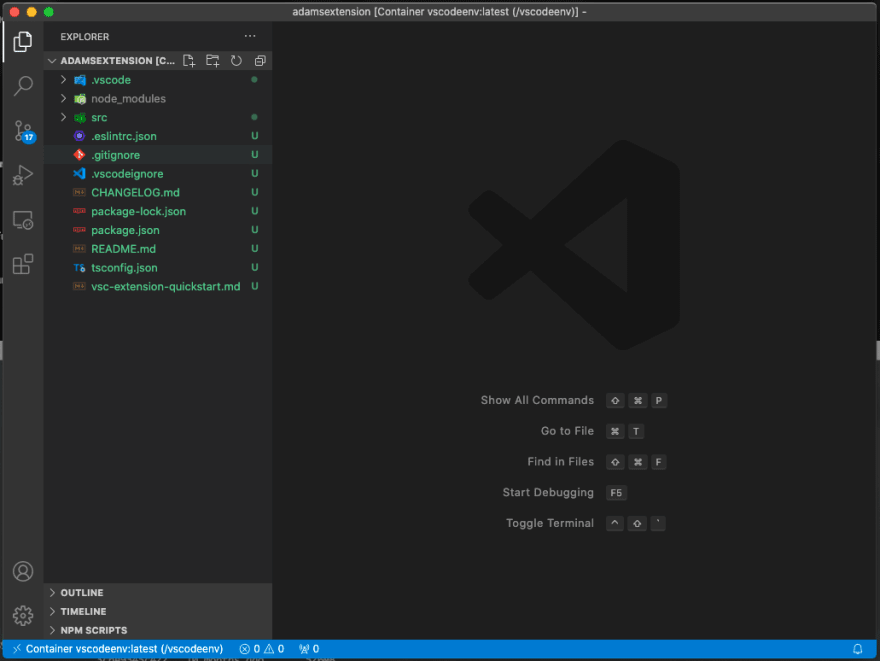
Now you can hit F5 and VS Code will open up a new Extension Development Host window with your test extension loaded. In that window you should be able to search for the "Hello World" command in the command palette and run the command.
Profit
And that's it, no Node.js or any other tooling installed to your local machine other than VS Code & Docker. Once you're done playing around, exit out of the running Docker container (enter "exit" in the bash prompt) and the container will be terminated, and all the files you created will remain in the path you mounted into the container.
If you want to later pick up where you left off, just run the same docker run command as before, re-attach to the container, and re-open the folder.

Top comments (0)