TL;DR: Learn to add mail merge functionality to the Blazor Rich Text Editor! We’ll set up a Blazor app, configure the editor, and add merge fields using a custom toolbar and Mention component. Finally, we’ll process data with Scriban for seamless personalized content creation.
Syncfusion Blazor Rich Text Editor is a feature-rich WYSIWYG HTML editor and WYSIWYG Markdown editor. It is used to create blogs, forum posts, notes sections, support tickets (incidents), comment sections, messaging apps, and more. The control provides an efficient user interface with mobile support for a better editing experience. It has a variety of tools to edit and format rich content and returns valid HTML markup or Markdown (MD) content. It allows users to insert images, links, tables, and lists with modular architectures.
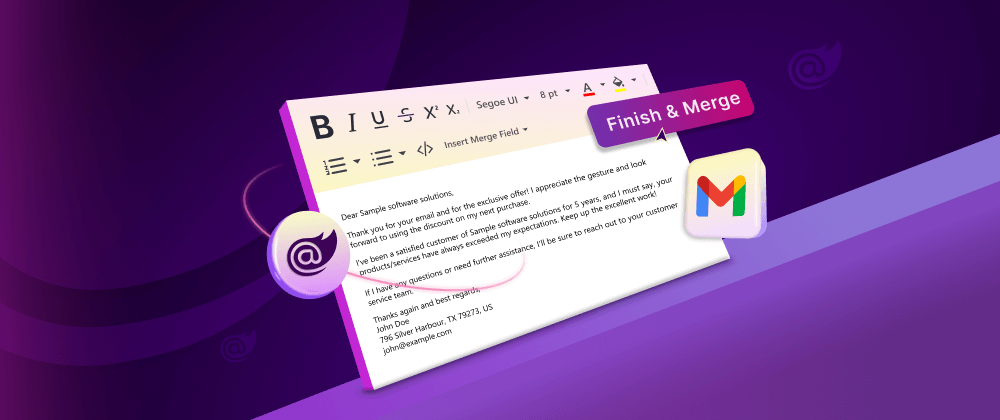
In this blog, we’ll see how to easily add a mail merge feature to the Blazor Rich Text Editor. This feature is handy for sending personalized messages to many people at once. With a simple setup, users can make their content creation and distribution much smoother, improving their communication process. Keep reading to learn how to make the most of the Blazor Rich Text Editor with mail merge!
Prerequisites
We are going to demonstrate the process using a Blazor server-side app. So, the following prerequisites are needed:
Let’s get started!
Step 1: Create a Blazor server-side app
First, create a Blazor server-side app and configure the Syncfusion Blazor services.
Step 2: Add the Insert Merge Field menu button in the Blazor Rich Text Editor toolbar
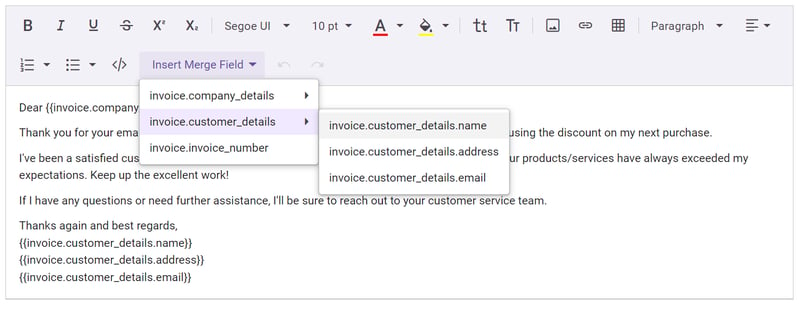
Let’s add a custom menu button labeled Insert Merge Field to the toolbar of the Blazor Rich Text Editor. For that, we should configure the Blazor Menu component to include available insert merge field options. This menu button enables users to select and insert merge fields into their text. This can be achieved by binding the ItemSelected event of the Menu component and calling the Rich Text Editor’s ExecuteCommandAsync method with the command name InsertHTML.
Refer to the following code example.
@page "/"
@using Syncfusion.Blazor.RichTextEditor
@using Syncfusion.Blazor.Navigations

<SfRichTextEditor ID="mailMerge" @ref="rteObj" @bind-Value="TextEditorValue">
 <RichTextEditorToolbarSettings Items="@Tools" Type="ToolbarType.MultiRow">
  <RichTextEditorCustomToolbarItems>
   <RichTextEditorCustomToolbarItem Name="InsertMergeField">
    <Template>
     <SfMenu TValue="MenuItem">
      <MenuEvents TValue="MenuItem" ItemSelected="ItemSelected"></MenuEvents>
      <MenuItems>
       <MenuItem Text="Insert Merge Field">
        <MenuItems>
         <MenuItem Text="invoice.company_details">
          <MenuItems>
           <MenuItem Text="invoice.company_details.name"></MenuItem>
           <MenuItem Text="invoice.company_details.address"></MenuItem>
           <MenuItem Text="invoice.company_details.phone"></MenuItem>
          </MenuItems>
         </MenuItem>
         <MenuItem Text="invoice.customer_details">
          <MenuItems>
           <MenuItem Text="invoice.customer_details.name"></MenuItem>
           <MenuItem Text="invoice.customer_details.address"></MenuItem>
           <MenuItem Text="invoice.customer_details.email"></MenuItem>
          </MenuItems>
         </MenuItem>
         <MenuItem Text="invoice.invoice_number"></MenuItem>
        </MenuItems>
       </MenuItem>
      </MenuItems>
     </SfMenu>

    </Template>
   </RichTextEditorCustomToolbarItem>
  </RichTextEditorCustomToolbarItems>
 </RichTextEditorToolbarSettings>
</SfRichTextEditor>

@code {
    SfRichTextEditor? rteObj;
    public string TextEditorValue { get; set; } = @"<p>Dear {{invoice.company_details.name}},</p>

                <p>Thank you for your email and for the exclusive offer! I appreciate the gesture and look forward to using the discount on my next purchase.</p>

                <p>I've been a satisfied customer of {{invoice.company_details.name}} for 5 years, and I must say, your products/services have always exceeded my expectations. Keep up the excellent work!</p>

                <p>If I have any questions or need further assistance, I'll be sure to reach out to your customer service team.</p>

                <p>
                    Thanks again and best regards,<br>
                    {{invoice.customer_details.name}} <br />
                    {{invoice.customer_details.address}} <br />
                    {{invoice.customer_details.email}}
                </p>";

    public class PersonData
    {
        public string? Name { get; set; }

        public string? Status { get; set; }
    }
    List<PersonData> EmailData = new List<PersonData> {
      new PersonData() { Name="invoice.company_details.name", Status = "active", },
      new PersonData() { Name="invoice.company_details.address", Status = "away" },
      new PersonData() { Name="invoice.company_details.phone", Status = "busy" },
      new PersonData() { Name="invoice.customer_details.name", Status = "active"},
      new PersonData() { Name="invoice.customer_details.address", Status = "busy" },
      new PersonData() { Name="invoice.customer_details.email", Status = "active" },
      new PersonData() { Name="invoice.issue_date", Status = "away"},
      new PersonData() { Name="invoice.due_date", Status = "busy" }
    };

    private List<ToolbarItemModel> Tools = new List<ToolbarItemModel>()
    {
        new ToolbarItemModel() { Command = ToolbarCommand.Bold },
        new ToolbarItemModel() { Command = ToolbarCommand.Italic },
        new ToolbarItemModel() { Command = ToolbarCommand.Underline },
        new ToolbarItemModel() { Command = ToolbarCommand.StrikeThrough },
        new ToolbarItemModel() { Command = ToolbarCommand.SuperScript },
        new ToolbarItemModel() { Command = ToolbarCommand.SubScript },
        new ToolbarItemModel() { Command = ToolbarCommand.Separator },
        new ToolbarItemModel() { Command = ToolbarCommand.FontName },
        new ToolbarItemModel() { Command = ToolbarCommand.FontSize },
        new ToolbarItemModel() { Command = ToolbarCommand.FontColor },
        new ToolbarItemModel() { Command = ToolbarCommand.BackgroundColor },
        new ToolbarItemModel() { Command = ToolbarCommand.Separator },
        new ToolbarItemModel() { Command = ToolbarCommand.LowerCase },
        new ToolbarItemModel() { Command = ToolbarCommand.UpperCase },
        new ToolbarItemModel() { Command = ToolbarCommand.Separator },
        new ToolbarItemModel() { Command = ToolbarCommand.Image },
        new ToolbarItemModel() { Command = ToolbarCommand.CreateLink },
        new ToolbarItemModel() { Command = ToolbarCommand.CreateTable },
        new ToolbarItemModel() { Command = ToolbarCommand.Separator },
        new ToolbarItemModel() { Command = ToolbarCommand.Formats },
        new ToolbarItemModel() { Command = ToolbarCommand.Alignments },
        new ToolbarItemModel() { Command = ToolbarCommand.Separator },
        new ToolbarItemModel() { Command = ToolbarCommand.NumberFormatList },
        new ToolbarItemModel() { Command = ToolbarCommand.BulletFormatList },
         new ToolbarItemModel() { Command = ToolbarCommand.SourceCode },
        new ToolbarItemModel() { Name = "InsertMergeField", TooltipText = "Insert Merge Field" },
        new ToolbarItemModel() { Command = ToolbarCommand.Undo },
        new ToolbarItemModel() { Command = ToolbarCommand.Redo }
    };

    public async Task ItemSelected(MenuEventArgs<MenuItem> args)
    {
        if (args.Item.Items == null)
        {
            await this.rteObj.ExecuteCommandAsync(CommandName.InsertHTML, "<span contenteditable='false' class='e-mention-chip'>{{" + args.Item.Text + "}}</span>", new ExecuteCommandOption() { Undo = true });
        }
    }

}
Refer to the following image.
Step 3: Integrate the Blazor Mention component to insert the merge field
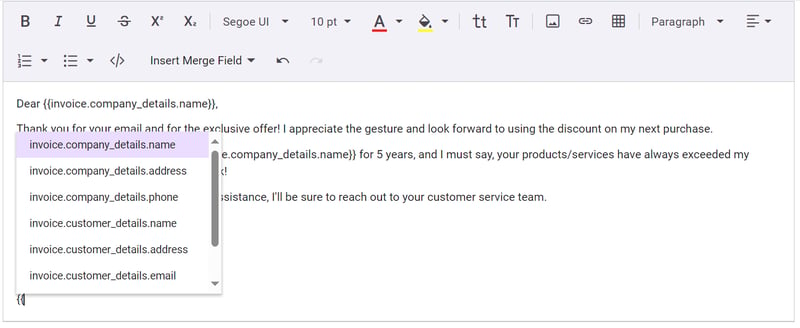
First, we need to install the Syncfusion.Blazor.DropDowns package. Now, add the Blazor Mentioncomponent with the required insert merge field data. Then, integrate it with the Rich Text Editor by setting the Target property of the Mention component as the Rich Text Editor’s content editable element id [mailMerge_rte-editable]. Also, configure the MentionChar property as “ { “. When pressing the mention character in the editor, it will appear, allowing users to select and display it in the editor.
Refer to the following code example.
@page "/"
@using Syncfusion.Blazor.RichTextEditor
@using Syncfusion.Blazor.DropDowns
@using Syncfusion.Blazor.Navigations

<SfRichTextEditor ID="mailMerge" @ref="rteObj" @bind-Value="TextEditorValue">
 <RichTextEditorToolbarSettings Items="@Tools" Type="ToolbarType.MultiRow">
  <RichTextEditorCustomToolbarItems>
   <RichTextEditorCustomToolbarItem Name="InsertMergeField">
                …
                …
                …
   </RichTextEditorCustomToolbarItem>
  </RichTextEditorCustomToolbarItems>
 </RichTextEditorToolbarSettings>

</SfRichTextEditor>

<SfMention TItem="PersonData" MentionChar="@mentionChar" Target="#mailMerge .e-rte-content .e-content" DataSource="@EmailData" SuggestionCount=8 AllowSpaces="true" PopupHeight="200px" PopupWidth="250px">

<DisplayTemplate>
   {{@((context as PersonData).Name)}};
</DisplayTemplate>
<ChildContent>
 <MentionFieldSettings Text="Name"></MentionFieldSettings>
</ChildContent>
</SfMention>

@code {
    …
    …
    …

    public char mentionChar = '{';
    public class PersonData
    {
        public string? Name { get; set; }

        public string? Status { get; set; }
    }
    List<PersonData> EmailData = new List<PersonData> {
      new PersonData() { Name="invoice.company_details.name", Status = "active", },
      new PersonData() { Name="invoice.company_details.address", Status = "away" },
      new PersonData() { Name="invoice.company_details.phone", Status = "busy" },
      new PersonData() { Name="invoice.customer_details.name", Status = "active"},
      new PersonData() { Name="invoice.customer_details.address", Status = "busy" },
      new PersonData() { Name="invoice.customer_details.email", Status = "active" },
      new PersonData() { Name="invoice.issue_date", Status = "away"},
      new PersonData() { Name="invoice.due_date", Status = "busy" }
   };
   …
   …
   …

}
Refer to the following image.
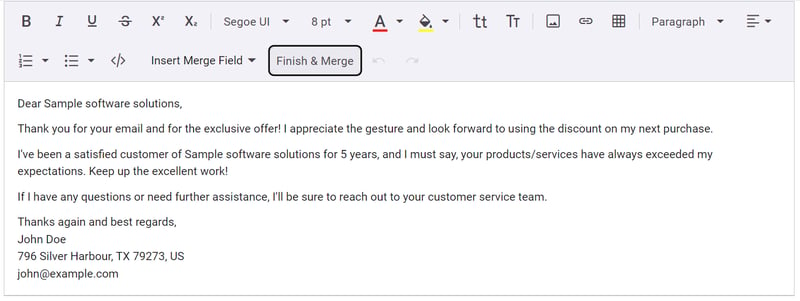
Step 4: Add the Finish and Merge button to the Rich Text Editor toolbar and merge the placeholder text
Let’s add a custom button labeled Finish & Merge to the Blazor Rich Text Editor’s toolbar. Then, define the JSON data in the InvoiceData.json file for customer and company details to merge the placeholder text.
Using the Scriban, we can render the mail merge placeholder text and assign it to the Rich Text Editor’s Value property.
Refer to the following code example.
@page "/"
@using Syncfusion.Blazor.RichTextEditor
@using Syncfusion.Blazor.DropDowns
@using Syncfusion.Blazor.Navigations
@using RichTextEditorMailMerge.Model
@using Newtonsoft.Json
@using Scriban

<SfRichTextEditor ID="mailMerge" @ref="rteObj" @bind-Value="TextEditorValue">
 <RichTextEditorToolbarSettings Items="@Tools" Type="ToolbarType.MultiRow">
  <RichTextEditorCustomToolbarItems>
   <RichTextEditorCustomToolbarItem Name="InsertMergeField">
                …
                …
                …
   </RichTextEditorCustomToolbarItem>
   <RichTextEditorCustomToolbarItem Name="FinishMerge">
    <Template>
     <button class="e-btn e-tbar-btn" @onclick="ClickHandler">
      <span style="font-size:14px">Finish & Merge</span>
     </button>
    </Template>
   </RichTextEditorCustomToolbarItem>
  </RichTextEditorCustomToolbarItems>
 </RichTextEditorToolbarSettings>

</SfRichTextEditor>
…
…
…

@code {
    …
    …
    …
    private List<ToolbarItemModel> Tools = new List<ToolbarItemModel>()
    {
        …
        …
        …
        new ToolbarItemModel() { Name = "InsertMergeField", TooltipText = "Insert Merge Field" },
        new ToolbarItemModel() { Name = "FinishMerge", TooltipText = "Finish & Merge" },
        new ToolbarItemModel() { Command = ToolbarCommand.Undo },
        new ToolbarItemModel() { Command = ToolbarCommand.Redo }
    };
    public void ClickHandler()
    {
        Invoice ? invoice = JsonConvert.DeserializeObject<Invoice>(File.ReadAllText(".\\Data\\InvoiceData.json"));
        string invoiceHTML = TextEditorValue;
        Template template = Template.Parse(invoiceHTML);
        var templateData = new { invoice };
        //Fill the template with real invoice data
        TextEditorValue = template.Render(templateData);
    }
    …
    …
    …
}
RichTextEditorMailMerge.Model
using Newtonsoft.Json;

namespace RichTextEditorMailMerge.Model
{
    public class Invoice
    {
        public string? InvoiceNumber { get; set; }
        public string? IssueDate { get; set; }
        public string? DueDate { get; set; }

        public UserDetails? CompanyDetails { get; set; }
        public UserDetails? CustomerDetails { get; set; }

    }
    public class UserDetails
    {
        public string? Name { get; set; }
        public string? Address { get; set; }
        public string? Email { get; set; }
        public string? Phone { get; set; }
    }
}
Refer to the following image.
GitHub reference
For more details, refer to the Mail merge in Blazor Rich Text Editor GitHub demo.
Conclusion
Thanks for reading! In this blog, we have seen how to integrate mail merge functionality into the Blazor Rich Text Editor. Try out the steps in this blog and provide your feedback!
If you are new to Syncfusion, try our control features by downloading a 30-day free trial.
You can also contact us through our support forum, support portal, or feedback portal. We are always happy to assist you!

Top comments (0)