
A machine learning model is only as good as the data it’s trained on. Gathering a robust set of training data is challenging for any ML project, but it’s especially difficult in the world of TinyML, where devices are often underpowered and running in areas with limited connectivity.
Here at Blues we specializing in making connectivity easy for embedded projects, and together with our friends at Edge Impulse and Zephyr, we’ve put together a workflow that we think helps make MLOps—or the process of continuously improving an ML model—possible for tiny devices.
In this article I’m going to lay out an opinionated way to implement a robust MLOps process. We’ll start by looking at how to collect ML data from your remote devices, and then show how you can update ML models running on our devices in the field. At the end you’ll have a workflow that looks like this.

Let’s get started.
NOTE: See Optimized MLOps with Edge Impulse, Blues, and Zephyr on YouTube for a video version of this tutorial.
Collecting ML Data
For this article we’re going to assume we manage a fleet of devices tasked with monitoring industrial equipment. Each device is fitted with an accelerometer that measures machine vibrations, and runs those readings through an ML model that has been trained to detect abnormalities.
To adopt an MLOps workflow, this project needs a way to gather accelerometer samples from the field, and a way to send those samples to the cloud so that they can be used to train an updated model.
To send the data we’re going to use the Blues Notecard.
The Notecard is a system on module that makes connectivity simple for embedded projects. Specifically, the Notecard offers:
- 500MB of cellular connectivity
- Global cellular over LTE-M, NB-IoT, or Cat-1
- Secure “off the internet” communications from device-to-cloud
- Low-power hardware (~8µA when idle), and power-conscious firmware
- Easy embedding with onboard M.2 Key E connector or via a companion board
The Notecard is great for connectivity on remote devices as it can work in areas without Wi-Fi coverage, and can work on equipment that moves between locations or on vehicles. You can even use the Notecard for asset tracking.
To communicate with the Notecard in our project we need a few other pieces of hardware.
Setting up your hardware
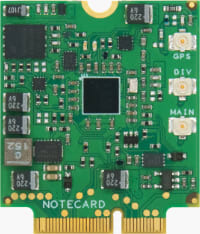
The easiest way to get started with the Notecard is with a Blues Starter Kit. The Starter Kit comes with a development board (Notecarrier), as well as a Swan microcontroller that can run this project’s firmware.

NOTE: The Blues quickstart has full details on how to assemble a Blues Starter Kit.
With the Starter Kit assembled, the last thing we need is an accelerometer to use to take readings. For that accelerometer we’ll use an LIS3DH, which you can connect to the Starter Kit’s Notecarrier via a Qwiic cable.

With all hardware assembled, let’s look at the firmware we’ll use to gather the accelerometer readings.
The Firmware
This project’s firmware is responsible for gathering readings from the accelerometer, and using the Notecard to send those readings to the cloud.
For the firmware implementation we’re using Zephyr, as Zephyr is low-level enough to give us access to features like threading, while high-level enough to provide sensor APIs and other development conveniences. Plus, Zephyr firmware runs great on the STM32-based boards like the Swan, and the Notecard has a ready-to-use Zephyr SDK.
The full firmware source code for this project is available on GitHub, and I will highlight some of the most important parts here.
First, the firmware has to establish a connection between the Notecard and the Notecard’s backing cloud service, Notehub. It does so by performing a hub.set request on the Notecard, and sending a ProductUID that tells what project to associate this Notecard with.
J *req = NoteNewRequest("hub.set");
JAddStringToObject(req, "product", "com.your-company:your-product-name");
JAddStringToObject(req, "mode", "continuous");
JAddStringToObject(req, "sn", "your-device-name");
NoteRequest(req);
A couple of notes on the code above:
- All of the Notecard’s API use JSON. The Notecard’s C SDK includes a number of helper functions such as
JAddStringToObjectto make it easier to create JSON objects and send them to the Notecard. - The development board that comes in a Blues Starter Kit, the Notecarrier F, performs all the necessary wiring so that the Swan can communicate with the Notecard via I2C. The
NoteRequestAPI performs this communication.
With a connection with Notehub established we next need to gather data from the accelerometer. The Zephyr code to take a reading from the LIS3DH is relatively straightforward on its own.
struct sensor_value accelerometerData[3];
int rc = sensor_sample_fetch(sensor);
if (rc != 0) {
    printk("Failed to fetch sensor data (error: %d)\n", rc);
    continue;
}

rc = sensor_channel_get(sensor, SENSOR_CHAN_ACCEL_XYZ, accelerometerData);
if (rc != 0) {
    printk("Failed to get sensor data (error: %d)\n", rc);
    continue;
}

float x = sensor_value_to_float(&accelerometerData[0]);
float y = sensor_value_to_float(&accelerometerData[1]);
float z = sensor_value_to_float(&accelerometerData[2]);
printk("Reading - x: %f, y: %f, z: %f\n", x, y, z);
This code snippet takes a single accelerometer reading and places the values in three floating point variables named x, y, and z.
For this example we need code that is a little more complex though, as we’re not taking one accelerometer reading—instead, we’re taking a series of readings over a period of time so that it can be sent to an ML model to look for patterns.
For this project we’re using Edge Impulse to create and train our models. After you’ve built a model with Edge Impulse, Edge Impulse lets you download an SDK with sample code that helps you gather sensor data at the intervals their platform expects for training purposes. Here’s what that ends up looking like in our Zephyr code.
struct sensor_value accelerometerData[3];
float *buffer = (float *)malloc(EI_CLASSIFIER_DSP_INPUT_FRAME_SIZE * sizeof(float));

for (size_t ix = 0; ix < (EI_CLASSIFIER_DSP_INPUT_FRAME_SIZE - 2);
    ix += EI_CLASSIFIER_RAW_SAMPLES_PER_FRAME)
{
    // Determine the next tick (and then sleep later)
    uint32_t next_tick_ms = NoteGetMs() + EI_CLASSIFIER_INTERVAL_MS;

    int rc = sensor_sample_fetch(sensor);
    if (rc != 0) {
        printk("Failed to fetch sensor data (error: %d)\n", rc);
        continue;
    }

    rc = sensor_channel_get(sensor, SENSOR_CHAN_ACCEL_XYZ, accelerometerData);
    if (rc != 0) {
        printk("Failed to get sensor data (error: %d)\n", rc);
        continue;
    }

    float x = sensor_value_to_float(&accelerometerData[0]);
    float y = sensor_value_to_float(&accelerometerData[1]);
    float z = sensor_value_to_float(&accelerometerData[2]);
    printk("x: %f, y: %f, z: %f\n", x, y, z);

    buffer[ix] = x;
    buffer[ix + 1] = y;
    buffer[ix + 2] = z;

    int32_t delay_ms = next_tick_ms - NoteGetMs();
    NoteDelayMs(delay_ms < 2 ? delay_ms : 2);
}
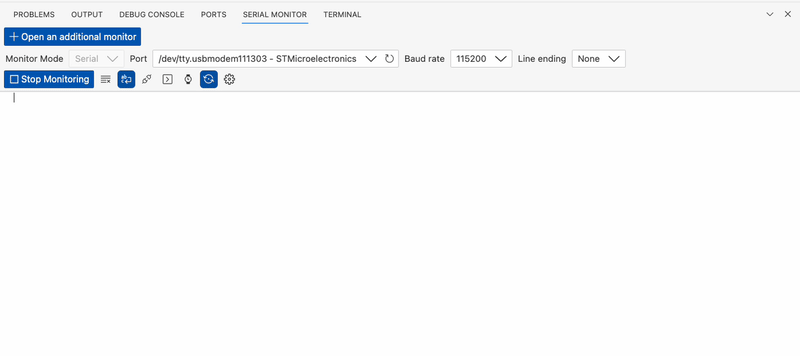
The various constants in this sample, EI_CLASSIFIER_DSP_INPUT_FRAME_SIZE, EI_CLASSIFIER_RAW_SAMPLES_PER_FRAME, and EI_CLASSIFIER_INTERVAL_MS, help dictate exactly how often the code takes accelerometer samples and loads them into the buffer. If you run the code and look at the logs you’ll see the accelerometer samples logged live.
With the data loaded into a buffer variable, our firmware’s last task is to send that data to Notehub.
Sending the Data
Large accelerometer samples like we’re using in this project require a decent amount of storage, and historically, working with these larger data packets was problematic for the Notecard, as the Notecard is primarily a low-bandwidth and low-power friendly device.
However, the new Notecard v5.3.1 firmware release includes a new feature aimed at drastically speeding up data transfer for these types of transfers, and allowing you to upload up to 128kb at a time—which is plenty for our situation.
The new Notecard APIs are named card.binary, and the way you use them in Zephyr apps is with the NoteBinaryStoreTransmit and NoteBinaryStoreReceive methods. Here’s what that looks like in our sample.
NoteBinaryStoreTransmit((uint8_t *)buffer,
    (EI_CLASSIFIER_DSP_INPUT_FRAME_SIZE * sizeof(float)),
    (EI_CLASSIFIER_DSP_INPUT_FRAME_SIZE_COBS * sizeof(float)),
    0);
The NoteBinaryStoreTransmit method loads the buffer into a dedicated area of the Notecard’s memory. Once loaded, you can send the data to your Notecard using the Notecard’s web.post method with the binary flag set to true. Here’s what that looks like.
J *req = NoteNewRequest("web.post");
JAddStringToObject(req, "route", "ingest");
JAddStringToObject(req, "content", "binary/octet-stream");
JAddBoolToObject(req, "binary", true);
NoteRequest(req);
At this point our code is now sending batches of accelerometer readings to Notehub as a binary stream of floating-point values. Our final task is to write an endpoint that can accept that stream, parse out the floating-point values, and send them to Edge Impulse as new training data for our ML model.
Getting the Data to Edge Impulse
In this step we’re going to look at how to create an HTTP server that can accept data from Notehub and forward it to Edge Impulse. The example code I’m providing is written in Node.js, Express, and JavaScript, as that’s my toolchain of choice, but the server needed for this step can be written in any language and using any framework you’d like.
As with before, the full source code required to create the server is open source and available on GitHub, and I’ll be highlighting the most important parts here.
At the highest level, this endpoint has to listen for POST requests coming in at the root of the server. Here’s how that’s done in Express.
const express = require("express");
const app = express();

app.post("/", async (req, res) => {
  ...
});
Once you have the request, you next have to parse out the floating-point accelerometer values coming from Notehub. Specifically, the code has to parse the request, get out 32-bit floating point values one at a time, and put them into an array of readings to use later. Here’s what that code looks like in JavaScript.
const binaryFromRequest = Buffer.from(request, "binary");
const dataView = new DataView(binaryFromRequest.buffer);

for (let i = 0; i <= buffer.length - 1; i += 12) {
  let x = dataView.getFloat32(i, true);
  let y = dataView.getFloat32(i + 4, true);
  let z = dataView.getFloat32(i + 8, true);
  data.push([x, y, z]);
}
With the data aggregated, the last step is to get our data to Edge Impulse. For this, Edge Impulse provides an ingestion API that expects data in a given format, and places a new entry in your model’s training set.
Here’s what the code to do that in JavaScript looks like.
const emptySignature = Array(64).fill("0").join("");
const body = {
    protected: {
        ver: "v1",
        alg: "none",
        iat: Math.floor(Date.now() / 1000),
    },
    signature: emptySignature,
    payload: {
        device_name: "device-1",
        device_type: "LIS2HH12",
        interval_ms: 1,
        sensors: [
            { name: "accX", units: "m/s2" },
            { name: "accY", units: "m/s2" },
            { name: "accZ", units: "m/s2" },
        ],
        values: data,
    },
};

try {
    await fetch("https://ingestion.edgeimpulse.com/api/training/data", {
        method: "POST",
        headers: {
            "x-api-key": process.env.EDGE_IMPULSE_API_KEY,
            "x-file-name": "test",
            "x-label": "idle",
            "Content-Type": "application/json",
        },
        body: JSON.stringify(body),
    });
} catch (e) {
    console.log("Error publishing data", e);
}
Now that you have a server you need to make the server available on the public internet. You can do this via your favorite hosting provider, or, if you’re looking for a quick way to test you can use a service like localtunnel or ngrok.
I’m a big fan of ngrok as I’ve found it works well and they have a generous free tier. After installing, you can run ngrok with a simple command from your terminal or command prompt.
ngrok http 3000
Running this command makes the provided port (in this case 3000) available on the public internet at the provided URL.

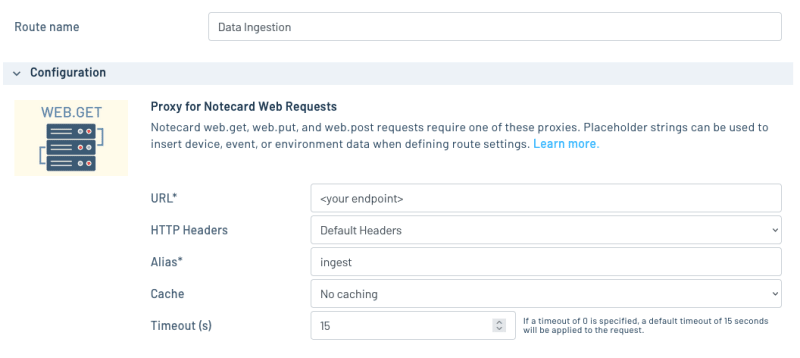
Once you have this URL your very last step is to create a proxy route in Notehub. The proxy route provides the connection so that Notehub knows to invoke your web server when it receives a web.post request from the Notecard. Here’s an example of the proxy route you need to create, making sure to provide your own URL for the URL field.
And with that—you’re all set. If you start up your firmware on your device it’ll start collecting accelerometer samples. The firmware will then use the Notecard to send your data to Notehub, which invokes your proxy route, which sends the data to Edge Impulse where you can further refine your ML models.
Pretty cool!
The power of this approach is that it can run in any environment that has cellular connectivity. Meaning, you could adapt this code to run on your production hardware, and start collecting training data from devices in real-world conditions.
Exactly how you’ll want to use this code will likely vary. Maybe you’d want to take a few samples a day at different intervals. Maybe you’ll want to create a Notehub environment variable and only send readings when that variable is activated. The idea behind this sample is to you how the raw data transfer works, and to serve as inspiration for the code and techniques you may want to incorporate into your own projects.
And speaking of techniques you may want to incorporate, I have one more fun thing to show you.
Updating ML Models
In this article we’re looking at how to implement a robust MLOps process. In the previous section we saw how to gather training data from devices in the field, which allows you to continuously improve your ML models with real data. But that leaves a big problem—after you’ve done the work to build an improved version of your model, how do you get that model back out to your devices in the field?
The Notecard offers a compelling answer to this question with Notecard Outboard Firmware Update.
What is Notecard Outboard Firmware Update?
Over-the-the firmware updates are table stakes in IoT, but implementing the updates themselves is often a complex and highly risky endeavor. Most firmware-update processes require developers to write code, generally placed within the application itself, or within its RTOS, requiring a special ‘bootloader’ and firmware layout. This requires a high degree of skill, is susceptible to bad updates “bricking” or rendering devices non-functional, and often removes developer choice from the equation.
Outboard Firmware Update is a Notecard feature that allows device builders to implement OTA firmware updates in their devices without writing any code. Additionally, developers have the freedom of choice, and may select from a large number of microcontrollers (MCUs), programming languages, and real-time operating systems (RTOS), and can even perform updates on ‘native’ applications with no code from Blues and no RTOS at all.
Outboard Firmware Update is compelling for machine-learning projects like the one we’re discussing in this article, because it allows you update an app’s full ML model, and it allows you to do so remotely, and all without the risk of bricking your devices.
How does Notecard Outboard Firmware Update work?
The Notecard’s docs have a convenient checklist for everything you need to do to perform an outboard firmware update. Let’s look at how each item in that list works in this project.
You ensure your hardware is using the required wiring.
Because we’re using a Notecarrier F from the Blues Starter Kit for this project, all wiring between the Notecard and our host (the Blues Swan) is already ready to go. If you’re using other boards, see this guide for details on the required wiring.
You enable Notecard Outboard Firmware Update on your Notecard.
We’re performing the necessary call to make this happen in our Zephyr firmware. Specifically, the sample code performs a card.dfu request on the Notecard setting "name" to "stm32" (because the Swan is an STM32-based MCU), and "on" to true.
J *req = NoteNewRequest("card.dfu");
JAddStringToObject(req, "name", "stm32");
JAddBoolToObject(req, "on", true);
NoteRequest(req);
You build your firmware image file.
This step requires you to build the binary firmware image file you’d like to update your device with. In a production workflow, this step would occur after you have an updated version of your model ready, have placed the updated model into your application, and have done the necessary testing to push the model out to some, or all, of your devices.
For local testing, I’d recommend adding a simple logging statement near the top of main() so you can see the firmware update in action.
printk("[INFO] version: 2.0\n");
With the app updated you’ll need to build your Zephyr app, and then grab the built binary in your project from build/zephyr/zephyr.bin.
You upload your firmware on Notehub.
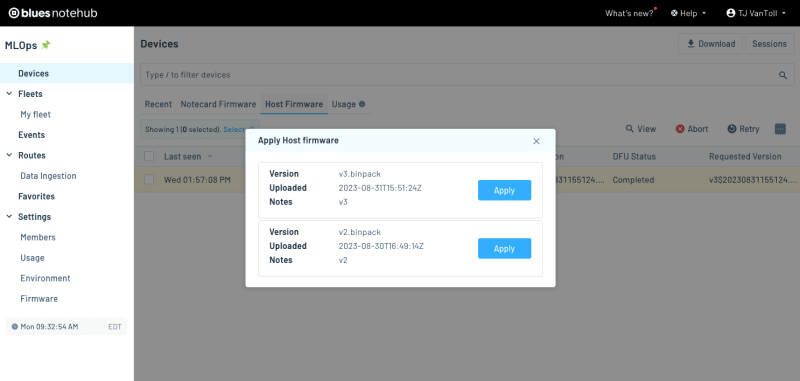
Once you have your new binary visit the Firmware section of your Notehub project, click the Upload firmware button, and upload your newly built file.

At this point Notehub has your firmware and is ready to push it out to your devices. To do so, go to your Notehub project’s Devices page, and then select the Host Firmware tab. Here you’ll see all available firmware versions for your host devices, and hitting Apply starts the process of getting the updated firmware on your host.
The Notecard downloads the firmware, verifies it, and performs the update.
Once you’ve queued up a firmware update in Notehub, the Notecard detects a new host binary is available on its next sync and downloads the firmware into its own flash storage.
The Notecard will then perform a RESET on the host microcontroller, which places it into its ROM bootloader. Then, using a microcontroller-specific communications protocol, the Notecard reprograms the various areas in flash as directed by instructions within the firmware image file, verifies them via MD5 hashes, and restarts the MCU.
The great thing is this all happens automatically, and at the end of the process your device will start running your updated model automatically.

Putting it all together
The big picture is each of the two processes discussed in this article—an easy way to collect ML training data from remote devices, and a workflow to remotely update your models—are both tools that can help you build a more robust MLOps process. The end goal is to avoid shipping your models once and forgetting about them, and to instead establish a process of continuously collecting data, and continuously improving the quality of the models you use for your production apps.
This article’s samples are reference implementations and are both available on GitHub. You may wish to use their code verbatim, or take the bits and pieces that make sense for your project.
At Blues we create a lot of real-world TinyML samples. If you found this discussion interesting, you might want to check out our ML accelerator projects, and the many ML projects our community have built. And if you have any questions about this post, or want to discuss anything further, check out our forum.

Top comments (0)