
Written by Dotun Jolaoso✏️
Introduction
Firebase authentication provides backend services to help authenticate users to your application. They provide support for different auth providers such as passwords, phone numbers, identity providers such as Google, Twitter, Facebook, etc. To integrate Firebase authentication to your application, you can use either the Firebase UI which handles the UI flows for signing in users using different providers or you can manually set up the Firebase SDK in your project and provide support for any provider you would like to use.
In this tutorial, we’ll be setting up Firebase manually. We’ll create the different views needed for registration and logging in and then provide support for email and password authentication.

Setting up Vue
To get started, we’ll be using the Vue CLI to quickly scaffold a new Vue project. The CLI can be installed globally by running the following command:
npm install -g @vue/cli
Next, run the following command to create a Vue project:
vue create firebase-auth
You will be prompted to pick a preset, the default works fine for this tutorial.
Setting up a Firebase project
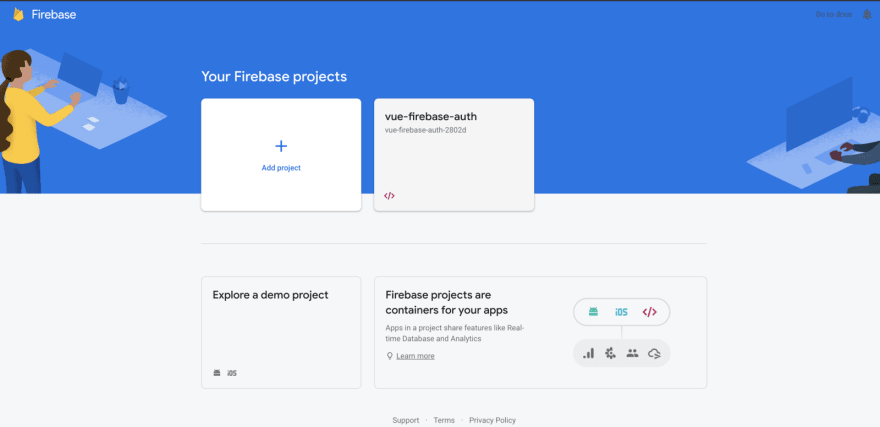
To begin using Firebase, you’ll need a Gmail account. Head over to https://console.firebase.google.com/u/0/ and create a new project.
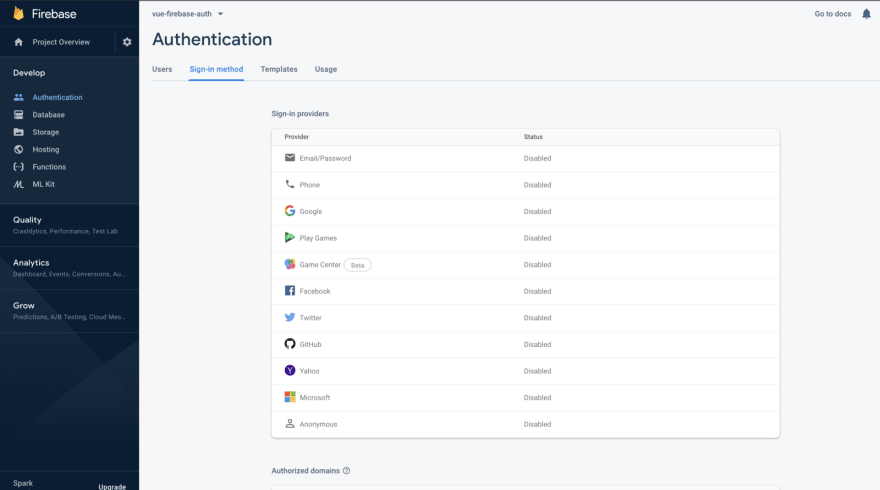
Firebase provides support for authentication using different providers such as Social Auth, phone numbers as well as the standard email and password method. Since we’ll be using the email and password authentication method in this tutorial, we need to enable this method for the project we just created in Firebase, as it is disabled by default.
Under the authentication tab for your project, click the sign-in method and you should see a list of providers Firebase currently supports.
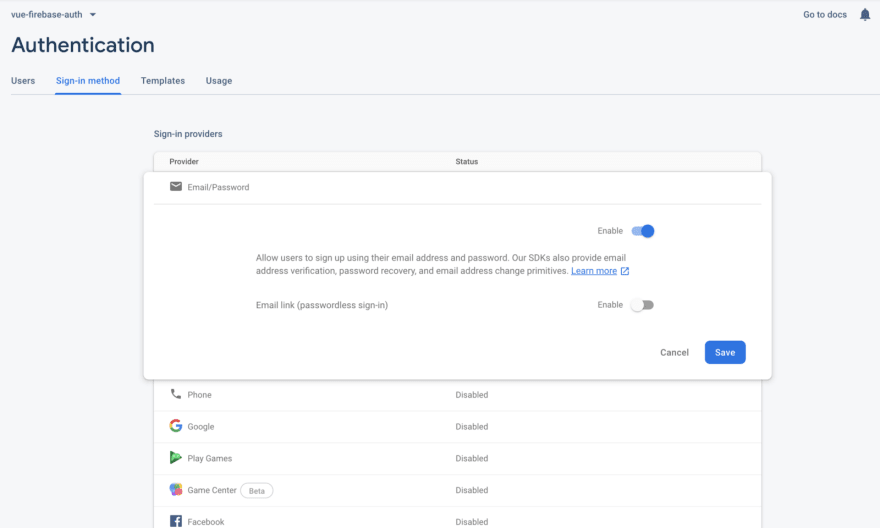
Next, click the edit icon on the email/password provider and enable it.
Next, you need to go and register your application under your Firebase project. On the project’s overview page, select the add app option and pick web as the platform.

Once you’re done registering the application, you’ll be presented with a screen containing your application credentials. Take note of the second script tag as we’ll be using it shortly in our Vue application.
Installing dependencies
Next, cd into your project’s directory and run the following command to install all our dependencies:
npm i firebase vue-router vuex
- firebase is the npm package we’ll use for interacting with Firebase
- vue-router is the official router for Vuejs
- vuex is a state management library for Vue
Vuejs and Firebase
It’s time to set up Firebase with our Vue project. In the main.js file, we’ll import the Firebase package and configure it to use the application credentials we noted from the Firebase console earlier. Edit the main.js file, so that it looks something similar to the code below:
import Vue from "vue";
import App from "./App.vue";
import * as firebase from "firebase";

Vue.config.productionTip = false;

const configOptions = {
  apiKey: "",
  authDomain: "vue-firebase-auth-2802d.firebaseapp.com",
  databaseURL: "https://vue-firebase-auth-2802d.firebaseio.com",
  projectId: "vue-firebase-auth-2802d",
  storageBucket: "",
  messagingSenderId: "",
  appId: ""
};

firebase.initializeApp(configOptions);

new Vue({
  render: h => h(App)
}).$mount("#app");
Don’t forget to replace configOptions with your own Firebase credentials.
Creating the components
Let’s create the different components our project will have. These are the following components we’ll need:
Register.vue — This component will handle the logic for allowing users to register as well as displaying the register view
Login.vue — This component will handle allowing users to log in and display the login view
Dashboard.vue — Once users have successfully registered or been authenticated, we’ll display this component to them
Navbar.vue — The navbar component that will be shared across all other components
Head over to the src/components directory and run the following command to create the components we just listed above
touch Register.vue Login.vue Dashboard.vue Navbar.vue
Routing
Before we start working on our components, let’s add the routes our application will have. Create a routes folder inside the src directory and inside the folder, add an index.js file and edit the file with the following code:
import Vue from 'vue';
import Router from 'vue-router';
import Login from '../components/Login'
import Register from '../components/Register'
import Dashboard from '../components/Dashboard'

Vue.use(Router)

const router = new Router({
    mode: 'history',
    base: process.env.BASE_URL,
    routes: [
        {
        path: '/login',
        name: 'login',
        component: Login
    },
    {
        path: '/register',
        name: 'Register',
        component: Register
    },
    {
        path: '/dashboard',
        name: 'Dashboard',
        component: Dashboard
    }
]
});

export default router
Next, replace the content of the App.vue file with the <router-view/> tag:
<template>
  <div>
    <main class="py-4">
      <router-view></router-view>
    </main>
  </div>
</template>

<script>
export default {
};
</script>
Registering users
Let’s see how we can register users and store their details on Firebase. Edit the src/components/Register.vue with the following code:
<template>
  <div class="container">
    <div class="row justify-content-center">
      <div class="col-md-8">
        <div class="card">
          <div class="card-header">Register</div>
          <div class="card-body">
            <div v-if="error" class="alert alert-danger">{{error}}</div>
            <form action="#" @submit.prevent="submit">
              <div class="form-group row">
                <label for="name" class="col-md-4 col-form-label text-md-right">Name</label>

                <div class="col-md-6">
                  <input
                    id="name"
                    type="name"
                    class="form-control"
                    name="name"
                    value
                    required
                    autofocus
                    v-model="form.name"
                  />
                </div>
              </div>

              <div class="form-group row">
                <label for="email" class="col-md-4 col-form-label text-md-right">Email</label>

                <div class="col-md-6">
                  <input
                    id="email"
                    type="email"
                    class="form-control"
                    name="email"
                    value
                    required
                    autofocus
                    v-model="form.email"
                  />
                </div>
              </div>

              <div class="form-group row">
                <label for="password" class="col-md-4 col-form-label text-md-right">Password</label>

                <div class="col-md-6">
                  <input
                    id="password"
                    type="password"
                    class="form-control"
                    name="password"
                    required
                    v-model="form.password"
                  />
                </div>
              </div>

              <div class="form-group row mb-0">
                <div class="col-md-8 offset-md-4">
                  <button type="submit" class="btn btn-primary">Register</button>
                </div>
              </div>
            </form>
          </div>
        </div>
      </div>
    </div>
  </div>
</template>


<script>
import firebase from "firebase";

export default {
  data() {
    return {
      form: {
        name: "",
        email: "",
        password: ""
      },
      error: null
    };
  },
  methods: {
    submit() {
      firebase
        .auth()
        .createUserWithEmailAndPassword(this.form.email, this.form.password)
        .then(data => {
          data.user
            .updateProfile({
              displayName: this.form.name
            })
            .then(() => {});
        })
        .catch(err => {
          this.error = err.message;
        });
    }
  }
};
</script>
Within the <template></template> tag, we’ve created a simple bootstrap form for registering users. Each input field in the form is bound to the defined properties in the data() function using v-model . When the form is submitted, a submit() method is triggered, which handles the actual registration of the user on Firebase. Let’s take a look at this method in detail to further understand what’s happening.
methods: {
    submit() {
      firebase
        .auth()
        .createUserWithEmailAndPassword(this.form.email, this.form.password)
        .then(data => {
          data.user
            .updateProfile({
              displayName: this.form.name
            })
            .then(() => {});
        })
        .catch(err => {
          this.error = err.message;
        });
    }
  }
In the submit() method, firebase.auth() gives us access to our default app’s auth service.
Next, we call createUserWithEmailAndPassword(), passing in the email and password of the user we would like to register on Firebase. We do not need to hash the password as Firebase automatically takes care of that. Once the registration is successful, we call updateProfile() method on the user object that was returned to associate the name field with the user. In the catch block, we assign any errors that occurred to an error property on the component which is then displayed to the user.
Logging in users
Next, we’ll take a look at how we can allow users to be able to log in. Edit the Login.vue component we created earlier with the following code:
<template>
  <div class="container">
    <div class="row justify-content-center">
      <div class="col-md-8">
        <div class="card">
          <div class="card-header">Login</div>
          <div class="card-body">
            <div v-if="error" class="alert alert-danger">{{error}}</div>
            <form action="#" @submit.prevent="submit">
              <div class="form-group row">
                <label for="email" class="col-md-4 col-form-label text-md-right">Email</label>

                <div class="col-md-6">
                  <input
                    id="email"
                    type="email"
                    class="form-control"
                    name="email"
                    value
                    required
                    autofocus
                    v-model="form.email"
                  />
                </div>
              </div>

              <div class="form-group row">
                <label for="password" class="col-md-4 col-form-label text-md-right">Password</label>

                <div class="col-md-6">
                  <input
                    id="password"
                    type="password"
                    class="form-control"
                    name="password"
                    required
                    v-model="form.password"
                  />
                </div>
              </div>

              <div class="form-group row mb-0">
                <div class="col-md-8 offset-md-4">
                  <button type="submit" class="btn btn-primary">Login</button>
                </div>
              </div>
            </form>
          </div>
        </div>
      </div>
    </div>
  </div>
</template>

<script>
import firebase from "firebase";

export default {
  data() {
    return {
      form: {
        email: "",
        password: ""
      },
      error: null
    };
  },
  methods: {
    submit() {
      firebase
        .auth()
        .signInWithEmailAndPassword(this.form.email, this.form.password)
        .then(data => {
          this.$router.replace({ name: "Dashboard" });
        })
        .catch(err => {
          this.error = err.message;
        });
    }
  }
};
</script>
The Login.vue component is very similar to the Register.vue component. We’ve defined a simple form for collecting the user’s email and password and each input field is bound to a data() property on our component using v-model. When the user tries to log in, the submit() method is called which in turn authenticates the user using Firebase.
methods: {
  submit() {
    firebase
      .auth()
      .signInWithEmailAndPassword(this.form.email, this.form.password)
      .then(data => {
        this.$router.replace({ name: "Dashboard" });
      })
      .catch(err => {
        this.error = err.message;
      });
  }
}
The signInWithEmailAndPassword() is called on firebase.auth() which takes in the email and password of the user we would like to authenticate. Once the user has been successfully authenticated, we’ll take them to the Dashboard route using vue-router. Any error message that occurred during this phase is assigned to the error property and then displayed to the user.
Managing state with Vuex
Right now, our application has no way of knowing when users have been authenticated. Let’s fix that. In the src directory, create a store.js file and add the following code to the file:
import Vue from "vue";
import Vuex from "vuex";
Vue.use(Vuex);
export default new Vuex.Store({
  state: {
    user: {
      loggedIn: false,
      data: null
    }
  },
  getters: {
    user(state){
      return state.user
    }
  },
  mutations: {
    SET_LOGGED_IN(state, value) {
      state.user.loggedIn = value;
    },
    SET_USER(state, data) {
      state.user.data = data;
    }
  },
  actions: {
    fetchUser({ commit }, user) {
      commit("SET_LOGGED_IN", user !== null);
      if (user) {
        commit("SET_USER", {
          displayName: user.displayName,
          email: user.email
        });
      } else {
        commit("SET_USER", null);
      }
    }
  }
});
Let’s break down what’s happening in this file. To start with, our state contains a user object which holds information about the logged-in user.
state: {
  user: {
    loggedIn: false,
    data: null
  }
},
The loggedIn property which has a default value of false is a boolean that tells us whether the user has been authenticated or not. The data property holds information about the logged-in user.
getters: {
    user(state){
      return state.user
    }
  },
Getters in vuex generally, provide a way of accessing data stored in the state. We’ve defined a simple getter called user that returns the user object from the state:
mutations: {
  SET_LOGGED_IN(state, value) {
    state.user.loggedIn = value;
  },
  SET_USER(state, data) {
    state.user.data = data;
  }
},
Mutations allows us to be able to make changes to our state. Here, we’ve defined two mutations.
SET_LOGGED_IN which sets the loggedIn property on state.user to the value that was passed to it. SET_USER makes changes to the data property on state.user.
actions: {
  fetchUser({ commit }, user) {
    commit("SET_LOGGED_IN", user !== null);
    if (user) {
      commit("SET_USER", {
        displayName: user.displayName,
        email: user.email
      });
    } else {
      commit("SET_USER", null);
    }
  }
}
Actions are similar to Mutations but instead of mutating the state, they commit mutations. We’ve defined a simple fetchUser action here to commit the SET_LOGGED_IN and SET_USERmutations we defined earlier.
Using the store
Now that we’ve defined everything in our store, we need a way to be able to dispatch the fetchUser() action when a user has been successfully authenticated. Thankfully, Firebase provides an onAuthStateChanged() observer we can set on the auth() object, which we can then use to get the currently signed-in user. For example:
firebase.auth().onAuthStateChanged(user =>  {
  if (user) {
    // User is signed in.
  } else {
    // No user is signed in.
  }
});
So all we need to do in our case is to dispatch the fetchUser() action on the observer. Edit the src/main.js file with the following code:
import Vue from "vue";
import App from "./App.vue";
import router from "./routes/index";
import * as firebase from "firebase";
import store from "./store";

Vue.config.productionTip = false;

const configOptions = {
  apiKey: "",
  authDomain: "vue-firebase-auth-2802d.firebaseapp.com",
  databaseURL: "https://vue-firebase-auth-2802d.firebaseio.com",
  projectId: "vue-firebase-auth-2802d",
  storageBucket: "",
  messagingSenderId: "",
  appId: ""
};

firebase.initializeApp(configOptions);

firebase.auth().onAuthStateChanged(user => {
  store.dispatch("fetchUser", user);
});

new Vue({
  router,
  store,
  render: h => h(App)
}).$mount("#app");
Now, using the store, we can tell whether a user is authenticated or not.
Dashboard and navbar component
Next, add the code below to src/components/Dashboard.vue file:
<template>
  <div class="container">
    <div class="row justify-content-center">
      <div class="col-md-8">
        <div class="card">
          <div class="card-header">Dashboard</div>
          <div class="card-body">
            <div v-if="user" class="alert alert-success" role="alert">You are logged in!</div>
          </div>
        </div>
      </div>
    </div>
  </div>
</template>
<script>
import { mapGetters } from "vuex";
export default {
  computed: {
    // map `this.user` to `this.$store.getters.user`
    ...mapGetters({
      user: "user"
    })
  }
};
</script>
Here, we’ve defined a simple dashboard view with a bootstrap alert informing the user that they’ve successfully logged in. In the <script> tag, we import mapGetters from vuex which is a helper that simply maps store getters to local computed properties.
Next, let’s edit the src/components/Navbar.vue . Our aim with the Navbar is to display the profile information of the user if they’re currently logged in or a simple register and login button, if they’re not logged in. Add the following code to the file:
<template>
  <nav class="navbar navbar-expand-md navbar-light navbar-laravel">
    <div class="container">
      <router-link to="/" class="navbar-brand">Vue Firebase Auth</router-link>
      <button
        class="navbar-toggler"
        type="button"
        data-toggle="collapse"
        data-target="#navbarSupportedContent"
        aria-controls="navbarSupportedContent"
        aria-expanded="false"
        aria-label
      >
        <span class="navbar-toggler-icon"></span>
      </button>
      <div class="collapse navbar-collapse" id="navbarSupportedContent">
        <ul class="navbar-nav mr-auto"></ul>
        <ul class="navbar-nav ml-auto">
          <template v-if="user.loggedIn">
            <div class="nav-item">{{user.data.displayName}}</div>
            <li class="nav-item">
              <a class="nav-link" @click.prevent="signOut">Sign out</a>
            </li>
          </template>
          <template v-else>
            <li class="nav-item">
              <router-link to="login" class="nav-link">Login</router-link>
            </li>
            <li class="nav-item">
              <router-link to="register" class="nav-link">Register</router-link>
            </li>
          </template>
        </ul>
      </div>
    </div>
  </nav>
</template>
<script>
import { mapGetters } from "vuex";
import firebase from "firebase";
export default {
  computed: {
    ...mapGetters({
// map `this.user` to `this.$store.getters.user`
      user: "user"
    })
  },
  methods: {
    signOut() {
      firebase
        .auth()
        .signOut()
        .then(() => {
          this.$router.replace({
            name: "home"
          });
        });
    }
  }
};
</script>
Similarly, with the Dashboard.vue component, we import the mapGetters helper from vuex and then map a user computed property to our user getter on the store. Next, add the Navbar component to our App.vue file :
<template>
  <div>
    <navbar></navbar>
    <main class="py-4">
      <router-view></router-view>
    </main>
  </div>
</template>
<script>
import navbar from "./components/Navbar";
export default {
  components: {
    navbar
  }
};
</script>
Logging out users
In the Navbar.vue component, we defined a signOut() method. To log out users, we simply call signOut() on firebase.auth():
methods: {
    signOut() {
      firebase
        .auth()
        .signOut()
        .then(() => {
          this.$router.replace({
            name: "home"
          });
        });
    }
  }
Conclusion
In this tutorial, we’ve seen how we can set up a simple authentication system using the email and password auth provider Firebase supports. The codebase for this tutorial can be foundhere. To build on this, you can add middlewares to certain routes and allow only authenticated users to access those routes.
Editor's note: Seeing something wrong with this post? You can find the correct version here.
Plug: LogRocket, a DVR for web apps

LogRocket is a frontend logging tool that lets you replay problems as if they happened in your own browser. Instead of guessing why errors happen, or asking users for screenshots and log dumps, LogRocket lets you replay the session to quickly understand what went wrong. It works perfectly with any app, regardless of framework, and has plugins to log additional context from Redux, Vuex, and @ngrx/store.
In addition to logging Redux actions and state, LogRocket records console logs, JavaScript errors, stacktraces, network requests/responses with headers + bodies, browser metadata, and custom logs. It also instruments the DOM to record the HTML and CSS on the page, recreating pixel-perfect videos of even the most complex single-page apps.
Try it for free.
The post Vue + Firebase authentication appeared first on LogRocket Blog.

Top comments (3)
Hey Brian, great article but two things could be improved.
You should be sending an email verification during register.
data.user.sendEmailVerification();
You should use onAuthStateChanged you retrieve the current user in your BeforeEach like that:
router.beforeEach((to, from, next) => {
firebase.auth().onAuthStateChanged(function(user) {
let requiresAuth = to.matched.some(record => record.meta.requiresAuth);
if (requiresAuth && !user) next("login");
else next();
});
});
Best,
Maxime
Another option is to use
firebaseui.auth.AuthUIGreat post Brian.
Fell free to join and contribute to this opensource project sample: vue-social-login