
Hey there! Thanks for stopping by 👋🏽.
In this article, you’ll learn how to build an NFT Minting Platform that helps mint selfies as NFTs. This article is for web3 developers or developers looking to create NFT Minting platforms.
This article is a very descriptive one, we’ll be using the same Bunzz’s React Boilerplate and also one of the composable modules (Single Smart Contract). We’ll be building super cool stuff in this tutorial.
Getting started
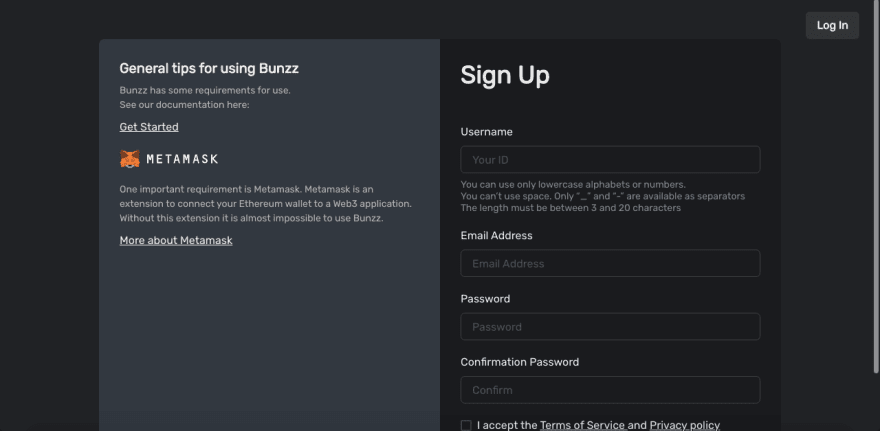
- Sign Up: You need to create a Bunzz account to get started with Bunzz. You have to fill in your credentials to get started with Bunzz. To get started, you can click this link. Note: After signing up, you’d get a confirmation code sent to your email. You should input this after the Sign Up process.
- Create a DApp: After signing up, one of the best parts of Bunzz is this; after inputting your confirmation code, you’ll find the Dashboard where you can create a DApp. Just click on “Create DApp”, like you’d see in the image below:

- Setup the DApp name: You need to create the DApp name. That’s the first step you’d take in the process of creating the NFT Marketplace as a DApp.

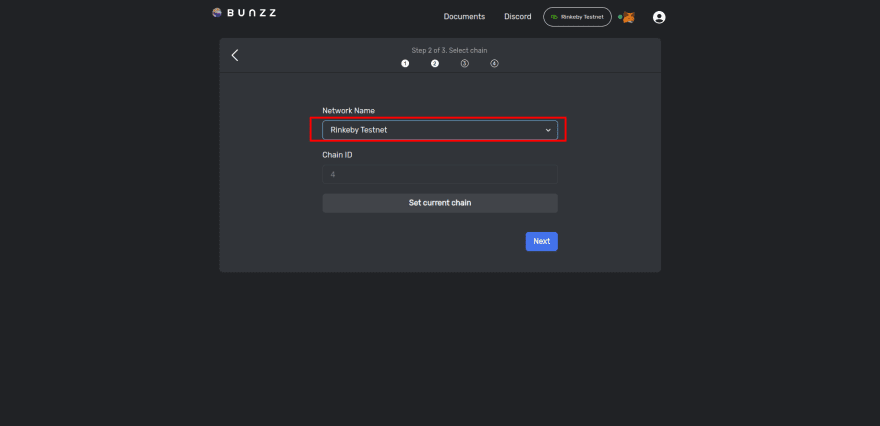
- When you click on the “create” button while trying to name your DApp, it redirects you to where you will select a chain. NOTE: you need to be using a testnet to be safe. Maybe Rinkeby Testnet, Ropsten Testnet, Kovan Testnet, etc.
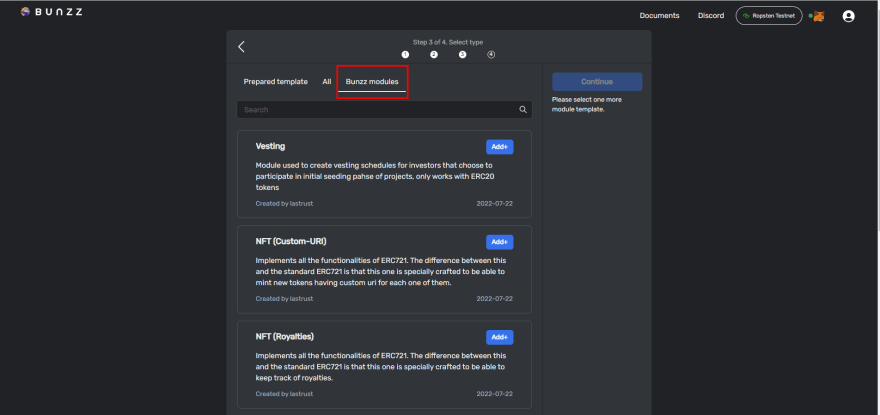
- *Select the Prepared Template * Smart Contract Module: You need to get to the STEP 3, under it, you will see the Bunzz Modules. It will help you create your smart contract, there are just a few things to do if you proceed with this step.
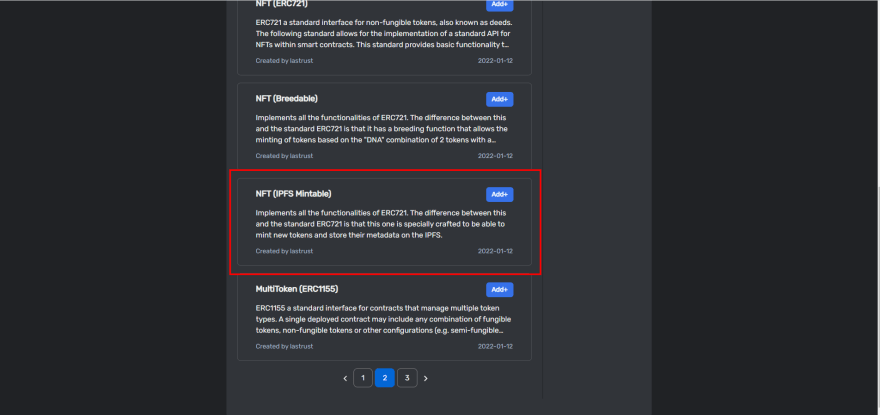
- Creating the Single Smart Contract: For this, you need to select the ‘NFT (IPFS Mintable)’ in the dropdown section, also create a name and symbol for the smart contract.
- Deployment Successful: After providing all the required data, you get to accept the transactions, and your DApp gets deployed successfully.

- Cloning the boilerplate: We need to clone this boilerplate to create this platform. But, in this case, we’ll be using React, not Vue nor JavaScript. In our VSCode, we will have to open the React folder, actually.

- Let’s get it done: You need to open your VSCode, after doing that, you need to open the React folder because that’s where everything will be. You need an env file with this command on your npm terminal:
$touch .env
This creates a .env file automatically, in the .env, there are some things that have to be in it - of course, the things needed to link your Bunzz project with the boilerplate. By the way, here are the stuffs that are meant to be in the .env file:
REACT_APP_DAPP_ID=YOUR_DAPP_ID
REACT_APP_API_KEY=YOUR_API_KEY
- Get your DApp and API Key: You need to get your DApp ID and API key, then copy and then replace the DApp ID with “YOUR_DAPP_ID” in the '.env' file, and also for the API Key, replace it with “YOUR_API_KEY” in the .env file as well.

- Create an NFT Storage: For this, you’d use the same nft.storage mentioned earlier. It’s the same platform you used to get your CID for IPFS; you need to create an API Key like this:

- One more thing to the .env file: Obviously, we cannot just get an API key without doing anything with it. There’s just a line and a key we need to add to the '.env' file:
REACT_APP_NFT_STORAGE_KEY=YOUR_NFT_STORAGE_KEY
You need to copy the API Key and replace it with YOUR_NFT_STORAGE_KEY, by the way. Note that you have to keep saving your changes to this file.
- Install the ‘react-html5-camera-photo’ npm package 📦 : You need to install this NPM package for usage, this is where the real stuff begins, this enables you to open up your webcam and capture an image. On your terminal, run this command::
npm install –save react-html5-camera-photo

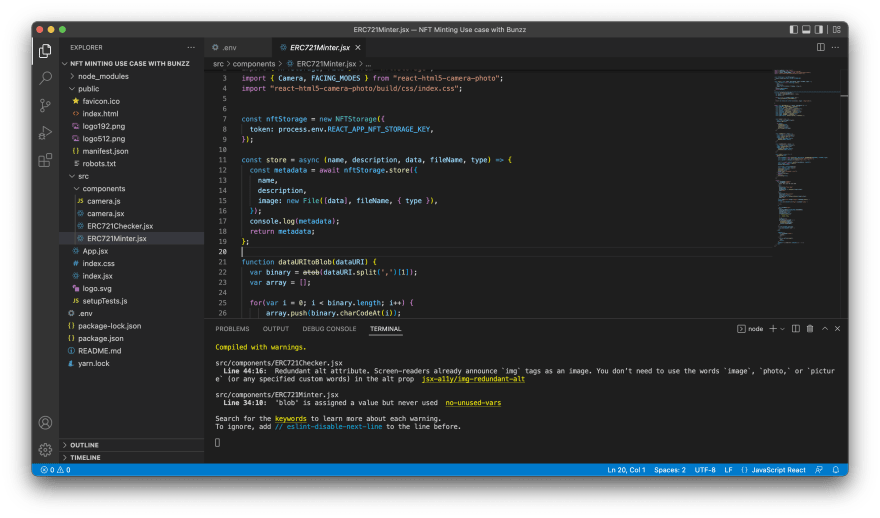
- Add these highlighted lines at the beginning of your code: By the way, we will be working with the ERC721Minter.jsx file under the components folder. Be sure you do not repeat any line.
import { NFTStorage, File } from "nft.storage";
import { Camera, FACING_MODES } from "react-html5-camera-photo";
import "react-html5-camera-photo/build/css/index.css";

- Remove some lines (the select file lines) after the description input and add these lines:
<div className="App">
     <Camera
       idealFacingMode={FACING_MODES.ENVIRONMENT}
       isImageMirror={false}
       isFullScreen={true}
       isMaxResolution={true}
       // idealResolution={{
       //   width: 500,
       //   height: 500
       // }}
       sizeFactor={1}
       onTakePhoto={(dataURI) => {
         setdataURI(dataURI);
         dataURItoBlob(dataURI);
         console.log(dataURI);
       }}
     />
     <a href={dataURI} download>
       <img src={dataURI} alt="" />
     </a>
   </div>
- The code needs to be inputted just like this 👇🏽:

- After inputting these lines, you’d also have to input these lines:
const store = async (name, description, data, fileName, type) => {
 const metadata = await nftStorage.store({
   name,
   description,
   image: new File([data], fileName, { type }),
 });
 console.log(metadata);
 return metadata;
};
Just like this 👇🏽
- After doing that, then you can run your application with the ‘npm run start’ command on your terminal. After doing that, you’d see something just like this:
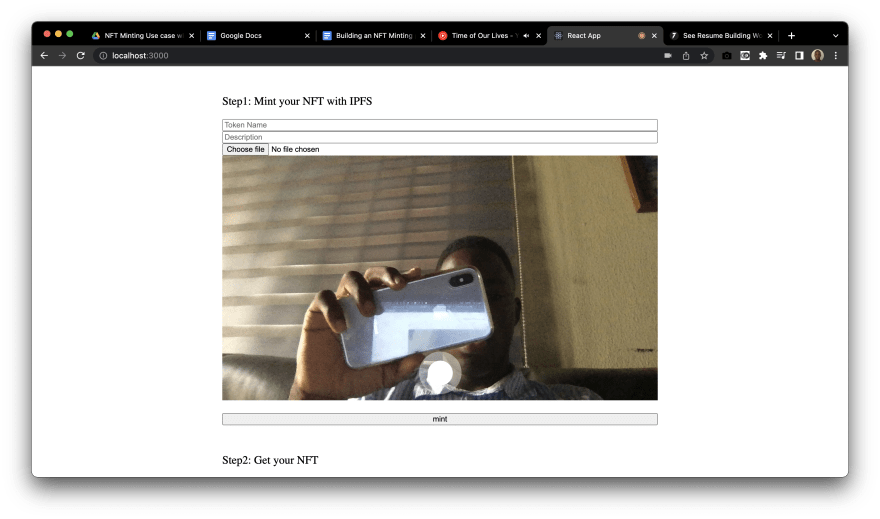
And YES, there you go, that’s your Selfie NFT Minting application.
How to use:
- Add your NFT token name and description
- Capture the image.
- Click the ‘Mint’ button.
- When the metamask extension pops up, accept the transaction.
- Next, it gives you the token ID.
- After getting the token ID, type your token ID in the Token ID input field.
- Next, click on the ‘GET’ button, and then it mints your selfie and provides the information.
That’s just it! Super easy. Thanks for taking out time to read this article, hoping this helps someone out there, an example is this. Now you could capture selfies and mint them as NFTs. Here is the link to the GitHub repo as an example: NFT Minting Application.
Sample Project:
https://github.com/coderoflagos/NFT-minting-project
Sign up to Bunzz here and start building your Dapp:
Any questions? Connect to our Community on Discord
https://discord.com/invite/rjfvZzDEaN
Would like to find more tutorials? check out our Blog here:
Check out our official website:
Follow us on Twitter:
We hope to see what you can build with this! 🙌🏽

gos/NFT-minting-project)
Top comments (1)
This was helpful , Thank You !