
This is tutorial 2 of a 5-part tutorial, but each tutorial can be read in isolation to learn various aspects Node+Express+TypeScript+Vue API/Vue web app set up.
Looking to learn mobile/desktop apps? The skills and concepts here are fundamental and re-usable for mobile apps (NativeScript) or desktop apps (Electron). I may cover them as a follow-on.
Navigation to other parts (you are at part 2)
- Setting up Node and Express API with TypeScript
- Setting up VueJs with TypeScript
- Setting up Postgres with Sequelize ORM
- Basic Vue templating and interaction with API
- Advanced Vue templating and image uploading to Express
In Part 1 you have completed an API scaffold. So now you will build a view to consume the API.
If you have not, you can start building by cloning and checking out tutorial-part1 branch:
git clone https://github.com/calvintwr/basicgram.git
git checkout tutorial-part1
1. Installing a VueJS + Webpack boilerplate
We will use the best boilerplate I can find that has VueJS 2 with Webpack 4, and TypeScript. I then forked to improve further. Less the fact that VueJS 3 has limited compatibility and Webpack 5 is not out yet, at the time of writing this is really as bleeding edge as possible.
Inside of "basicgram" root directory, run:
git clone https://github.com/calvintwr/vue-webpack-typescript-boilerplate.git 'view'
(Credits to ahmedash95 from who I forked and modified the boilerplate from.)
Go into "basicgram/view" and run the following commands:
npm install
npm run dev
npm run dev spins up a webpack development server that hot compiles when it detects changes to your vue files.
Head over to localhost:8080 and you should see the boilerplate up and running:

2. VueJS component library
VueJS has an ecosystem of component libraries which provides you with pre-built UI components -- like a sticky navigation bar, or a container with infinity scroll feature -- much like building Lego.
OnsenUI already installed for you
OnsenUI is an OK library for mobile use, given that not many mobile libraries exist or are well-maintained. It is already installed in the boilerplate. So you can skip to Step 3 if you are not interested to learn how to install Vue component libraries.
In case you are interested, the following commands and code were used to install Onsen:
npm install onsenui vue-onsenui -save
For your brief understanding, most of these component libraries are portable to different frontends like React, Angular etc. So they always come in a "core package" (in this case onsensui) which you will install for any framework, along with a "bindings package" (in this cause vue-onsensui) specific to the framework you intend to use.
In src/index.ts is where you need to import these modules. I merely followed onsen's instructions.
// Onsen
import * as Onsen from 'vue-onsenui' // needed to use * as Onsen for TypeScript to work, this is the only difference from the official guide.
import 'onsenui/css/onsenui.css'
import 'onsenui/css/onsen-css-components.css'
Vue.use(Onsen)
Note: You are not limited to one library, but it makes sense to stick to a few to not bloat your code.
Note: In the package you will also find
tailwindcssmodule, which is essentially something like bootstrap, but I find a little bit better for Vue use-case. It has some neat features like purging unused css styles from your builds. You will learn about it in the later tutorials.
3. Start building
From the OnsenUI components library, we will select the Tabbar component to begin building our app.
First we create a new file and make a tabbar page, and we want to put it into a subfolder: pages/homepage.vue.
<!-- pages/homepage.vue -->
<template>
    <v-ons-page>
        <p style="text-align: center">
            This is the home page
        </p>
    </v-ons-page>
</template>

<script lang="ts">
import Vue from "vue"

export default {
    data() {
        return {}
    }
}
</script>
The above is the simplest form a fresh Vue template can be written in. You can always start from this structure.
Next we modify home.vue:
<!-- home.vue -->
<template>
    <div>
        <v-ons-page>
            <v-ons-toolbar>
                <div class="center">{{ title }}</div>
            </v-ons-toolbar>

            <v-ons-tabbar
                swipeable position="auto"
                :tabs="tabs"
                :visible="true"
                :index.sync="activeIndex"
            >
            </v-ons-tabbar>
        </v-ons-page>
    </div>
</template>

<script lang="ts">
import Vue from 'vue'
// we import homePage, which actually becomes a Javascript object that we can reference.
import homePage from './pages/homepage.vue'

// the below syntax follows OnsenUI's guide
export default {
    data() {
        return {
            activeIndex: 0,
            tabs: [
                {
                    // By default, OnsenUI uses IOS/Android icons.
                    // Because it's a mobile app centric library.
                    // So we change to fontawesome for web app.
                    icon: 'fa-home',
                    label: 'Home',
                    page: homePage,
                    key: "homePage"
                }
            ]
        }
    },
    computed: {
        title() {
            // nothing too interesting, just a logic to handle our page title.
            // this is a pretty standard use of VueJS computed property
            return this.tabs[this.activeIndex].label === 'Home' ? 'Basicgram' : this.tabs[this.activeIndex].label
        }
    }
}
</script>
Webpack dev server should reload your browser and you should see this:

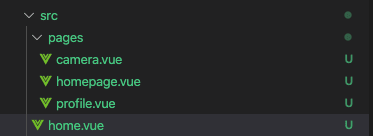
Continue to add more tabs by duplicating homepage.vue. We name the files camera.vue and profile.vue:
Import them into home.vue:
import Vue from 'vue'
import homePage from './pages/homepage.vue'
// import the pages here.
import camera from './pages/camera.vue'
import profile from './pages/profile.vue'

export default {
    data() {
        return {
            activeIndex: 0,
            tabs: [
                {
                    icon: 'fa-home',
                    label: 'Home',
                    page: homePage,
                    key: "homePage"
                },
                // and add more items to the tabs.
                {
                    icon: 'fa-camera',
                    label: 'Home',
                    page: camera,
                    key: "camera"
                },
                {
                    icon: 'fa-user',
                    label: 'Home',
                    page: profile,
                    key: "profile"
                },
            ]
        }
    },
    computed: {
        title() {
            return this.tabs[this.activeIndex].label === 'Home' ? 'Basicgram' : this.tabs[this.activeIndex].label
        }
    }
}
And you get something basic-looking, but mobile responsive and promising:

With this app scaffold, which you will just add more components as you go.
Now, we need to head back to make APIs for this app to consume. Continue to part 3: Building an API service and setting up Postgres.

Oldest comments (0)