In the previous articles of this series, we've covered the initial setup of our email marketing engine and how to send emails via the SendGrid API to contacts stored in a SQLite database. Now, let's dive into an essential part of any web application - security. In this article, we'll see how we can secure our frontend using Auth0.
Auth0 and Express-openid-connect
Auth0 is a flexible, drop-in solution to add authentication and authorization services to your applications. Your team and organization can avoid the cost, time, and risk that comes with building your own solution to authenticate and authorize users.
We used the express-openid-connect library, which is an Auth0 developed middleware that makes it super easy to set up authentication in your Express.js apps.
Let's delve into our code:
const { auth } = require('express-openid-connect');

require('dotenv').config();

const config = {
  authRequired: true,
  auth0Logout: true,
  secret: 'a long, randomly-generated string stored in env',
  baseURL: 'https://your_application_domain.com',
  clientID: 'your_client_id',
  issuerBaseURL: 'https://your_domain.region.auth0.com'
};

app.use(auth(config));
In this snippet, we require the auth function from express-openid-connect and dotenv to load environment variables. We then define a configuration object, config, that we pass to the auth function.
Here's what each configuration option does:
-
authRequired: This is a boolean that, when true, requires authentication for all routes. -
auth0Logout: When true, this enables Auth0's logout feature. -
secret: This is a long, randomly-generated string that is used to encrypt and sign the session cookie. It is important that this is kept secure and not checked into version control. It should be stored in an environment variable. -
baseURL: This is the URL of your application. This is used by the middleware to determine the callback URL and the post-logout redirect URL. -
clientID: This is your Auth0 application's Client ID. -
issuerBaseURL: This is the URL of your Auth0 tenant.
Please note that these configuration values, especially secret, clientID, and issuerBaseURL, should not be hard-coded as they are sensitive pieces of information. They should be stored securely in environment variables and loaded into the application using dotenv or a similar package.
require('dotenv').config();
The dotenv package loads environment variables from a .env file into process.env. This means that when we run require('dotenv').config(), we can access the values in our .env file as if they were in the system's environment variables. This is a common practice to handle configuration in a secure, manageable way.
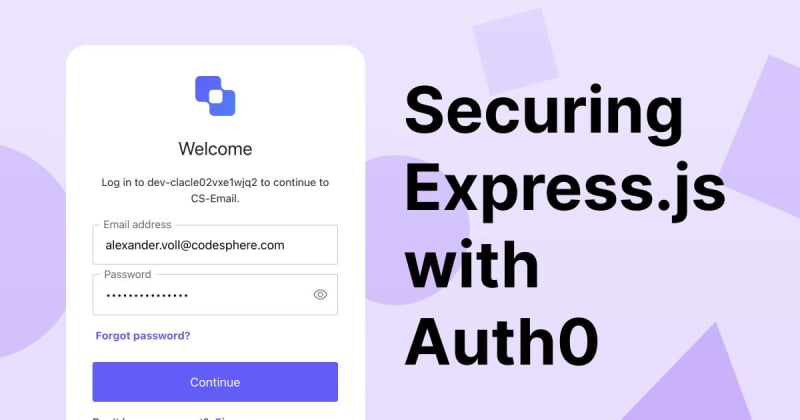
You can adjust the look and settings of your login page in the Auth0 dashboard. The default page will look like this:

Mounting and initializing auth()
This is a pretty basic setup. As soon as we mount and initialize auth(), all routes that are initialized afterwards will be protected by Auth0s login.
We insert this code snippet into our index.js which we set up in the previous parts of our series:
const express = require('express');
const app = express();
const port = 3000;

const multer = require('multer');
const upload = multer({ dest: 'uploads/' });

const { sendEmails } = require('./server/api');
const { processContacts } = require('./server/utils');
const { uploadToDb } = require('./server/uploadToDb');
const { auth } = require('express-openid-connect');

require('dotenv').config();

const config = {
  authRequired: true,
  auth0Logout: true,
  secret: process.env.SECRET,
  baseURL: process.env.BASE_URL,
  clientID: process.env.CLIENT_ID,
  issuerBaseURL: process.env.ISSUER_BASE_URL
};

app.use(auth(config));

app.use(express.json());
app.use(express.static('public'));

app.all("*", (req, res, next) => {
  console.log(`Received a ${req.method} request on ${req.originalUrl}`);
  next();
});

app.post("/contacts", async (req, res) => {
  console.log(req.body);

  const { templateId } = req.body;

  try {
    const emailGroups = await processContacts(99);

    // Send emails to each group
    for (let group of emailGroups) {
        await sendEmails(group, templateId);
    }

    res.json(emailGroups);
  } catch (error) {
    res.status(500).json({ error: "An error occurred while fetching contacts" });
  }
});

app.post('/upload', upload.single('contacts-upload'), (req, res) => {

  uploadToDb(req.file.path);

  res.send('File uploaded successfully');

});

app.listen(port, () => {
  console.log(`Server is running at http://localhost:${port}`);
});
Only allowing specific email domains
When building internal tools, you might want to restrict your login to company emails only.
Unfortunately, Auth0 doesn't support this for OAuth2 logins like Google or GitHub, however you can restrict the login to specific domains or emails when using regular Email/Password login. This is done by utilizing Auth0s Action Flows, which allow you to insert custom Node.js code in specific places of the login flow.
To restrict specific user Emails, you would use a "Pre User Registration" flow, which is called when a user tries to sign up before the signup in complete.
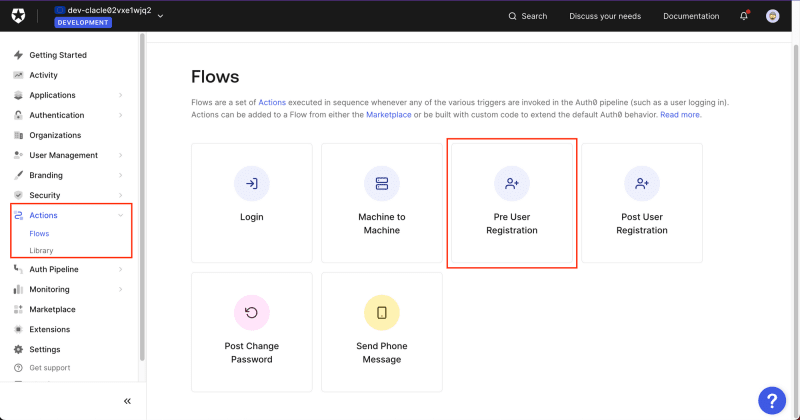
Auth0 Action Flow Menu
You can then use Auth0s neat drag and drop editor, to either insert predefined actions or create a custom one.

Auth0's drag and drop Action editor
To restrict email domains to a specific whitelist, you can create a small JS snippet which will then run on the Auth0 server.

In our case, we created the following custom snippet, which only allows users with a "codesphere.com" email to sign up:
exports.onExecutePreUserRegistration = async (event, api) => {
  console.log(event); // log the event object

  const whitelist = ['codesphere.com'];

  const emailSplit = event.user.email.split("@");
  const userDomain = emailSplit[emailSplit.length - 1].toLowerCase();

  // If userDomain is not part of the whitelist, deny access
  if (!whitelist.includes(userDomain)) {
    const LOG_MESSAGE = "User not part of Codesphere"
    const USER_MESSAGE = "Access to this tool is only available for employees of Codesphere"
    api.access.deny(LOG_MESSAGE, USER_MESSAGE);
  }
};
To make this more secure, it would be advisable to allow only specific emails and adjust the whitelist to accept new users if needed.
Conclusion
Securing your application is a critical task, and thankfully, with services like Auth0 and libraries like express-openid-connect, it becomes a lot simpler. By integrating Auth0 into our email marketing engine, we've added a robust layer of security with just a few lines of code and made sure that only specific domains can log in.

Top comments (0)