
In this article, we are going to implement caching in a node js application using Redis, but, before we delve into the implementation details, let’s explore what caching is and how it can help the performance of our application.
What is caching?
Caching is the process of storing copies of files in a cache or a temporary storage location so that they can be accessed more quickly. - Cloudflare
Now that we understand what caching is, let’s explore the reason for caching
Why do we cache?
Given many super fast services and options available for users on the Internet today, you don’t want your application to take too long to respond to users’ requests or you risk the chance of your users dumping your service for a competitor and keep your bounce-rate growing instead of your revenue.
Below are a few of the reasons we cache:
- To save cost. Such as paying for bandwidth or even volume of data sent over the network.
- To reduce app response time.
In general, caching done the right way will improve the performance of our application and lead to a win-win situation for us and our users.
Prerequisites
To follow through this tutorial you must have the following installed on your computer
- Node JS
- NPM
- Postman/Web Browser
- Code Editor (VsCode)
If you don’t have Node.js installed just head on to the official Node.js website to get a copy of Node.js for your platform. Once you install node.js you will automatically have npm installed.
Getting Started
To get started, create a new directory for the application by running the following command on the terminal:
cd desktop && mkdir node-caching && cd node-caching
The commands above
cd desktop - navigate to the desktop directory
mkdir node-caching - create a new directory named “node-caching”
cd node-caching - navigate into the newly created node-caching directory
Initialize the directory to create a package.json file by running
npm init -y
Install dependencies
For this project we will be using Redis, axios and Express Framework for Node.js, so let’s install them by running the following:
npm install express redis axios
Open the newly created folder in your editor of choice.
Your folder structure should now look like the one below:

Create a simple Express server as shown below:
We are going to be making request to a public API for various food items recipe provided by http://www.recipepuppy.com
In index.js file paste the following code:
Start the server by running node index.js and open postman to make a request to the recipe endpoint

As we can see, the request completed in 615ms which is quite a long time to fetch data that doesn't change often. We will improve this by implementing caching using Redis.
To be able to take full advantage of Redis offerings, we need to get Redis by compiling it directly from source. To do this kindly run the following command on your terminal:
wget http://download.redis.io/redis-stable.tar.gz
tar xvzf redis-stable.tar.gz
cd redis-stable
make
Confirm installation by running
make test
You can then copy redis to your path by running
sudo make install
To confirm that redis has been properly setup, start the redis server by running
redis-server
from your terminal. Then, open a new terminal tab/window and run
redis-cli ping
you should get PONG back as response.
For detailed setup instruction, visit the official guide on the website here https://redis.io/topics/quickstart
Now that we have correctly setup redis, the next thing is to use it in our application to improve it by reducing the turn around time of request and response.
Add the following changes to index.js file
Explaining the cache process
First we created a redis client and link it with the local redis instance using the default redis port (6379)
const client = redis.createClient(6379);
Then, in the /recipe route handler, we tried to get the appropriate matching data to serve the request by checking for the key in our redis store. If found, the result is served to the requesting client from our cache and then we don’t have to make the server request anymore.
// Check the redis store for the data first
   client.get(foodItem, async (err, recipe) => {
     if (recipe) {
       return res.status(200).send({
         error: false,
         message: `Recipe for ${foodItem} from the cache`,
         data: JSON.parse(recipe)
       })
     }
But if the key is not found in our redis store, a request is made to the server and and once the response is available, we store the result using a unique key in the redis store:
const recipe = await axios.get(`http://www.recipepuppy.com/api/?q=${foodItem}`);

         // save the record in the cache for subsequent request
         client.setex(foodItem, 1440, JSON.stringify(recipe.data.results));
Hence, subsequent requests to the same endpoint with the same parameter will always be fetched from the cache so long the cached data has not expired. The setex method of the redis client is used to set the key to hold a string value in the store for a particular number of seconds which in this case is 1440 (24 minutes).
Full list of available redis commands and options can be found here: https://redis.io/commands
Testing the application
Now let’s test the application after implementing cache. Open postman and make a request to the same endpoint as before.
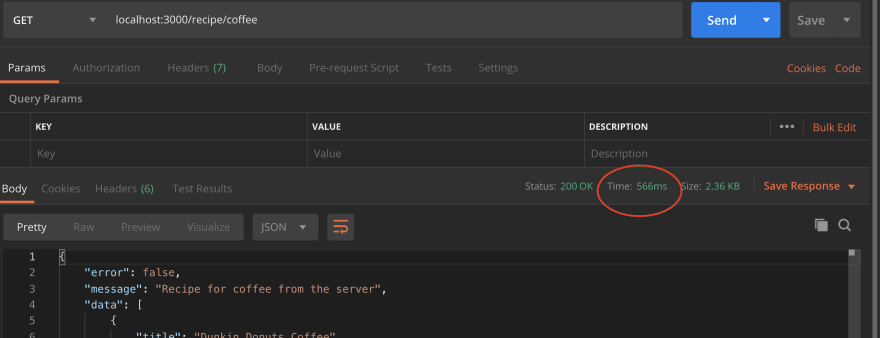
Again, because the key is not found in the cache the request is sent to the server which takes 566 ms to complete. Since the key didn’t exist in the cache before, it is now saved in the cache and subsequent requests with the same data will be fetched from the cache which makes it faster, and also reduces the load on the server. Below is the response time after the cache:
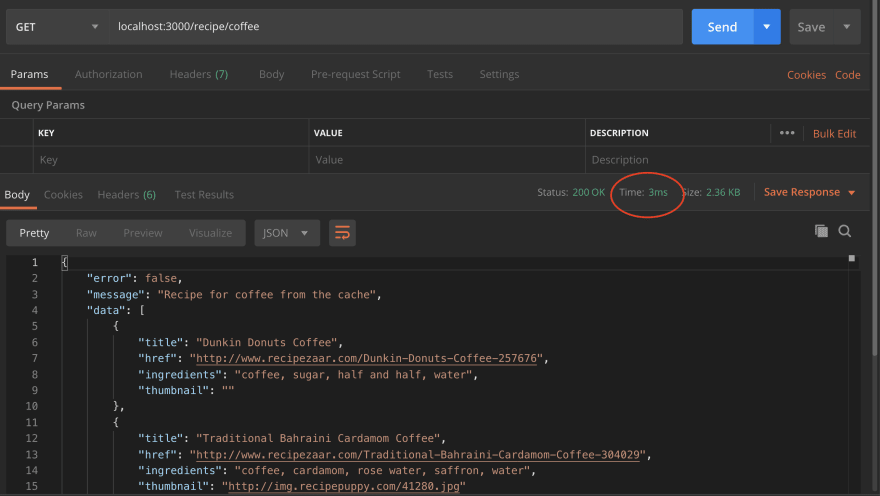
As we can see above, it took a blazing 3ms for the request to be completed because it was fetched from the cache.
Now tell me, don’t you want to start caching already?
Kindly note that this is just a tip of the iceberg of what we can do with redis and I recommend that you consult the official documentation https://redis.io/documentation to enjoy full capabilities of this amazing data store.
Complete code can be found here https://github.com/iMichaelOwolabi/node-redis-caching-tut

Top comments (8)
Nice article 👍🏼
Caching reduces server response time, minimizes database calls, and optimizes your resource usage, which is critical in high-traffic applications.
hoainho.info/blog/1767#6-caching-s...
Great walkthrough.
ps: 1440 seconds = 24 mins
Thanks, Nano.
I appreciate your observation, will make modifications.
thank you ❤️
Thanks Anfossi
wow amazing thanks!
Thanks André
Thanks , good learning article for beginner👍👍.