Cloud computing has come of age.
According to CRN Magazine, Worldwide enterprise cloud infrastructure services spending increased by $10.5 billion year over year in third quarter 2023, representing an 18 percent growth rate. This marks the fifth successive quarter in which the cloud market grew by between $10 billion to $11 billion from the prior year.
Companies can now build out their infrastructure entirely in the cloud, eliminating the need to have any single on-prem infrastructure. For companies that implementig Continuous Integration and deployment (CI/CD) using Jenkins, a major concern is how to configure their jenkins build agents.
Jenkins build agents are a very important component of any "self-respecting" Continuous integration infrastructure built on jenkins. They are important because it is not practical, much less advisable to build on the Jenkins Master.
When you have multiple long-running builds per day, you would want to configure your Jenkins infrastructure for scalability and high availability.
There are several Jenkins build agent types available - inlcuding physical machines, virtual machines, Kubernetes clusters, and with Docker images.
In this project, we will be using AWS EC2 instances to set up build agents. We have to configure it in such a way that our set up is built for high availability, dynamic scalability and idempotency. We will utilize terraform for deploying the Jenkins Controller (master). Also we will use terraform to provision cloud resources for the build agents.
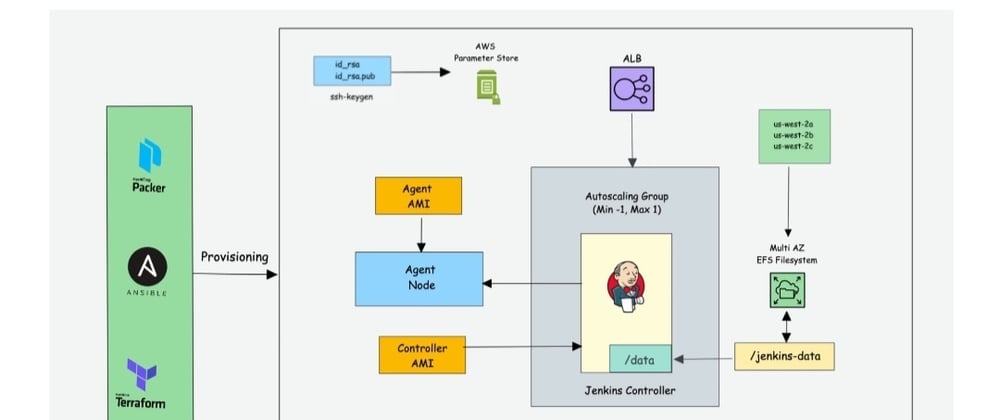
Again, here's our reference diagram:
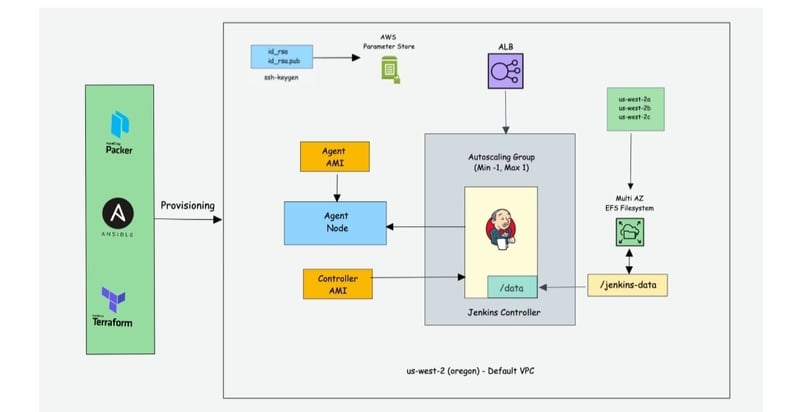
We will not be using ansible or packer in our own case however. We will create and provision the controller and other cloud resoruces using just Terraform. Also, we won't be creating an application load balancer, as it is not needed here.
Our application will consist of a single Jenkins controller and multiple jenkins agents spread across three availability zones. The jenkins agents will be dynamically provisioned and will scale up or down depending on the average CPU utilization of the instances.
Here's the terraform code for the policy beign used:
resource "aws_autoscaling_policy" "asg-policy" {
  autoscaling_group_name = aws_autoscaling_group.asg.name
  name                   = "jenkins-agents-asg-policy"
  policy_type            = "TargetTrackingScaling"
  target_tracking_configuration {
    predefined_metric_specification {
      predefined_metric_type = "ASGAverageCPUUtilization"
    }
    target_value = 50.0
  }

  depends_on = [
    aws_autoscaling_group.asg
  ]
}
As you can see, we are using a target tracking policy which tracks the average CPU utilization and will scale up once the meric exceeds 50%.
An Elastic Filesystem will also be provisioned for persistent file storage across all the jenkins servers, should the need arise.
Step 1: Clone The Git Repository
- Clone this repository
git clone https://github.com/Kelvinskell/terra-jenk.git
- Switch into the terraform directory
cd terra-jenk/terraform
- Initialize and run the terraform code
terraform init
terraform plan
terraform apply -auto-approve
Wait for the "Apply" to complete.
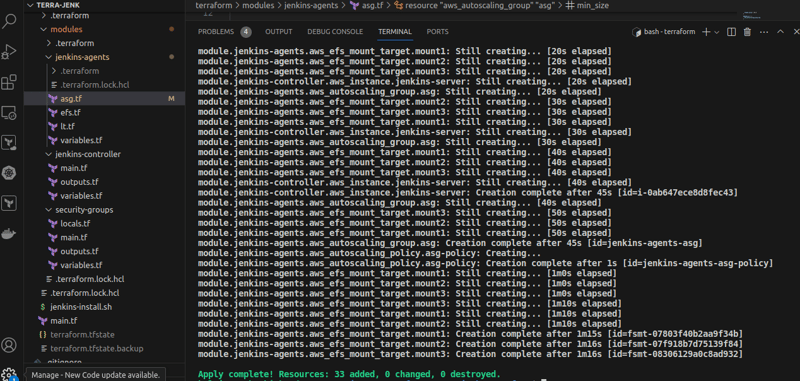
At this stage, half of the work is done! Such is the beauty of infrastructure-as-Code.
By using Terraform, we have been able to provision the Jenkins Controller, a Multi-AZ auto scaling group for the Jenkins agents, an Elastic Filesystem for scalable, persistent file storage - conected across all the servers, security groups and appropirate instance roles.
Step 2: Configure SSH Keys
In order for the cotroller to connect to the agents, it will need an SSH private key. Hence the launch template for the jenkins agents is configured to create a key-pair and attach to the agents.
However, terraform does not actually generate the key-pair. You will have to manually generate them and then feed the values to terraform.
Since ssh-key pairs are meant to be secret, we will be using an advanced method of handling terraform secrets.
- First, login to your AWS account and go to the KMS service.
- Create an AWS Customer Managed Key. I'll be using the symmetric key type.
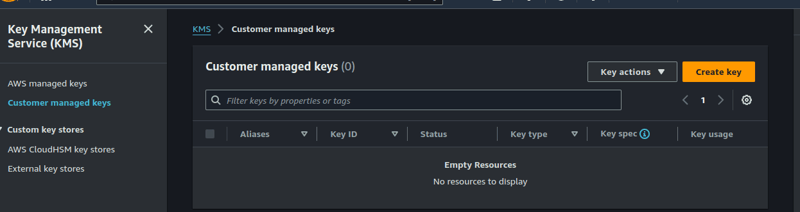
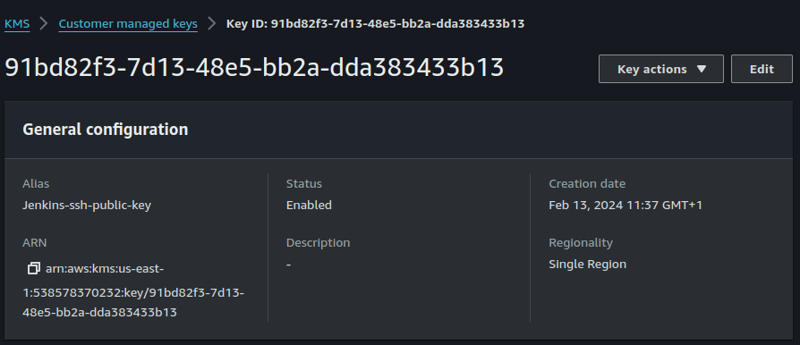
NB: Make sure that your terraform user has sufficient IAM permissions to invoke this key.
- In the repository, within the terraform directory (your working directory), generate an SSH key-pair.
ssh-keygen
- Make sure it is named id_rsa.
- Use the AWS KMS encrypt command to encrypt your credentails file.
aws kms encrypt \
    --key-id <YOUR-CMK-KEY-ID> \
    --plaintext fileb://id_rsa.pub \
    --output text \
    --query CiphertextBlob | base64 \
    --decode > id_rsa.pub.encrypted
This will encrypt our create an encrypted file called id_rsa.pub.encrypted which will contain our credentials. We can now safely delete the id_rsa.pub file. The id_rsa.pub.encrypted file is secure enough to be checked into version control.
- Copy the private key (id_rsa) to your note pad or another text editor. It will be required in Step 4. After that, You can either delete the private key (id_rsa) or simply ignore it (It will not be commited into version control).
The terraform code has been configured to handle every other thing else.
You can also read more on How To Manage Your Terraform Secrets Like A Pro.
Step 3: Configure The Jenkins Controller
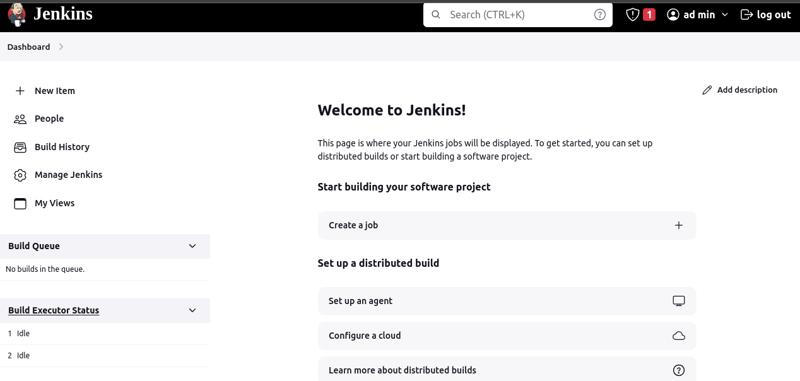
Log in to the jenkins controller
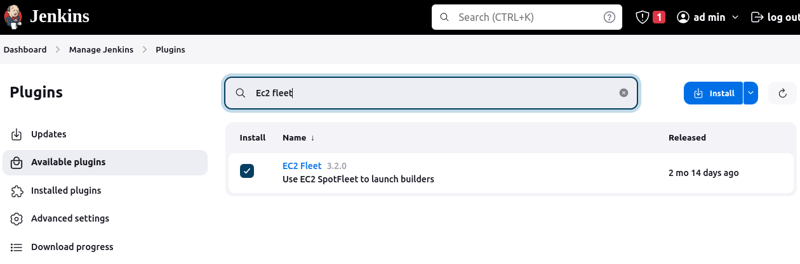
After the resources have been provisioned by teraform and status checks have passed, log in to the jenkins server on port 8080.Go to Dashboard > Manage Jenkins > Plugins > Available plugins
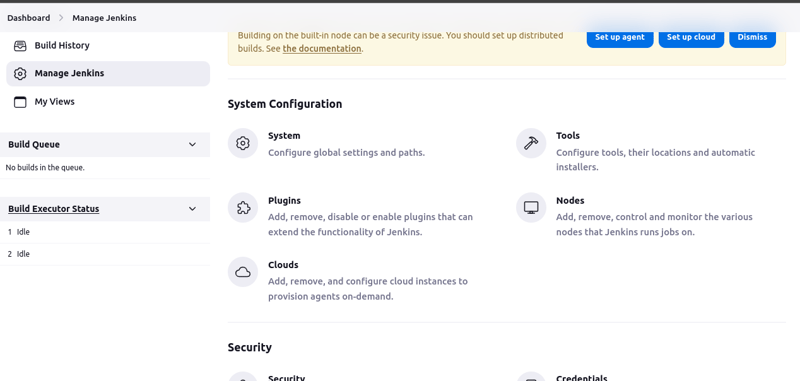
- Install the EC2 Fleet plugin
- Go to Manage Jenkins > Clouds > Add new cloud
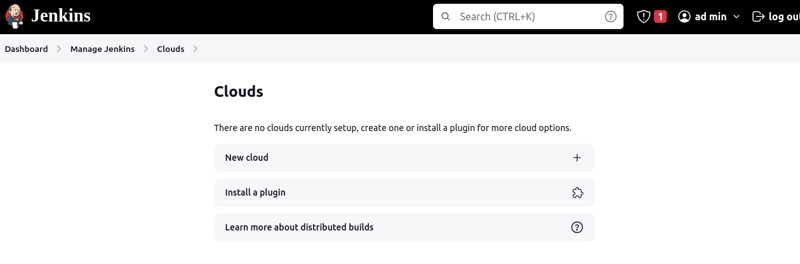
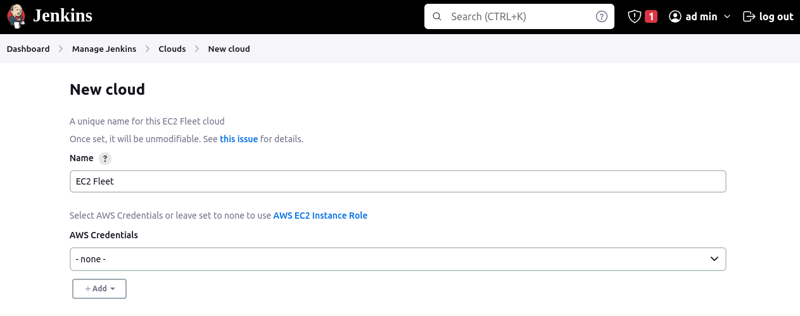
- Click on EC2 Fleet and assign a name to it. Click on Create.
We do not need to supply AWS Credentials since Jenkins will use the instance profile attached to our EC2 instance to connect to our AWs account.
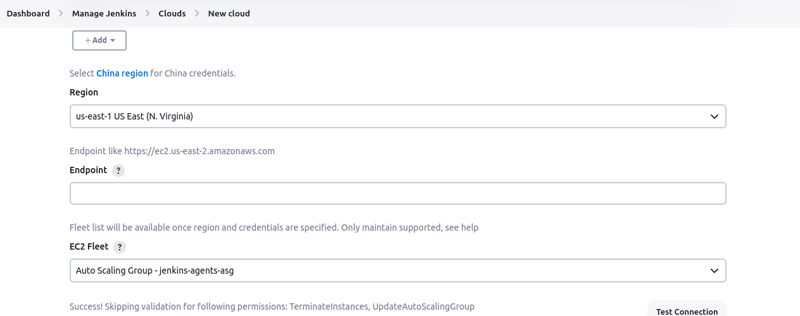
- Select the "us-east-1" region
- Select "jenkins-agents-asg" under EC2 Fleet
When you click on "test connection", you should see a similar success message as below:
- Click on Save
We are not done with this configuration, we will get back to it later.
Step 4: Configure SSH Credentials
- Back on the Jenkins server, go to Dashboard > Manage Jenkins > Credentials

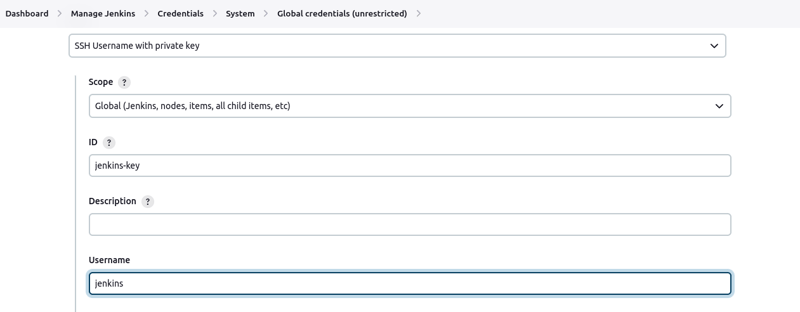
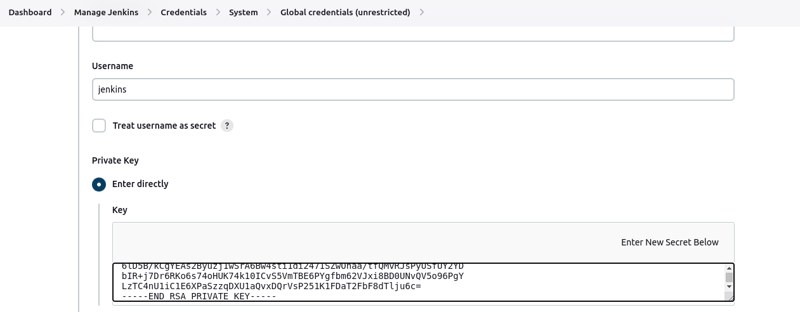
- Click on "Add credentials", select "SSH Username with private key"
- Fill in the boxes as required
- Copy the contents of the private key that you created in your working directory in step 2 above.
Step 5: Set Up The Cloud
- Go back to Clouds and select the EC2 Fleet you created earlier
- Clck on Configure
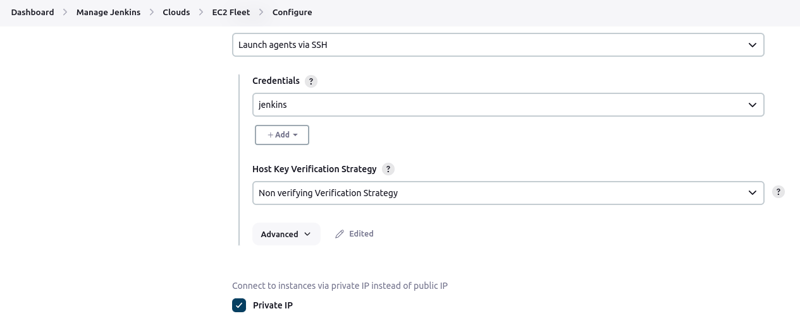
- Under "Launcher", select the credentials you just created. Also set "Host key verification strategy" to Non verifying strategy.
- Check the box to connect via private IP
- Check the box to Always Reconnect.
- Leave the defualt label or modify as you wish.
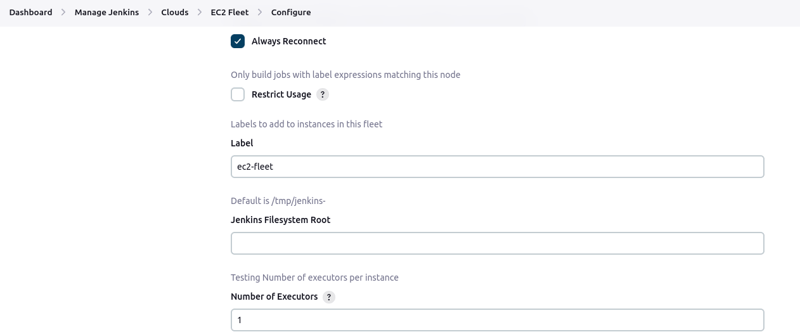
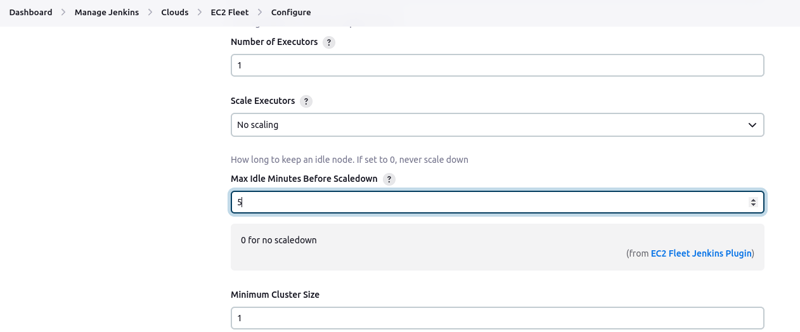
- The jenkins Filesystem Root is
/var/lib/jenkins - Max idle Minutes before scaledown should be set to 5
- Check the box for "No Delay Provision Strategy"
- Click on "Save".
After some time, Jenkins will automatically connect to the running agents in your auto scaling group. It should look like this:
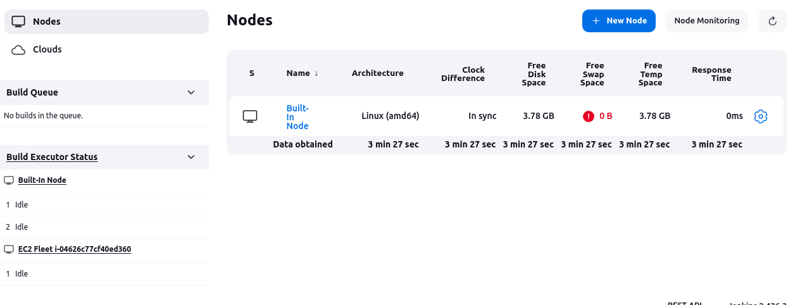
Notice the "EC2 Fleet ..." at the bottom left corner.
Step 6: Test The Setup
This final step is a validation step to confirm that everything is indeed working properly.
We will run a workload on this agent to see if it will run as expected.
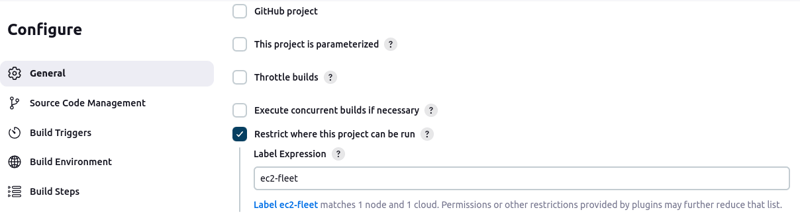
- Go to Dashboard > New item > Freestyle Project
- Restrict where the project can be run by setting the label for the EC2 Fleet.
- Click on "Add build step" > "Execute shell script"
- Add the following shell script in the box
#!/bin/bash

echo "Hello world"
sleep 15
echo "Goodbye world"
- Save and build.
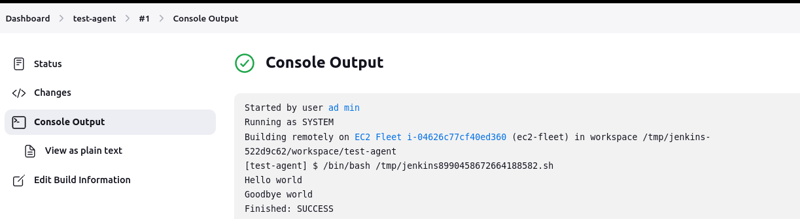
As you can see, the build ran successfully on the remote agent!
Conclusion
EC2 instances are a great option for building jenkins agents.
The EC2 Fleet plugin enables dynamic provisioning of the instances based on your available fleet (autoscaling group).
Terraform is a great tool for achieving automated provisoning of cloud infrastructure in a replicable manner.
What terraform concept bothers you? What would you like to learn about terraform, infrastructure-as-code and DevOps in general? Let me know in the comments and I might consider writing a detailed tutorial on that.
PS: I am open to remote DevOps, Cloud or technical writing offers.
Connect with me on LinkedIn.


Top comments (0)