
Introduction
In this blog we are going to see Otomi: self-hosted PaaS for Kubernetes. Otomi is an open source self-hosted PaaS to run on top of Kubernetes and offers wide range of pre-configured Cloud Native applications such as Prometheus, Grafana, Loki,Argo CD, Istio, Jaeger, Keycloak, Knative, Harbor, and much more. Otomi is optimized for running on managed Kubernetes services like AS, EKS, GKE, DigitalOcean Kubernetes and LKE(Linode) then on any K8s cluster on on-prem or even on Minikube. In the container world Kubernetes becoming an operating system of cloud native applications where Otomi helps developers to launch cloud native application in few clicks away.
And We will see how to create DigitalOcean K8s cluster and installing Otomi then some Otomi post installation steps
Otomi Features
Otomi offers complete suite of pre-configured Cloud Native applications combined with automation and developer self-service. We can Install trending Cloud Native Application in one run and get a unified user experience on top of any Kubernetes cluster in any cloud.
- Intuitive Web UI
- Runs on any Kubernetes Cluster - Any Cloud
- Create teams in an advanced Multi-tenant setup
- Configure network policies
- Create Kubernetes Jobs and Cron Jobs without writing any YAML
- Create and manage secrets in HashiCorp Vault
- Create new Knative workloads without writing any YAML
- Enforce Pod security policies and more...
To install Otomi we need following prerequisites.
- DigitalOcean Account (you can use any cloud or k8s cluster)
- Kubectl
- Helm
- doctl (DigitalOcean CLI)
Creating K8s Cluster
Run the following commands to install Kubernetes cluster
#Connecting to Digital ocean CLI

kingsathurthi@ThinkPad:~$ doctl auth init
Please authenticate doctl for use with your DigitalOcean account. You can generate a token in the control panel at https://cloud.digitalocean.com/account/api/tokens

Enter your access token:
Please create new personal access token from this link set validity and required scope. Keep the token safely it will visible only once while creating. Enter your access token in your terminal to complete the authentication process and results looks like below
kingsathurthi@ThinkPad:~$ doctl auth init
Please authenticate doctl for use with your DigitalOcean account. You can generate a token in the control panel at https://cloud.digitalocean.com/account/api/tokens

Enter your access token:
Validating token... OK
#Setting env
kingsathurthi@ThinkPad:~$ OWNER="kingsathurthi"
kingsathurthi@ThinkPad:~$ NAME="otomi"

#creating k8s cluster.
kingsathurthi@ThinkPad:~$ doctl kubernetes cluster create doks-$NAME \
> --tag $OWNER \
> --region ams3 \
> --node-pool "name=${NAME};size=s-4vcpu-8gb;tag=${OWNER};auto-scale=true;min-nodes=2;max-nodes=3;count=3;" \
> --wait
Notice: Cluster is provisioning, waiting for cluster to be running
.....................................................
Notice: Cluster created, fetching credentials
Notice: Adding cluster credentials to kubeconfig file found in "/home/kingsathurthi/.kube/config"
Notice: Setting current-context to do-ams3-doks-otomi
ID                                      Name          Region    Version        Auto Upgrade    Status     Node Pools
c738edf8-942b-4aa6-94e3-1249c98a5755    doks-otomi    ams3      1.22.8-do.1    false           running    otomi
#Updating kubeconfig
kingsathurthi@ThinkPad:~$ doctl kubernetes cluster kubeconfig save doks-$NAME
Notice: Adding cluster credentials to kubeconfig file found in "/home/kingsathurthi/.kube/config"
Notice: Setting current-context to do-ams3-doks-otomi
Install Otomi
# Add the Otomi repo
kingsathurthi@ThinkPad:~$ helm repo add otomi https://otomi.io/otomi-core
"otomi" has been added to your repositories
kingsathurthi@ThinkPad:~$ helm repo update
Hang tight while we grab the latest from your chart repositories...
...Successfully got an update from the "otomi" chart repository
...Successfully got an update from the "kubecost" chart repository
...Successfully got an update from the "argo" chart repository
...Successfully got an update from the "nginx-stable" chart repository
...Successfully got an update from the "apache" chart repository
...Successfully got an update from the "aerokube" chart repository
...Successfully got an update from the "devtron" chart repository
...Successfully got an update from the "bitnami" chart repository
Update Complete. ⎈Happy Helming!⎈

#Otomi install with minimal chart values
kingsathurthi@ThinkPad:~$ helm install otomi otomi/otomi --set cluster.k8sVersion="1.22" --set cluster.name=doks-$NAME --set cluster.provider=digitalocean
NAME: otomi
LAST DEPLOYED: Fri Jun 24 19:24:59 2022
NAMESPACE: default
STATUS: deployed
REVISION: 1
TEST SUITE: None
NOTES:
The Otomi installer was successfully deployed on the cluster.

Please inspect the output of the installer job (default/otomi) for any feedback or errors.

Also visit otomi.io for further instructions and reference documentation.
The helm chart deploys an installer job which is responsible for installing the Otomi platform on the DOKS cluster. lets monitor the status of Installation
# Monitor the job status
kingsathurthi@ThinkPad:~$ kubectl get job otomi -w
NAME    COMPLETIONS   DURATION   AGE
otomi   0/1           10m        10m
otomi   1/1           11m        11m
Otomi installation has completed let connect to it. Run below command to get Otomi console URL and login credentials
#Installer job logs
kingsathurthi@ThinkPad:~$ kubectl logs jobs/otomi -n default --tail=7
    ########################################################################################################################################
    #
    #  To start using Otomi, go to https://otomi.134.209.135.54.nip.io and sign in to the web console
    #  with username "otomi-admin" and password "XXXXXXXXXXXXXX".
    #  Then activate Drone. For more information see: https://otomi.io/docs/installation/activation/
    #
    ########################################################################################################################################
As of now we were manually created the k8s cluster in DigitalOcean and installed Otomi. Otomi is available in DigitalOcean marketplace you can easily install it in few clicks. below is the button to deploy Otomi
![]()
Post installation steps
Sign in to the Otomi web console using the above credentials found in the installer job logs.
Note: While accessing Otomi for first time ignore the SSL warning we will cover this is in next step of configuration

Adding Otomi Auto generated CA to our local machine

In the left menu of Otomi Console, click on "Download CA" and install using below command
# On Mac
  sudo security add-trusted-cert -d -r trustRoot -k /Library/Keychains/System.keychain ~/Downloads/ca.crt
  # Restart the browser or open it in private mode

# On Windows(PowerShell - Run as Administrator)
  # Use certutil:
  certutil.exe -addstore root <downloaded cert path>
  # Or
  Import-Certificate -FilePath "<downloaded cert path>" -CertStoreLocation Cert:\LocalMachine\Root
  # Restart the browser or open it in private mode

# On Linux
  sudo cp ca.crt /usr/local/share/ca-certificates/ca.crt
  sudo update-ca-certificates
  # or
  Import certificate in you browser
  # Restart the browser or open it in private mode
In the side menu of Otomi Console under Platform, select Apps and click on the Drone app

Click on the play button in the top right. A new tab will open for Drone and click CONTINUE


Sign in locally with as otomi-admin and the password provided in the logs of the installer job.

Click on Authorize Application

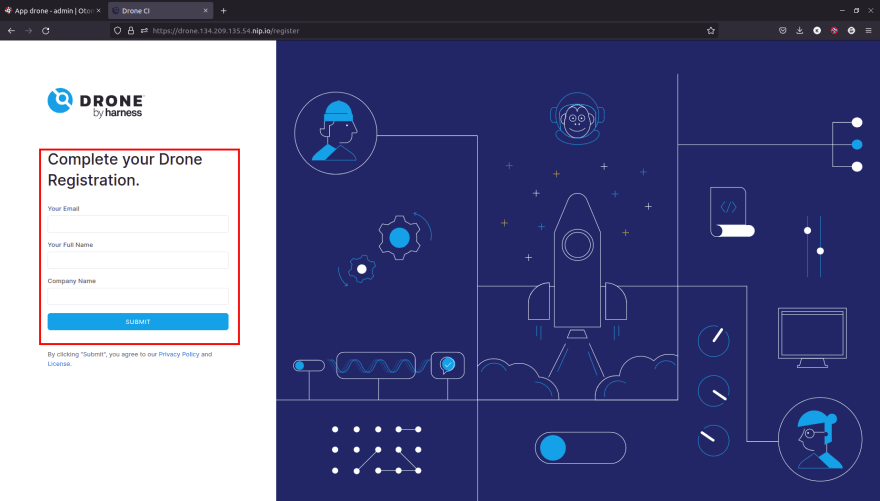
Click on SUBMIT on the Complete your Drone Registration page. You don't need to fill in your Email, Full Name or Company Name if you don't want to
Click on the otomi/values repository

Click on + ACTIVATE REPOSITORY


Awesome you have completed the installation and configuration of DOKS k8s cluster and Otomi. I hope this blog will useful for you, if you face any issue in this tutorial please comment below I will be there to assist you.
Useful Resource Link

Top comments (0)