
Inspired by the video game Split Fiction, I'm amazed by the creators' imagination in showcasing two distinct worlds side by side through a split screen. Motivated by their creativity, I am eager to recreate this split effect right within the browser.
TL;DR
Basic HTML & CSS
The easiest part of this effect is to create a static split screen in the browser.
The skeleton:
<div class="container" id="container">
  <div class="side left-side" id="leftSide"></div>
  <div class="side right-side" id="rightSide"></div>
</div>
Some basic CSS reset:
html,
body {
  margin: 0;
  padding: 0;
  height: 100%;
  overflow: hidden;
  user-select: none;
  cursor: crosshair;
  background: #222;
}
Let the container cover the full screen:
.container {
  position: relative;
  width: 100vw;
  height: 100vh;
  overflow: hidden;
}
Both sides should cover the entire screen, utilizing clip-path to control which area is displayed on each side.
.side {
position: absolute;
top: 0;
left: 0;
width: 100%;
height: 100%;
pointer-events: none;
}
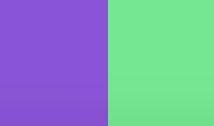
.left-side {
background-color: rgb(150, 72, 222);
z-index: 1;
clip-path: polygon(0 0, 50% 0, 50% 100%, 0 100%);
}
.right-side {
background-color: rgb(55, 234, 136);
z-index: 1;
clip-path: polygon(50% 0, 100% 0, 100% 100%, 50% 100%);
}
You got:
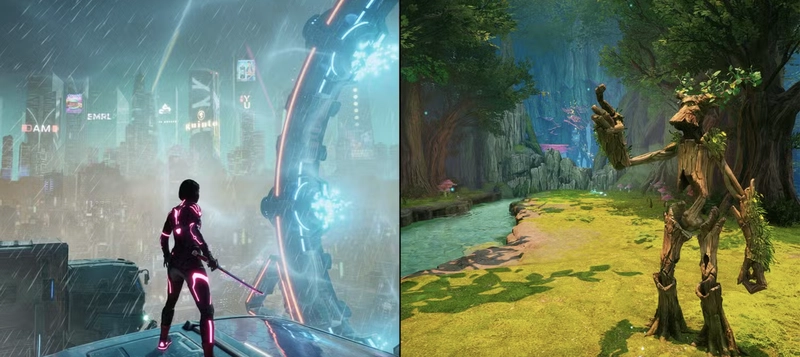
Add background image for both sides:
.left-side {
  background-image: url(https://static0.gamerantimages.com/wordpress/wp-content/uploads/2024/12/split-fiction-splitscreen-platforming.jpg?q=49&fit=crop&w=750&h=422&dpr=2);
  background-size: cover;
  background-position: center;
  background-repeat: no-repeat;
  z-index: 1;
  clip-path: polygon(0 0, 50% 0, 50% 100%, 0 100%);
}

.right-side {
  background-image: url(https://static0.gamerantimages.com/wordpress/wp-content/uploads/2024/12/split-fiction-fantasy-transformations.jpg?q=49&fit=crop&w=750&h=422&dpr=2);
  background-size: cover;
  background-position: center;
  background-repeat: no-repeat;
  z-index: 1;
  clip-path: polygon(50% 0, 100% 0, 100% 100%, 50% 100%);
}
You got background image on both sides:
Rotate the Split Line with JavaScript
Our target is to update the clip-path along with mouse moving. Here's the brain-teaser time!🤯
For each side, we need four points to draw the polygon.


First thing we need to do is get intersections of screen edges and the split line.

Some preparation work, I need the coordinates of the center point, the angle between the center and the mouse, ...
const containerWidth = container.clientWidth;
const containerHeight = container.clientHeight;
const centerX = containerWidth / 2;
const centerY = containerHeight / 2;

let deltaX = mouseX - centerX;
let deltaY = mouseY - centerY;

if (deltaX === 0 && deltaY === 0) {
  deltaX = 0.0001; // Avoid zero vector
}

// Calculate the angle between the center and the mouse position
const angleRadians = Math.atan2(deltaY, deltaX);

// Direction vector of the split line (unit vector)
const lineDirX = Math.cos(angleRadians);
const lineDirY = Math.sin(angleRadians);

// Define the edges of the viewport
const viewportEdges = [
  [{ x: 0, y: 0 }, { x: containerWidth, y: 0 }],   // Top edge
  [{ x: containerWidth, y: 0 }, { x: containerWidth, y: containerHeight }],   // Right edge
  [{ x: containerWidth, y: containerHeight }, { x: 0, y: containerHeight }],   // Bottom edge
  [{ x: 0, y: containerHeight }, { x: 0, y: 0 }]    // Left edge
];

// Find intersections of the split line with the viewport edges
let intersectionPoints = [];
for (const edge of viewportEdges) {
  const intersection = lineSegmentIntersection(centerX, centerY, lineDirX, lineDirY, edge[0], edge[1]);
  if (intersection) intersectionPoints.push(intersection);
}
And, this is the function to calculate whether the split line is intersect with the edge. If true, it will return the coordinates of the intersection point.
/**
 * Calculates the intersection point between an infinite line and a line segment.
 * @param {number} linePointX - X coordinate of a point on the infinite line.
 * @param {number} linePointY - Y coordinate of a point on the infinite line.
 * @param {number} lineDirX - X component of the infinite line's direction vector.
 * @param {number} lineDirY - Y component of the infinite line's direction vector.
 * @param {Object} segmentStart - Starting point of the line segment {x, y}.
 * @param {Object} segmentEnd - Ending point of the line segment {x, y}.
 * @returns {Object|null} - Intersection point {x, y} or null if no intersection exists.
 */
function lineSegmentIntersection(linePointX, linePointY, lineDirX, lineDirY, segmentStart, segmentEnd) {
  // Direction vector of the line segment
  const segmentDirX = segmentEnd.x - segmentStart.x;
  const segmentDirY = segmentEnd.y - segmentStart.y;

  // Calculate the determinant (cross product of direction vectors)
  const determinant = lineDirX * segmentDirY - lineDirY * segmentDirX;

  // If determinant is 0, the line and segment are parallel or collinear
  if (determinant === 0) return null;

  // Calculate parameters t and u
  const t = ((segmentStart.x - linePointX) * segmentDirY - (segmentStart.y - linePointY) * segmentDirX) / determinant;
  const u = ((segmentStart.x - linePointX) * lineDirY - (segmentStart.y - linePointY) * lineDirX) / determinant;

  // If u is not in the range [0, 1], the intersection point is outside the segment
  if (u < 0 || u > 1) return null;

  // Calculate the intersection point
  return {
    x: linePointX + t * lineDirX,
    y: linePointY + t * lineDirY
  };
}
Now, we need to determine whether corners belong to the left side or the right side.

The code:
// Normal vector: perpendicular to the direction vector
const normalX = lineDirY;
const normalY = -lineDirX;

// Define the corners of the viewport
const viewportCorners = [
  { x: 0, y: 0 },
  { x: containerWidth, y: 0 },
  { x: containerWidth, y: containerHeight },
  { x: 0, y: containerHeight }
];

// Separate corners into left and right groups based on the signed distance
let leftSidePoints = [];
let rightSidePoints = [];

for (const corner of viewportCorners) {
  const distance = signedDistance(corner.x, corner.y, centerX, centerY, normalX, normalY);
  if (distance < 0) {
    leftSidePoints.push(corner);
  } else {
    rightSidePoints.push(corner);
  }
}

// Add intersection points to both sides
leftSidePoints.push(...intersectionPoints);
rightSidePoints.push(...intersectionPoints);
Use signedDistance to determine the corner is on which side of the split line.
/**
 * Calculates the signed distance from a point to a line defined by a normal vector.
 * The sign of the distance indicates which side of the line the point lies on.
 *
 * @param {number} px - X coordinate of the point.
 * @param {number} py - Y coordinate of the point.
 * @param {number} cx - X coordinate of a point on the line (e.g., the center point).
 * @param {number} cy - Y coordinate of a point on the line.
 * @param {number} nx - X component of the line's normal vector.
 * @param {number} ny - Y component of the line's normal vector.
 * @returns {number} - The signed distance from the point to the line.
 */
function signedDistance(px, py, cx, cy, nx, ny) {
  // Calculate the vector from the line's reference point (cx, cy) to the target point (px, py).
  const vectorX = px - cx;
  const vectorY = py - cy;

  // Compute the dot product of the vector and the normal vector of the line.
  // This projects the vector onto the normal vector, giving the signed distance.
  return vectorX * nx + vectorY * ny;
}
The coordinates we require are stored in the leftSidePoints and rightSidePoints. Reorder those coordinates in clock wise before do the final step.
/**
 * Orders a set of points in clockwise order around their centroid.
 * This is useful for defining polygons where the order of points matters.
 *
 * @param {Array<Object>} points - An array of points, each with {x, y} properties.
 */
function orderPointsClockwise(points) {
  // Step 1: Calculate the centroid (geometric center) of the points.
  // The centroid is the average of all x and y coordinates.
  const centroid = points.reduce((acc, p) => ({
    x: acc.x + p.x,
    y: acc.y + p.y
  }), { x: 0, y: 0 });
  centroid.x /= points.length;
  centroid.y /= points.length;

  // Step 2: Sort the points based on their angle relative to the centroid.
  // Use Math.atan2 to calculate the angle between each point and the centroid.
  points.sort((a, b) => {
    const angleA = Math.atan2(a.y - centroid.y, a.x - centroid.x); // Angle of point A
    const angleB = Math.atan2(b.y - centroid.y, b.x - centroid.x); // Angle of point B
    return angleA - angleB; // Sort in ascending order of angle
  });
}

// Order points clockwise for clip-path polygons
orderPointsClockwise(leftSidePoints);
orderPointsClockwise(rightSidePoints);
Let's convert the coordinates to the clip-path properties.
// Convert points to clip-path format
const pointsToClipPath = (points) => points.map(point => `${point.x}px ${point.y}px`).join(', ');

// Update the clip-path for both sides
leftSide.style.clipPath = `polygon(${pointsToClipPath(leftSidePoints)})`;
rightSide.style.clipPath = `polygon(${pointsToClipPath(rightSidePoints)})`;
Listen to the Mouse Move
The split line needs to move along with the mouse.
// Initialize with vertical split on page load
updateSplit(window.innerWidth / 2, window.innerHeight / 2);

// Update on mouse enter and move
container.addEventListener('mouseenter', e => {
  updateSplit(e.clientX, e.clientY);
});

container.addEventListener('mousemove', e => {
  updateSplit(e.clientX, e.clientY);
});

// Reset on mouse leave
container.addEventListener('mouseleave', () => {
  leftSide.style.clipPath = 'polygon(0 0, 50% 0, 50% 100%, 0 100%)';
  rightSide.style.clipPath = 'polygon(50% 0, 100% 0, 100% 100%, 50% 100%)';
});
Demo
Or access the code on GitHub.

Top comments (6)
i think this is super slick - i always wanted to mess around with split screens like that but never got around to it
Now we have LLM tools, we can quickly get some ideas on how to achieve these effects 😎. It can't give you the code directly though 😑.
This is really cool... THANKS FOR SHARING
I'm glad you like it!!
Picture perfect thing
thanks!