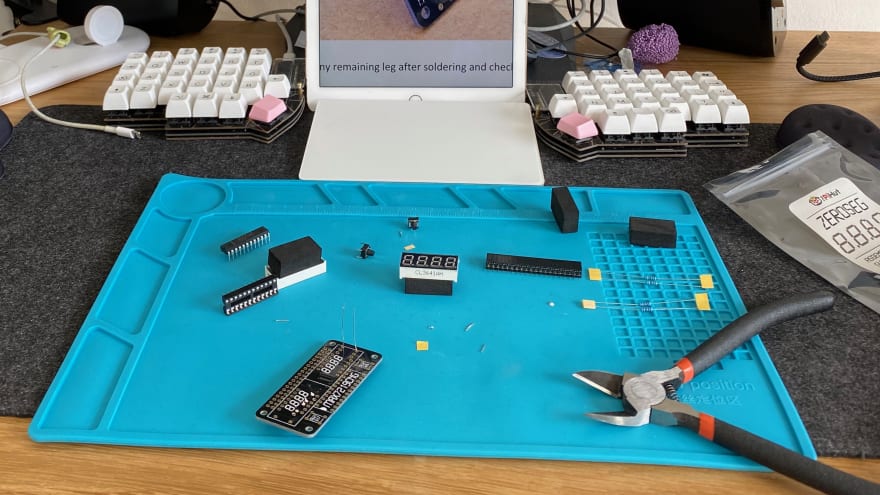
This weekend I spent some time getting to know how Raspberry Pi, GPIO and SPI work - not know what any of that means? Great, me neither until this weekend.
For a tenner I picked up a ZeroSeg with the aim to use it to display numbers like temperature, time, and anything else you can think of. I often browse The PiHut just to see what's available and what sparks ideas for little projects like this.
Kit
For this build I used:
- ZeroSeg
- Soldering Iron (etc)
- Raspberry Pi 3B+
- Micro SD (or USB thumb)
Getting Started
Hands on
The ZeroSeg comes as a kit that needs building with a couple of resistors and chips that need soldering to the supplied board - loads of fun and a great project for beginners as it comes with a pretty comprehensive guide.
Prepping the Pi
I've covered my go-to Raspberry Pi setup previously and this build is no different, DietPi flashed onto a USB thumbdrive (booting to USB supported on Raspberry Pi 3 B+ onwards).
Testing, Testing
To get things started I popped the ZeroSeg on the GPIO pins.
GPIO is simply an series of pins that can be used to talk (send signals) to any number of devices, sensors etc via the Raspberry Pi - switching off / on an LED is common example you'll often see.
Next I used SSH to connect to my Raspberry Pi so I can configure the display without having to plug into a mouse and keyboard, instead working on my laptop.
SSH gives me a command line on the Raspberry Pi and if you've not tried using the command line I highly recommend it - it's a great way to interact with different devices from your Mac / Windows PC to a Cloud Server / Raspberry Pi.
There was a recommended library in the ZeroSeg guide for interacting with the display which I cloned and had a play with.
Ok, What Next?
The library provided uses Python, which is a typical programming language for this type of project. However my plan was to make the display available over the network and I wanted to do this using NodeJS.
There are a couple of benefits to NodeJS, first you write JavaScript which is a language I'm already comfortable with and secondly, there are a wealth of packages on npm that I can use to get something workable quickly.
I decided to try find a NodeJS equivalent package / library (over on npm) and then write a small wrapper to expose it to the web. (I probably could have just done it all in Python and saved myself an afternoon, but, the learning was fun.)
Abandonware
I started my search with "node raspberry-pi" and "node zeroseg" before finding something with "node MAX7219" (where MAX7219 is the name of the chip powering the ZeroSeg).
Turns out there's no "recent" library that does what I want. Several libraries claimed to talk to the chip however I had some real issues getting things going on my Pi.
Through this searching I did learn the ZeroSeg uses the Serial Peripheral Interface(SPI) to talk to to the display and that support for SPI in NodeJS is lacking - knowing what to search for however, "node spi", for made a huge difference when debugging (and reading the manual more thoroughly would have helped too).
Bespokeware
However after a bit of digging I discovered both spi-device and MAX7219.js which combined could do what I wanted.
The result is this: a new MAX7219.js.
I forked MAX72219.js from the original repo and converted to use spi-device. It was a super interesting deep dive into how SPI works and how to talk to devices attached to a Raspberry Pi.
Let's See it in Action?
Ok, so now I have a NodeJS interface to the display which means I can start to have a little play. In the update to MAX7219.js I started adding some abstractions (helper functions for common actions like setText) on top of the setDigitSymbol function - which will change on of the 8 numbers to the supplied symbol.
To demonstrate some of the new abstractions I built I created an examples folder and started putting together things like show_time.js and show_message.js.
The one I'm running at the moment is bounce.js - which "bounces" the time between the "sides" of the display, check it out 👇
This feels like a good place to have reached, I was able to talk to my display, with NodeJs, and I even made some commits to GitHub.
Next Steps
As mentioned I want to make this display available to devices on the network so the first thing I will do is implement some wrapper around my library so that I can do something like http://my-zeroseg.home/setText?value="hello_world" and have it shown on the display.
Another thing that I learned through the course of the project is the Arduino board should also be able to talk to this display - so I might try the whole thing again but this time without the Pi.
First appeared on my blog, published 15th May 2021


Top comments (0)