
GraphQL is a query language for APIs and a runtime that allows the API consumer to get exactly the required information instead of the server exclusively controlling the contents of the response. While some REST API implementations require loading the references of a resource from multiple URLs, GraphQL APIs can follow references between related objects and return them in a single response.
This step-by-step guide demonstrates how to build a GraphQL API with Spring Boot and Spring for GraphQL for querying a sample dataset of related companies, persons, and properties seeded to a Neo4j database. It also demonstrates how to build a React client with Next.js and MUI Datagrid to consume the API. Both the client and the server are secured with Auth0 authentication using Okta Spring Boot Starter for the server and Auth0 React SDK for the client.

NOTE: If you prefer skipping the step-by-step building process and rather run this example and inspect the final code, you can follow the README instructions in the GitHub repository.
This example was created with the following tools and services:
- Node.js v20.10.0
- npm 10.2.3
- Java OpenJDK 17
- Docker 24.0.7
- Auth0 account
- Auth0 CLI 1.3.0
- HTTPie 3.2.2
- Next.js 14.0.4
Table of Contents
- Build a GraphQL API with Spring for GraphQL
- Build a React Client
- Add Security with Auth0
- Update the GraphQL Query in the Client
- Learn More about Spring Boot, GraphQL, and React
Build a GraphQL API with Spring for GraphQL
The resource server is a Spring Boot web application that exposes a GraphQL API with Spring for GraphQL. The API allows querying a Neo4j database containing information about companies and their related owners and properties using Spring Data Neo4j. The data was obtained from a Neo4j use case example.
Create the application with Spring Initializr and HTTPie:
https start.spring.io/starter.zip \
  bootVersion==3.2.1 \
  language==java \
  packaging==jar \
  javaVersion==17 \
  type==gradle-project \
  dependencies==data-neo4j,graphql,docker-compose,web \
  groupId==com.okta.developer \
  artifactId==spring-graphql  \
  name=="Spring Boot API" \
  description=="Demo project of a Spring Boot GraphQL API" \
  packageName==com.okta.developer.demo > spring-graphql-api.zip
Unzip the file and start editing the project. Define the GraphQL API with a schema file named schema.graphqls in the src/main/resources/graphql directory:
# src/main/resources/graphql/schema.graphqls

type Query {
    companyList(page: Int): [Company!]!
    companyCount: Int
}

type Company {
    id: ID
    SIC: String
    category: String
    companyNumber: String
    countryOfOrigin: String
    incorporationDate: String
    mortgagesOutstanding: Int
    name: String
    status: String
    controlledBy: [Person!]!
    owns: [Property!]!
}

type Person {
    id: ID
    birthMonth: String
    birthYear: String
    nationality: String
    name: String
    countryOfResidence: String
}

type Property {
    id: ID
    address: String
    county: String
    district: String
    titleNumber: String
}
As you can see, the schema defines the object types Company, Person, and Property and the query types companyList and companyCount.
Start adding classes for the domain. Create the package com.okta.developer.demo.domain under src/main/java. Add the classes Person, Property, and Company.
Here is the definition for the Person class:
// Person.java
package com.okta.developer.demo.domain;

import org.springframework.data.neo4j.core.schema.GeneratedValue;
import org.springframework.data.neo4j.core.schema.Id;
import org.springframework.data.neo4j.core.schema.Node;

@Node
public class Person {

    @Id @GeneratedValue
    private Long id;

    private String birthMonth;
    private String birthYear;
    private String countryOfResidence;

    private String name;
    private String nationality;

    public Person(String birthMonth, String birthYear, String countryOfResidence, String name, String nationality) {
        this.id = null;
        this.birthMonth = birthMonth;
        this.birthYear = birthYear;
        this.countryOfResidence = countryOfResidence;
        this.name = name;
        this.nationality = nationality;
    }

    public Person withId(Long id) {
        if (this.id.equals(id)) {
            return this;
        } else {
            Person newObject = new Person(this.birthMonth, this.birthYear, this.countryOfResidence, this.name, this.nationality);
            newObject.id = id;
            return newObject;
        }
    }

    public String getBirthMonth() {
        return birthMonth;
    }

    public void setBirthMonth(String birthMonth) {
        this.birthMonth = birthMonth;
    }

    public String getBirthYear() {
        return birthYear;
    }

    public void setBirthYear(String birthYear) {
        this.birthYear = birthYear;
    }

    public String getCountryOfResidence() {
        return countryOfResidence;
    }

    public void setCountryOfResidence(String countryOfResidence) {
        this.countryOfResidence = countryOfResidence;
    }

    public String getName() {
        return name;
    }

    public void setName(String name) {
        this.name = name;
    }

    public String getNationality() {
        return nationality;
    }

    public void setNationality(String nationality) {
        this.nationality = nationality;
    }

    public Long getId() {
        return this.id;
    }
}
The following is the definition for the Property class:
// Property.java
package com.okta.developer.demo.domain;

import org.springframework.data.neo4j.core.schema.GeneratedValue;
import org.springframework.data.neo4j.core.schema.Id;
import org.springframework.data.neo4j.core.schema.Node;

@Node
public class Property {

    @Id
    @GeneratedValue  private Long id;
    private String address;
    private String county;
    private String district;
    private String titleNumber;

    public Property(String address, String county, String district, String titleNumber) {
        this.id = null;
        this.address = address;
        this.county = county;
        this.district = district;
        this.titleNumber = titleNumber;
    }

    public Property withId(Long id) {
        if (this.id.equals(id)) {
            return this;
        } else {
            Property newObject = new Property(this.address, this.county, this.district, this.titleNumber);
            newObject.id = id;
            return newObject;
        }
    }

    public String getAddress() {
        return address;
    }

    public void setAddress(String address) {
        this.address = address;
    }

    public String getCounty() {
        return county;
    }

    public void setCounty(String county) {
        this.county = county;
    }

    public String getDistrict() {
        return district;
    }

    public void setDistrict(String district) {
        this.district = district;
    }

    public String getTitleNumber() {
        return titleNumber;
    }

    public void setTitleNumber(String titleNumber) {
        this.titleNumber = titleNumber;
    }
}
And this is the code for the Company class:
// Company.java
package com.okta.developer.demo.domain;

import org.springframework.data.neo4j.core.schema.GeneratedValue;
import org.springframework.data.neo4j.core.schema.Id;
import org.springframework.data.neo4j.core.schema.Node;
import org.springframework.data.neo4j.core.schema.Relationship;

import java.time.LocalDate;
import java.util.ArrayList;
import java.util.List;

@Node
public class Company {
    @Id
    @GeneratedValue
    private Long id;
    private String SIC;
    private String category;
    private String companyNumber;
    private String countryOfOrigin;
    private LocalDate incorporationDate;
    private Integer mortgagesOutstanding;
    private String name;
    private String status;

    // Mapped automatically
    private List<Property> owns = new ArrayList<>();

    @Relationship(type = "HAS_CONTROL", direction = Relationship.Direction.INCOMING)
    private List<Person> controlledBy = new ArrayList<>();

    public Company(String SIC, String category, String companyNumber, String countryOfOrigin, LocalDate incorporationDate, Integer mortgagesOutstanding, String name, String status) {
        this.id = null;
        this.SIC = SIC;
        this.category = category;
        this.companyNumber = companyNumber;
        this.countryOfOrigin = countryOfOrigin;
        this.incorporationDate = incorporationDate;
        this.mortgagesOutstanding = mortgagesOutstanding;
        this.name = name;
        this.status = status;
    }

    public Company withId(Long id) {
        if (this.id.equals(id)) {
            return this;
        } else {
            Company newObject = new Company(this.SIC, this.category, this.companyNumber, this.countryOfOrigin, this.incorporationDate, this.mortgagesOutstanding, this.name, this.status);
            newObject.id = id;
            return newObject;
        }
    }

    public String getSIC() {
        return SIC;
    }

    public void setSIC(String SIC) {
        this.SIC = SIC;
    }

    public String getCategory() {
        return category;
    }

    public void setCategory(String category) {
        this.category = category;
    }

    public String getCompanyNumber() {
        return companyNumber;
    }

    public void setCompanyNumber(String companyNumber) {
        this.companyNumber = companyNumber;
    }

    public String getCountryOfOrigin() {
        return countryOfOrigin;
    }

    public void setCountryOfOrigin(String countryOfOrigin) {
        this.countryOfOrigin = countryOfOrigin;
    }

    public LocalDate getIncorporationDate() {
        return incorporationDate;
    }

    public void setIncorporationDate(LocalDate incorporationDate) {
        this.incorporationDate = incorporationDate;
    }

    public Integer getMortgagesOutstanding() {
        return mortgagesOutstanding;
    }

    public void setMortgagesOutstanding(Integer mortgagesOutstanding) {
        this.mortgagesOutstanding = mortgagesOutstanding;
    }

    public String getName() {
        return name;
    }

    public void setName(String name) {
        this.name = name;
    }

    public String getStatus() {
        return status;
    }

    public void setStatus(String status) {
        this.status = status;
    }
}
Create the package com.okta.developer.demo.repository and the class CompanyRepository:
// CompanyRepository.java
package com.okta.developer.demo.repository;

import com.okta.developer.demo.domain.Company;
import org.springframework.data.neo4j.repository.ReactiveNeo4jRepository;

public interface CompanyRepository extends ReactiveNeo4jRepository<Company, Long> {

}
Create the configuration class GraphQLConfig under the root package:
// GraphQLConfig.java
package com.okta.developer.demo;

import org.slf4j.Logger;
import org.slf4j.LoggerFactory;
import org.springframework.boot.autoconfigure.graphql.GraphQlSourceBuilderCustomizer;
import org.springframework.context.annotation.Bean;
import org.springframework.context.annotation.Configuration;

@Configuration(proxyBeanMethods = false)
class GraphQLConfig {

    private static Logger logger = LoggerFactory.getLogger("graphql");

    @Bean
    public GraphQlSourceBuilderCustomizer sourceBuilderCustomizer() {
        return (builder) ->
                builder.inspectSchemaMappings(report -> {
                    logger.debug(report.toString());
                });
    }
}
Create a configuration class named SpringBootApiConfig in the root package as well, defining a reactive transaction manager required for reactive Neo4j:
// SpringBootApiConfig.java
package com.okta.developer.demo;

import org.neo4j.driver.Driver;
import org.springframework.context.annotation.Bean;
import org.springframework.context.annotation.Configuration;
import org.springframework.data.neo4j.core.ReactiveDatabaseSelectionProvider;
import org.springframework.data.neo4j.core.transaction.ReactiveNeo4jTransactionManager;
import org.springframework.data.neo4j.repository.config.ReactiveNeo4jRepositoryConfigurationExtension;
import org.springframework.transaction.ReactiveTransactionManager;

@Configuration
public class SpringBootApiConfig {

    @Bean(ReactiveNeo4jRepositoryConfigurationExtension.DEFAULT_TRANSACTION_MANAGER_BEAN_NAME) //Required for neo4j
    public ReactiveTransactionManager reactiveTransactionManager(
            Driver driver,
            ReactiveDatabaseSelectionProvider databaseNameProvider) {
        return new ReactiveNeo4jTransactionManager(driver, databaseNameProvider);
    }
}
Create the package com.okta.developer.demo.controller and the class CompanyController implementing the query endpoints matching the queries defined in the GraphQL schema:
// CompanyController.java
package com.okta.developer.demo.controller;

import com.okta.developer.demo.domain.Company;
import com.okta.developer.demo.repository.CompanyRepository;
import org.springframework.beans.factory.annotation.Autowired;
import org.springframework.graphql.data.method.annotation.Argument;
import org.springframework.graphql.data.method.annotation.QueryMapping;
import org.springframework.stereotype.Controller;
import reactor.core.publisher.Flux;
import reactor.core.publisher.Mono;

@Controller
public class CompanyController {

    @Autowired
    private CompanyRepository companyRepository;

    @QueryMapping
    public Flux<Company> companyList(@Argument Long page) {
        return companyRepository.findAll().skip(page * 10).take(10);
    }

    @QueryMapping
    public Mono<Long> companyCount() {
        return companyRepository.count();
    }
}
Create a CompanyControllerTests for the web layer in the directory src/main/test/java under the package com.okta.developer.demo.controller:
// src/main/test/java/CompanyControllerTests.java
package com.okta.developer.demo.controller;

import com.okta.developer.demo.domain.Company;
import com.okta.developer.demo.repository.CompanyRepository;
import org.junit.jupiter.api.Test;
import org.springframework.beans.factory.annotation.Autowired;
import org.springframework.boot.test.autoconfigure.graphql.GraphQlTest;
import org.springframework.boot.test.mock.mockito.MockBean;
import org.springframework.graphql.test.tester.GraphQlTester;
import reactor.core.publisher.Flux;

import java.time.LocalDate;

import static org.mockito.Mockito.when;

@GraphQlTest(CompanyController.class)
public class CompanyControllerTests {

    @Autowired
    private GraphQlTester graphQlTester;

    @MockBean
    private CompanyRepository companyRepository;

    @Test
    void shouldGetCompanies() {

        when(this.companyRepository.findAll())
                .thenReturn(Flux.just(new Company(
                        "1234",
                        "private",
                        "12345678",
                        "UK",
                        LocalDate.of(2020, 1, 1),
                        0,
                        "Test Company",
                        "active")));

        this.graphQlTester
                .documentName("companyList")
                .variable("page", 0)
                .execute()
                .path("companyList")
                .matchesJson("""
                    [{
                        "id": null,
                        "SIC": "1234",
                        "name": "Test Company",
                        "status": "active",
                        "category": "private",
                        "companyNumber": "12345678",
                        "countryOfOrigin": "UK"
                    }]
                """);
    }
}
Create the document file companyList.graphql containing the query definition for the test, in the directory src/main/test/resources/graphql-test:
# src/main/test/resources/graphql-test/companyList.graphql
query companyList($page: Int) {
    companyList(page: $page) {
        id
        SIC
        name
        status
        category
        companyNumber
        countryOfOrigin
    }
}
Update the test configuration in build.gradle file, so passed tests are logged:
// build.gradle
tasks.named('test') {
    useJUnitPlatform()

    testLogging {
        // set options for log level LIFECYCLE
        events "failed", "passed"
    }
}
Run the test with:
./gradlew test
You should see logs for the successful tests:
...
SpringBootApiApplicationTests > contextLoads() PASSED

CompanyControllerTests > shouldGetCompanies() PASSED
...
Add Neo4j seed data
Let's add Neo4j migrations dependency for the seed data insertion. Edit the build.gradle file and add:
// build.gradle
dependencies {
    ...
    implementation 'eu.michael-simons.neo4j:neo4j-migrations-spring-boot-starter:2.8.2'
    ...
}
Create the directory src/main/resources/neo4j/migrations and the following migration files:
// src/main/resources/neo4j/migrations/V001_Constraint.cypher

CREATE CONSTRAINT FOR (c:Company) REQUIRE c.companyNumber IS UNIQUE;
//Constraint for a node key is a Neo4j Enterprise feature only - run on an instance with enterprise
//CREATE CONSTRAINT ON (p:Person) ASSERT (p.birthMonth, p.birthYear, p.name) IS NODE KEY
CREATE CONSTRAINT FOR (p:Person) REQUIRE (p.birthMonth, p.birthYear, p.name) IS UNIQUE;
CREATE CONSTRAINT FOR (p:Property) REQUIRE p.titleNumber IS UNIQUE;
// src/main/resources/neo4j/migrations/V002_Company.cypher

LOAD CSV WITH HEADERS FROM "file:///PSCAmericans.csv" AS row
MERGE (c:Company {companyNumber: row.company_number})
RETURN COUNT(*);
// src/main/resources/neo4j/migrations/V003_Person.cypher

LOAD CSV WITH HEADERS FROM "file:///PSCAmericans.csv" AS row
MERGE (p:Person {name: row.`data.name`, birthYear: row.`data.date_of_birth.year`, birthMonth: row.`data.date_of_birth.month`})
  ON CREATE SET p.nationality = row.`data.nationality`,
  p.countryOfResidence = row.`data.country_of_residence`
RETURN COUNT(*);
// src/main/resources/neo4j/migrations/V004_PersonCompany.cypher

LOAD CSV WITH HEADERS FROM "file:///PSCAmericans.csv" AS row
MATCH (c:Company {companyNumber: row.company_number})
MATCH (p:Person {name: row.`data.name`, birthYear: row.`data.date_of_birth.year`, birthMonth: row.`data.date_of_birth.month`})
MERGE (p)-[r:HAS_CONTROL]->(c)
SET r.nature = split(replace(replace(replace(row.`data.natures_of_control`, "[",""),"]",""),  '"', ""), ",")
RETURN COUNT(*);
// src/main/resources/neo4j/migrations/V005_CompanyData.cypher

LOAD CSV WITH HEADERS FROM "file:///CompanyDataAmericans.csv" AS row
MATCH (c:Company {companyNumber: row.` CompanyNumber`})
SET c.name = row.CompanyName,
c.mortgagesOutstanding = toInteger(row.`Mortgages.NumMortOutstanding`),
c.incorporationDate = Date(Datetime({epochSeconds: apoc.date.parse(row.IncorporationDate,'s','dd/MM/yyyy')})),
c.SIC = row.`SICCode.SicText_1`,
c.countryOfOrigin = row.CountryOfOrigin,
c.status = row.CompanyStatus,
c.category = row.CompanyCategory;
// src/main/resources/neo4j/migrations/V006_Land.cypher

LOAD CSV WITH HEADERS FROM "file:///LandOwnershipAmericans.csv" AS row
MATCH (c:Company {companyNumber: row.`Company Registration No. (1)`})
MERGE (p:Property {titleNumber: row.`Title Number`})
SET p.address = row.`Property Address`,
p.county  = row.County,
p.price   = toInteger(row.`Price Paid`),
p.district = row.District
MERGE (c)-[r:OWNS]->(p)
WITH row, c,r,p WHERE row.`Date Proprietor Added` IS NOT NULL
SET r.date = Date(Datetime({epochSeconds: apoc.date.parse(row.`Date Proprietor Added`,'s','dd-MM-yyyy')}));
CREATE INDEX FOR (c:Company) ON c.incorporationDate;
Update application.properties and add the following properties:
# src/main/resources/application.properties
spring.graphql.graphiql.enabled=true
spring.graphql.schema.introspection.enabled=true
org.neo4j.migrations.transaction-mode=PER_STATEMENT

spring.graphql.cors.allowed-origins=http://localhost:3000
The property spring.graphql.cors.allowed-origins will eventually enable CORS for the client application.
Create a .env file in the server root to store the Neo4j credentials:
# .env
export NEO4J_PASSWORD=verysecret
If using git, don't forget to add the .env file to the ignored files.
Download the following seed files to an empty directory, as it will be mounted to the Neo4j container:
Spring Boot's Docker Compose integration now supports Neo4j. Edit the compose.yaml file and add a service for the Neo4j database.
# compose.yaml
services:
  neo4j:
    image: neo4j:5
    volumes:
      - <csv-dir>:/var/lib/neo4j/import
    environment:
      - NEO4J_AUTH=neo4j/${NEO4J_PASSWORD}
      - NEO4JLABS_PLUGINS=["apoc"]
    # If you want to expose these ports outside your dev PC,
    # remove the "127.0.0.1:" prefix
    ports:
      - '127.0.0.1:7474:7474'
      - '127.0.0.1:7687:7687'
    healthcheck:
      test: ['CMD', 'wget', 'http://localhost:7474/', '-O', '-']
      interval: 5s
      timeout: 5s
      retries: 10
As you can see the compose file will mount <csv-dir> to a /var/lib/neo4j/import volume, making the content accessible from the running Neo4j container.
Replace <csv-dir> with the path to the CSV files downloaded before.
Run the Spring Boot API server
Go to the project root directory and start the application with:
./gradlew bootRun
Wait for the logs to inform the seed data migrations have run:
2023-09-13T11:52:08.041-03:00  ... Applied migration 001 ("Constraint").
2023-09-13T11:52:12.121-03:00  ... Applied migration 002 ("Company").
2023-09-13T11:52:16.508-03:00  ... Applied migration 003 ("Person").
2023-09-13T11:52:22.635-03:00  ... Applied migration 004 ("PersonCompany").
2023-09-13T11:52:25.979-03:00  ... Applied migration 005 ("CompanyData").
2023-09-13T11:52:27.703-03:00  ... Applied migration 006 ("Land").
Test the API with GraphiQL at http://localhost:8080/graphiql. In the query box on the left, paste the following query:
{
    companyList(page: 20) {
        id
        SIC
        name
        status
        category
        companyNumber
        countryOfOrigin
    }
}
You should see the query output in the box on the right:

NOTE: If you see a warning message in the server logs, that reads The query used a deprecated function: id, you can ignore it. Spring Data Neo4j still behaves correctly.
Build a React Client
Now let's create a Single Page Application (SPA) to consume the GraphQL API with React and Next.js. The list of companies will be displayed in a MUI Data Grid component. The application will use Next.js' App Router. The src/app directory will only contain routing files, and the UI components and application code will be in other directories.
Install Node, and in a terminal, run the create-next-app command at the parent directory of the Spring Boot application. It will create a project directory for the client application at the same level as the server application directory:
npx create-next-app
Answer the questions as follows:
✔ What is your project named? ... react-graphql
✔ Would you like to use TypeScript? ... Yes
✔ Would you like to use ESLint? ... Yes
✔ Would you like to use Tailwind CSS? ... No
✔ Would you like to use `src/` directory? ... Yes
✔ Would you like to use App Router? (recommended) ... Yes
✔ Would you like to customize the default import alias? ... No
Then add the MUI Datagrid dependencies, custom hooks from Vercel, and Axios:
cd react-graphql && \
  npm install @mui/x-data-grid && \
  npm install @mui/material@5.14.5 @emotion/react @emotion/styled && \
  npm install react-use-custom-hooks && \
  npm install axios
Run the application with:
npm run dev
Navigate to http://localhost:3000, and you should see the default Next.js page:
Create the API client
Create the directory src/services and add the file base.tsx with the following code:
// src/services/base.tsx
import axios from 'axios';

export const backendAPI = axios.create({
  baseURL: process.env.NEXT_PUBLIC_API_SERVER_URL
});

export default backendAPI;
Add the file src/services/companies.tsx with the following content:
// src/services/companies.tsx
import { AxiosError } from 'axios';
import { backendAPI } from './base';

export type CompaniesQuery = {
  page: number;
};

export type CompanyDTO = {
  name: string;
  SIC: string;
  id: string;
  companyNumber: string;
  category: string;
};

export const CompanyApi = {

  getCompanyCount: async () => {
    try {
      const response = await backendAPI.post('/graphql', {
        query: `{
        companyCount
      }`,
      });
      return response.data.data.companyCount as number;
    } catch (error) {
      console.log('handle get company count error', error);
      if (error instanceof AxiosError) {
        let axiosError = error as AxiosError;
        if (axiosError.response?.data) {
          throw new Error(axiosError.response?.data as string);
        }
      }
      throw new Error('Unknown error, please contact the administrator');
    }
  },

  getCompanyList: async (params?: CompaniesQuery) => {
    try {
      const response = await backendAPI.post('/graphql', {
        query: `{
        companyList(page: ${params?.page || 0}) {
          name,
          SIC,
          id,
          companyNumber,
          category
        }}`,
      });
      return response.data.data.companyList as CompanyDTO[];
    } catch (error) {
      console.log('handle get companies error', error);
      if (error instanceof AxiosError) {
        let axiosError = error as AxiosError;
        if (axiosError.response?.data) {
          throw new Error(axiosError.response?.data as string);
        }
      }
      throw new Error('Unknown error, please contact the administrator');
    }
  },

};
Add a file .env.example and .env.local in the root directory, both with the following content:
NEXT_PUBLIC_API_SERVER_URL=http://localhost:8080
NOTE: The
.env.localis ignored in the repository, and the.env.exampleis pushed as a reference on what environment variables are required for running the application.
Create a companies home page
Create the directory src/components/company and add the file CompanyTable.tsx with the following content:
// src/components/company/CompanyTable.tsx
import { DataGrid, GridColDef, GridEventListener, GridPaginationModel } from '@mui/x-data-grid';

export interface CompanyData {
  id: string,
  name: string,
  category: string,
  companyNumber: string,
  SIC: string
}

export interface CompanyTableProps {
  rowCount: number,
  rows: CompanyData[],
  columns: GridColDef[],
  pagination: GridPaginationModel,
  onRowClick?: GridEventListener<'rowClick'>
  onPageChange?: (pagination: GridPaginationModel) => void,

}

const CompanyTable = (props: CompanyTableProps) => {

  return (
    <>
      <DataGrid
        rowCount={props.rowCount}
        rows={props.rows}
        columns={props.columns}
        pageSizeOptions={[props.pagination.pageSize ]}
        initialState={{
          pagination: {
            paginationModel: { page: props.pagination.page, pageSize: props.pagination.pageSize },
          },
        }}
        density='compact'
        disableColumnMenu={true}
        disableRowSelectionOnClick={true}
        disableColumnFilter={true}
        disableDensitySelector={true}
        paginationMode='server'
        onRowClick={props.onRowClick}
        onPaginationModelChange={props.onPageChange}
      />
    </>
  );
};

export default CompanyTable;
Create a Loader.tsx component in the directory src/components/loader with the following code:
// src/components/loader/Loader.tsx
import { Box, CircularProgress, Skeleton } from '@mui/material';

const Loader = () => {
  return (
    <Box sx={{ display: 'flex', justifyContent: 'center', alignItems: 'center', height: 200 }}>
      <CircularProgress />
    </Box>
  );
}

export default Loader;
Add the file src/components/company/CompanyTableContainer.tsx with the following content:
// src/components/company/CompanyTableContainer.tsx
import { GridColDef, GridPaginationModel } from '@mui/x-data-grid';
import CompanyTable from './CompanyTable';
import { usePathname, useRouter, useSearchParams } from 'next/navigation';
import { CompanyApi } from '@/services/companies';
import Loader from '../loader/Loader';
import { useAsync } from 'react-use-custom-hooks';

interface CompanyTableProperties {
  page?: number;
}

const columns: GridColDef[] = [
  { field: 'id', headerName: 'ID', width: 70 },
  {
    field: 'companyNumber',
    headerName: 'Company #',
    width: 100,
    sortable: false,
  },
  { field: 'name', headerName: 'Company Name', width: 350, sortable: false },
  { field: 'category', headerName: 'Category', width: 200, sortable: false },
  { field: 'SIC', headerName: 'SIC', width: 400, sortable: false },
];

const CompanyTableContainer = (props: CompanyTableProperties) => {
  const router = useRouter();
  const searchParams = useSearchParams()!;
  const pathName = usePathname();
  const page = props.page ? props.page : 1;

  const [dataList, loadingList, errorList] = useAsync(
    () => CompanyApi.getCompanyList({ page: page - 1 }),
    {},
    [page]
  );
  const [dataCount] = useAsync(() => CompanyApi.getCompanyCount(), {}, []);

  const onPageChange = (pagination: GridPaginationModel) => {
    const params = new URLSearchParams(searchParams.toString());
    const page = pagination.page + 1;
    params.set('page', page.toString());
    router.push(pathName + '?' + params.toString());
  };

  return (
    <>
      {loadingList && <Loader />}
      {errorList && <div>Error</div>}

      {!loadingList && dataList && (
        <CompanyTable
          pagination={{ page: page - 1, pageSize: 10 }}
          rowCount={dataCount}
          rows={dataList}
          columns={columns}
          onPageChange={onPageChange}
        ></CompanyTable>
      )}
    </>
  );
};

export default CompanyTableContainer;
Add the following src/app/HomePage.tsx file for the homepage:
// src/app/HomePage.tsx
'use client';

import CompanyTableContainer from '@/components/company/CompanyTableContainer';
import { Box, Typography } from '@mui/material';
import { useSearchParams } from 'next/navigation';

const HomePage = () => {
  const searchParams = useSearchParams();
  const page = searchParams.get('page')
    ? parseInt(searchParams.get('page') as string)
    : 1;

  return (
    <>
      <Box>
        <Typography variant='h4' component='h1'>
          Companies
        </Typography>
      </Box>
      <Box mt={2}>
        <CompanyTableContainer page={page}></CompanyTableContainer>
      </Box>
    </>
  );
};

export default HomePage;
Replace the contents of src/app/page.tsx and change it to render the HomePage component:
// src/app/page.tsx
import HomePage from './HomePage';

const Page = () => {
  return (
    <HomePage/>
  );
}

export default Page;
Add a component defining the page width, for using it in the root layout. Create src/layout/WideLayout.tsx with the following content:
// src/layout/WideLayout.tsx
'use client';

import { Container, ThemeProvider, createTheme } from '@mui/material';

const theme = createTheme({
  typography: {
    fontFamily: 'inherit',
  },
});

const WideLayout = (props: { children: React.ReactNode }) => {
  return (
    <ThemeProvider theme={theme}>
      <Container maxWidth='lg' sx={{ mt: 4 }}>
        {props.children}
      </Container>
    </ThemeProvider>
  );
};

export default WideLayout;
With the implementation above, the page content will be wrapped in a ThemeProvider component, so MUI child components inherit the font family from the root layout.
Update the contents of src/app/layout.tsx to be:
// src/app/layout.tsx
import WideLayout from '@/layout/WideLayout';
import { Ubuntu} from 'next/font/google';

const font = Ubuntu({
  subsets: ['latin'],
  weight: ['300','400','500','700'],
});

export const metadata = {
  title: 'Create Next App',
  description: 'Generated by create next app',
};

export default function RootLayout({
  children,
}: {
  children: React.ReactNode;
}) {
  return (
    <html lang='en'>
      <body className={font.className}>
        <WideLayout>{children}</WideLayout>
      </body>
    </html>
  );
}
Also, remove src/app/globals.css and src/app/page.module.css. Then run the client application with:
npm run dev
Navigate to http://localhost:3000 and you should see the companies list:

Add Security with Auth0
For securing both the server and client, the Auth0 platform provides the best customer experience, and with a few simple configuration steps, you can add authentication to your applications. Sign up at Auth0 and install the Auth0 CLI that will help you create the tenant and the client applications.
Add resource server security to the GraphQL API server
In the command line, log in to Auth0 with the CLI:
auth0 login
The command output will display a device confirmation code and open a browser session to activate the device.
NOTE: In case your browser does not open automatically, activate the device by manually opening the URL
https://auth0.auth0.com/activate?user_code={deviceCode}.
On successful login, you will see the tenant, which you will use as the token issuer later.
The next step is to create a client app, which you can do in one command:
auth0 apps create \
  --name "GraphQL Server" \
  --description "Spring Boot GraphQL Resource Server" \
  --type regular \
  --callbacks http://localhost:8080/login/oauth2/code/okta \
  --logout-urls http://localhost:8080 \
  --reveal-secrets
Once the app is created, you will see the OIDC app's configuration:
=== dev-avup2laz.us.auth0.com application created

  CLIENT ID            ***
  NAME                 GraphQL Server
  DESCRIPTION          Spring Boot GraphQL Resource Server
  TYPE                 Regular Web Application
  CLIENT SECRET        ***
  CALLBACKS            http://localhost:8080/login/oauth2/code/okta
  ALLOWED LOGOUT URLS  http://localhost:8080
  ALLOWED ORIGINS
  ALLOWED WEB ORIGINS
  TOKEN ENDPOINT AUTH
  GRANTS               implicit, authorization_code, refresh_token, client_credentials

 ▸    Quickstarts: https://auth0.com/docs/quickstart/webapp
 ▸    Hint: Emulate this app's login flow by running `auth0 test login ***`
 ▸    Hint: Consider running `auth0 quickstarts download ***`
Add the okta-spring-boot-starter dependency to the build.gradle file in the spring-graphql-api project:
// build.gradle
dependencies {
    ...
    implementation 'com.okta.spring:okta-spring-boot-starter:3.0.6'
    ...
}
Set the client ID, issuer, and audience for OAuth 2.0 in the application.properties file:
# src/main/resources/application.properties
okta.oauth2.issuer=https://<your-auth0-domain>/
okta.oauth2.client-id=<client-id>
okta.oauth2.audience=${okta.oauth2.issuer}api/v2/
Add the client secret to the .env file:
# .env
export OKTA_OAUTH2_CLIENT_SECRET=<client-secret>
Add the following factory method to the class SpringBootApiConfig, for requiring a bearer token for all requests:
// SpringBootApiConfig.java
    ...
    @Bean
    public SecurityFilterChain configure(HttpSecurity http) throws Exception {
        http.oauth2ResourceServer(oauth2ResourceServer -> oauth2ResourceServer.jwt(withDefaults()));
        return http.build();
    }
    ...
NOTE: The Okta Spring Boot starter provides the security auto-configuration out of the box, and the resource server configuration should not be necessary. For some reason, the Spring for GraphQL CORS allowed origins configuration does not take effect without the customization above.
Again, in the root directory, run the API server with:
./gradlew bootRun
Get an access token using the Auth0 CLI with the auth0 test token command:
auth0 test token -a https://<your-auth0-domain>/api/v2/ -s openid
Select the CLI Login Testing app or any available client when prompted. You will also be prompted to open a browser window and log in with a user credential.
With HTTPie, send a request to the API server using a bearer access token:
ACCESS_TOKEN=<auth0-access-token>
echo -E '{"query":"{\n    companyList(page: 20) {\n        id\n        SIC\n        name\n        status\n        category\n        companyNumber\n        countryOfOrigin\n    }\n}"}' | \
  http -A bearer -a $ACCESS_TOKEN POST http://localhost:8080/graphql
NOTE: You can also follow these instructions for creating a test access token.
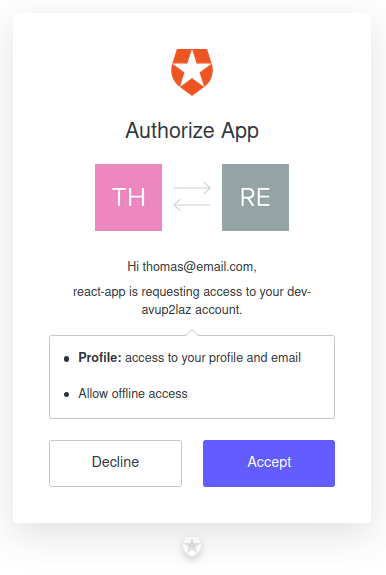
Add Auth0 Login to the React client
When using Auth0 as the identity provider, you can configure the Universal Login page for a quick integration without having to build the login forms. First, register a SPA application using the Auth0 CLI:
auth0 apps create \
  --name "React client for GraphQL" \
  --description "SPA React client for a Spring GraphQL API" \
  --type spa \
  --callbacks http://localhost:3000/callback \
  --logout-urls http://localhost:3000 \
  --origins http://localhost:3000 \
  --web-origins http://localhost:3000
Copy the Auth0 domain and the client ID, and update the .env.local adding the following properties:
# .env.local
NEXT_PUBLIC_AUTH0_DOMAIN=<your-auth0-domain>
NEXT_PUBLIC_AUTH0_CLIENT_ID=<client-id>
NEXT_PUBLIC_AUTH0_CALLBACK_URL=http://localhost:3000/callback
NEXT_PUBLIC_AUTH0_AUDIENCE=https://$NEXT_PUBLIC_AUTH0_DOMAIN/api/v2/
Add the new variables to the file .env.example too, but not the values, for documenting the required configuration.
For handling the Auth0 post-login behavior, you need to add the page src/app/callback/page.tsx with the following content:
// src/app/callback/page.tsx
import Loader from '@/components/loader/Loader';

const Page = () => {
  return <Loader/>
};

export default Page;
For this example, the callback page will render empty.
Add the @auth0/auth0-react dependency to the project:
npm install @auth0/auth0-react
NOTE: You might wonder why I'm using the Auth0 React SDK instead of the Auth0 Next.js SDK. I'm only using the front-end features of Next.js. If this example used a Next.js backend, the Auth0 Next.js SDK would make more sense.
Create the component Auth0ProviderWithNavigate in the directory src/components/authentication with the following content:
// src/components/authentication/Auth0ProviderWithNavigate.tsx
import { AppState, Auth0Provider } from '@auth0/auth0-react';
import { useRouter } from 'next/navigation';
import React from 'react';

const Auth0ProviderWithNavigate = (props: { children: React.ReactNode }) => {
  const router = useRouter();

  const domain = process.env.NEXT_PUBLIC_AUTH0_DOMAIN || '';
  const clientId = process.env.NEXT_PUBLIC_AUTH0_CLIENT_ID || ''
  const redirectUri = process.env.NEXT_PUBLIC_AUTH0_CALLBACK_URL || '';
  const audience = process.env.NEXT_PUBLIC_AUTH0_AUDIENCE || '';

  const onRedirectCallback = (appState?: AppState) => {
    router.push(appState?.returnTo || window.location.pathname);
  };

  if (!(domain && clientId && redirectUri)) {
    return null;
  }

  return (
    <Auth0Provider
      domain={domain}
      clientId={clientId}
      authorizationParams={{
        audience: audience,
        redirect_uri: redirectUri,
      }}
      useRefreshTokens={true}
      onRedirectCallback={onRedirectCallback}
    >
      <>{props.children}</>
    </Auth0Provider>
  );
};

export default Auth0ProviderWithNavigate;
The component Auth0ProviderWithNavigate wraps the children component with Auth0Provider, the provider of the Auth0 context, remembering the requested URL for redirection after login.
Use the component in the WideLayout component. The final code must look like this:
// WideLayout.tsx
'use client';

import Auth0ProviderWithNavigate from '@/components/authentication/Auth0ProviderWithNavigate';
import { Container, ThemeProvider, createTheme } from '@mui/material';

const theme = createTheme({
  typography: {
    fontFamily: 'inherit',
  },
});

const WideLayout = (props: { children: React.ReactNode }) => {
  return (
    <ThemeProvider theme={theme}>
      <Auth0ProviderWithNavigate>
        <Container maxWidth='lg' sx={{ mt: 4 }}>
          {props.children}
        </Container>
      </Auth0ProviderWithNavigate>
    </ThemeProvider>
  );
};

export default WideLayout;
Add the file src/components/authentication/AuthenticationGuard.tsx with the following content:
// src/components/authentication/AuthenticationGuard.tsx
'use client'

import { useAuth0 } from '@auth0/auth0-react';
import { useEffect } from 'react';
import Loader from '../loader/Loader';

const AuthenticationGuard = (props: { children: React.ReactNode }) => {
  const { isLoading, isAuthenticated, error, loginWithRedirect } = useAuth0();

  useEffect(() => {
    if (!isAuthenticated && !isLoading) {
      loginWithRedirect({
        appState: { returnTo: window.location.href },
      });
    }
  }, [isAuthenticated, isLoading, loginWithRedirect]);

  if (isLoading) {
    return <Loader />;
  }
  if (error) {
    return <div>Oops... {error.message}</div>;
  }
  return <>{isAuthenticated && props.children}</>;
};

export default AuthenticationGuard;
The AuthenticationGuard component will be used to protect pages that require authentication, redirecting to the Auth0 Universal Login. Protect the index page by wrapping its content in the AuthenticationGuard component:
// app/page.tsx
import AuthenticationGuard from '@/components/authentication/AuthenticationGuard';
import HomePage from './HomePage';

const Page = () => {
  return (
    <AuthenticationGuard>
      <HomePage/>
    </AuthenticationGuard>
  );
};

export default Page;
Call the API server with an access token
Add the file src/services/auth.tsx with the following code:
// src/services/auth.tsx
import backendAPI from './base';

let requestInterceptor: number;
let responseInterceptor: number;

export const clearInterceptors = () => {
  backendAPI.interceptors.request.eject(requestInterceptor);
  backendAPI.interceptors.response.eject(responseInterceptor);
};

export const setInterceptors = (accessToken: String) => {

  clearInterceptors();

  requestInterceptor = backendAPI.interceptors.request.use(
    // @ts-expect-error
    function (config) {
      return {
        ...config,
        headers: {
          ...config.headers,
          Authorization: `Bearer ${accessToken}`,
        },
      };
    },
    function (error) {
      console.log('request interceptor error', error);
      return Promise.reject(error);
    }
  );
};
Add the file src/hooks/useAccessToken.tsx with the following content:
// src/hooks/useAccessToken.tsx
import { setInterceptors } from '@/services/auth';
import { useAuth0 } from '@auth0/auth0-react';
import { useCallback, useState } from 'react';

export const useAccessToken = () => {
  const { isAuthenticated, getAccessTokenSilently } = useAuth0();
  const [accessToken, setAccessToken] = useState('');

  const saveAccessToken = useCallback(async () => {
    if (isAuthenticated) {
      try {
        const tokenValue = await getAccessTokenSilently();
        if (accessToken !== tokenValue) {
          setInterceptors(tokenValue);
          setAccessToken(tokenValue);
        }
      } catch (err) {
        // Inactivity timeout
        console.log('getAccessTokenSilently error', err);
      }
    }
  }, [getAccessTokenSilently, isAuthenticated, accessToken]);

  return {
    saveAccessToken,
  };
};
The hook will call Auth0's getAccessTokenSilently() and trigger a token refresh if the access token expires. Then, it will update Axios interceptors to set the updated bearer token value in the request headers.
Create the useAsyncWithToken hook:
// src/hooks/useAsyncWithToken.tsx
import { useAccessToken } from './useAccessToken';
import { useAsync } from 'react-use-custom-hooks';

export const useAsyncWithToken = <T, P, E = string>(
  asyncOperation: () => Promise<T>, deps: any[]
) => {
  const { saveAccessToken } = useAccessToken();
  const [ data, loading, error ] = useAsync(async () => {
    await saveAccessToken();
    return asyncOperation();
  }, {},  deps);

  return {
    data,
    loading,
    error
  };
};
Update the calls in the CompanyTableContainer component to use the useAsyncWithToken hook instead of useAsync:
// src/components/company/CompanyTableContainer.tsx
- import { useAsync } from 'react-use-custom-hooks';
+ import { useAsyncWithToken } from '@/hooks/useAsyncWithToken';

...
- const [dataList, loadingList, errorList] = useAsync(
-   () => CompanyApi.getCompanyList({ page: page - 1 }),
-   {},
-   [page]
-  );
- const [dataCount] = useAsync(() => CompanyApi.getCompanyCount(), {}, []);
+ const {
+   data: dataList,
+   loading: loadingList,
+   error: errorList,
+ } = useAsyncWithToken(
+   () => CompanyApi.getCompanyList({ page: page - 1}),
+   [props.page]
+ );
+
+ const { data: dataCount } = useAsyncWithToken(
+   () => CompanyApi.getCompanyCount(),
+   []
+ );
...
Run the application with:
npm run dev
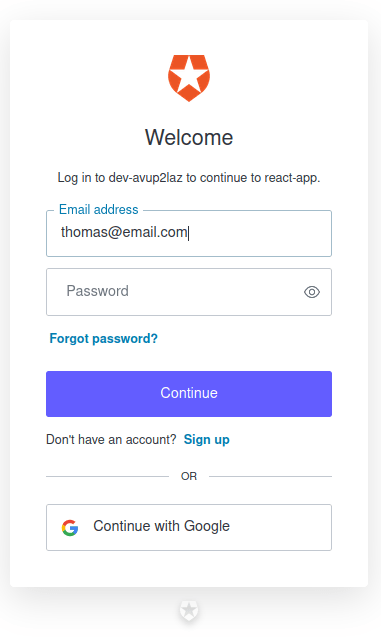
Go to http://localhost:3000 and you should be redirected to the Auth0 Universal Login page. After logging in, you should see the companies list again.
Once the companies load, you can inspect the network requests and see the bearer token is sent in the request headers. It will look like the example below:
Authorization: Bearer eyJhbGciOiJSU...
Update the GraphQL Query in the Client
The GraphQL query in the React client application can be easily updated to request more data from the server. For example, add the status and information about who controls the company. First, update the API client:
// src/services/companies.tsx
...

export type PersonDTO = {
  name: string;
}

export type CompanyDTO = {
  name: string;
  SIC: string;
  id: string;
  companyNumber: string;
  category: string;
  status: string;
  controlledBy: PersonDTO[]
};

...

  getCompanyList: async (params?: CompaniesQuery) => {

    try {
      const response = await backendAPI.post('/graphql', {
        query: `{
        companyList(page: ${params?.page || 0}) {
          name,
          SIC,
          id,
          companyNumber,
          category,
          status,
          controlledBy {
            name
          }
        }}`,
      });
      return response.data.data.companyList as CompanyDTO[];
    } catch (error) {
      console.log('handle get companies error', error);
      if (error instanceof AxiosError) {
        let axiosError = error as AxiosError;
        if (axiosError.response?.data) {
          throw new Error(axiosError.response?.data as string);
        }
      }
      throw new Error('Unknown error, please contact the administrator');
    }
  },
...
Then update the CompanyData interface in the CompanyTable.tsx component:
// src/components/company/CompanyTable.tsx
export interface CompanyData {
  id: string,
  name: string,
  category: string,
  companyNumber: string,
  SIC: string
  status: string,
  owner: string
}
Finally, update the CompanyTableContainer column definitions and data formatting. The final code should look like below:
// src/components/company/CompanyTableContainer.tsx
import { GridColDef, GridPaginationModel } from '@mui/x-data-grid';
import CompanyTable from './CompanyTable';
import { usePathname, useRouter, useSearchParams } from 'next/navigation';
import { CompanyApi, CompanyDTO } from '@/services/companies';
import Loader from '../loader/Loader';
import { useAsyncWithToken } from '@/hooks/useAsyncWithToken';

interface CompanyTableProperties {
  page?: number;
}

const columns: GridColDef[] = [
  { field: 'id', headerName: 'ID', width: 70 },
  {
    field: 'companyNumber',
    headerName: 'Company #',
    width: 100,
    sortable: false,
  },
  { field: 'name', headerName: 'Company Name', width: 250, sortable: false },
  { field: 'category', headerName: 'Category', width: 200, sortable: false },
  { field: 'SIC', headerName: 'SIC', width: 200, sortable: false },
  { field: 'status', headerName: 'Status', width: 100, sortable: false },
  { field: 'owner', headerName: 'Owner', width: 200, sortable: false },
];

const CompanyTableContainer = (props: CompanyTableProperties) => {
  const router = useRouter();
  const searchParams = useSearchParams()!;
  const pathName = usePathname();
  const page = props.page ? props.page : 1;

  const {
    data: dataList,
    loading: loadingList,
    error: errorList,
  } = useAsyncWithToken(
    () => CompanyApi.getCompanyList({ page: page - 1}),
    [props.page]
  );

  const { data: dataCount } = useAsyncWithToken(
    () => CompanyApi.getCompanyCount(),
    []
  );

  const onPageChange = (pagination: GridPaginationModel) => {
    const params = new URLSearchParams(searchParams.toString());
    const page = pagination.page + 1;
    params.set('page', page.toString());
    router.push(pathName + '?' + params.toString());
  };

  const companyData = dataList?.map((company: CompanyDTO) => {
    return {
      id: company.id,
      name: company.name,
      category: company.category,
      companyNumber: company.companyNumber,
      SIC: company.SIC,
      status: company.status,
      owner: company.controlledBy.map((person) => person.name).join(', '),
    }
  });

  return (
    <>
      {loadingList && <Loader />}
      {errorList && <div>Error</div>}

      {!loadingList && dataList && (
        <CompanyTable
          pagination={{ page: page - 1, pageSize: 10 }}
          rowCount={dataCount}
          rows={companyData}
          columns={columns}
          onPageChange={onPageChange}
        ></CompanyTable>
      )}
    </>
  );
};

export default CompanyTableContainer;
Give it a try. It's pretty neat how GraphQL allows you to get more data just by changing the client!
Learn More about Spring Boot, GraphQL, and React
I hope you enjoyed this tutorial and found this example useful. As you can see, not much work would be required to consume more company data from the GraphQL server, just a query update in the client. Also, the Auth0 Universal Login and Auth0 React SDK provide an efficient way to secure your React applications, following security best practices. You can find all the code for this example in the GitHub repository.
Check out the Auth0 documentation for adding sign-up and logout to your React application. And for more fun tutorials about Spring Boot, GraphQL, and React, you can visit the following links:
- Build a Simple CRUD App with Spring Boot and Vue.js
- Use React and Spring Boot to Build a Simple CRUD App
- The Complete Guide to React User Authentication with Auth0
- Build and Secure a GraphQL Server with Node.js
- Full Stack Java with React, Spring Boot, and JHipster
Keep in touch! If you have questions about this post, please ask them in the comments below. And follow us! We're @oktadev on Twitter, @oktadev on YouTube, and we frequently post to our LinkedIn page. You can also sign up for our newsletter to stay updated on everything Identity and Security.

Top comments (0)