This post is part of a series. To see all published posts in the series see the tag "elm calculator book".If you wish to support my work you can purchase the book on gumroad.
This project uses Elm version 0.19
- Part 1 - Introduction
- Part 2 - Project Setup (this post)
- Part 3 - Add CSS
- Part 4 - Basic Operations
- Part 5 - Adding Decimal Support
- Part 6 - Supporting Negative Numbers
- Part 7 - Add Dirty State
- Part 8 - Support Keypad Input
- Part 9 - Combination Key Input
- Part 10 - Testing
- Part 11 - Netlify Deployment
- browse: https://gitlab.com/pianomanfrazier/elm-calculator/-/tree/v0.1
- ellie: https://ellie-app.com/72nScWrSMfVa1
Setup your editor
The easiest way is to use the ellie-app link provided with each chapter.
I use VSCode throughout but there are lots of tools from the community for other IDEs. See this page for more editor choices.
Setup Shortcut
I have created a project template on GitHub that does this whole setup for you at https://github.com/pianomanfrazier/elm-starter.
If you have a GitHub account you can simply click the "Use this template" button and GitHub will make a repo in your account for you.
The rest of this chapter is to walk through setting things up by hand with the elm-live development server.
Initialize elm and npm
Now that our editor is setup we can write some code.
Create a new directory and open a terminal in that directory.
mkdir elm-calculator
cd elm-calculator
elm init
npm init
npm install --save-dev elm-live
Now create the following files: index.html, style.css, and an Elm file src/Main.elm.
touch index.html style.css src/Main.elm
You should have a file structure that looks like this.
elm-calculator
├── elm.json
├── index.html
├── package.json
├── src
│   └── Main.elm
└── style.css
The Html
The important thing here is that the Elm is loaded properly. The Elm compiler will compile our Elm program to an elm.js file. We need to load that file and initialize it in the index.html.
We can also link a CSS file in the header as well.
<!-- index.html -->
<!DOCTYPE html>
<html lang="en">
<head>
    <meta charset="UTF-8">
    <link rel="stylesheet" href="style.css">
    <script src="elm.js"></script>
    <title>Elm Calculator</title>
</head>
<body>
    <main></main>
    <script>
        var app = Elm.Main.init({ node: document.querySelector('main') })
    </script>
</body>
</html>
The CSS
We'll add a little bit of style just to convince us that it is working.
/* style.css */
body {
    font-family: sans-serif;
    text-align: center;
    padding-top: 3em;
    font-style: italic;
}
A Minimal Elm Program
And here is the most minimal elm program. Every Elm program needs a model, update, and view function.
-- src/Main.elm
module Main exposing (main)
-- import the things we will be using
import Browser
import Html exposing (Html, h1, text)

-- an empty model for now
type alias Model =
    {}
-- our model always needs an initial state
initialModel : Model
initialModel =
    {}
-- since the user can't do anything yet
-- we'll define a no-operation message
type Msg
    = NoOp

update : Msg -> Model -> Model
update msg model =
    case msg of
        NoOp ->
            model

view : Model -> Html Msg
view model =
    h1 [] [text "Hello Elm!"]

main : Program () Model Msg
main =
    Browser.sandbox
        { init = initialModel
        , view = view
        , update = update
        }
Run the project
npx elm-live src/Main.elm --hot --open -- --output=elm.js
npx ships with node.js and npm. It allows us to run programs that are installed locally by npm in the project directory. The alternative would be to install elm-live globally on your machine with npm install --global elm-live and use elm-live without npx.
--hot tells elm-live to inject any changes into the app without requiring a hard browser refresh.
--open tells elm-live to open the browser when the program is done being compiled.
Anything after the -- are flags that are passed directly to the elm compiler. In this case we want elm to output a JavaScript file that we can include in our index.html.
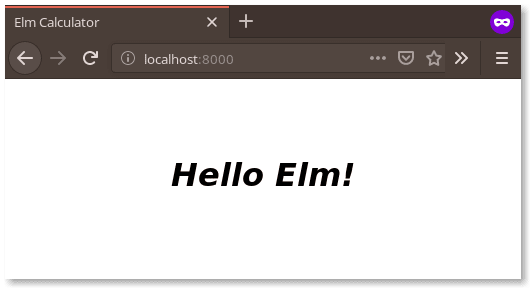
If all goes well you should see the following output.
For more information about the options to elm-live see the documentation here.
Now that we have the project setup we can begin to work on our application. The next chapter will start with adding CSS to make the calculator look good. I like to look at something pretty before I have to stare at it for a couple hours.


Top comments (0)