This article is a simple guide to getting started with 2 database models in the Oracle Cloud using the Always Free Tier program.
I don't work for Oracle but I have worked with Oracle tools on premises for years. So it's time to check what Oracle Cloud has to offer, at least in terms of database. And no more Oracle XE in the local machine 🎆 .
You will need a credit card to open an account with Oracle Cloud, but the samples we are going to create are cost free.
I already created an account so I will not show how to do it here. So we can jump to the console.
As we can check in the console below, at the red mark, a 200 USD value trial are offered to new users for 30 days free. Be aware of the end of this period to not be surprised with the credit card later in case you keep some activated resources.
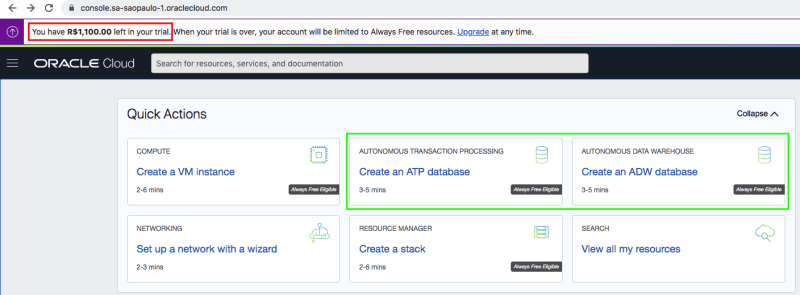
The green mark (any button) send us to the Create Autonomous Database screen.
Oracle Cloud Infrastructure's Autonomous Database is a fully managed, preconfigured database environment with two workload types available, Autonomous Transaction Processing and Autonomous Data Warehouse.
After setting the basic name and display name of the database, we can choose the workload type.
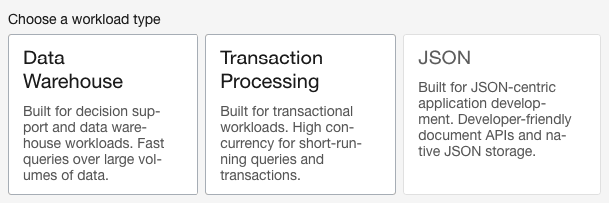
Transactional Database and Data Warehouse are both systems that store data. But they serve very different purposes. (The Difference Between a Data Warehouse and a Database)
JSON storage isn't available for the Always Free suite at this time.
Autonomous Database can be used without charge as part of Oracle Cloud Infrastructure's suite of Always Free resources. Users have access to two Always Free instances of Autonomous Database. Always Free Autonomous Databases have a fixed 8 GB of memory, 20 GB of storage, 1 OCPU, and can be configured for either Autonomous Transaction Processing or Autonomous Data Warehouse workloads.
So we can create a database for Transaction Processing and another for Data Warehouse as named below.
| Display Name | Name |
|---|---|
| Oracle Data Warehouse 20 GB 19c Shared Infrastructure | DBWH20GB19cSHR |
| Oracle Transaction Processing 20 GB 19c Shared Infrastructure | DBTP20GB19cSHR |
Each database will have an ADMIN (default) user. Let's assume that we will use the database name as the password. 🤪
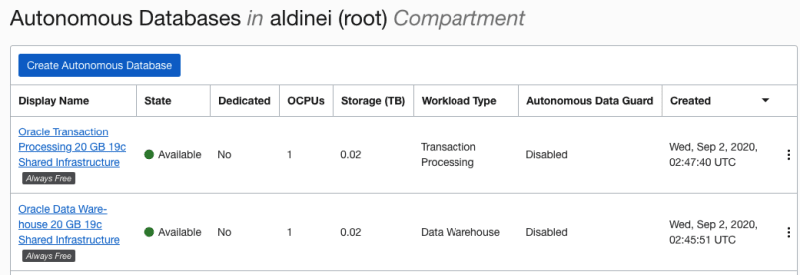
Our databases are ready. Keep in mind that they will be automatically stopped if not used for 7 days.
Connecting to the databases
Oracle offers some tools to visualize and administer our databases.
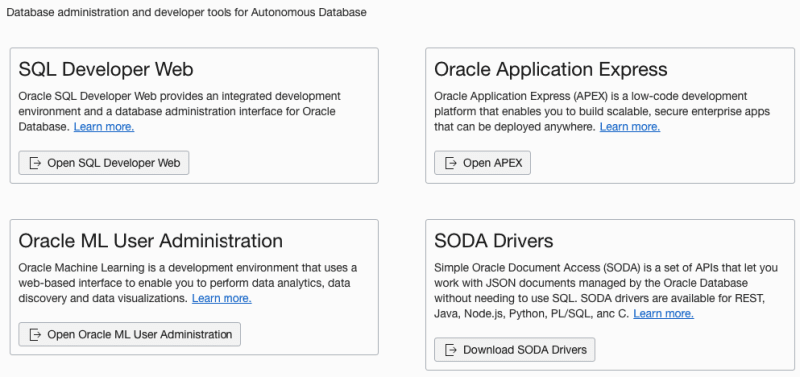
I didn't test any of these tools yet. In general I prefer to use a local database tool. And I think DBeaver is the best free tool available for relational database managers. All we need is a JDBC driver and a way to connect to the database wherever it be.
The Oracle Autonomous Databases mandates a secure connection. For this connection type, Java applications that use a JDBC Thin driver require either Oracle Wallet or Java KeyStore (JKS). (JDBC Thin Connections and Wallets)
If you don't understand those methods, it's not a problem. We will use Oracle Wallet method in this article and you are going to see it's simple.
Oracle Wallet provides a simple and easy method to manage database credentials across multiple domains. It allows you to update database credentials by updating the Wallet instead of having to change individual datasource definitions. This is accomplished by using a database connection string in the datasource definition that is resolved by an entry in the wallet.
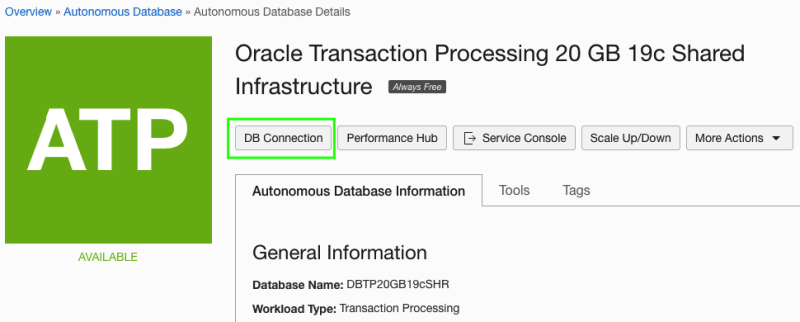
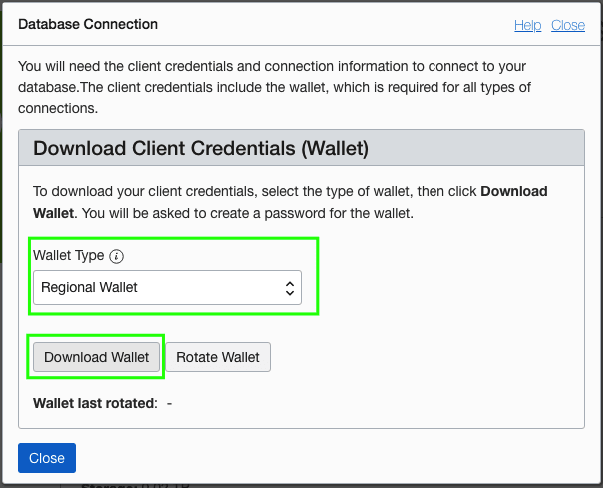
The wallet and keystore files are included in the client credentials .zip file that is available by clicking DB Connection on the Oracle Cloud Infrastructure console.
Select Regional Wallet to get the credentials for both databases in the same .zip.
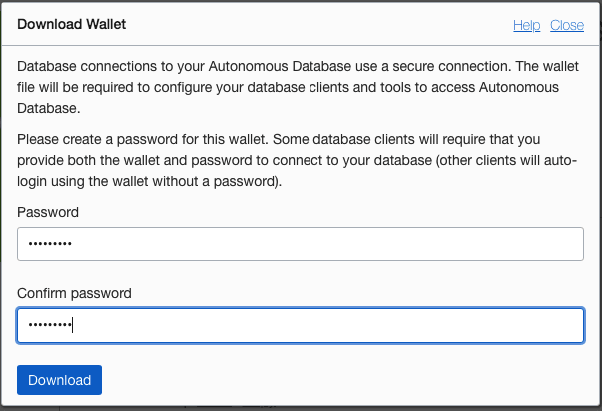
We need a password for the wallet. I will use myWallet1 for this sample. This will be the keyStore and truststore password.
It looks like that the .zip includes some Oracle configuration files and some binary files for SSL certificates.
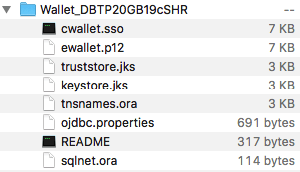
| Method | Files |
|---|---|
| Oracle Wallet | ewallet.sso, ewallet.p12 |
| Java KeyStore (JKS) | truststore.jks, keystore.jks |
Despite the .zip filename, the tnsnames.ora includes connection strings for both databases, as we selected a Regional Wallet for download. For each database we have three or five database service names like (for instance) high, medium, and low. The predefined service names provides different levels of performance and concurrency for Autonomous Databases.
dbtp20gb19cshr_high = (description= ... )
dbtp20gb19cshr_low = (description= ... )
dbtp20gb19cshr_medium = (description= ... )
dbtp20gb19cshr_tp = (description= ... )
dbtp20gb19cshr_tpurgent = (description= ... )

dbwh20gb19cshr_high = (description= ... )
dbwh20gb19cshr_low = (description= ... )
dbwh20gb19cshr_medium = (description= ...)
We can use any service name to test our connection, but each one may serve for a different purpose in a real application as you can see in the documentation (links below).
| Documentation |
|---|
| Predefined Database Service Names for Autonomous Data Warehouse |
| Predefined Database Service Names for Autonomous Transaction Processing |
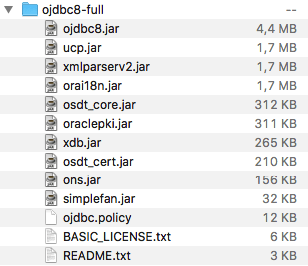
It's time to configure our DBeaver. The default JDBC Oracle Driver provided by the tool doesn't support Oracle Wallet. I had to download Oracle Database 19c (19.6) JDBC Driver.
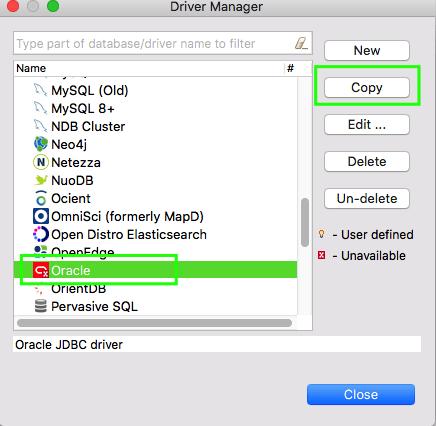
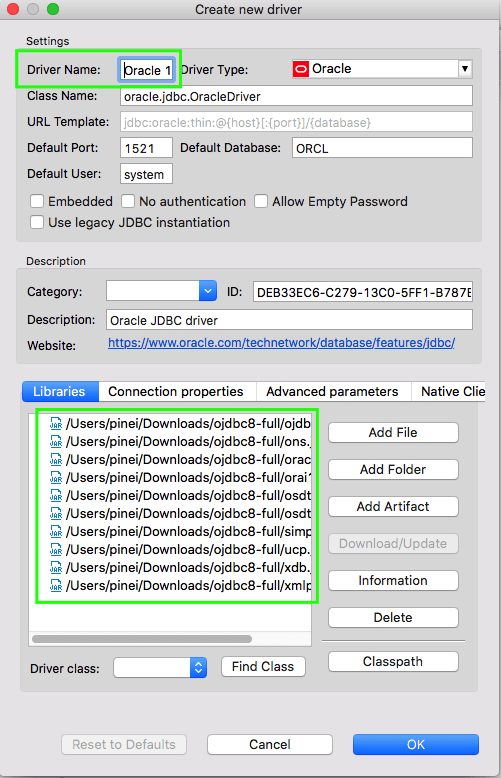
Go to Tools → Driver Manager in DBeaver to create a copy of a Oracle driver configuration.
For this new configuration, change the default files to the JAR files included in 19.6 JDBC .zip driver.
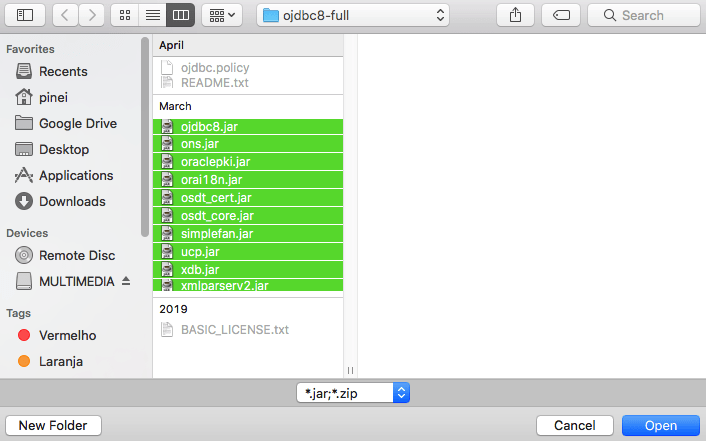
Name it Oracle 19.6.
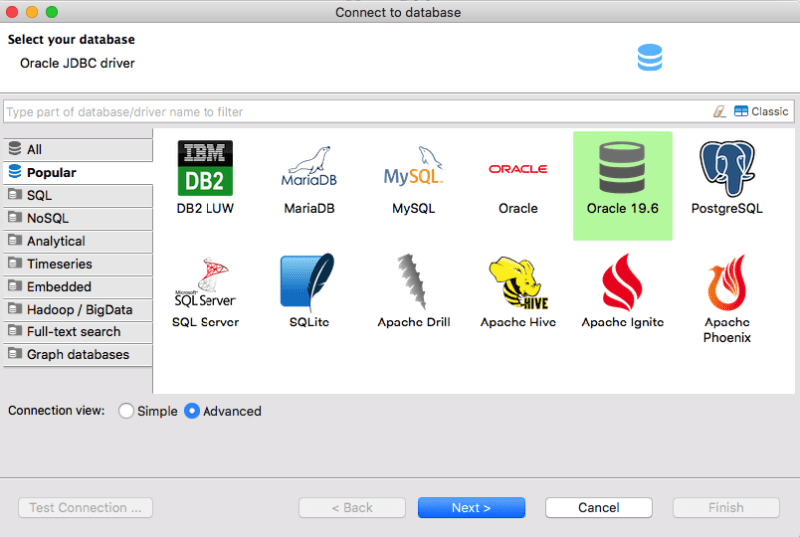
In Database Navigator, Create a New Connection. Select our new driver.
We will provide a custom JDBC URL for our Transaction Processing database connection. For the URL and other fields we need some simple informations:
| Info | Value |
|---|---|
| Service name | dbtp20gb19cshr_tp |
| Wallet location path | /Users/.../Downloads/Wallet_DBTP20GB19cSHR |
| Username | ADMIN |
| Password | DBTP20GB19cSHR (we set our database name 🤪 ) |
This is the shape of the URL for Oracle Wallet:
jdbc:oracle:thin:@dbtp20gb19cshr_tp?TNS_ADMIN=/Users/pinei/Downloads/Wallet_DBTP20GB19cSHR
After filling the fields, test the connection. For the first connection there can be a little lag.
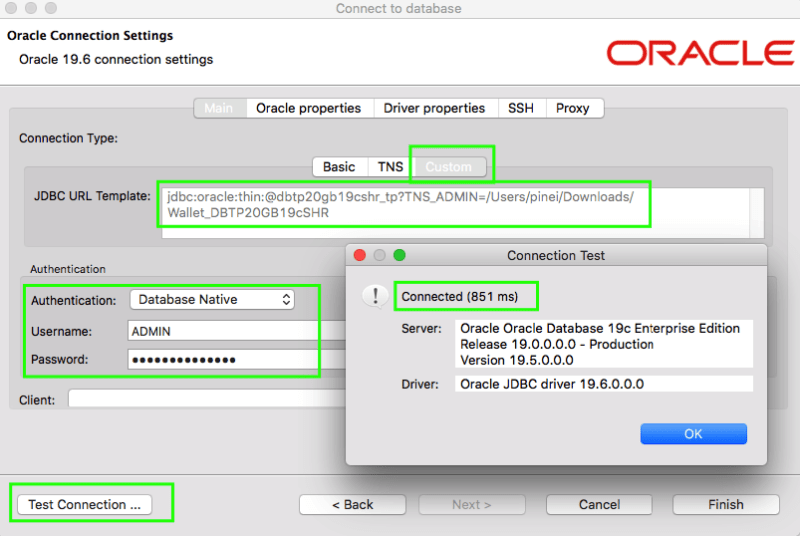
We can click Finish to create the connection configuration.
We can repeat the process for the Data Warehouse Database using these values:
| Info | Value |
|---|---|
| Service name | dbwh20gb19cshr_medium |
| Wallet location path | /Users/.../Downloads/Wallet_DBTP20GB19cSHR |
| Username | ADMIN |
| Password | DBWH20GB19cSHR (we set our database name 🤪 ) |
And URL:
jdbc:oracle:thin:@dbwh20gb19cshr_medium?TNS_ADMIN=/Users/pinei/Downloads/Wallet_DBTP20GB19cSHR
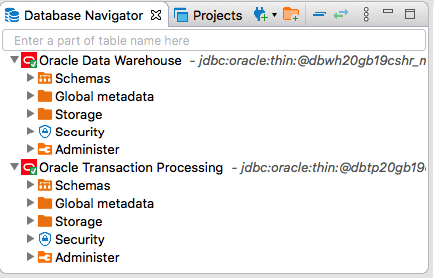
We can rename the connections afterward.
We didn't need the wallet password for our configuration, but the Java KeyStore (JKS) method makes use of it. If you want to try, see JDBC Thin Connections and Wallets
This article won't stop here, but with this content I decided to publish. More to come ...

Oldest comments (1)
Thank you! This was great!!