Introduction
For week 2 at SheCode Africa Cloud School, we were asked to create an Azure static web app.
Azure Static Web Apps is a service offered by Microsoft Azure that allows developers to deploy and host static web applications quickly and easily. Static web applications are web applications that do not require server-side code, which makes them faster and easier to deploy than traditional web applications.
The purpose of this article is to provide a step-by-step guide on how to create an Azure Static Web App. This guide will cover the prerequisites, creating the app, and deploying it. By the end of this article, you should have a good understanding of how to create an Azure Static Web App and how to deploy your static web applications quickly and easily using Microsoft Azure.
Pre-requisites
- Microsoft Azure account.
- A Github repository. You'll need to have your web app's source code in this repository, and you'll need to connect this repository to your Azure Static Web App to enable automated deployments.
Steps to Create an Azure Static Web App
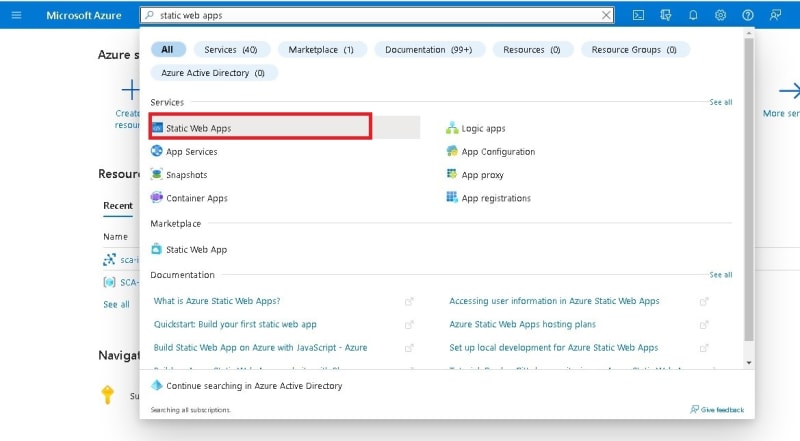
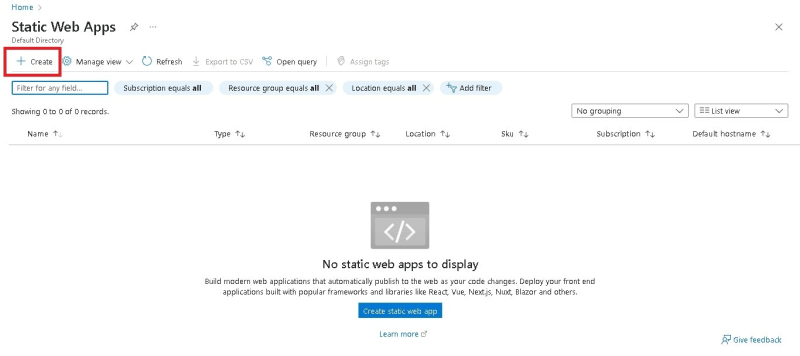
Sign in to your Azure account, search 'Static Web Apps' in the search bar and select it.
Select a subscription, a resource group, and name your Static Web App.
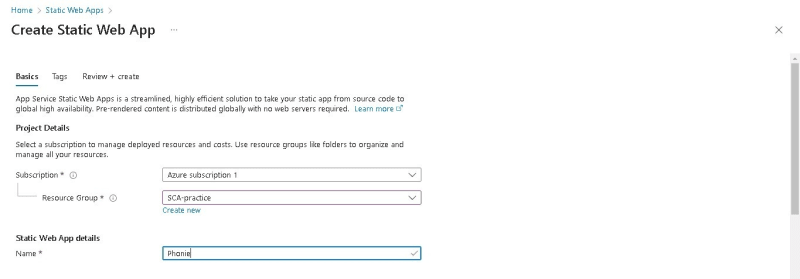
An Azure subscription provides access to Azure resources and to track usage and costs, while an Azure resource group is used to organize and manage related resources within a subscription.
If you do not have a pre-existing resource group, click create new to create a new resource group. All Azure resources must be created within a resource group.Select your plan type, region, and source
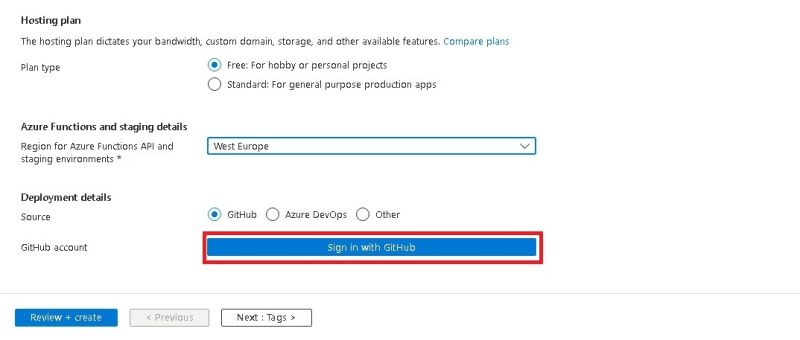
Your plan type should be free.
It is important to select a region closest to you because the closer the region is to your location, the lower the latency or delay in communication between your application and the Azure resources. This can result in faster application performance, lower response times, and better user experiences.
You can visit this website https://www.azurespeed.com/Azure/Latency to tests latency from your IP location to Azure datacenters worldwide. The region with the lowest average latency in milliseconds is the closest region to you.

Select sign in with Github and authorize Azure's access to your Github account.Select your Github organization (your account), the repository housing your source code and the branch
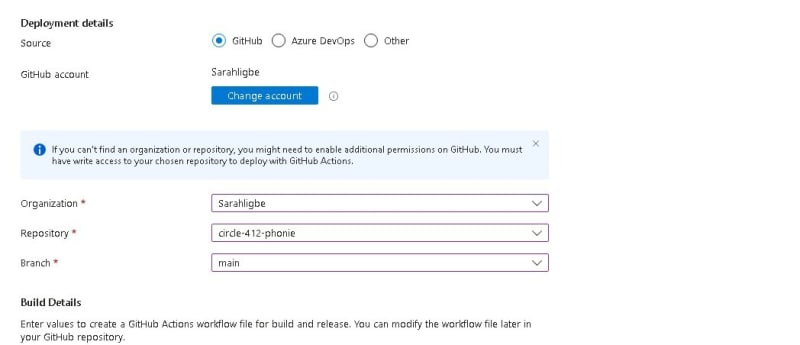
In the Build details section, add configurations specific to your application
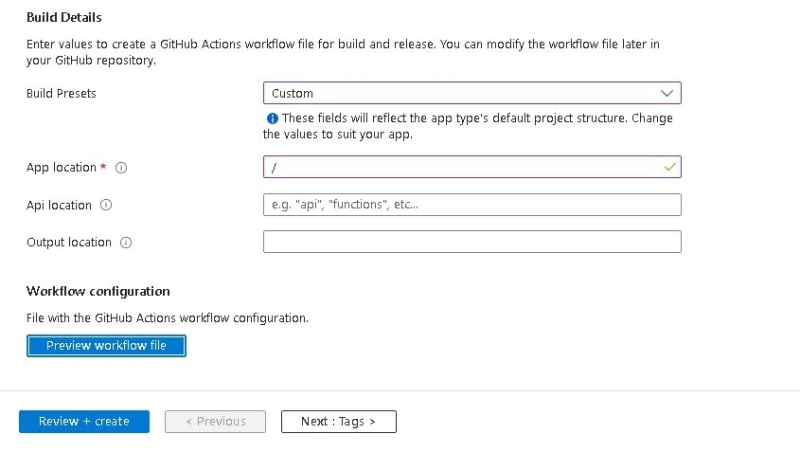
Select Custom in the Build presets since the application is not using any framework.
Select the root directory ("/") since the index.html file of the application is in the root directory. This may be different for you.
Leave the rest of the configurations empty.Click Preview workflow file to view the Github Actions workflow file generated by Azure.

Azure automatically generates one and pushes it to your Github repository. This file is used to automate the deployment of your app to Azure whenever changes are pushed to the specified branch of your GitHub repository.The deployment takes a few minutes and when it is complete, click Go to resource


Copy the URL link to see your application.
Conclusion
To wrap up, I hope this article has been helpful in guiding you through the process of creating an Azure Static Web App. By following the steps outlined in this article, you can quickly and easily deploy your own static web app in Azure.
Remember to select a region closest to you when deploying resources in Azure, and take advantage of Azure subscriptions and resource groups to manage costs and resources.
If you're interested in learning more about Azure Static Web Apps or other Azure services, Microsoft provides a wealth of documentation and resources for getting started. Some additional resources and links for further learning include:
- Microsoft Learn: https://learn.microsoft.com




Top comments (0)