Spheron Network offers a marketplace for deploying and managing nodes, including Avail Validator Nodes. This guide will walk you through the process of deploying an Avail Validator Node using Spheron.
To deploy an Avail Validator Node using Spheron, follow these steps:
1.Create a new cluster
Click "New Cluster" on the top right corner of the Spheron dashboard.
2.Choose Compute
Select "Compute" to use CPU-based instances for running containers.
3. Select Compute Type
Choose your desired Compute Type option under Compute Type.
4.Start from the Marketplace App
Click "Start from Marketplace App" and Select "Avail Validator Node" from the marketplace.
5. Choose your preferred Region
If you have a specific region preference, select it. If not, the container will be deployed in any region for Spot or in the US-West region for On Demand.
6. Select the recommended plan
Spheron will automatically select the recommended plan for the specific template. If you intend to proceed with the recommended plan, click " Deploy" to initiate deployment.
Before you click on deploy, make sure you have followed step 8 for a smooth experience.
7. Select the instance plan
Choose the instance plan that suits your needs Or You can use the "Create Custom Plan" toggle to create custom plans.
8. Add Advanced Configuration
Add your node name in the argument
--name=add your identifier
Ex. -name=potato-depl
9.Wait for the deployment to complete
The Avail Validator Node can be accessed only after the Compute Instance is provisioned. You need to wait for the installation to complete before you can start using it.
10. Monitor the Instance Logs
As the node starts, the Instance Logs will display the output about the operations performed. If you see messages that blocks are being proposed and finalized, you have a running node.
11. Check your running node
Go to Avail Telemetry https//telemetry.avail.tools/, and check the synchronization status of the node. The block needs to attain a specific hash to become part of the validation network.
The synchronization will take time as per the network ~15hrs
12. Create a stash and a controller account
Before you can become an active validator, you need to bond your funds to your node. This involves creating two separate Avail accounts: a stash account for holding your funds and a controller account for managing staking actions. [Please refer to https://docs.availproject.org/operate/validator/staking/ for elaborate details]
Create Stash Account
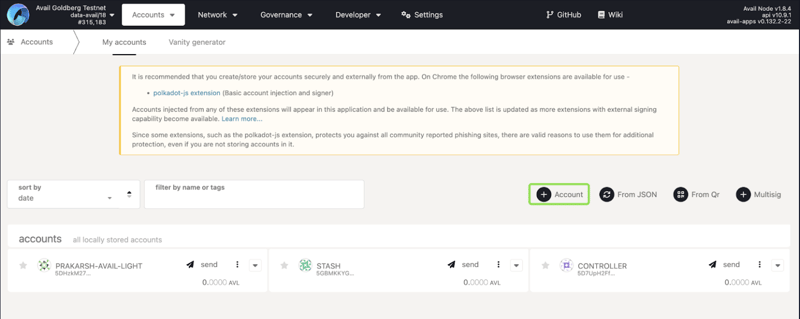
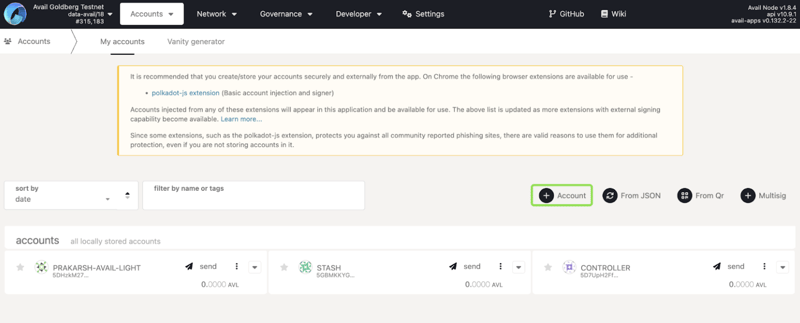
- Go to https://goldberg.avail.tools/, Create a stash account, by clicking on +Account button.
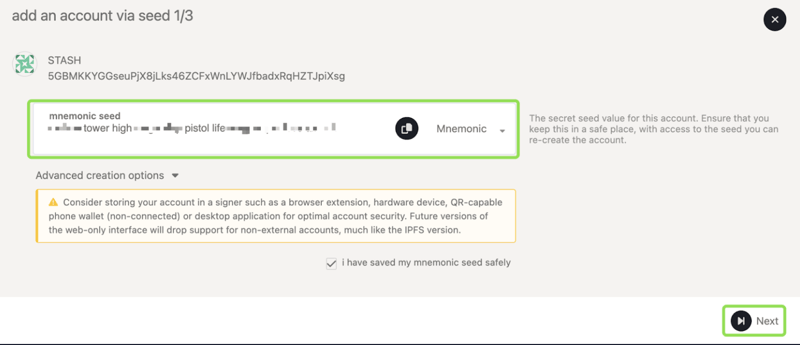
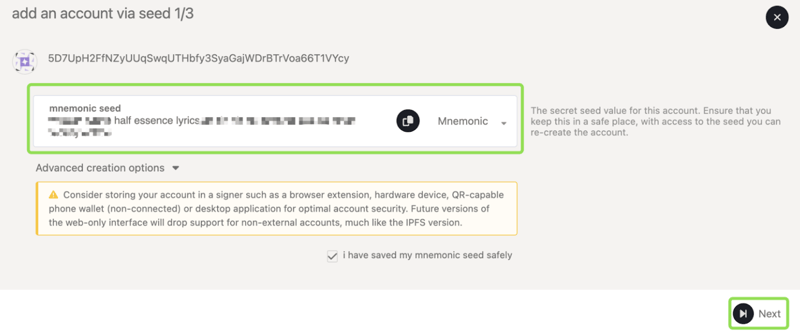
- Copy the Mnemonic key and keep it safe, and then click on next.
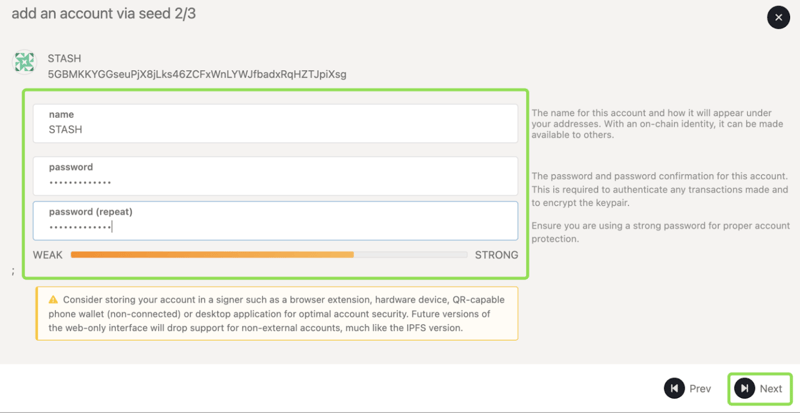
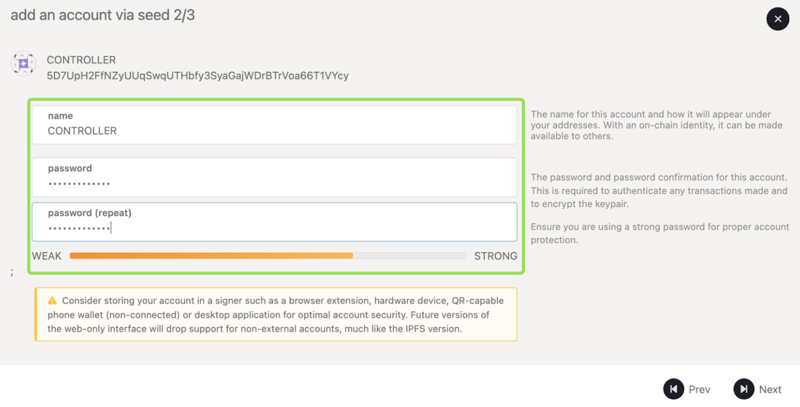
- Input the name and password to the stash account, then click next.
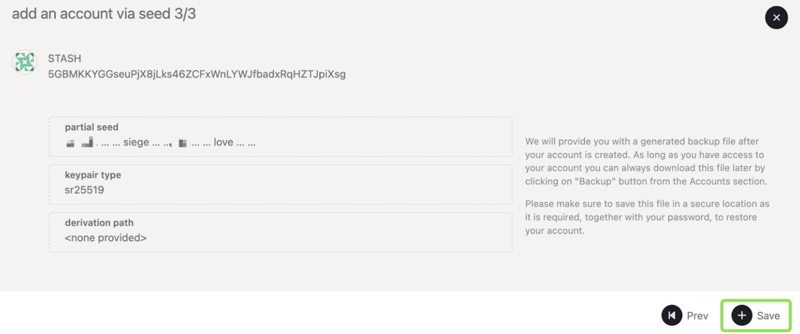
- Click on Save, and you have successfully created a Stash account.
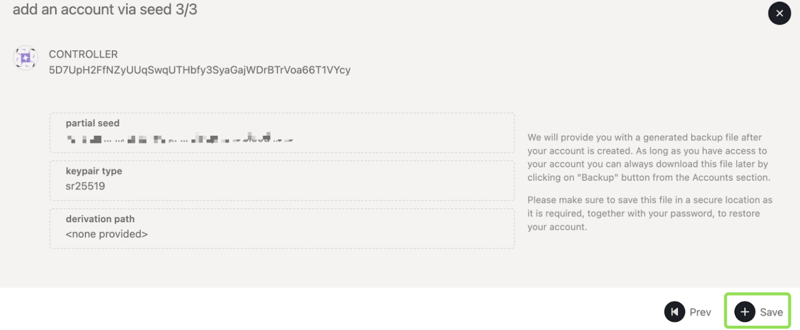
Create Controller Account
- Create a controller account similarly by clicking on +Account.
- Copy the Mnemonic key and keep it safely and then click on next.
- Input the name and password to the stash account, then click next.
- Click on Save, and you have successfully created a Stash account.
13. Bond your funds
- Navigate to the Staking tab in the Explorer.
- Navigate to Account and then click on Stash to initiate the bonding process.
- Add the AVL bonded value and then click on the bond button.
14. Adding Session Key
After your node is fully synced, you'll need to rotate and submit your session keys.
Paste the following command in the shell
- Submit Session Keys
- Register as a Validator
Set your validator commission percentage.
Enter your password and click on the Validate button.
Start Validation
Your validator is now prepared to begin the validation process. If you wish to discontinue, you can click the stop icon.
Please note that the Avail interface doesn't automatically verify if your node is synchronized; you'll need to confirm this manually. If your node has sufficient stake, the Avail blockchain will likely select it in the next epoch or two.
Conclusion
Running an Avail Validator Node using Spheron is a hassle-free and flexible process. With no long-term commitments, you can easily manage your node and focus on your validator duties. Spheron's marketplace provides a user-centric experience and one-click node deployment, making running nodes seamless.





Top comments (0)