
Release 16.8.0 of React introduced a groundbreaking feature, hooks. It will not be an exaggeration to say that this single feature changed the React landscape completely. Not only did it disuse class components, but it also reduced the necessity of using a store management library like MobX and Redux. I, for one, stopped using Redux-Forms, and migrated the forms in my projects to hooks.
useState is a hook that lets you have a state in a classless or functional component. Previously, if your component needed state, you had to use a class for it.
There is another hook, useReducer. The documentation states,
(It’s) an alternative to useState.
The question is when is using useReducer more suitable than useState hook?
Here, I will create a simple React application, first using useState. Then I will create the same application using useReducer hook. The differences and advantages fall into place when you can compare the code side by side.
I will use TypeScript. I expect the reader is familiar with TypeScript and primary hook usage.
What’s the application objective?
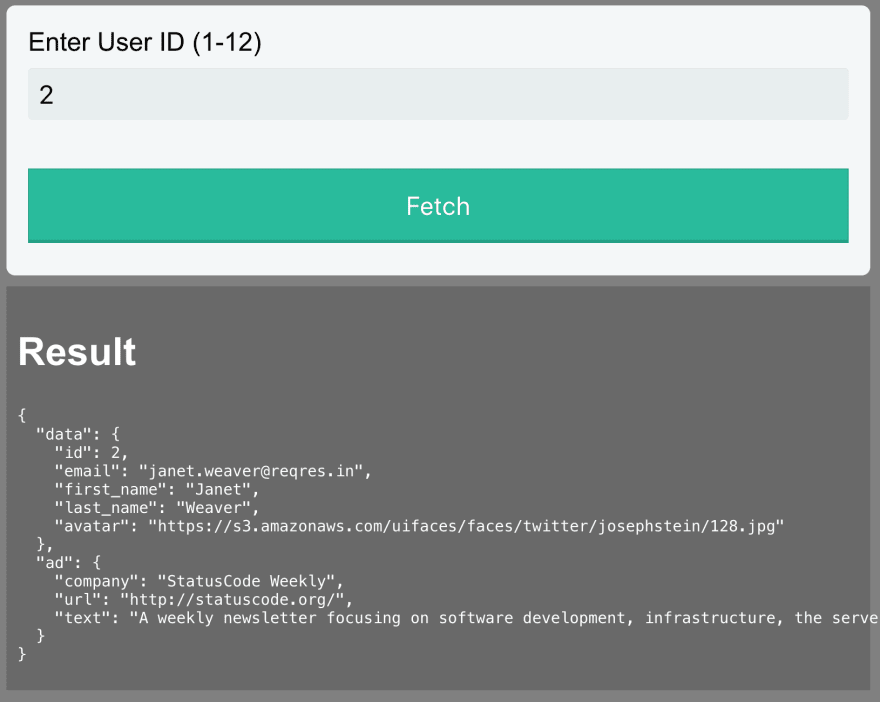
It is a simple application to fetch user information from Reqres API server.
- End-user will enter a number into a text field
- On clicking the fetch button, the application will fetch the info and display the result
- In case of error, show the error message
- Also, we do not want the end-user to click the fetch button multiple times while the application is fetching information


Let’s start the development
Create a boilerplate repository using Create React App.
yarn create react-app my-app --template typescript
Then edit src/App.tsx file.
const App = () => {
  return (
    <div className="App">
      <form noValidate autoComplete="off">
        <label>
          Enter User ID (1-12)
          <input type="text" id="userId" name="userId" required />
        </label>
        <input type="submit" value="Fetch" />

        <label className="status">
          Fetching data. Please wait (max wait: 5 seconds)...
        </label>
        <label className="error">"errorMessage"</label>
      </form>

      <div className="result">
        <h2>Result</h2>
        <pre>
          <code>"result"</code>
        </pre>
      </div>
    </div>
  );
};
It is a simple form with a text field, a submit button, and a pre to show the result. We also have to two labels, one to show the error message and one to show the “Please wait” message.
useState for state management
Now, we are going to use useState hook, for adding the required features.
Control input field
Update the input field when a user types in it and store the value.
const [userIdValue, setUserIdValue] = React.useState("1");

const onValueChanged = (event: React.ChangeEvent<HTMLInputElement>) => {
  setUserIdValue(event.target.value);
};

// ... Some other code

<input
  type="text"
  id="userId"
  name="userId"
  required
  onChange={onValueChanged}
  value={userIdValue}
/>;
Submit button click handler
Next, add a handler for the button, so that we can know user has clicked it.
const onFetchClicked = (
  event: React.MouseEvent<HTMLInputElement, MouseEvent>
) => {
  event.preventDefault();
  // fetchUserInfo();  // We will add its definition later
};

// ... Some other code

<input type="submit" value="Fetch" onClick={onFetchClicked} />;
Disable button until fetch request is not complete
We do not want the user to click the button in rapid succession. It will overload the server, and in almost in all cases, results in bad user experience.
We add a state isFetching. As long as it is true, the button will stay disabled.
const [isFetching, setIsFetching] = React.useState(false);

// Disable the text field
<input
  ...
  disabled={isFetching}
/>

// Disable the button
<input
  type="submit"
  ...
  disabled={isFetching}
/>
Show wait message
Good manners and good user experience dictates us to tell the user, “please hold on”. Otherwise, our user will get confused, “why the button is not working? Did I break something?”
For this task, we already have a label. We only need to show when the application is fetching.
{
  isFetching && (
    <label className="status">
      Fetching data. Please wait (max wait: 5 seconds)...
    </label>
  );
}
Notice, so far we have not used setIsFetching method. We will get to it.
Show Result
To show the result, we will request the server. This request can complete successfully, or it can fail. It does not make sense to show the result when the request has failed. We will hide the result section unless the request has completed successfully.
In other words, show the result, but only when the request was successful.
const [result, setResult] = React.useState("");
const [isSuccessful, setIsSuccessful] = React.useState(false);

...

{isSuccessful && (
  <div className="result">
    <h2>Result</h2>

    <pre>
      <code>{result}</code>
    </pre>
  </div>
)}
Show error
If a request fails, we should show message to the user. A request can fail for a number of reasons, server was busy, connection to the server failed, or our user entered an incorrect userId.
We display an error message, but only when the request fails.
const [errorMessage, setErrorMessage] = React.useState("");

...

{!isSuccessful && errorMessage.length > 0 && (
  <label className="error">{errorMessage}</label>
)}
Fetch User Info
Now we get to the core of the application, fetch user info and set result or error message.
I am going to use fetch API and Promises.
const fetchUserInfo = () => {
  fetch(`https://reqres.in/api/users/${userIdValue}?delay=5`)
    .then(response =>
      response.status === 200
        ? Promise.resolve(response.json())
        : Promise.reject(response.status)
    )
    .then(data => {
      setIsSuccessful(true);
      setResult(JSON.stringify(data, undefined, 2));
    })
    .catch(err => {
      setIsSuccessful(false);
      setErrorMessage(`Request failed. Error: ${err}`);
    })
    .then(() => {
      setIsFetching(false);
    });
};
If the request is successful, we set isSuccessful to true. Then we set the result. I have used JSON.stringify() to convert the JSON response to string and to prettify it.
If the request fails, we set isSuccessful to false and set an error message.
Finally, we set isFetching to false. Right? Because fetching has completed. This part of the code is executed whether request succeeds or fails.
We missed one thing. We didn’t actually call the fetchUserInfo() method. Yet! We call it in the onFetchClicked().
const onFetchClicked = (
  event: React.MouseEvent<HTMLInputElement, MouseEvent>
) => {
  event.preventDefault();
  setErrorMessage("");
  setIsSuccessful(false);
  setIsFetching(true);
  fetchUserInfo();
};
Before calling fetchUserInfo(), we make sure we reset the values of errorMessage and isSuccessful. We also set isFetching to true.
Let’s run the code
I have created a repository of this code.
https://github.com/talha131/onCrashReboot-react-state-hook-example
Let’s run the code using CodeSandbox. Try entering some number or a string and see the result.
Let’s review the code
We used useState hook for the application. We ended up having five state variables in our component.
Statements to set the states are strewn around the code. For example, we call setIsSuccessful in three different places. setIsFetching is called at two places.
If we were coding a real-world application, then this pattern would have become a severe problem. Maintaining such a code becomes a nightmare. You have to invest significant time to understand where and why a state is set or modified.
Another thing to note is that we had to set some states successively, for example in onFetchClicked.
setErrorMessage("");
setIsSuccessful(false);
setIsFetching(true);
Is the order of these statements relevant? What happens if we set one state, but not the other two? In this code, these questions are not significant. But in any real application, this will pose a problem, and code maintenance would become a challenge.
Overall, this code is difficult to understand, follow, and maintain. You may disagree, but that is because it is a small and straightforward application. In any application of moderate size, it is essential to have readable and easy to follow code, which does not require a considerable resource investment to maintain.
useReducer for state management
Now we are going to create the same application using useReducer hook.
Define component actions
Our component can have four possible actions.
- User is typing in the input field
- Fetching response from the server
- Fetch response succeeds
- Fetch response fails
We can define these actions in this way:
type Action =
  | { type: "typing"; value: string }
  | { type: "fetching" }
  | { type: "success"; payload: string }
  | { type: "error"; code: string };
The value in typing action will contain the string user has typed into the input field.
payload is the result of the response request, which we will get when the request succeeds.
code will contain the error code, which we will get when the request fails.
Define component state
Remember, we had to define five state hooks in the useState example? Here too, we need five state fields.
Let’s define an interface and then the initial values of the state.
interface State {
  isFetching: boolean;
  isSuccessful: boolean;
  errorMessage: string;
  result: string;
  userIdValue: string;
}

const initialState: State = {
  isFetching: false,
  isSuccessful: false,
  errorMessage: "",
  result: "",
  userIdValue: "1"
};
Define the reducer
Reducer is the nexus where action and state meet. It is a function that gets the current state and current action in its argument. It then updates the state and returns the result.
const appReducer = (state: State, action: Action) => {
  switch (action.type) {
    case "fetching":
      return {
        ...state,
        isFetching: true,
        isSuccessful: false,
        errorMessage: "",
        result: ""
      };

    case "typing":
      return { ...state, userIdValue: action.value };

    case "success":
      return {
        ...state,
        isFetching: false,
        isSuccessful: true,
        result: action.payload
      };

    case "error":
      return {
        ...state,
        isFetching: false,
        errorMessage: `Request failed. Error: ${action.code}`
      };
  }
};
When the component is performing fetching, we set isFetching to true and other state fields.
When the user is typing, then we only need to update the userIdValue.
We set state, in a similar fashion, when success and error action is dispatched.
Create instances of state fields and dispatch
Inside the App component, we create instances of the state fields and dispatch method.
const App = () => {
  const [
    { isSuccessful, isFetching, userIdValue, errorMessage, result },
    dispatch
  ] = React.useReducer(appReducer, initialState);
...
dispatch actions
We have to update our fetchUserInfo and other methods to dispatch appropriate actions.
const fetchUserInfo = () => {
  fetch(`https://reqres.in/api/users/${userIdValue}?delay=5`)
    .then(response =>
      response.status === 200
        ? Promise.resolve(response.json())
        : Promise.reject(response.status)
    )
    .then(data => {
      dispatch({
        type: "success",
        payload: JSON.stringify(data, undefined, 2)
      });
    })
    .catch(err => {
      dispatch({ type: "error", code: err });
    });
};

const onValueChanged = (event: React.ChangeEvent<HTMLInputElement>) => {
  dispatch({ type: "typing", value: event.target.value });
};

const onFetchClicked = (
  event: React.MouseEvent<HTMLInputElement, MouseEvent>
) => {
  event.preventDefault();
  dispatch({ type: "fetching" });
  fetchUserInfo();
};
Use state fields
This part of the code is not different from the code we wrote in useState example.
return (
  <div className="App">
    <form noValidate autoComplete="off">
      <label>
        Enter User ID (1-12)
        <input
          type="text"
          id="userId"
          name="userId"
          required
          onChange={onValueChanged}
          value={userIdValue}
          disabled={isFetching}
        />
      </label>
      <input
        type="submit"
        value="Fetch"
        onClick={onFetchClicked}
        disabled={isFetching}
      />
      {isFetching && (
        <label className="status">
          Fetching data. Please wait (max wait: 5 seconds)...
        </label>
      )}
      {!isSuccessful && errorMessage.length > 0 && (
        <label className="error">{errorMessage}</label>
      )}
    </form>
    {isSuccessful && (
      <div className="result">
        <h2>Result</h2>

        <pre>
          <code>{result}</code>
        </pre>
      </div>
    )}
  </div>
);
Let’s run the code
I have create a repository of this code.
https://github.com/talha131/onCrashReboot-react-reducer-hook-example
Let’s run the code using CodeSandbox. Try entering some number or a string and see the result.
Moment of truth
At last, we are prepared to compare useState code alongside useReducer code.
See the definition of onFetchClicked method in both the projects.
// using useState()
setErrorMessage("");
setIsSuccessful(false);
setIsFetching(true);
// using useReducer
dispatch({ type: "fetching" });
Notice how three lines have been reduced to just one.
See the code that is called when request failed.
// using useState()
setIsSuccessful(false);
setErrorMessage(`Request failed. Error: ${err}`);
// using useReducer()
dispatch({ type: "error", code: err });
We reduced two lines of code to one.
Also note, that in useReducer we do not have to add a then after the last catch in fetchUserInfo method.
When you study both the codes, you notice certain things.
useReducer code is easier to understand. The component state is modified in only one place, i.e. the reducer method. You can see the list of actions and understand what kind of state changes this component supports. dispatch simplifies our state modification code. Instead of several setState methods, you only need to call one dispatch.
But all these benefits come at a cost. useReducer code is verbose. It requires you to define actions and state, whereas useState does not have this wordiness problem. Verbosity is the reason which made a lot of people prefer MobX over Redux, so we cannot disregard it altogether. A verbose design requires more time and effort.
Another concern is that useReducer has a steep learning curve. Unless you have prior experience, it is challenging to understand the concepts behind reducer and actions.
Conclusion
useState
-
useStateis easier to start with and requires less boilerplate code - Using
useStatein a component of even moderate functionality results in a less understandable code
Consequently, useState is better suited for components which have only one or two states
useReducer
-
useReduceris difficult to understand for beginners - It compels you to write more code
- It drives you to think your design through
- The result is a code which is easier to understand, read, and maintain
Therefore, use useReducer when your component has non-trivial state transitions or business logic, or you are creating a medium-sized application which you plan to maintain for a considerable period.
Recommended Readings
Internet is teeming with articles on React and hooks. Among the plethora of articles and tutorials on the topic, Robin Wieruch articles on useReducer hook stand tall. I advise you to read them.
Cover Image Attribution: Dietmar Becker

Top comments (1)
I've been looking for this for so long. This is so helpful