
This tutorial outlines in a very basic way, the steps needed to be taken to use Terraform to fire up an instance of AWS EC2 and then SSH into it. Please note that this is for absolute beginners.
Install Terraform
To begin with, we first need to install gnupg and software-properties-common, if not already present. This step follows the instructions mentioned in the official Terraform documentation.
sudo apt-get update
sudo apt-get install -y gnupg software-properties-common
After installing these, we need to add the HashiCorp GPG Key to the Ubuntu system.
wget -O- https://apt.releases.hashicorp.com/gpg | \
gpg --dearmor | \
sudo tee /usr/share/keyrings/hashicorp-archive-keyring.gpg
Now, let's go ahead and add the HashiCorp repository to Ubuntu. This repository will allow us to find the Terraform software on the internet.
echo "deb [signed-by=/usr/share/keyrings/hashicorp-archive-keyring.gpg] \
https://apt.releases.hashicorp.com $(lsb_release -cs) main" | \
sudo tee /etc/apt/sources.list.d/hashicorp.list
And finally, it's time to install Terraform itself.
sudo apt-get update
sudo apt-get install terraform
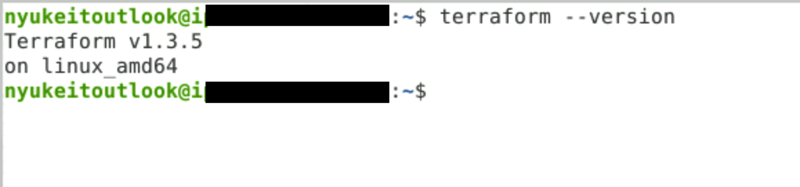
After completion, let's verify if the installation was successful using this command:
terraform --version
Now that Terraform is installed, it's time to install AWSCLI, the utility to configure our AWS with credentials.
Install AWSCLI
Although there are a few ways to install AWSCLI, we will use the method prescribed in the official documentation by Amazon.
curl "https://awscli.amazonaws.com/awscli-exe-linux-x86_64.zip" -o "awscliv2.zip"
unzip awscliv2.zip
sudo ./aws/install
Once again, we verify the successfull installation of AWSLI by checking its version by typing in the following command:
aws --version

AWS Credentials
Create an AWS account with a free tier if you already don't have one. Then head to your Profile and look for Credentials. We will use these credentials to connect to AWS from the CLI.
Now in the terminal, we type the following command
aws configure
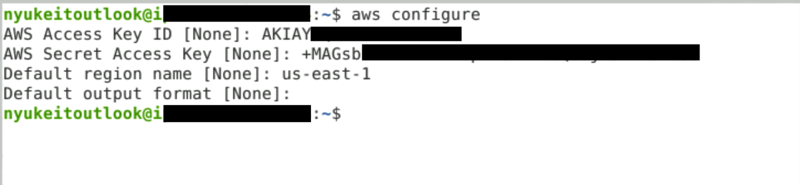
AWS presents us with options to paste/type the following one by one. Press enter after pasting in each line. Note that [none] means there is no data configured for that key yet.
Access Key [none]: <paste access key here>

Secret Key [none]: <paste secrete key here>

Region [none]: us-east-1

Output format [none]: <leave this blank>
Now we have our AWSCLI configured to access the AWS account, however, this is not enough to launch an EC2 instance. For that, we need a keypair.
Sidenote: This article makes use of the root account in AWS and does not consider any security viewpoint. Creating an IAM user account and using permission boundaries is generally suggested.
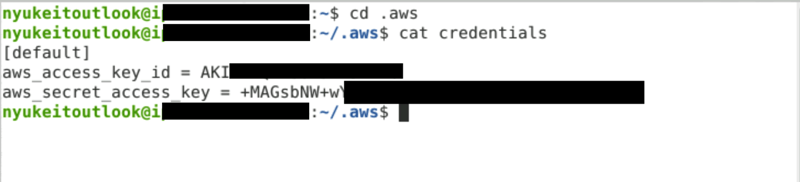
Again, we confirm everything is in place by verifying. Seeing is believing.
cd /.aws
cat credentials
EC2 Keypair
In AWS dashboard, go to EC2 and on the left navigation, go to Keypair. Click on Create.
Give a suitable name to the keypair file and select RSA and PEM and click on Save. This will download the PEM file to the system.
In terminal, create a folder for your project.
mkdir projectfolder
If you cannot access your downloaded PEM file for any reason (eg. if you are in a VM inside a host machine), you can create it inside the terminal.
sudo nano keyfile.pem
Copy paste the contents of the downloaded keypair file inside the nano window in the terminal. Press ctrl + x + y to save the file.
Now we will change the permissions of this key file, without which EC2 will reject our connection.
sudo chmod 400 keyfile.pem
We will use this keypair file to ssh into the newly created EC2 Instance.
Creating Terraform Scripts
Now that we have the prerequisites in place, let's create a Terraform plan and apply it to create our instance.
cd projectfolder
Once inside the folder, create the Terraform creds file which will contain the same credentials that we used for AWSCLI.
sudo nano creds.tf
provider "aws" {
    access_key = "<your aws access key>"
    secret_key = "<your aws secret key"
    region = "<your aws region>"
}
Now it's time to create the main Terraform script that will actually execute the commands to launch our EC2 instance.
sudo nano main.tf
resource "aws_instance" "myproject" {
    ami = "ami-2757f631"
    instance_type = "t2.micro"
    key_name = "ec2tf"
}
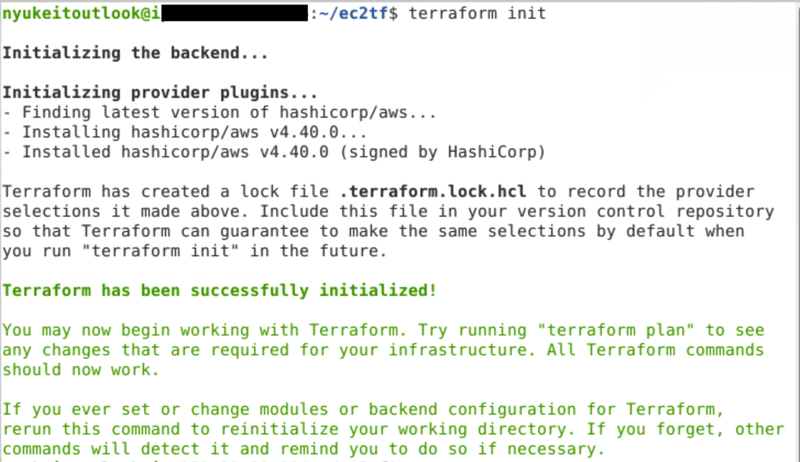
We now have the Terraform plan ready and we need to initiate it.
terraform init
Once the configuration is initialized, we need to apply it for Terraform to create our EC2 instance.
terraform apply
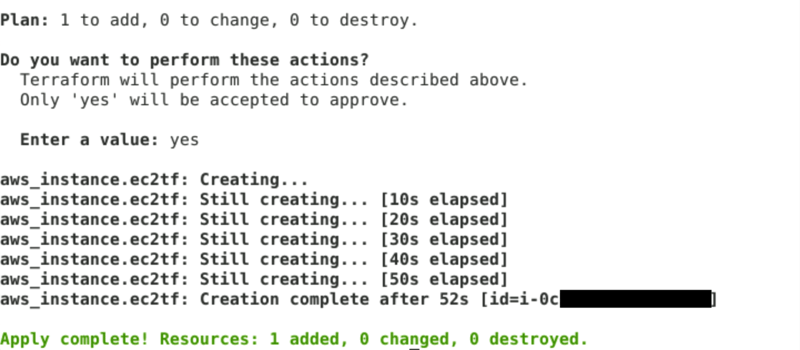
When prompted, type yes
Terraform will now begin to create the EC2 instance. This may take some time depending on the image.
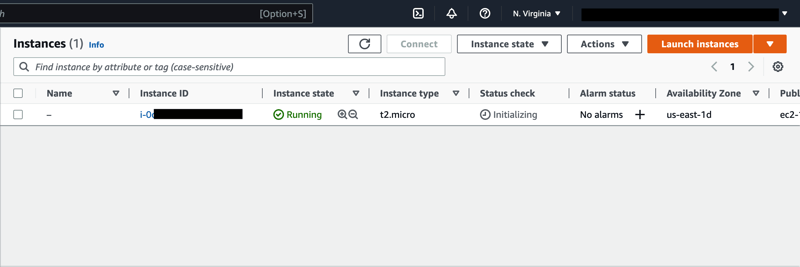
To verify the creation of the instance, go to the EC2 dashboard and see the newly created instance in the running state.
Connecting to EC2 Instance using SSH
The reason why I initiated my instance using a keypair file was to be able to SSH into it after creation. And we will see how this became very easy now.
The first step is to go to the EC2 dashboard and click on Security Groups.
There, select the security group and click on Inbound Rules tab. Click on Edit Inbound Rules.
There was a default rule already added.
Click on Add Rule and select the protocol as SSH and source as Custom. Click on the search box next to Custom and select 0.0.0.0/0 and save the rule.
The EC2 instance was now ready to accept incoming SSH connections.
Before moving ahead, we need the public IPv4 DNS address of the instance. Select your instance from Instances in the sidebar menu.
Now to login to the EC2 instance, we type the following
sudo ssh -i "keyfile.pem" ubuntu@ip4-public-dns
Note: Amazon AWS has default usernames for AMIs based on the type of image which can be found on here
When prompted, type yes.
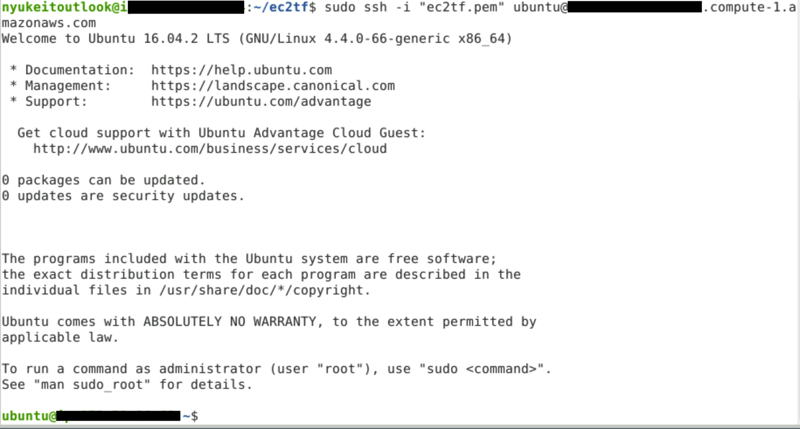
With this, we have successfully logged in to our new EC2 instance using SSH.
Resources
AWS EC2 User Guides - Connection Prerequisites
AWS EC2 User Guides - Accessing Instances using SSH
Provisioning EC2 Keypairs with Terraform


Top comments (0)