
Flyway is an open-source tool for version controlling databases. It’s like the Git for the databases.
Flyway enables you to write SQL scripts for your schemas and tables and version them to ensure consistency and offers the ability to roll back as needed.
This article assumes that you have basic familiarity with Spring Boot. If not, refer to this official guide from the creators of Spring Boot: https://spring.io/guides/gs/spring-boot/
Configuring Flyway
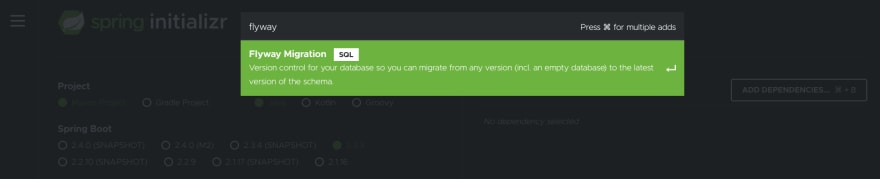
If setting up a new Spring Boot project, you can add the Flyway dependency through the Spring Initializr at https://start.spring.io and adding Flyway as a dependency as shown below:
If you’re working with an existing Spring Boot project, you can just add it manually to your pom.xml file as follows:
-
Add the Flyway Core dependency:
<dependency> <groupId>org.flywaydb</groupId> <artifactId>flyway-maven-plugin</artifactId> <version>6.5.5</version> </dependency> -
Add the Flyway maven plugin (this will enable you to run Flyway using Maven):
<plugin>
    <groupId>org.flywaydb</groupId>
    <artifactId>flyway-maven-plugin</artifactId>
    <version>6.5.5</version>
    <configuration>
        <url>your_db_url</url>
        <user>your_db_username</user>
        <password>your_db_password</password
        <locations>classpath:db/migration</locations>
    </configuration>
</plugin>
Running the Migrations
Once you’ve configured your pom.xml, you now need to create your first migration file. By default, Flyway will check for migration files inside src/main/resources/db/migration. If you used the Spring Initializr to add Flyway, this directory has already been created for you. If not, create that directory and add your first migration file.
The migration file should be named as such: V1__Create_first_table.sql
After creating your migration file, you can now run the following commands from the root directory of your project:
mvn clean installto build your project.mvn flyway:migrateto run the migration(s).
Common Errors
[ERROR] Failed to execute goal org.flywaydb:flyway-maven-plugin:6.5.5:migrate (default-cli) on project flyway-demo: org.flywaydb.core.api.FlywayException: Unable to connect to the database. Configure the url, user and password! -> [Help 1]
To solve this error, double-check your pom.xml under the Flyway plugin configuration to ensure that the URL, username, and password are correctly specified.
Also, ensure that the database you’re trying to access exists and that you have sufficient privileges to access it.FlywayException: Detected failed migration to version 1.0
This is usually caused by an SQL error in a migration file. To solve this error, first fix the SQL error in your migration and then run the following command to repair the migration:mvn flyway:repair.
Once the migration is repaired, you can runmvn flyway:migrateto rerun the migration.

Top comments (3)
Very well explained article. Might I add an addition.
Flyway configuration can also be added in the
application.yamlorapplication.propertiesfile of spring boot.This would be helpful when using different profiles in spring boot e.g
application-dev.yamllocally andapplication-staging.yamlon staging.Thanks for the addition Muhammad. This is an excellent addition, especially when working with different Spring profiles.
Excellent article